How to configure NFS on Linux
Sharing files between computers and servers is an essential networking task. Thankfully, NFS (Network File System) is available for Linux systems and makes the job extremely easy. With NFS properly configured, moving files between computers is as easy as moving files around on the same machine. Since NFS functionality is built directly into the Linux kernel, it is both powerful and available on every Linux distro, although the configuration can differ slightly between them.
In this guide, we’ll show how to install and configure NFS on major Linux distros, like Ubuntu and others based on Debian, and Fedora and others based on Red Hat. The configuration will involve a server (which hosts the files) and one client machine (which connects to the server to view or upload files). Follow along with the steps below to get NFS setup on your own system.
In this tutorial you will learn:
- How to install NFS server
- How to configure NFS server shares
- How to connect to NFS server from client machines

| Category | Requirements, Conventions or Software Version Used |
|---|---|
| System | Any Linux distro |
| Software | NFS |
| Other | Privileged access to your Linux system as root or via the sudo command. |
| Conventions | # – requires given linux commands to be executed with root privileges either directly as a root user or by use of sudo command $ – requires given linux commands to be executed as a regular non-privileged user |
Set up NFS server
This section of the guide will go over the configuration for the NFS server – in other words, the machine that will be hosting the NFS shares. Client machines can then connect to the server to access and/or upload files.
- The first thing we need to do is install the NFS server package, which is available from the main repositories. Use the appropriate command below to install the software on your system. On Ubuntu, Linux Mint, and other Debian-based distros:
$ sudo apt install nfs-kernel-server
$ sudo dnf install nfs-utils
$ sudo systemctl enable --now nfs-server
/media/nfs 192.168.1.0/24(rw,sync,no_subtree_check)
You can include as many shares as you like, provided each has its own line. You can also include more than one hostname or IP in each line and assign them different permissions. For example:
/media/nfs 192.168.1.112(rw,sync,no_subtree_check) 192.168.1.121(ro,sync,no_subtree_check)
$ sudo exportfs -arv exporting 192.168.1.0/24:/media/nfs
Your share is now accessible from the client machines that you configured in your /etc/exports file. See the next section for instructions on connecting to the NFS share.
Connect to NFS server from client machine(s)
This section of the guide will show how to use a client machine to connect to the NFS share that we have configured in the previous section.
- The first thing we need to do is install the appropriate NFS packages on our system. Use the appropriate command below to install it with your system’s package manager. On Ubuntu, Linux Mint, and other Debian-based distros:
$ sudo apt install nfs-common
$ sudo dnf install nfs-utils
$ sudo mount -t nfs4 192.168.1.110:/media/nfs /media/share

Mounting the NFS share on our client system, and then checking to see our test file that was created on the server
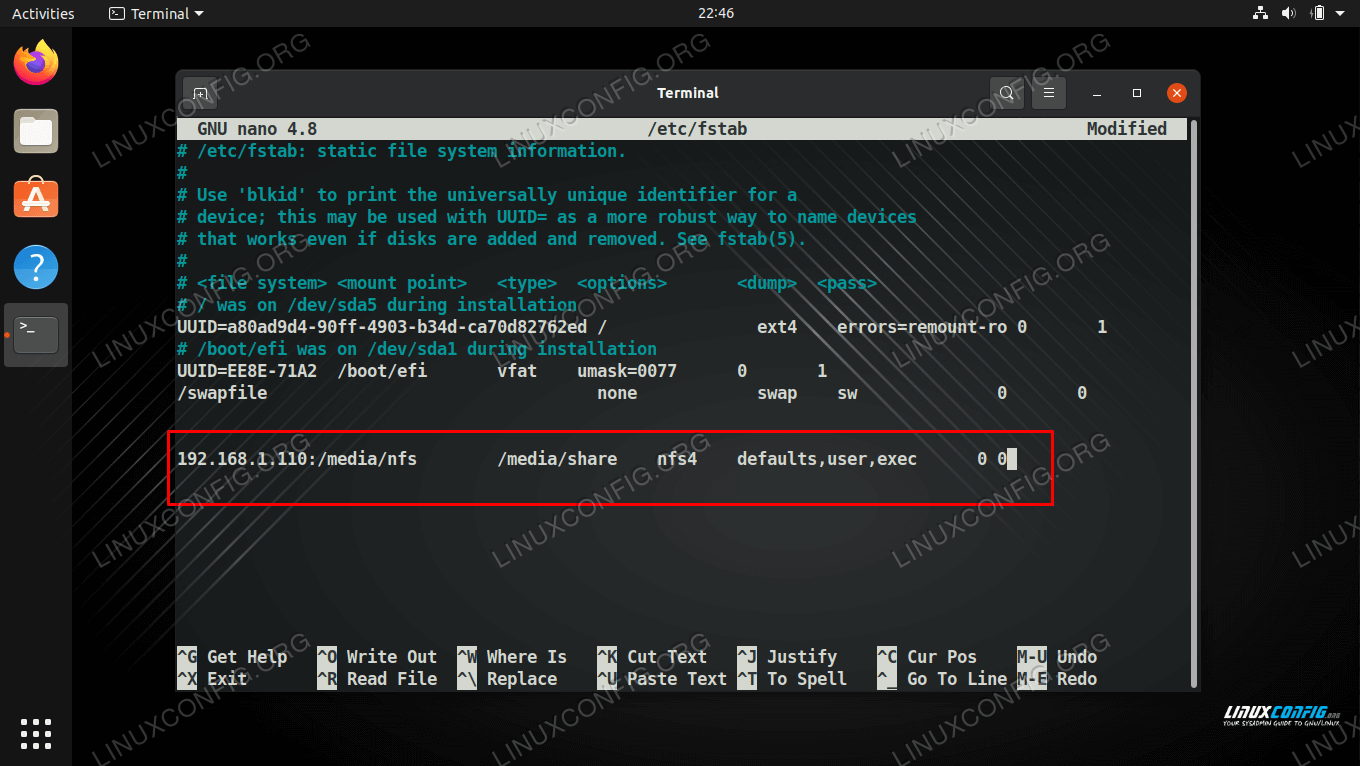
192.168.1.110:/media/nfs /media/share nfs4 defaults,user,exec 0 0
If you aren’t certain if the share will always be available on the client, add noauto to the list of options to prevent your system from trying to mount it automatically.
192.168.1.110:/media/nfs /media/share nfs4 defaults,user,exec,noauto 0 0
Closing Thoughts
Your NFS server is now ready to start serving files, and you shouldn’t have any trouble setting up the rest of your client machines. Remember that NFS doesn’t have much in the way of security, so you’re going to need other methods to restrict access to your files, should you choose to share anything more sensitive.
Related Linux Tutorials:
Comments and Discussions
NEWSLETTER
Subscribe to Linux Career Newsletter to receive latest news, jobs, career advice and featured configuration tutorials.
WRITE FOR US
LinuxConfig is looking for a technical writer(s) geared towards GNU/Linux and FLOSS technologies. Your articles will feature various GNU/Linux configuration tutorials and FLOSS technologies used in combination with GNU/Linux operating system.
When writing your articles you will be expected to be able to keep up with a technological advancement regarding the above mentioned technical area of expertise. You will work independently and be able to produce at minimum 2 technical articles a month.
TAGS
FEATURED TUTORIALS
- VIM tutorial for beginners
- How to install the NVIDIA drivers on Ubuntu 20.04 Focal Fossa Linux
- Bash Scripting Tutorial for Beginners
- How to check CentOS version
- How to find my IP address on Ubuntu 20.04 Focal Fossa Linux
- Ubuntu 20.04 Remote Desktop Access from Windows 10
- Howto mount USB drive in Linux
- How to install missing ifconfig command on Debian Linux
- AMD Radeon Ubuntu 20.04 Driver Installation
- Ubuntu Static IP configuration
- How to use bash array in a shell script
- Linux IP forwarding – How to Disable/Enable
- How to install Tweak Tool on Ubuntu 20.04 LTS Focal Fossa Linux
- How to enable/disable firewall on Ubuntu 18.04 Bionic Beaver Linux
- Netplan static IP on Ubuntu configuration
- How to change from default to alternative Python version on Debian Linux
- Set Kali root password and enable root login
- How to Install Adobe Acrobat Reader on Ubuntu 20.04 Focal Fossa Linux
- How to install the NVIDIA drivers on Ubuntu 18.04 Bionic Beaver Linux
- How to check NVIDIA driver version on your Linux system
- Nvidia RTX 3080 Ethereum Hashrate and Mining Overclock settings on HiveOS Linux
LATEST TUTORIALS
- Easy Steps to Update Your Raspberry Pi
- Connecting Your Raspberry Pi to Wi-Fi: A How-To
- How to install RealVNC viewer on Linux
- How to check Raspberry Pi RAM size and usage
- How to check Raspberry Pi model
- Understanding UEFI and BIOS in Relation to Linux Nvidia Driver Installation
- How to orchestrate Borg backups with Borgmatic
- How to monitor filesystem events on files and directories on Linux
- Debian USB Firmware Loader Script
- How to install and self host an Ntfy server on Linux
- How to backup your git repositories with gickup
- How to bind an SSH public key to a specific command
- Creating a Bootable USB for Windows 10 and 11 on Linux
- How to list all displays on Linux
- List of QR code generators on Linux
- How to extract text from image
- Linux EOF explained
- How to use xclip on Linux
- List of window managers on Linux
- What is zombie process on Linux