Nikon D750
I wrote this section by request for those that are converting from Canon to the D750 or upgrading from DX. While the D750 definitely has plenty of resolution, you should not be concerned about lens performance, since I found many lenses (including many budget options) to work extremely well on it. Don’t use DX lenses on the D750, as you will lose half the resolution – best to get rid of those DX lenses if you are planning to permanently move up to FX (there are a couple of lenses like the Nikkor 35mm f/1.8G DX that will give cover most of the FX frame, but you will get heavy vignetting, especially at close focus distances).

For portraits and weddings, my preference would be to get a set of great f/1.8 primes. They are lightweight, inexpensive, and perform exceptionally well on the D750. If you need to cover a wide range, go for the new Nikkor 20mm f/1.8G, 35mm f/1.8G, 50mm f/1.8G, and 85mm f/1.8G lenses. If you want to limit yourself to two lenses, I would get the 20mm f/1.8G and either the 50mm f/1.8G or the 85mm f/1.8G.

For wildlife and sports, it all depends on your budget. I won’t bother with recommending high-end super teles, since those are out of budget for most people out there. If you are considering a budget option, my first recommendation would be to get the new Tamron 150-600mm lens – the 600mm reach is amazing and it will do very well wide open and much better stopped down to f/8. If you want to stick with Nikon lenses, the Nikkor 300mm f/4D AF-S is still my favorite choice coupled with the 1.4x teleconverter. Not much of a reach compared to the Tamron, but very sharp at f/5.6!

For landscapes, I would get the 20mm f/1.8G (superb for astrophotography), the 35mm f/1.8G, and a couple of good zooms like the 14-24mm f/2.8G and the 24-70mm f/2.8G, or the 16-35mm f/4G VR and 24-120mm f/4G VR. If the wide-angle lenses are too expensive, get the 18-35mm f/3.5-4.5G – it is a stellar lens for the price.
There are many more budget lens choices out there, including some of the older Nikon AF-D and manual focus lenses for a wide range of photography needs.

Metering Performance
The Nikon D750 is shipped with the same 3D Color Matrix Meter III exposure metering system with a 91,000-pixel RGB sensor as the high-end Nikon D810 and D4S cameras, so its performance and accuracy is great. No matter what I was shooting, whether it was a wedding, a landscape scene, or a bird, the camera metered exceptionally well, requiring very little adjustment. Looking through the wedding pictures, I could see only one image where the camera drastically overexposed an image and required -1.33 EV of compensation adjustment. Here it is:
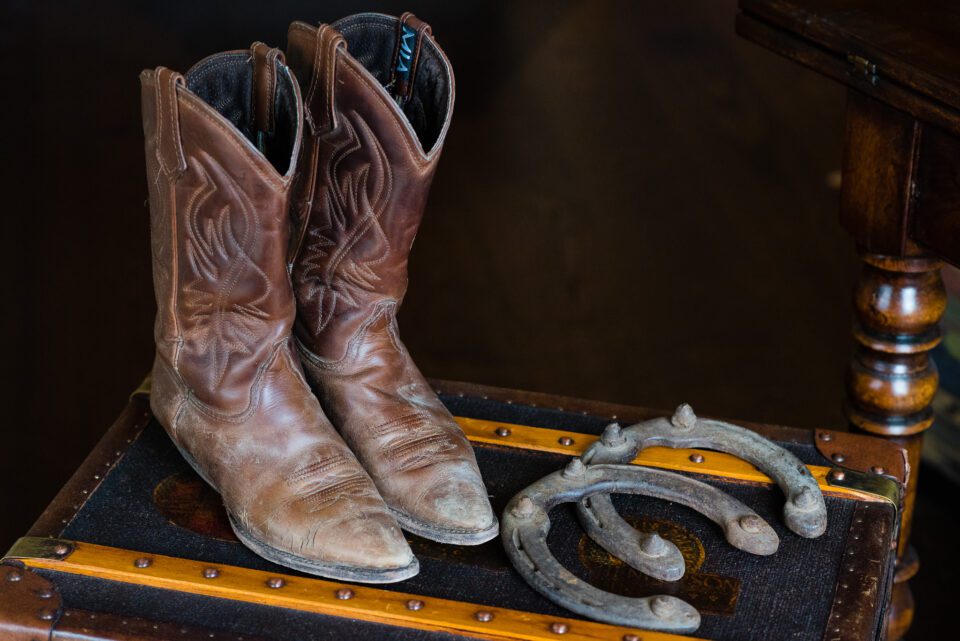
It is a tough subject to meter because there is so much dark in the scene, so I know that all other Nikon DSLRs would have struggled as well.
Battery Life
With a 1230-shot CIPA-rated battery life, the D750 can take more shots than any other standard profile Nikon DSLR, which is very impressive. Since the CIPA rating requires cameras to be used in different settings and environments, including Live View usage, the 1230 shot specification is actually much lower than what you can yield when using the camera without Live View. And if you want to maximize battery life, you can also turn off image review, so that the camera does not display the image on the LCD after each shot. During the wedding, I shot about 800 frames on the primary D750 (with image review turned on) and the battery life indicator showed 58% charge left at the end of the wedding. Another D750 showed a 40% charge left after 1102 images, so I could easily get over 2000 images in both cameras if I shot all the way to the end. That’s pretty amazing, especially for those that travel and cannot recharge often! And those that need more can get the MB-D16 battery grip, which will allow using two EN-EL15 batteries for twice the capacity. I am also very happy that Nikon is sticking to the same battery on many cameras. With the D750, there are now a total of 8 cameras that have the same battery: Nikon D7000, D7100, D600, D610, D800, D800E, D810, and Nikon 1 V1. I love the fact that I can use the EN-EL15 battery interchangeably between my D750, D800E, and D810, and I do not have to carry an extra charger with me when I travel.

Live View and Tilting Screen
The Nikon D750 comes with two live view options – one for photography and one for videography, similar to the D600/D610. You can switch between the modes by moving the live view lever on the back of the camera. The photography mode is similar to the previous “tripod” mode on older DSLRs – you cannot record video or audio, but you can zoom in and out, track objects/faces and acquire focus using contrast-detect. The video mode is used for recording video, so you will see microphone record levels and other video-related features.

As I have already pointed out, the D750 has an excellent 1:1 pixel-level Live View mode without any interpolation mess as we had seen on the D800 / D800E cameras. This means that you can see very fine details when zoomed in to a pixel-level view, which makes manual focusing a breeze to use. I have used the D750 in Live View mode in a number of different scenarios: when shooting landscapes, when shooting macro in combination with the tilt screen and when shooting the dance floor during a wedding, also in combination with the tilting screen. Live View worked great and I was very happy with the results because Live View allowed me to capture images with perfect focus and the best sharpness.

The tilting screen was very useful when shooting in Live View mode because I could change angles and still see what was going on. It is great that you can tilt the screen up or down at 90 degrees – this allows for capturing all kinds of vertical angles.

Movie Recording
Although I am not into movie recording, the D750 was heavily marketed by Nikon to appeal to videographers. The D750 inherited a lot of the movie recording features from the D810 such as zebra stripes and separate video ISO sensitivity controls, making the D750 one of the best DSLRs for videography. In fact, the D750 is more videographer-friendly, because Nikon consolidated all video features into a separate “Movie Shooting Menu”. The camera can record 1080p videos at up to 60 fps using the H.264/MPEG-4 codec and you can slow down the framerate to 50, 30, 25, or 24 frames. There is a built-in stereo microphone for recording sound and you can connect an external microphone via the external stereo microphone jack on the side of the camera. As specified by Nikon, the D750 is also capable of outputting uncompressed video feed via HDMI (just like the D800/D810 can), which makes it a great camera for recording videos.
Video footage is very impressive, especially at high ISOs. Although I do not have any good content worth posting on YouTube, you can find plenty of footage from the D750 online.
The rolling shutter effect is mostly taken care of, although if you move the camera too fast, you will still see the effect a little. Unlike the limited movie recording functions of the D600/D610, the D750 is not limited to a set aperture in Live View mode – you can adjust all three exposure variables on the fly when shooting in Manual mode.

Built-in WiFi
The D750 is the first Nikon full-frame DSLR to have integrated WiFi capability. It enables the wireless transfer of images between the camera and a mobile or tablet device or remote control. You will have to download the Nikon Wireless Mobile Utility (available for both Apple iOS and Android devices) and you can then control the camera remotely and take pictures with it, or use the app to transfer images from the camera to your device. The setup is fairly simple and straightforward – all you have to do is enable WiFi, then search for the wireless signal on your smartphone/tablet. Once connected, you must launch the Nikon Wireless Mobile Utility in order to remotely control the camera or to transfer images. Here is what the app looks like on my phone:
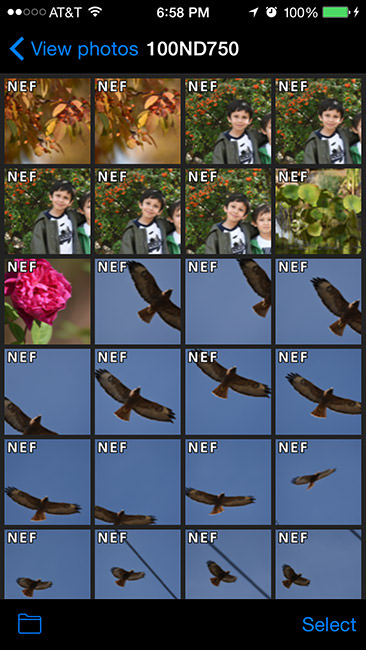
The interface is very simplistic but works reasonably well.