Nintendo switch android linux
This guide covers installation of the public release of Switchroot Android 10/Q, based on LineageOS 17.1, on the Switch. The original home of this guide was here. All photos are credited to @bylaws on XDA Developers Forum.
¶ Requirements
- RCM-exploitable Switch (CHECK HERE FIRST)
- RCM exploitation method (Usually a jig, but other methods can be found HERE)
- Computer
- USB-C cable/USB-C Switch autoinjector
- High quality SD card >= 16GB
- microSD card reader for the computer
¶ Prerequisites
- Nuke any Switchroot Andorid Oreo installations or Pie, Q, or R dev builds before attempting to install this release
- Ensure SD is formatted as FAT32 or exFAT. It will be formatted automatically as FAT32 during partitioning as it is necessary to boot Android (or L4T Linux)
¶ Steps
- Download the required files and put hekate on the SD card
a. Download the latest version of the hekate bootloader from HERE ( hekate_ctcaer_[version]_Nyx_[version].zip )
b. Unzip the hekate archive to the root of the SD card
c. Download the latest zip HERE of either icosa-tab (standard tablet Android) or icosa-atv (Android TV)
Your SD card should now look like this, assuming it is shared with HOS (Horizon OS/Switch OS):
root |- bootloader | |- ini | | |- . | |- payloads | | |- . | |- res | | |- . | |- sys | | |- . - Prepare Switch, boot into hekate, and dump JoyCon pairing info
a. Boot into HOS and ensure Joy-Cons are paired
b. Insert your SD card into your Switch, slide the RCM jig into the right rail
c. Hook your Switch up to your PC (or other payload injector) via USB-C and power off the console
d. Press Power and VOL + simultaneously to enter RCM mode and inject the hekate payload ( hekate_ctcaer_[version].bin ) that came with your downloaded hekate zip
NOTE: To keep it simple you can use this in Google Chrome (not compatible with other browsers), check «Upload .bin payload» and select the payload mentioned above, then click «Do the thing!» and select «APX» from the pop-up menu.
e. Once booted into hekate , you can remove the RCM jig, and launch Nyx Options
f. Dump your Joy-Con BT pairing information (with your Joy-Cons railed)
g. Ensure the message is correct, otherwise physically re-connect and re-pair the JoyCons in HOS and try again - Partition SD card in hekate
a. Navigate to hekate ‘s partition manager
b. Use sliders to select appropriate space for each OS (we recommend at least 16 GB for Android, although it should be usable with ~8GB), then press Next Step
NOTE: this step creates multiple partitions for a somewhat standard AOSP layout — look HERE for more information if interested
c. You may want backup Nintendo folder or any CFW files if necessary via hekate ‘s SD UMS tool over USB-C or by removing the SD card and reading directly on a PC ( hekate /Nyx can pause and reload when SD is removed), but Hekate will offer to backup and restore up to 1 GB of data from your existing file-system. - Add ROM zips to SD
a. Plug the Switch into your PC and select «SD UMS»
b. Extract the icosa-tab or icosa-atv zip to the root of the SD card (any major unzipping program should work fine as of 8/16/21)


Your SD card should now look like this:
root |- bootloader | |- ini | | |- . | |- payloads | | |- . | |- res | | |- . | |- sys | | |- . |- Nintendo | |- . |- switchroot | |- android | | |- . | |- install | | |- . |- lineage-17.1-[date]-UNOFFICIAL-[device]-signed.zip - Add other zips and enter recovery
a. If you would like to add Google Play functionality, we follow the recommendations of the LineageOS org on which GApps package to install. For standard tab Android, use MindTheGapps 10.0 for arm64, and for Android TV, use OpenGApps 10.0 tvmini for arm64.
b. If you have any other flashable zips, place them on the root of the SD card
c. Safely remove/eject the SD UMS device from your computer
d. Back on the Switch, select «Flash Android» and accept the prompt to reboot to recovery
e. Swipe right to allow writing to the SD
f. Press Install, then «Select Storage» in recovery and select «Micro SD Card»
g. Install the Lineage zip, followed by your GApps zip and any other zips you may have to install (see Extra Zips), and select Reboot -> System - First boot
a. If setup gets stuck on voice detection go back to the Wi-Fi config page and select «Skip for now»
b. Your JoyCons will not auto-pair on first boot—reboot to auto-pair your dumped JoyCons in Android - Subsequent boots
a. Boot Switchroot Android from More Configs —> Switchroot Android 10 in hekate
b. Hold VOL + on choosing this option to get back to recovery to flash zips
c. Hold VOL — on choosing this option to get back to hekate without having to reinject a payload
d. Rebooting the Switch will take you back to stock firmware - Asking for support/If you get stuck
a. First, get a screenshot of SD Info in hekate —this will allow us to rule out the most common issue first
b. If you are experiencing seemingly unintended behavior while already booted into Android, try and get us a log—find a guide on how to install adb , enable USB debugging in developer options on the Switch, plug into the computer with adb installed, and run adb logcat > switchroot.log . If this seems like too much for you, just get a bug report from developer settings.
c. Submit the screenshot and logs if needed to in our Discord server—the invite link can be found HERE.
¶ Extra Zips
- GApps—Google Apps packages are used to add Google Play, GMS, and basic Google stock applications to your device. See step 5a for details.
- JoyCon Xbox Layout—grab the package from HERE to use an Xbox controller-style control scheme
- Lumince’s CPU overclock zips. Grab one of the _OC-April_8th.zip package from HERE to use it
- WARNING: Leaving your Switch CPU OC’d to higher than recommended speeds for extended periods can decrease your battery’s lifespan, and this zip is not recommended for those who are not attempting to maximize performance at the expense of hardware longevity
¶ Updating
Updates are pushed through OTA (over-the-air) updates, just like any standard Android OEM. Use the Updater in Settings to get the latest updates without losing data.
¶ Tips & Tricks
- To enable Performance Mode and change resolution go to Settings -> Scroll Down -> System -> Scroll Down -> Display and Performance configuration.
- The Nvidia Shield TV app is a must have for docked usage, allowing keyboard and mouse control from a phone.
- If you don’t set a password the switch will auto-unlock after being docked.
- The capture button on the Joy-Cons is mapped to Play/Pause media.
- You can enable desktop mode to have a slightly better docked experience by going to Developer Options and scrolling down to ‘Force Desktop Mode’ enable that and reboot.
- To see battery percentage on ATV follow this guide.
- If you want to use a controller to type on tablet then install this keyboard.
- To run tablet apps on ATVuse this launcher.
- For root the latest magisk can be flashed in recovery
- To transfer files to Android you can use MTP over USB.
¶ Known Bugs
- Shield games are broken, DO NOT BUY THEM.
- Desktop GL is not supported and some EGL games have issues
- 5GHz Wi-Fi channels >44 can cause instability—check your router settings if you’re having issues connecting to Wi-Fi
- Hardware overlays are forced off (software compositing only)
- Joycons do not turn off in sleep automatically, make sure to turn them off by tapping the ‘sync’ button on side.
- Default keyboard can’t be used with a controller.
Nintendo switch android linux
Current version: 5.1.1 based on Ubuntu Bionic 18.04 LTS
Note: hekate 6.0.5 v2 or newer MUST be used for this release.If you need help you can ask in our Discord Server
You should also take a look at our FAQ and Common Issues which may already answer to some of your questionsThe important parts of the guide are the Installation and Update sections.
You can skip the rest if you don’t want extra information about the project.IMPORTANT: The apt repo certificate expired on 2023/04/14.
On existing installations, you will need to run the following commands at least once.
Or if the installation image was downloaded before 2023/04/22, run them after setup.sudo apt-key del 92813F6A23DB6DFC wget -O - https://newrepo.switchroot.org/pubkey | sudo apt-key add - sudo apt update¶ Updating existing installations (3.x.x/5.x.x)
If you come from a previous release and need to update.
- In L4T Ubuntu Linux, go to the Software Updater app and click «Install Now»
Or open terminal and execute: sudo apt update && sudo apt-get dist-upgrade .
After update is finished, reboot and done.- If Nvidia BSP was forcefully changed, creating a .reinit file into boot directory will restore Kernel, Kernel Modules and Firmware on the next boot and make the installation working again.
- In case of an update from 3.x.x , uenv.txt will be backed up. If it was manually edited before, README_CONFIG.txt can be followed to restore the custom boot settings inside .ini this time.
¶ Prerequisites
- hekate 6.0.5 v2 or newer
- A 16GB SD Card MINIMUM (Recommended: 128GB and up U3 or U3/A2 class)
- A computer (for backing up and extracting the installation files)
¶ Installation
- Download the base image directly or via torrent from here.
- Backup your SD Card:
- Backup normal files from FAT32 (this also backs up emuMMC if file based)
- If emuMMC raw partition exists, go to hekate -> Tools -> Backup eMMC -> SD emuMMC RAW Partition and back it up (BOOT0/1 and Raw GPP)
- If android exists, do a TWRP backup
4. From your PC, extract the 7z to your SD FAT32 partition. Suggestion: Use hekate UMS ( hekate -> Tools -> USB Tools ) with a USB-C cable connecting your switch and PC to mount your SD card instead of swapping your card from Switch to PC.
5. In Hekate, go to Tools -> Partition SD Card -> Flash Linux.
6. Go to hekate -> Nyx Options -> Dump Joy-Con BT to dump Joycon pairing data, with both Joycon connected to console, after they were paired in hos first.
This must be run even if a Switch Lite is used, since it dumps the calibration data. - Now you can boot L4T Ubuntu.
Make sure any existing online updates are done via Software Updater or apt command. - After making sure everything is fine, you can now restore your backed up files
- Copy your normal files to FAT32
- For emuMMC use Hekate to restore your backup hekate -> Tools -> Restore eMMC
- For Android, copy your TWRP backup to your FAT32 partition then follow the steps and 4 of our android BUT instead of installing «Lineage zip, followed by your GApps zip» at step 4.g restore your backup in TWRP
¶ Extras
Pairing procons Pair procons by opening the bluetooth menu in settings and pressing the + button in the bottom left corner. Then press the sync button on the controller and select its name in the pairing window.
L4T Megascript Use the L4T-Megascript app, available in your apps list (installed by default in 3.4.0+)
You can get or build various essential stuff, apps or emulators with a single click. All configured and optimized for Switch.¶ Misc.
¶ Credits
CTCaer (kernel/bootloader, distro maintainer, NVENC/NVDEC),
Gavin_Darkglider (distro maintainer),
Azkali (distro maintainer),
Ave (repo management and host),
DanielOgorchock(Switch controller drivers/joycond),
Bylaws,
Langerhans,
Natinusala,
stary2001 (reboot2payload),
NVIDIA (Tegra BSP),
theofficialgman and cobalt2727 (L4T-Megascript),
Everyone else in switchrootТеперь каждый может запустить Android на Nintendo Switch
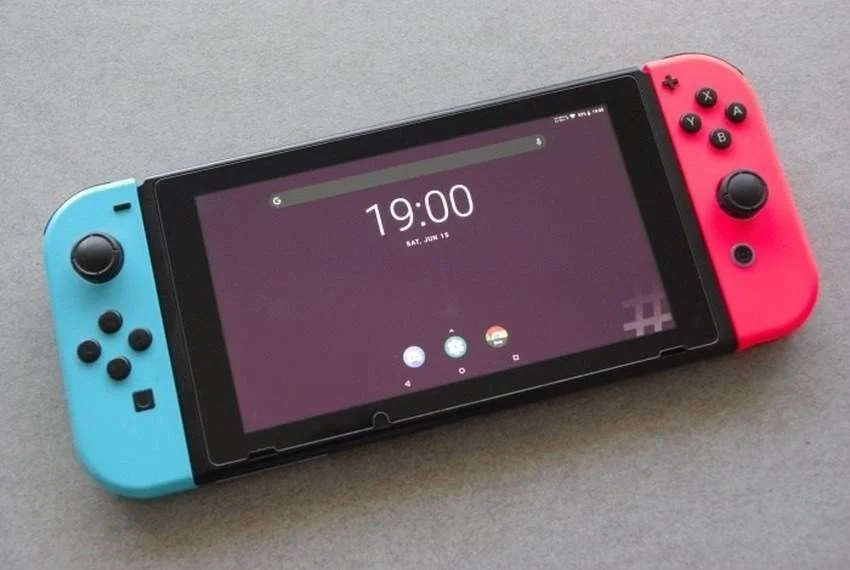
На консоли Nintendo Switch уже запускали Linux, Windows 10 и Android. Но теперь последнюю ОС можно установить и использовать девайс полноценно. Ну, за некоторыми исключениями. Прошивка Switchroot LineageOS 15.1, по сути, превращает Switch в планшет на Android 8.1, позволяя просматривать веб-страницы, видео, игры и так далее.
Лучше всего программное обеспечение работает с карты памяти microSD объёмом от 16 до 128 ГБ. Достаточно извлечь её, и получится снова Nintendo Switch, которая по-прежнему может запускать игры, разработанные для этой платформы.
Хотя есть несколько «но». В частности, Switchroot LineageOS будет работать только со старыми моделями Nintendo Switch, поскольку в программном обеспечении используется эксплойт. А в середине 2018 года эту брешь убрали. Подойдут модели, приобретённые до июля прошлого года.
А вот более новые модификации Switch и будущие Switch Lite , скорее всего, не подойдут. Также отметим, что система не поддерживает режим гибернации, экран автоматически не поворачивается, а сенсор может зависнуть. Wi-Fi иногда перестаёт работать (спасает только перезагрузка), а некоторые приложения могут не поддерживать Joy-con.
Загрузить образы, найти инструкции и ответы можно на форуме XDA-Developers.