- How to fix .h: No such file or directory error
- What is the “no such file or directory” error and how does this error occur
- How resolve the error “no such file or directory”
- Conclusion
- About the author
- Aaliyan Javaid
- No such file or directory in Arduino Project
- 1 Answer 1
- ArduinoJson.h: No such file or directory (Arduino)
- Library Manager installation
- .ZIP Installation
- Manual Installation
- Ошибка компиляции в Arduino
How to fix .h: No such file or directory error
![]()
In Arduino programming when writing a code for the microcontroller to perform some specific task one should expect that there might be some errors at the time of compilation of the Arduino code. We can classify the errors encountered while writing the Arduino code; some are related to the syntax; some are related to the declaration of variables or libraries; and all these errors come under the compiler errors. Although the Arduino IDE indicates the expected errors before compiling the code by highlighting the lines having the error in the red. Similarly, when the code is compiled, and a specific error is raised the compiler tells which thing in that line is causing that specific error. So, in this write up we have discussed an error that is “no such file or directory” in detail.
What is the “no such file or directory” error and how does this error occur
From the name of the error, it is obvious that when a file name being used in the Arduino code is not present in the installed directory of the Arduino IDE this error can be encountered. This error relates to the libraries we use to interface different devices with Arduino boards. When we compile the respective code using the library of any device the compiler searches that specific library in its installed directory. If it is unable to find such a file it gives the respective error of “no such file or directory “. The libraries are used for helping the compiler to know about the functions that we are going to perform using that device by interfacing it with the Arduino board.
How resolve the error “no such file or directory”
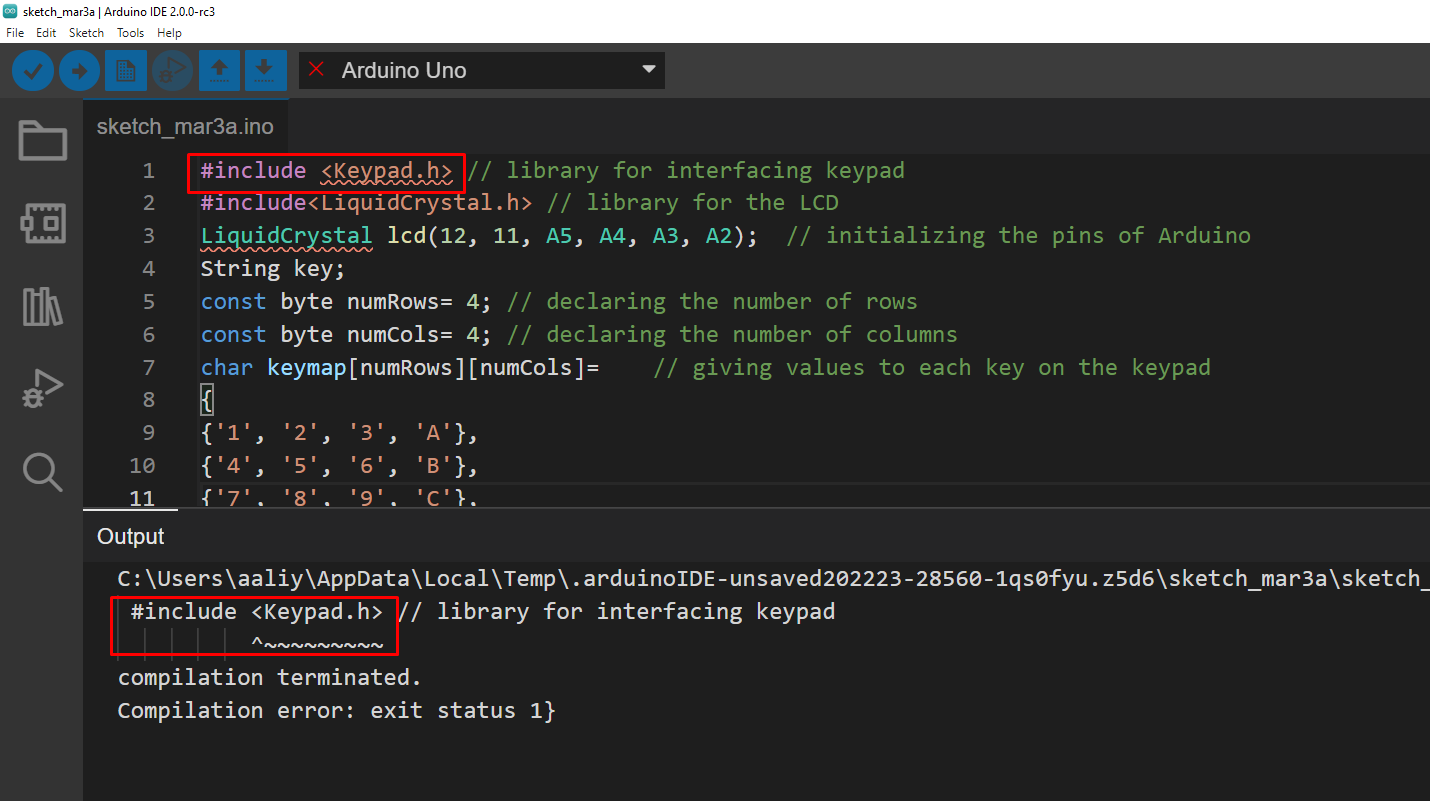
To give the clear concept of the error we have explained it with the help of code compiled for interfacing the keypad with Arduino. The code for interfacing the keypad with Arduino is given below in the figure and you can see in the figure that it is highlighted in red and when we compile the code, we get the error “no such file or directory”:

To resolve the error “no such file or directory” we have to install the respective library in order to compile the code successfully.
For installing the library of the keypad we have given the image below that shows step wise installation of the library for the keypad. You can use the similar procedure for installing the library for any device; the only change will be the key word used in the search bar of the library manager.
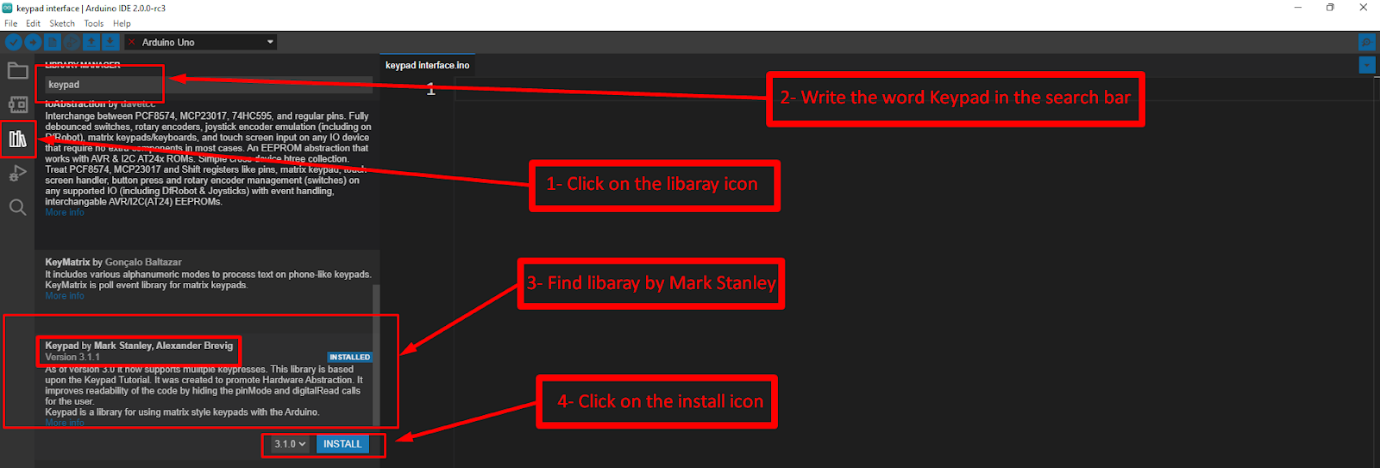
1 : To install the library we have to access the library manager of the Arduino IDE by pressing the library icon that comes fourth in the menu that you can see on the left of the compiler.
2 : Next after opening the library manager you have to write the name of the device that you are interfacing with Arduino and the list of libraries will appear.
3 : As in our case the device is a keypad. We wrote the keypad in the search bar and after that found the suitable library for the keypad.
4 : Once you have found the suitable library, click the icon colored in blue having INSTALL written on it for installing the library.
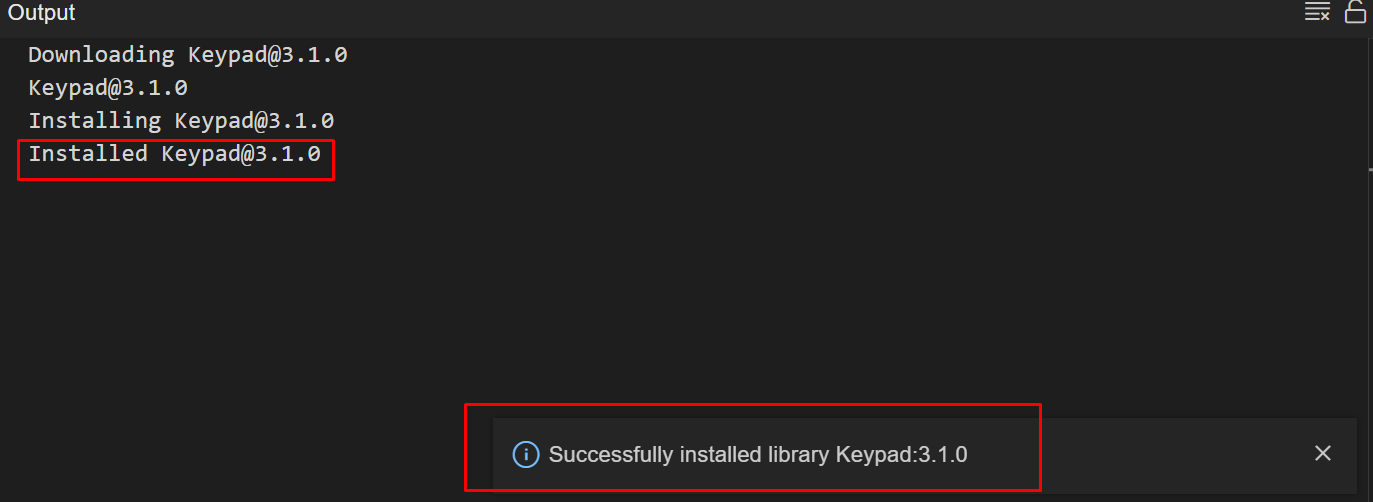
After the library is installed, you will see its status in the output menu at the bottom as well as shown in the figure given below:
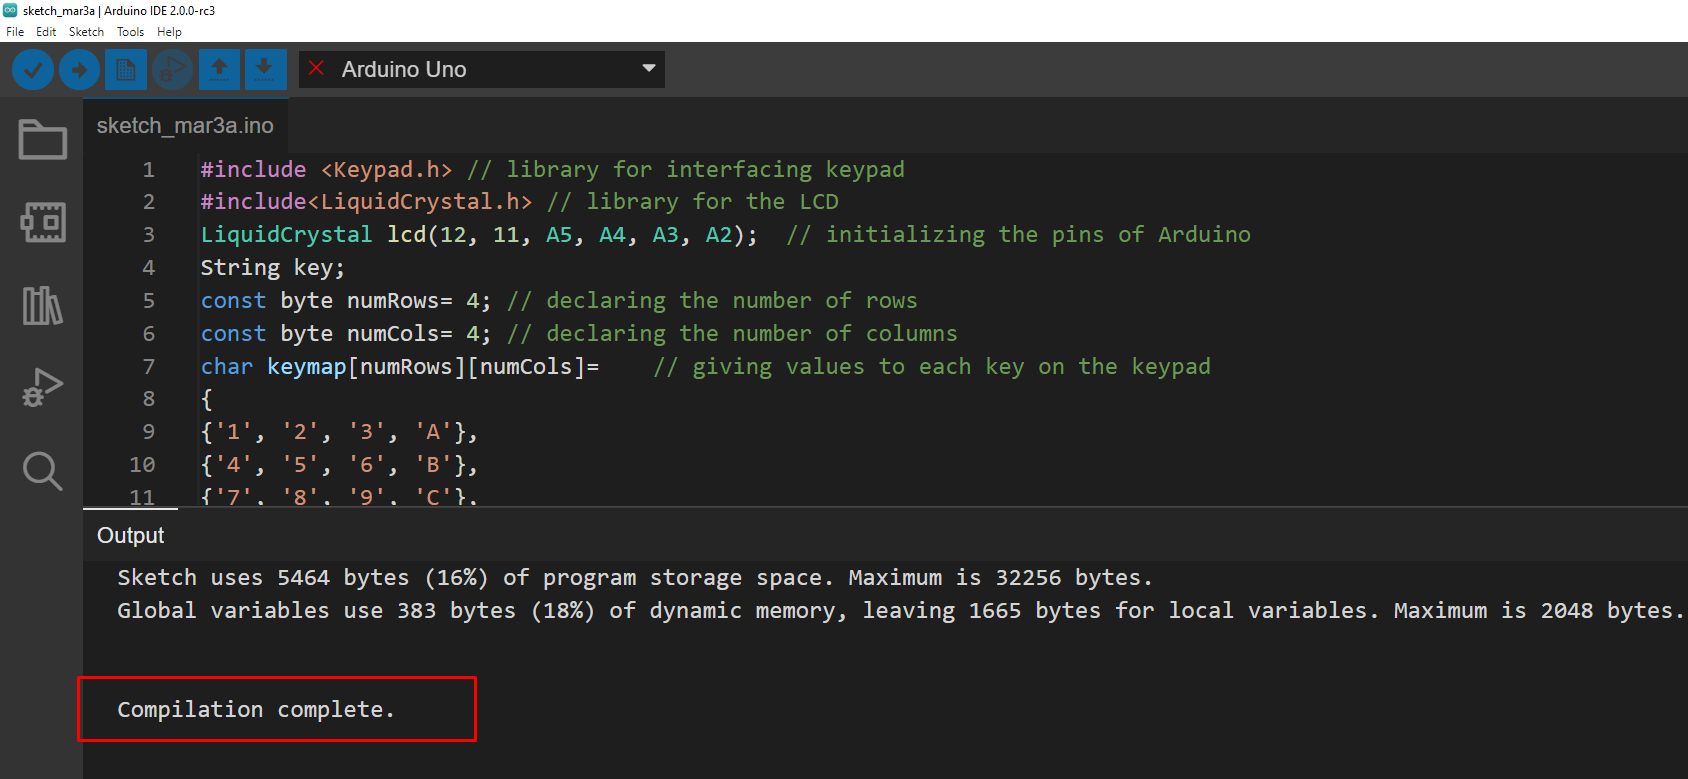
Now as you can see in the image below that the code is successfully compiled and the error of “ no such file or directory “ is removed.
Conclusion
There are different types of errors that can be encountered while compiling the Arduino code. The errors might be related to the syntax or related to the declaration of variables and libraries. The use of libraries gives the compiler an idea of which functions are to be performed using a specific device. Sometimes the Arduino IDE does not have the libraries for some devices and when the code is compiled it gives the error “no such file or directory “as the compiler is unable to recognize the functions. So, in this write-up we have explained how we can remove the Arduino IDE error that is “no such file or directory”.
About the author
Aaliyan Javaid
I am an electrical engineer and a technical blogger. My keen interest in embedded systems has led me to write and share my knowledge about them.
No such file or directory in Arduino Project
I downloaded the original project from github and I tried to compile the example it has in examples/mqtt_esp8266 but again I have the same problem. I also tried to put the PubSubClient.h in the same folder but again I have the same problem. Any ideas? Thanks in advance.
1 Answer 1
The file you have downloaded and included in your project is probably not actually a header file. You probably copied the contents of it from github and pasted it into a text document which you saved as a text file with the extension «.h».
It now has the extension «filename.h.txt». The name and extension need to be only «filename.h». Use save as, and select «all files» when saving, and name it «filename.h». Be sure to retype the filename, or it can be auto-filled with the already existing «filename.h.txt» (even if you don’s see it!).
If the file now has the right extension, put it in the same folder as your source code file. You can see which directory your source file is in by going to «save as» in your IDE.
A problem you might run into after this is missing definitions. You see, when you use libraries in the form of header files, each header file must usually (in this case, yes) be accompanied by a .cpp file (not necessarily with the same name). The reason for this is that the header file contains declarations, and the cpp file the definitions for said declarations. In other words, the header file is an overview of the facilities available in the library, and the cpp file actually implements the guts of it.
Edit: The example you are trying to run also has #include , a file that is not available in the github repository that you referred to. I assume that this is a library for a WiFi module or such that you can get elsewhere (manufacturer, other git’s or maybe it comes with the Arduino IDE?). In other words, you also need to add its header and (probably) .cpp file to your source directory.
ArduinoJson.h: No such file or directory (Arduino)
When you encounter a «No such file or directory» error it usually means you need to install the library that contains the missing file (in this case ArduinoJson.h).
Ideally the documentation for the code you are trying to compile will have instructions for installing dependencies. Sometimes the author did not make the effort to write this documentation and you’ll need to go searching for the missing library.
Many Arduino libraries are in the Library Manager index, which makes them quite easy to install:
Library Manager installation
- (In the Arduino IDE) Sketch > Include Library > Manage Libraries.
- Wait for the download to finish.
- In the «Filter your search. » box, type your search query, in this case «ArduinoJson» would be appropriate.
- Scroll through the search results to find something that looks correct (in this case «ArduinoJson by Benoit Blanchon»), then click on it.
- Click «Install».
- Wait for installation to finish.
- Click «Close».
If you don’t find the library you need in Library Manager you’ll need to spend some time with your favorite search engine. Once you find the library and download it you’ll need to install it.
.ZIP Installation
(In the Arduino IDE) Sketch > Include Library > Add .ZIP Library Select the downloaded file (must be a .zip). Click «Open».
The above installation instructions require the .zip file to have a specific folder structure. In some cases the library author has not been kind enough to provide the correct folder structure. If you get a «Zip doesn’t contain a library» error message then you will need to do a manual installation of the library.
Manual Installation
- Unzip the downloaded file
- Browse through the unzipped folder until you find the library folder. This will either have a library.properties file and/or a .h file.
- Copy the library folder to /libraries. You can find the sketchbook folder in the Arduino IDE at File > Properties > Sketchbook location. You will need to restart the Arduino IDE before the examples sketches for manually installed libraries will appear under the File > Examples menu.
Ошибка компиляции в Arduino

Даже опытные программисты-«ардуинщики» могут столкнуться с ошибками компиляции. Исправить их не сложно, а вот найти порой не так просто. Мы решили рассказать сегодня в деталях, какие системные ошибки чаще возникают на различных платах Ардуино, как их исправить и по возможности избежать.
Для начала рассмотрим базовые, так называемые синтаксические ошибки. Они встречаются чаще всего у новичков, но и опытные электронщики с ними точно знакомы не понаслышке. Искать их обычно супер-просто – в Arduino IDE некорректный синтаксис выделяется построчно (таким образом значительно легче отыскать неточность в кодах). Обычно это: отсутствие скобки в конце команды, пропуск этой самой служебной команды или слова, нехватка важных функций, неправильное их написание и т.д.
Для быстрого поиска ошибки советуем рассмотреть строку-подсказку. Ничего не помогло? Тогда для вас наша подборка наиболее распространенных синтаксических ошибок:
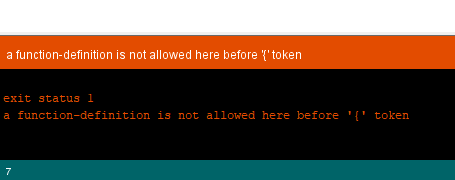
- Такое сообщение указывает на то, что вы забыли открыть фугурную скобку;

- “expected initializer before ‘>’ token” — наоборот, забыли ее закрыть;
- “undefined reference to “setup” — удалена либо изменена процедура “setup”;
- “undefinedreferenceto “loop” – проблема с опцией loop (ненароком изменили, удалили);
- Тут говорится о том, что в прошивке найдены слова, написанные неверно (текст, который не должен считаться программным, все же читается средой IDE).
 Тут говорится о том, что в прошивке найдены слова, написанные неверно (текст, который не должен считаться программным, все же читается средой IDE).
С синтаксисом все понятно – вставляем пропущенные символы, убираем лишние знаки, возвращаем функции по умолчанию.
Напомним, в среде разработки Ардуино IDE можно заливать скетчи для различных микроконтроллеров. По умолчанию обычно указана плата Genuino Uno. Если вы работаете с Mega, следует выбрать именно эту платформу (меню «Сервис»), иначе вас ожидает неприятное предупреждение: “programmer is not responding”.
Ошибка компиляции для платы Arduino Uno чаще всего возникает из-за проблем, связанных с библиотеками, например, неправильно подключили, не то ПО инсталлировали. В этом случае вы увидите напоминание “fatal error: … No such file or directory” (библиотека не перенесена в папку libraries) или “redefinition of void setup”.

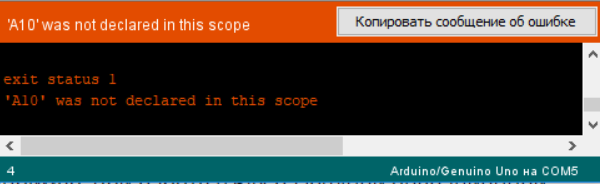
Обозначенная на скриншоте ERROR означает, что программирование завершилось некорректно (расшифровываем: внутренние проблемы с компилятором, не обновили версию IDE, сбой в библиотеке, неправильный выбор разрядности операционной системы и др.).
Важно! Не забывайте использовать подсказки приложения – они очень помогают. Включаем тут: Файл -> Настройки -> «Показать подробный вывод во время компиляции».
Что делать, если произошла ошибка при загрузке скетча Arduino Nano. Тут могут быть те же причины, что мы описали выше. Особых отличий в компиляции плат нет, главное, их правильный выбор первоначально. Однако часто пользователи настраивают не те показатели скорости порта: 9600 вместо необходимых 57600 либо не имеют соответствующих драйверов на устройствах – все это нужно проверить и исправить!