- Настройка Wi-Fi на виртуальной машине Vmware/Virtualbox (в образе Linux)
- Аренда выделенного сервера
- Сложности при установке и отладке WiFi-интерфейса под образами Linux
- Инсталляция требуемых драйверов для работы с WiFi-модулем
- Настройка WiFi-карты
- Unable to access Wi-Fi on VirtualBox? Try these methods
- How do I fix Wi-Fi errors on VirtualBox?
- 1. Bridge Wi-Fi network adapter
- 2. Enable and Disable Network Adapter
- 3. Run network troubleshooter
- 4. Set NAT adapter
- How do I enable the Internet on VirtualBox?
- Conclusion
- About the author
- Shehroz Azam
Настройка Wi-Fi на виртуальной машине Vmware/Virtualbox (в образе Linux)
В данном материале мы рассмотрим достаточно распространенный вопрос, связанный с подключением Wi-Fi интерфейса в виртуальной среде Vmware и Virtualbox. Нередко у начинающих сисадминов, да и тех, что поопытнее, возникают сложности именно на этом этапе реализации сетевого доступа к образу установленной системы.
Сегодня все чаще для виртуализации рабочей, системной среды используются USB-девайсы в виде WiFi-карт. Это обусловлено тем, что нормально использовать встроенный WiFi-модуль в виртуальной машине практически невозможно. В данном случае речь идет не только о программно-железячной совместимости, но и о некоторых специфических аспектах работы Linux/Unix – систем с виртуальными машинами. Что же касается USB-модулей Wi-Fi, то здесь все достаточно просто и понятно, если речь идет о работе в образе ОС Windows – чтобы получить возможность настраивать WiFi-соединения в виртуальной среде Vmware или Virtualbox, вставляем USB-интерфейс в хостовый ПК и подключаем его к рабочей виртуальной среде. Далее в гостевой операционной системе определяется данный WiFi-модуль, последующая работа с которым происходит, как на обыкновенном ПК (установка драйверов, отладка и так далее).
В виртуальной среде Vmware-Player нужно выполнить определенные действия, чтобы подключить такой интерфейс. Открываем в основном меню раздел «Player», где выбираем пункт «Removable Devices» в списке предложенных устройств выбираем требуемую карту Wi-Fi после чего нажимаем кнопку «Соединение».
Аренда выделенного сервера
- Intel® Xeon® E3-1270 v2
3.5 , 4 ядра - 16Gb DDR3
- 2 x SSD: 240Gb, Ent
- 1 x SATA3: 1 TB
Хорошее решение, для задач средней ложности.
Любой выбранный сервер, всегда можно улучшить в процессе работы, если вы поймете что вам не достаточно производительности.
- Intel® Xeon® E3-1270 v6
3.8 , 4 ядра - 32Gb DDR4
- 2 x SSD: 480Gb, Ent
- 1 x SATA3: 2 TB
Аренда сервера для удаленного доступа и 1С.
Позволит экономить и безопасно работать на арендованном сервере, через удаленный рабочий стол и Веб браузер.
Сложности при установке и отладке WiFi-интерфейса под образами Linux
В Linux для настройки и правильной работы WiFi потребуется соответствующий драйвер, которого может не оказаться в системе. Чтобы выяснить какую карту сети использует оборудование, можно при посредством команды узнать ID устройства.
Посредством данных команд консоль выведет список системных устройств с указанием их идентификаторов. Вот пример строки из командного вывода lsusb:
Bus 001 Device 002: ID 0bda:8176 Realtek Semiconductor Corp. RTL8188CUS 802.11n WLAN
Как можно видеть, это Wi-Fi-интерфейс от производителя Realtek модели RTL8188CUS. Ее ID – это первая четверка шестнадцатеричных чисел 0bda:8176. Эти числа обозначают ID производителя, а последующие относятся к обозначению ID WiFi-карты. В нашем случае модель устройства мы уже знаем, а потому искать ее по ID нет необходимости. Большинство USB-драйверов и драйверов для внутренних карт производства Realtek находятся в firmware-realtek – пакете. Тем не менее, после того, как этот пакет установлен и подключена ваша USB-карта, беспроводной интерфейс может попросту не появиться. Поэтому лучше всего сразу, не теряя времени, отправиться на сайт производителя и скачать там драйвера для конкретной модели карты под Unix/Linux. В нашем случае в скачанном архиве можно найти исходный текст драйверов, сопроводительную документацию и установочный скрипт «install.sh». Запускаем полученный скрипт – после его запуска система скомпилирует модуль драйвера 8192cu, а затем инсталлирует его в Linux.
После этого мы сможем наконец увидеть в конфигурации беспроводной wlan0-интерфейс.
Инсталляция требуемых драйверов для работы с WiFi-модулем
Для настройки WiFi-сети можно использовать режим графической настройки в рамках Network-Manager, а также консольный режим, либо Wicd. Рассмотрим вариант отладки Wi-Fi в консольном варианте.
Чтобы настроить беспроводной интерфейс, вам потребуется пакет wireless_tools, в котором присутствуют такие необходимые утилиты как iwlist, iwconfig и другие. Также для поддержки WPA/WPA2 потребуется wpasupplicant — пакет. Эти два пакета обязательны к установке.
Настройка WiFi-карты
В первую очередь потребуется подключение беспроводного интерфейса с использованием команды
После ее выполнения можно провести сканирование доступных беспроводных сетей, воспользовавшись командой iwlist, утилита станет доступной к исполнению системной командой только после того, как вы установите пакет wireless tools). Для установки wireless-tools в Ubuntu / Linux Mint / Debian
sudo apt install wireless-tools
Unable to access Wi-Fi on VirtualBox? Try these methods

Try Outbyte Driver Updater to resolve driver issues entirely: This software will simplify the process by both searching and updating your drivers to prevent various malfunctions and enhance your PC stability. Check all your drivers now in 3 easy steps:
- Download Outbyte Driver Updater.
- Launch it on your PC to find all the problematic drivers.
- Afterward, Click Update & Apply Selected to get the latest driver versions.
- OutByte Driver Updater has been downloaded by 0 readers this month.
Oracle VirtualBox is a free open source virtualization software that allows the users to run virtual machines on Windows and other platforms. However, if you are using a Wi-Fi connection, you may not be able to access it on VirtualBox.
This is because VirtualBox by default does not support Wi-Fi connectivity unless the users have a USB Wi-Fi adapter installed. However, as a workaround, you can bridge to a Wi-Fi network card on the host.
In this article, we discuss how to enable Wi-Fi on VirtualBox to access the Internet on your virtual machine.
How do I fix Wi-Fi errors on VirtualBox?
1. Bridge Wi-Fi network adapter
- Start VirtualBox if it’s not already running.
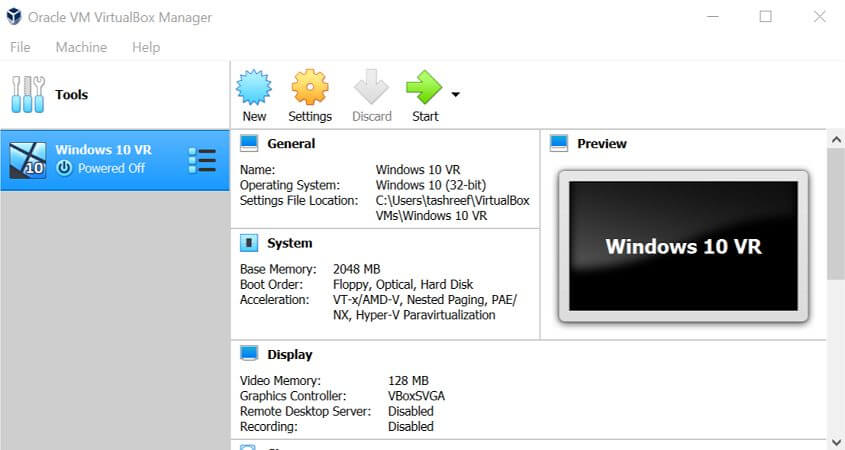
- Open VirtualBox Manager.
- Select the machine you cannot get internet on in the left pane.
- From the top menu, select the Settings button.
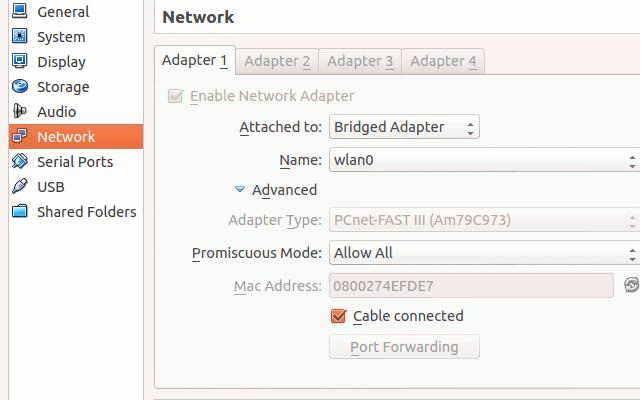
- From the left pane, click on Network under the Settings window.
- Next, switch to Bridged Adapter in the Attached to the drop-down menu.
- Now you need to select the name of the network adapter you are currently using on the host machine.
- Under the Advanced section, make sure the machine is set to use Dekstop Adapter Type.
- Make sure Promiscuous Mode is sent to Allow VMs under Advanced section.
- Again under the Advanced section, make sure Cable connected option is checked.
- Click OK to save the changes and exit the settings window.
- Restart VirtualBox and open a web browser and you should be able to access the internet now.
After configuring the VirtualBox settings, you can access the Wi-Fi network on your virtual machine. If the issue persists, get the MAC address information of your network adapter and enter it in the MAC address filed of the guests’ network configuration dialogue box.
Here is how to get the MAC address of your host machine’s network adapter.
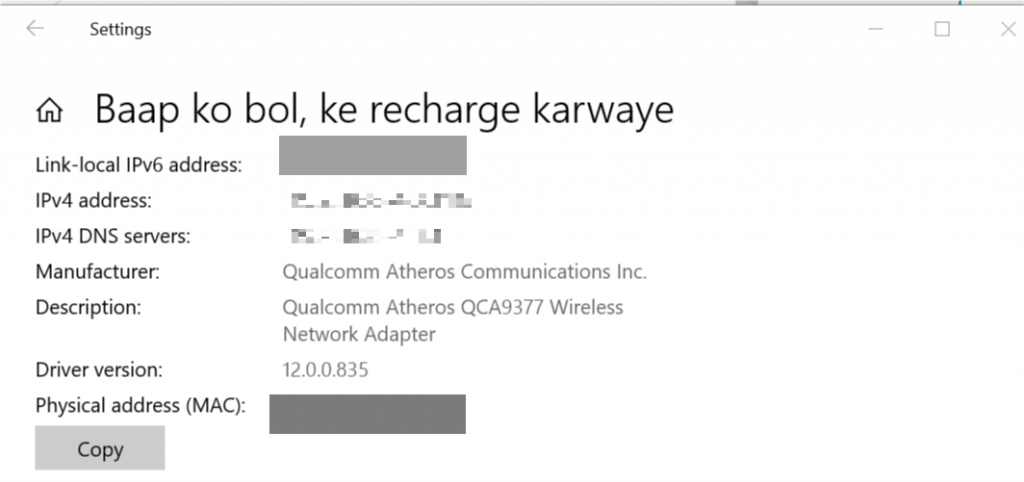
- Click on the Internet Access icon in the taskbar.
- Select your WiFi network and click on Properties.
- Scroll down to the Properties section.
- Note down the Physical address (MAC):
- Enter the MAC address in the VirtualBox’s network configuration dialogue.
2. Enable and Disable Network Adapter
- Right-click on the network for the virtual machine in the taskbar (bottom right corner).
- Toggle the switch to disable Connect Network Adapter option.
- Wait for a minute or two.
- Toggle the switch again to enable Connect Network Adapter option again.
- Try to access the Internet.
This will only work if the Wi-Fi connection was working earlier and suddenly stopped.
3. Run network troubleshooter
- Press Windows Key + R to open Run.
- Type control and click OK.
- Click on Network and Internet.
- Click on Network and Sharing Center.
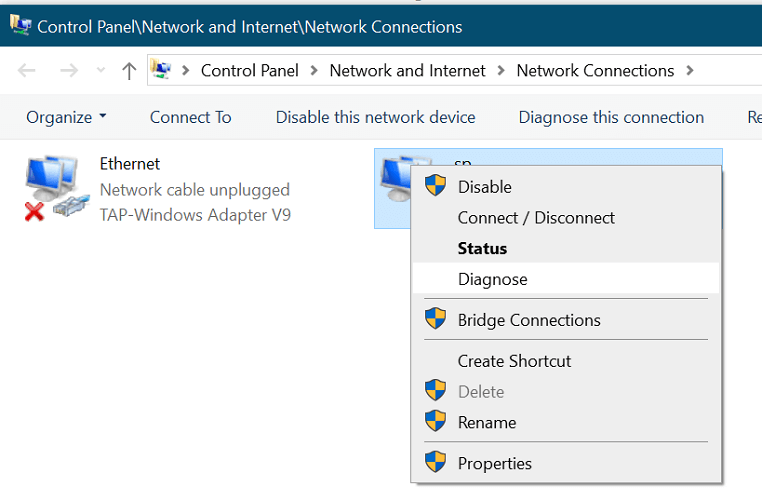
- Choose Change Adapter Settings from the left pane.
- Right-click on the Virtual Network Adapter and select Diagnose.
- Follow the on-screen instructions to complete the troubleshooting process.
- Click on Apply the recommended solutions/changes if prompted.
- Try accessing the internet from your virtual machine and check for any improvements.
4. Set NAT adapter
- Start VirtualBox if not running.
- Click on Settings and select Network Settings.
- In the network adapter add the following:
“BOOTPRO=DHCP“ - Check the Allow internet sharing option in the host machine adapter.
- Try to access the Internet and check if the Wi-Fi is working.
To be able to access Wi-Fi on your virtual machine, you need to make some tweaks to your host and the guest system. Follow the steps in this article to resolve any Wi-Fi-related issues that you encounter with Oracle VirtualBox.
If you have any other questions or suggestions, drop them in the comments section below.
How do I enable the Internet on VirtualBox?
![]()
When we create a new Virtual machine in VirtualBox and install any Operating system in that machine, it is often faced that the internet is not working or not connected. There can be multiple reasons if the internet is not working on the Virtual machine in the VirtualBox. This post will help you and provide you a step-by-step guide on fixing or enabling the internet connection in a virtual machine of VirtualBox.
Step 1: Ensure the internet connection
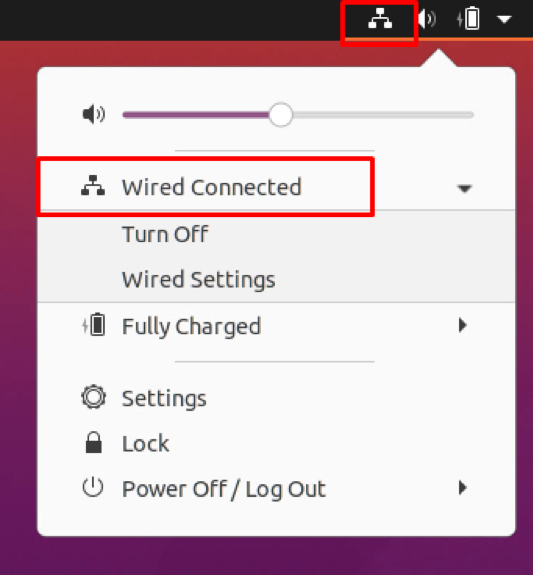
First, ensure that the wired network connection is already turned on by going to the network tab in the settings.
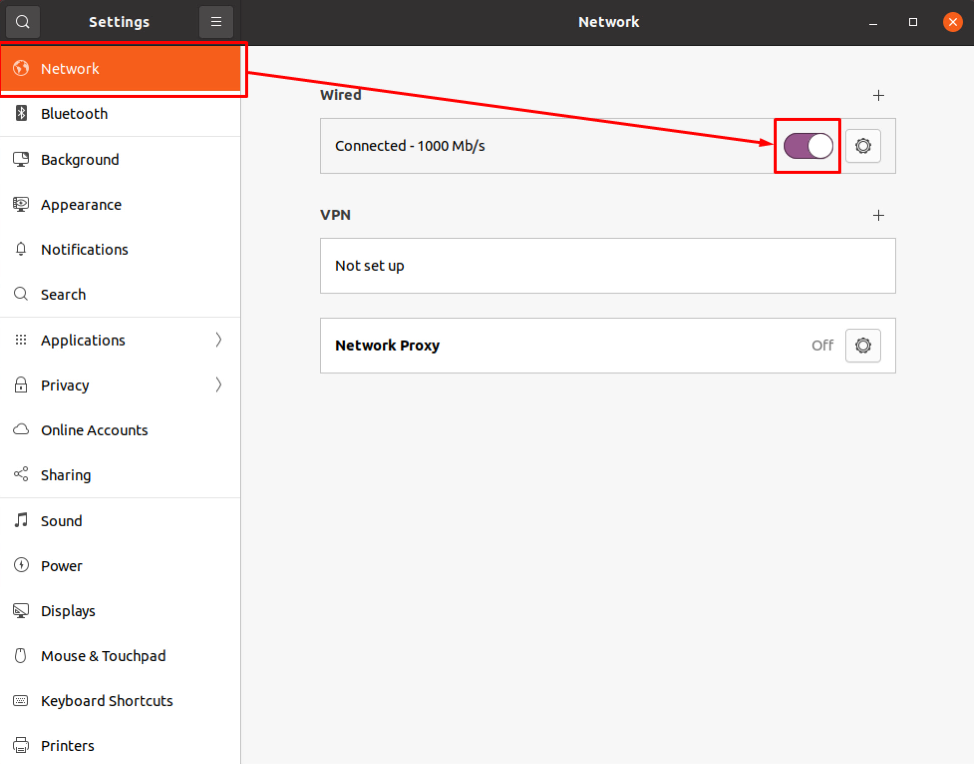
If the highlighted toggle button in the screenshot attached is OFF, then turn it ON and establish the internet connection.
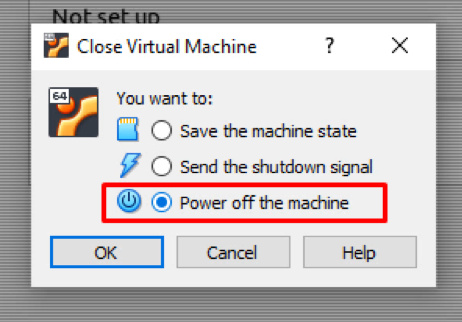
Step 2: Turn OFF the Virtual Machine
If you still do not have the internet connection established, you need to change the machine’s network adapter settings from the Virtual machine settings.
For changing the network settings and for the modifications to take effect, turn off the virtual machine.
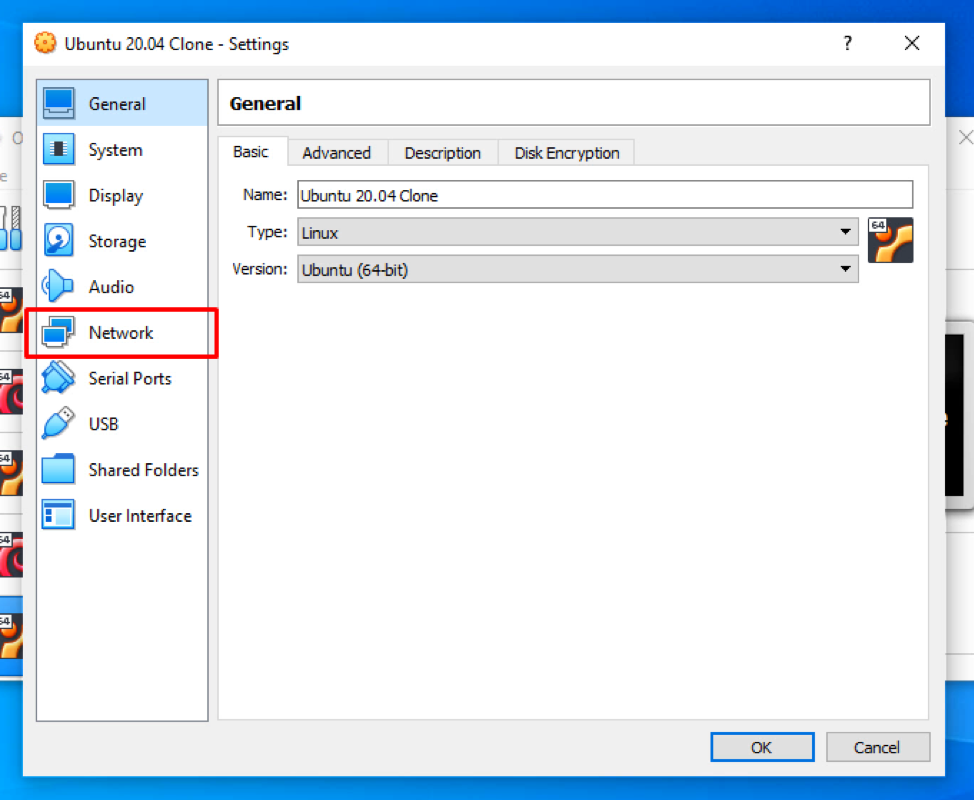
Step 3: Open network settings of Virtual Machine
After closing the Virtual Machine, open the virtual machine settings by right-clicking on the machine and selecting the settings option from the context menu.
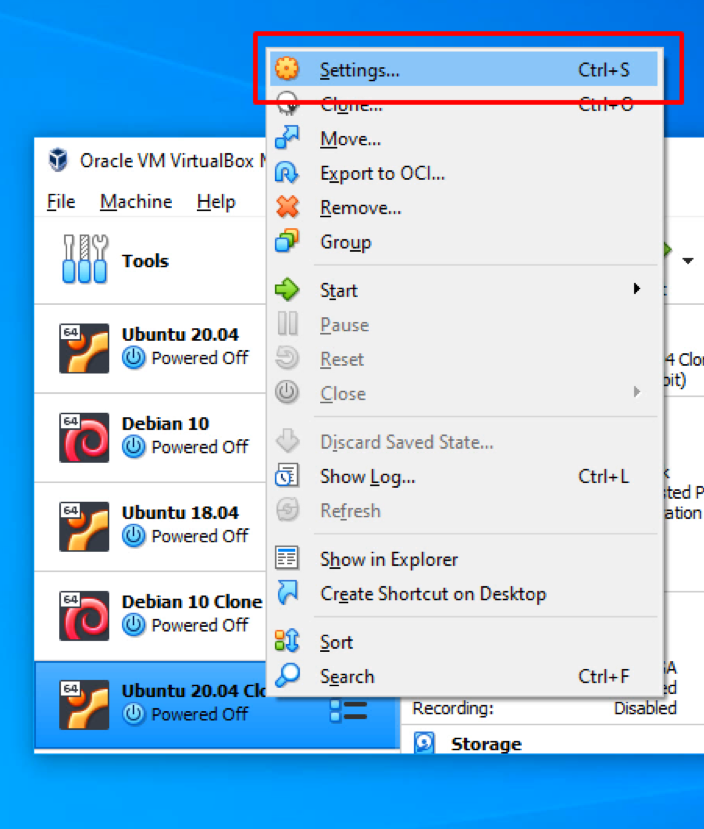
In the settings window that appeared, click on the Network tab from the left bar.
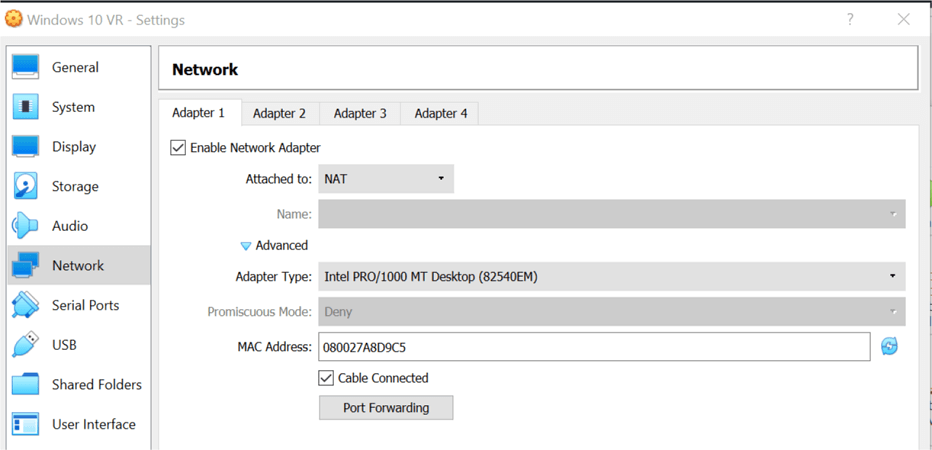
Step 4: Enable the Network Adapter
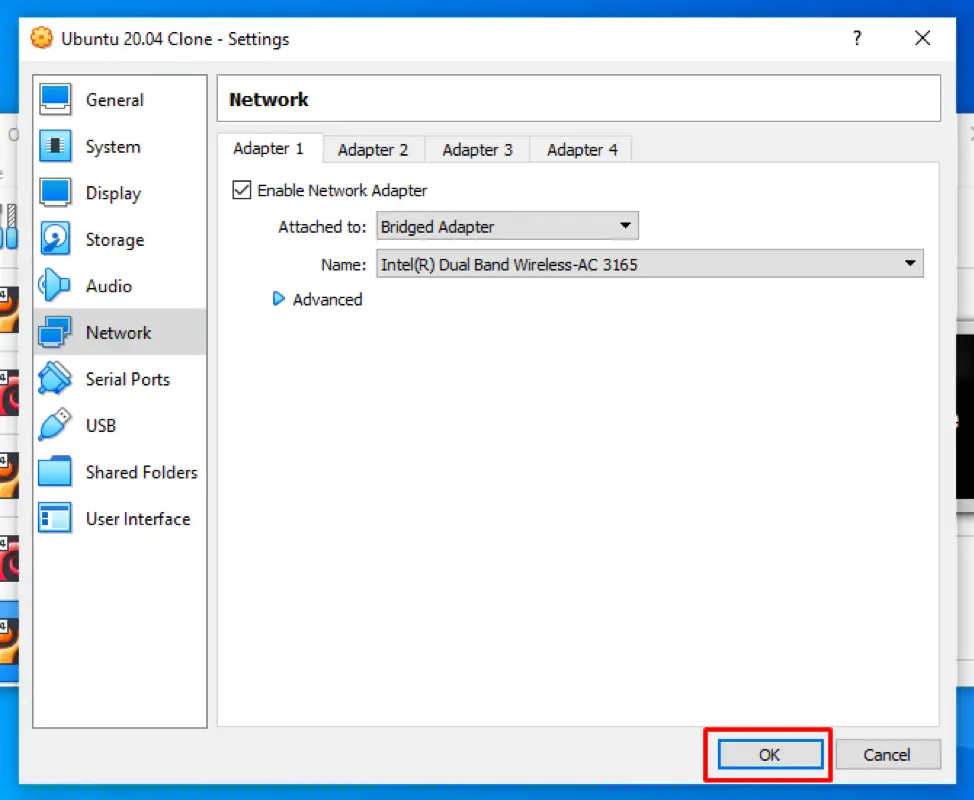
In the machine’s Network Adapter settings, click on the “Enable Network Adapter” to enable the network adapter and modify its settings.
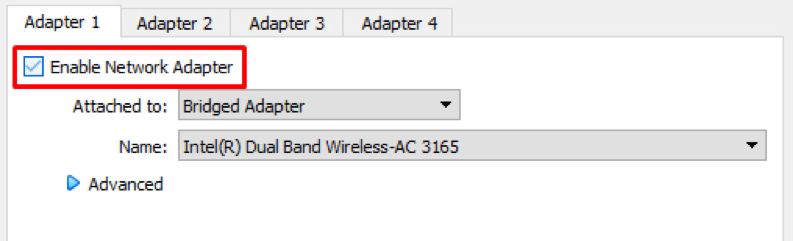
If it is unchecked, then definitely this was the reason behind the internet connection not working because there was no network adapter assigned to the Virtual machine by the VirtualBox.
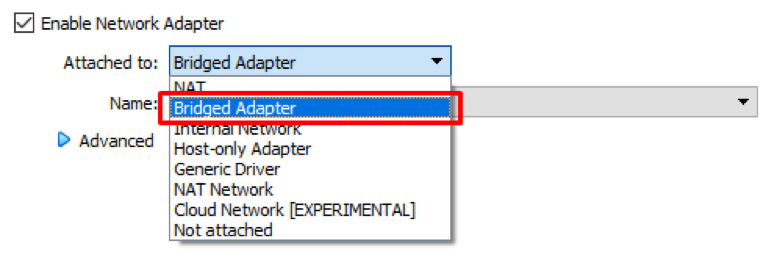
Step 5: Select the Network Device
After enabling the network adapter for the virtual machine, you can select the preferred method from the “attached to” dropdown menu to attach the virtual network adapter to your host OS network.

We will suggest selecting the Bridged Adapter because this way, the virtual machine will be connected to the network using the host OS Ethernet adapter.
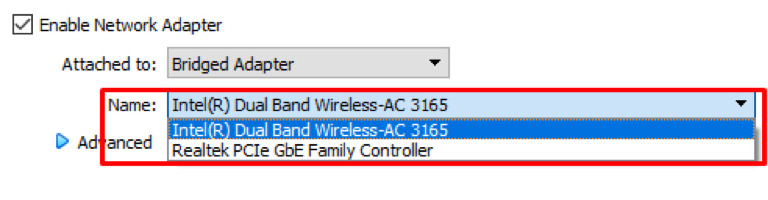
After selecting the appropriate method from the “Name” drop-down, select the right device that you want to choose.
Step 6: Save Settings and start the Virtual Machine
After configuring all the described settings, click on the OK button to save the settings.
And start the machine by double-clicking on the machine.
You will have the internet connection working perfectly fine on your virtual machine in the virtual box.
Conclusion
This post provides a step-by-step and easy-to-understand guide on how to enable the internet on VirtualBox. This post provides a step-by-step troubleshooting guide on configuring the network adapter settings of any machine in the VirtualBox. Using the method provided in this post, you can fix and enable any machine’s internet on VirtualBox.
About the author
Shehroz Azam
A Javascript Developer & Linux enthusiast with 4 years of industrial experience and proven know-how to combine creative and usability viewpoints resulting in world-class web applications. I have experience working with Vue, React & Node.js & currently working on article writing and video creation.