Hands on Arduino Mega
I’ve got me one of this ESP8266 boards to play around with my IoT project and it turns out to be a hell of configuration when you get a clone board with no much information about the hardware itself.
Later on I saw in a online shop with the description:
«This is a new version of NodeMcu Lua WIFI Development Board
Not compatible with MAC»
. great :]

the only it says are the following steps:
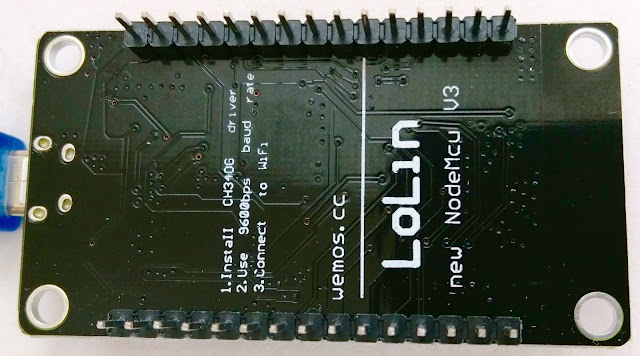
So I went to wemos.cc navigated to the CH340G, and guess what, there is nothing in there
Since this is taking me quite a lot of time I decided to write here my findings on how to configure this undocumented breakout device configuration.
Warning!
The following steps are valid for this ESP8266 board LoLin V3 NodeMcu from wemos.cc and Macbook pro OS X Yosemite 10.10.5. I don’t know if such steps are valid for any other configuration, so be carreful, if you have different configuration search for another tutorial.
This blog describes quite similar board:
http://ouilogique.com/NodeMCU_esp8266/
and with the help of google translator i figured things out.
Installing CH340G for OS X
I am using OS X Yosemite 10.10.5 so installing the UART driver it is not as trivial as on Windows.
I found this driver that works for me:
Once installed you connect the board to your USB and check the port.
open the terminal and type:
you should see one of the two serial port adaptors:
Note: The number depends on which USB port you connected the board: USB left or right
If you dont see any of these ports then you need to restart you computer. Otherwise check the USB cable, if still not working then someting went wrong with the driver installation.
Installing Esptool
Esptool is a python script that helps you to interface with your ESP8366 over the USB port.
To install python tools do:
Go to your temporal folder or any other folder where you can download the installation source, then
git clone https://github.com/themadinventor/esptool.git
cd esptool
sudo python setup.py install
which esptool.py # ⇒ /usr/local/bin/esptool.py
The last command «which» it is to check where the script was installed.
First commands with esptool
Now let’s try if the ESP8266 works. Open your console and type:
esptool.py -h
you will see the help page for esptool and how to use it.
Let’s check the mac address of the ESP8266:
esptool.py -p /dev/cu.wchusbserial1410 read_mac
Notice that the command requires the port name, with the format:
esptool.py -p read_mac
remember that you may have the other name /dev/cu.wchusbserial1420
Then the result of our querry is, in my case:
esptool.py v2.1
Connecting.
Detecting chip type. ESP8266
Chip is ESP8266
Uploading stub.
Running stub.
Stub running.
MAC: 5c:cf:7f:XX:XX:XX
Hard resetting.
Where ‘X’ is a Hexadecimal numer.
you can also try to read the chip id with the command:
esptool.py —port /dev/tty.wchusbserial1420 —after no_reset chip_id
or the flash size which it is important to know if you want to upgrade the NodeMcu version
esptool.py —port /dev/tty.wchusbserial1420 —after no_reset flash_id
esptool.py v2.1
Connecting.
Detecting chip type. ESP8266
Chip is ESP8266
Uploading stub.
Running stub.
Stub running.
Manufacturer: ef
Device: 4016
Detected flash size: 4MB
Staying in bootloader.
I have tried ESPlorer, which is a Java application to communicate with the ESPXX but for me does not work. I can open the port but I do not receive any answers from the ESP8266, You can have a try if you want:
You can also check the flash id in order to find more information about the chip.
esptool.py -p /dev/cu.wchusbserial1420 flash_id
esptool.py v2.1
Connecting.
Detecting chip type. ESP8266
Chip is ESP8266
Uploading stub.
Running stub.
Stub running.
Manufacturer: ef
Device: 4016
Detected flash size: 4MB
Hard resetting.
now, with the manufacturer «ef» you can search on the following file the id of the corresponding manufactures.
https://code.coreboot.org/p/flashrom/source/tree/HEAD/trunk/flashchips.h
W25X chips are SPI , first byte of device ID is memory type , second
byte of device ID is related to log ( bitsize )
#define WINBOND_NEX_ID ␉ 0xEF ␉ /* Winbond (ex Nexcom) serial flashes */
Buildting your frimware on the cloud
Here you can customize the firmware your want for your board and the you will receive a email with the link for downloading it.
I followed the steps from the following link and it worked just fine
esptool.py —port /dev/tty.wchusbserial1420 write_flash —flash_mode dio 0x00000 nodemcu-master-9-modules-2017-10-08-17-51-52-integer.bin
esptool.py v2.1
Connecting.
Detecting chip type. ESP8266
Chip is ESP8266
Uploading stub.
Running stub.
Stub running.
Configuring flash size.
Auto-detected Flash size: 4MB
Flash params set to 0x0240
Compressed 405760 bytes to 262269.
Wrote 405760 bytes (262269 compressed) at 0x00000000 in 23.5 seconds (effective 137.9 kbit/s).
Hash of data verified.
Leaving.
Hard resetting.
Flash mode is dio because my board is a >=4 MByte modules. This is explained in the tool overview. The address is 0x0 because I am using the full firmware bin package (see ref) and I dont need to set the board in bootloader mode because since I am using USB direct connection this is done by the tool (see ref )
NodeMCU LUA Amica R2 ESP8266 Wifi Board — ESP8266 для «чайников»
Очень долго облизывался на «народный» esp8266 и вот, в один из вечеров сделал заказ: ESP-07 и героя обзора. Почему выбрал последний — чтобы отладить все тонкости без пайки и прочего геморроя. Сразу предупреждаю, это обзор товара и его «тонкостей», а не новая метеостанция или другая поделка на esp8266.
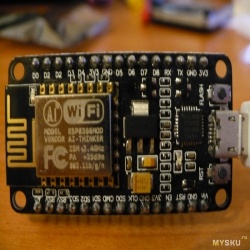
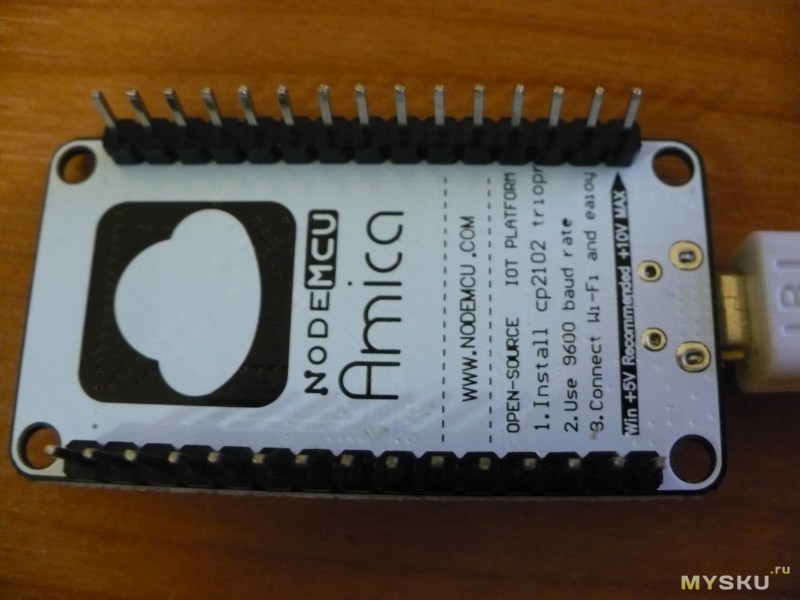
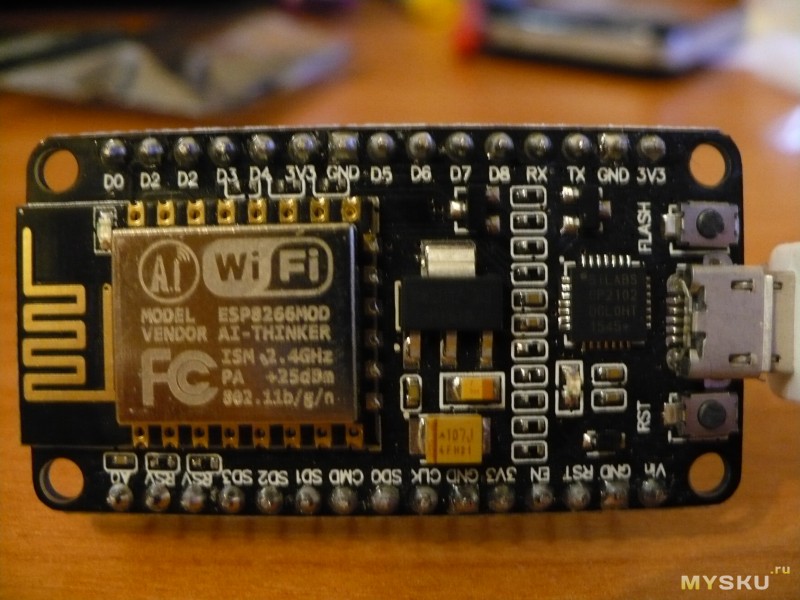
Пришел, судя по нижней стороне вот этот зверь NodeMCU LUA Amica R2 ESP8266 Wifi Board
Based on ESP-12E ESP8266 wifi board
All I/Os output
No need to press reset/flash for pgoramming
Open source support: www.nodemcu.com
R2 version had CP2102 USB-TTL instead, larger current support, slim board can put on breadboard.
Support windows 8.1 by CP2102, and support ESPlorer
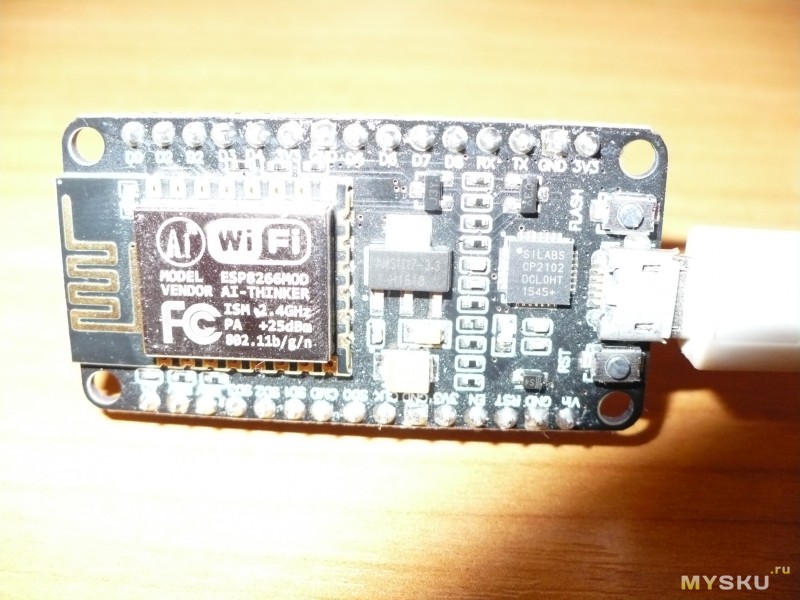
Основные преимущества перед 2 долларовыми esp-12 и esp-07:
Встроенные microUSB порт и CP2102 чип, что позволяет подключить для отладки к компьютеру через microUSB кабель (но с небольшими нюансами, об этом ниже)
Распаянная и подписанная «гребенка» с tx, rx, gnd, 3v3, 8ю цифровыми портами и сколько то аналоговых (вроде 3) и какие то ещё, мне пока неизвестные…
Питание от usb 5 вольт, не нужно искать мощный преобразователь на 3,3 вольта.
Прошивка без пайки — происходит автоматически. Есть кнопки reset и flash, но для прошивки они не нужны.
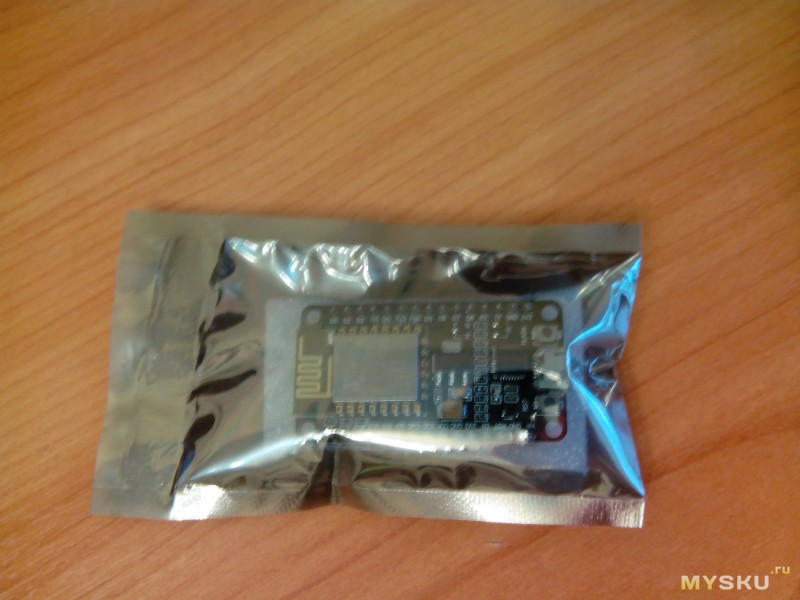
Пришел в антистатическом пакетике


Подключаем к компьютеру через кабель microusb. Драйвера в Windows 10 установились автомалически. Смотрим какой нам дали порт

И тут начались нюансы. Подключился Putty к com9 9600 как написано на нижней, в ответ получил кракозябры. Команды AT не принимает, ответа нет. Исправил на 115200 — в ответ тишина. Ладно, думаю надо перешивать. Перехожу по ссылке из магазина выше — www.electrodragon.com/w/ESP8266_NodeMCU_Dev_Board#R2_Version_Flash_Note
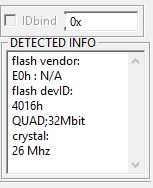
Скачиваю флэшер, последнюю прошивку. Настраиваю флэшер по инструкции. Вроде все хорошо
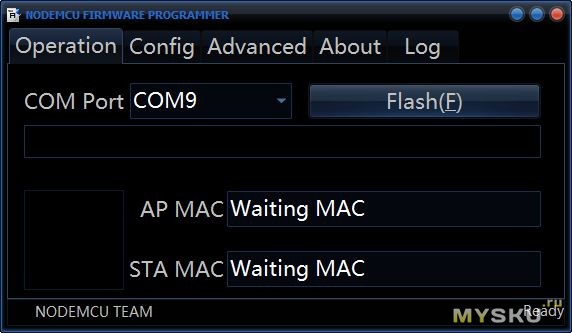
— горит ready, порт виден, проблем нет! Однако не прошивается! Оказалось, не работает только на этом usb выходе, при включении в другой разъем все прекрасно прошилось и заработало.
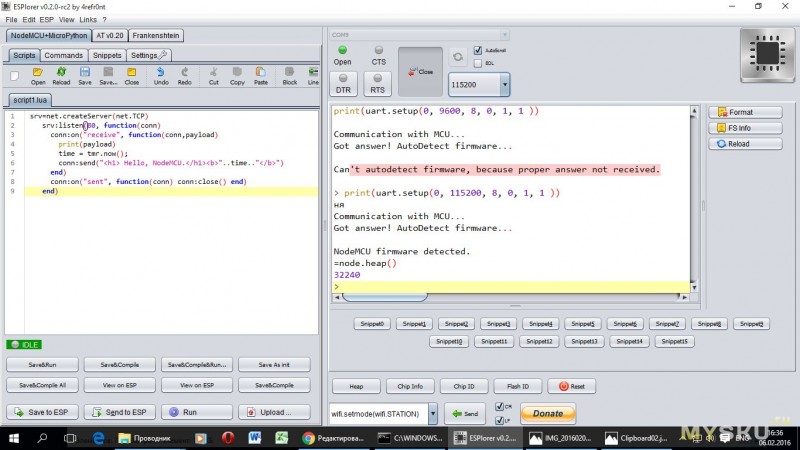
Скачиваем ESPlorer, запускаем на порт 9 и скорость 9600, нажимаем Open port получаем
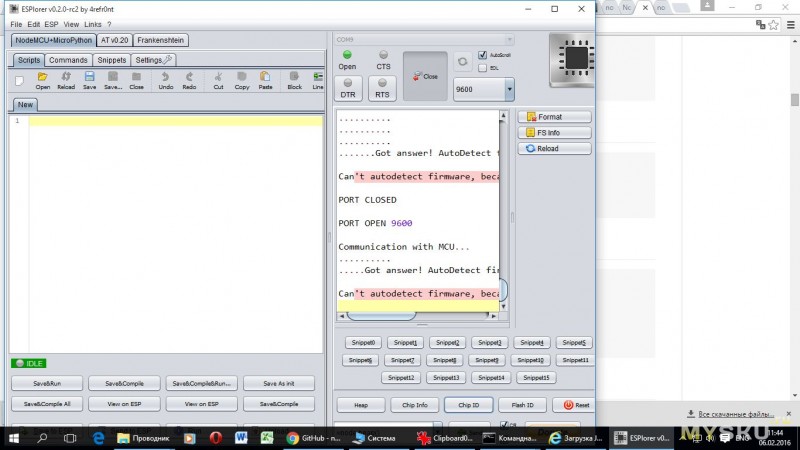

После этого выбираем 115200 и начинаем работать (я не знаю, это «фишка» моего конкретного образца или так и должно быть)
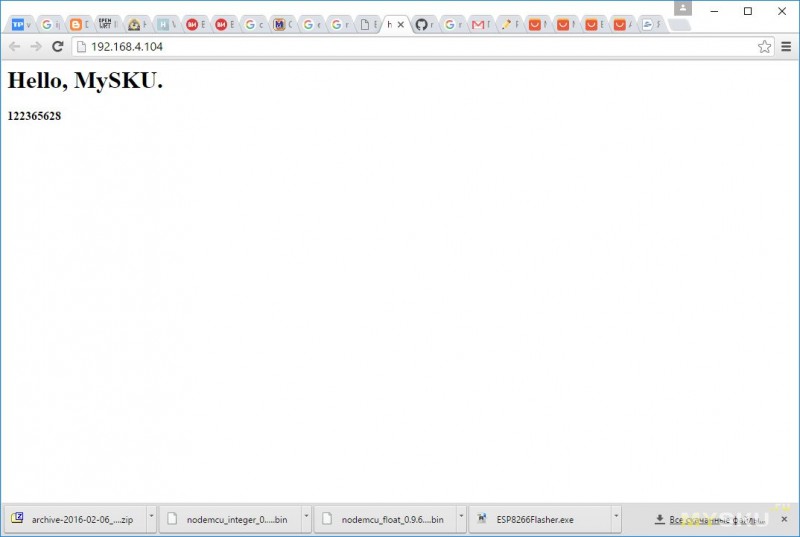
wifi.setmode(wifi.STATION) wifi.sta.config("myssid","mypassword") wifi.sta.status() wifi.sta.getip() srv=net.createServer(net.TCP) srv:listen(80, function(conn) conn:on("receive", function(conn,payload) print(payload) time = tmr.now(); conn:send(" Hello, MySKU.
"..time.."") end) conn:on("sent", function(conn) conn:close() end) end)заходим на адрес esp — радуемся

Итог. за 4 доллара получаем простую для новичка esp8266 плату с возможностью «поиграться» без паяльника.
Размер flash памяти в чипе esp6266 32mbit или 4 мбайта, что выгодно отличает от других esp шек c 4mbit(512kbytes)

NodeMCU LUA Amica R2 ESP8266 Wifi Board — ESP8266 для «чайников»

Очень долго облизывался на «народный» esp8266 и вот, в один из вечеров сделал заказ: ESP-07 и героя обзора. Почему выбрал последний — чтобы отладить все тонкости без пайки и прочего геморроя. Сразу предупреждаю, это обзор товара и его «тонкостей», а не новая метеостанция или другая поделка на esp8266.
Пришел, судя по нижней стороне вот этот зверь NodeMCU LUA Amica R2 ESP8266 Wifi Board
Based on ESP-12E ESP8266 wifi board
All I/Os output
No need to press reset/flash for pgoramming
Open source support: www.nodemcu.com
R2 version had CP2102 USB-TTL instead, larger current support, slim board can put on breadboard.
Support windows 8.1 by CP2102, and support ESPlorer
Основные преимущества перед 2 долларовыми esp-12 и esp-07:
Встроенные microUSB порт и CP2102 чип, что позволяет подключить для отладки к компьютеру через microUSB кабель (но с небольшими нюансами, об этом ниже)
Распаянная и подписанная «гребенка» с tx, rx, gnd, 3v3, 8ю цифровыми портами и сколько то аналоговых (вроде 3) и какие то ещё, мне пока неизвестные…
Питание от usb 5 вольт, не нужно искать мощный преобразователь на 3,3 вольта.
Прошивка без пайки — происходит автоматически. Есть кнопки reset и flash, но для прошивки они не нужны.
Пришел в антистатическом пакетике


Подключаем к компьютеру через кабель microusb. Драйвера в Windows 10 установились автомалически. Смотрим какой нам дали порт

И тут начались нюансы. Подключился Putty к com9 9600 как написано на нижней, в ответ получил кракозябры. Команды AT не принимает, ответа нет. Исправил на 115200 — в ответ тишина. Ладно, думаю надо перешивать. Перехожу по ссылке из магазина выше — www.electrodragon.com/w/ESP8266_NodeMCU_Dev_Board#R2_Version_Flash_Note
Скачиваю флэшер, последнюю прошивку. Настраиваю флэшер по инструкции. Вроде все хорошо

— горит ready, порт виден, проблем нет! Однако не прошивается! Оказалось, не работает только на этом usb выходе, при включении в другой разъем все прекрасно прошилось и заработало.
Скачиваем ESPlorer, запускаем на порт 9 и скорость 9600, нажимаем Open port получаем

После этого выбираем 115200 и начинаем работать (я не знаю, это «фишка» моего конкретного образца или так и должно быть)
wifi.setmode(wifi.STATION) wifi.sta.config("myssid","mypassword") wifi.sta.status() wifi.sta.getip() srv=net.createServer(net.TCP) srv:listen(80, function(conn) conn:on("receive", function(conn,payload) print(payload) time = tmr.now(); conn:send(" Hello, MySKU.
"..time.."") end) conn:on("sent", function(conn) conn:close() end) end)заходим на адрес esp — радуемся
Итог. за 4 доллара получаем простую для новичка esp8266 плату с возможностью «поиграться» без паяльника.
Размер flash памяти в чипе esp6266 32mbit или 4 мбайта, что выгодно отличает от других esp шек c 4mbit(512kbytes)