How do you run update-grub?
I went into Live CD and activated Terminal. Then, I typed gksu nautilus to gain temporary access to my root directory. Once the Manager window opened, I clicked on File System and navigated to the /etc/default/grub directory. I then double clicked on the Grub file to make changes to the TIMEOUT and TIMEOUT_QUIET . I saved the file after I made the changes. Then I went back to the terminal mode and typed:
I’m not sure what to do at this point. How can I run update-grub to update the changes? Thanks in advance for your help. Please be very detailed and specific with your response as I am totally new to this environment.
3 Answers 3
Phase 1 — Note: don’t use a Live CD.
- In your Ubuntu open a terminal (press Ctrl + Alt + T at the same time)
- Type gedit admin:///etc/default/grub
This will run text-editor gedit, if you’re using another one just type the name of it instead of gedit . - Make the changes you would like to make and save them.
- Close gedit.
Your terminal should still be open. - In the terminal type sudo update-grub , wait for the update to finish.
- Reboot your computer.
Phase 2 — After you have logged into your system
- Open a terminal again ( Ctrl + Alt + T ).
- Type in the terminal gksu gedit /etc/default/grub
- To see the grub-menu at boot time,
comment or remove the following line: GRUB_HIDDEN_TIMEOUT=0- To comment, add # at the beginning of this line, the result will be #GRUB_HIDDEN_TIMEOUT=0
If seeing the grub menu at boot is the only thing you want you should undo earlier changes to the file.
Thanks for your response. The original problem that I’m trying to solve is that I can’t get the grub menu to open. So I thought that I had to use the Live CD to access the grub config file and make my changes. I read that if I change the TIMEOUT to 10 and TIMEOUT_QUIT to true, that I’ll be able to access the Grub menu. When I boot the system, I hold down the shift key. I do see the words GRUB MENU pop up just for a split second. So without being able to use the Live CD to access Terminal, I’m at a loss as to how to modify the GRUB config file. Any suggestions on how to accomplish this?
You are getting that message because the Live CD doesn’t mount a writeable filesystem. It’s only meant to be used to try-out Ubuntu or to rescue a damaged system. Executing a sudo update-grub only works on an installed version of Ubuntu, where you have write access to the underlying GRUB files (and on a Live CD, you do not).
Good info, but the OP would also like to know how he can make the changes he wants in /etc/default/grub and then update-grub .
You can do update-grub from a live CD on an installed Ubuntu Distro (although I assume this works with any [debian-based?] linux distro. It is «required» (there may be other methods but knowing this one, I don’t care about them at all) if you clone your drive and have already installed the new one in the computer. I mention cloning here extensively, because in a sense the update-grub step is a subset of it and the approaches have the same basis during a live session. Also this method was discovered through searching in the context of cloning. You can take what you need from it if you are not cloning, and your process will be simplified.
I should qualify this here; importantly for cloning, not importantly for just doing update-grub: I have done this on BIOS systems only. I have not attempted it on a UEFI system. The UEFI system requires a FAT partition for boot loading and I have not tested whether this partition should just come along for the ride during the cloning copy steps. I expect that it does affect the required [bind-]mounting that synthesizes the native grub environment during the live session.
This is detailed on this page: http://frugaltech.happystoic.com/ssdlinux. I have used this method many times, and you can swap hard drives around ad-infinitum using it. Swapping physical hard drives becomes so trivial this way, it is tempting to make it its own hobby and/or try to fix other people’s messed-up computers.
The following may be a helpful paraphrase of what you will find there:
- Ctrl + Alt + T for Bash terminal and enter a superuser shell ( sudo -s ) during a live session.
- mount the full install drive partition (that which is [or will become] your permanent Linux filesystem root directory). 2a. If the full install already exists on your hard drive, skip to (2). IF you are CLONING: [based on the assumption that you are not doing a fresh install, since this is all entirely automatic in that case] if your full install does not already exist on this partition, now is the time to simply
rsync -a /existing/linux/filesystem/live-mount-point/ /new/linux/filesystem/live-mount-point/You should now be done. I have simultaneously cloned Windows (XP and 7) in various permutations alongside Ubuntu and Puppy using this method and it has not failed me. I think you can use a live medium of a different distro (I have only used different Ubuntu flavors and Mint for this however) as long as they provide the version of GRUB you intend to use. You can move partitions around, swap drives, combine other OS installs, and clone to or from SSD using this. I can only speak to it working in the same machine however. I assume drivers that might be required for a different machine might have been skipped during your previous full install. My rule of thumb is switching drives in a computer requires this method, but switching computers with a drive requires a full [re-]install.
Perhaps someone can debunk this.
How to Update Grub on Arch Linux

For Ubuntu and other Linux systems, GRUB (GRand Unified Bootloader) is a bootloader tool. The Linux kernel, as well as the initial RAM disc (initrd), are loaded by it at system startup. If more than one operating system or kernel is available, the user may choose which one to start. Additionally, it offers the sophisticated users with a command-line interface to directly configure the boot procedure. In this guide, we will discuss the methods of updating Grub on the Arch Linux system.
Update the Arch Linux
Start from the following listed command that is used to update the package databases and upgrade all packages on a system that is running on Arch Linux. The -S flag tells Pacman to sync (install or update) the packages. The -y flag tells Pacman to assume yes as an answer to any question that it may ask. And the -u flag tells Pacman to also upgrade the packages that are already installed on the system. In the output, you can see that the package databases for the core, extra, and community package repositories are already up to date.
Install Grub
Now, if grub is not yet installed, we install it using the “grub” package within a Pacman command. The -S flag tells Pacman to sync (install) the package. In the output, you can see that the “grub” package is already up-to-date and the command reinstalls the package. It then proceeds with the installation of the “grub” package. It checks for file conflicts and available disk space.
Update Grub Using Grub Customizer
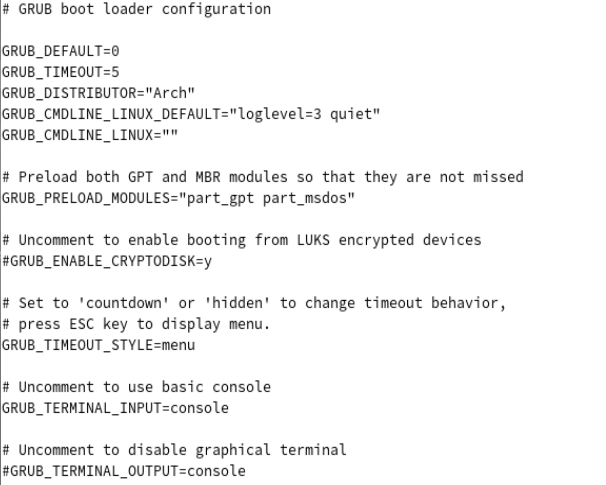
The “/etc/default/grub” file is a configuration file for the GRUB boot loader which is used to manage the boot procedure of the system. It contains various options and settings that determine how GRUB behaves and what options are presented to the user at boot time. It is important to be cautious when editing this file since making mistakes or using incorrect settings can lead to the system being unable to boot. After making changes to it, save it using Ctrl+S.
Grub-customizer is a graphical interface tool to configure the grub2/burg settings and appearance. It allows the users to edit the menu entries, update the GRUB configuration file, change the background image, and more which provide an easy-to-use interface to manage the boot process. The following command is used to install the “grub-customizer” package on a system that runs on Arch Linux. In the output, you can see that Pacman installs the “grub-customizer” package. Pacman then checks the available disk space and processes the package changes.
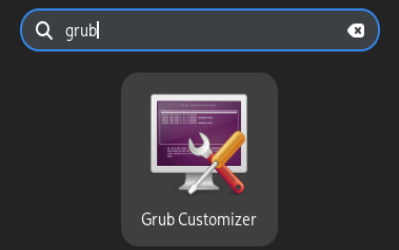
Now, search for the Grub Customizer application in your system activity area as shown in the following image. Then, open it.
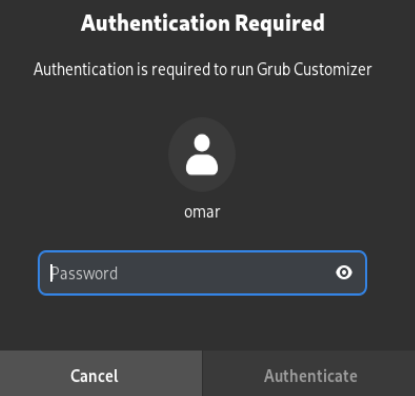
It might require authentication. Therefore, add your system password to continue.
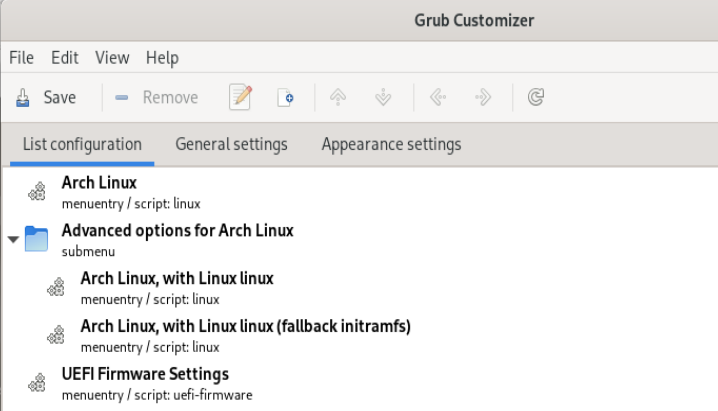
You can see the configuration settings if you want to make any changes in the first place.
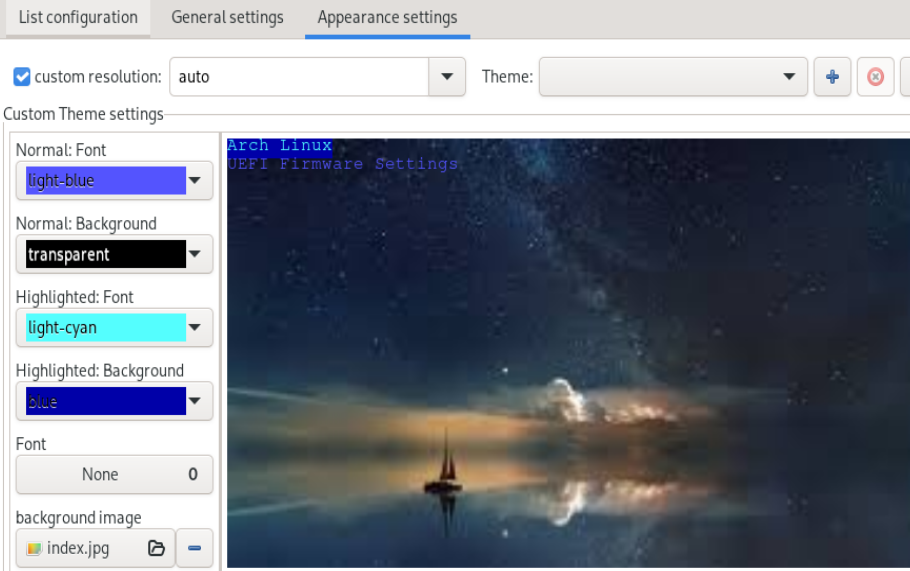
Within its “Appearance settings” tab, you can find the settings regarding the appearance of your Linux system. After making changes, save and close the Grub Customizer.
The GRUB2 “grub.cfg” bootloader file is generated by the grub-mkconfig command based on the settings in the /etc/default/grub file and the files in the /etc/grub.d directory. By generating the grub.cfg file, you can ensure that your system’s boot loader is configured correctly and that it includes the latest changes that you made to your system’s boot settings using Grub Customizer.
Using the Update-Grub Repository
If you find the previous method tricky and long, you can switch to the installation of the update-grub repository from Git. The following command is used to install the “git” and “base-devel” packages on Arch Linux. The “base-devel” is a group of packages that are commonly used to build and compile the software from the source on Arch Linux. The command asks the user to confirm the installation and shows the total size of packages to be installed and the net upgrade size. Once the user confirms with y, the command proceeds with the installation.
The following command is used to download a copy of a package called “update-grub” from the Git version control system. The package is downloaded to a new directory called “update-grub” in the current working directory. The process of downloading the package is called cloning. It includes several steps like enumerating the objects, counting the objects, compressing the objects, reusing the objects, and receiving the objects. After downloading the package, you can apply it by going to the update-grub directory.
The update-grub folder can be found in the current working directory of Arch Linux as per the ls command.
[ omar @ omar ~ ] $ ls
Desktop Downloads Pictures Templates docker-git update-grub
Documents Music Public Videos index.jpg yayThe next command, “cd update-grub”, changes the current working directory to the directory of the cloned repository.
The final command, “makepkg -sri”, is used to build and install the package from the cloned repository using the makepkg utility. The “-s” flag is to build the package with all dependencies. The “r” flag is to install the package after building it. And the “i” flag is to isntall the package without prompting for confirmation.
The following command uses the AUR “yay” helper program to install the “update-grub” package from the Arch User Repository (AUR). The command first checks for any package conflicts and inner conflicts. Then, it lists the package it finds (update-grub 0.0.1-7) and prompts the user to confirm the installation.
Here are the instructions to update the Grub bootloader configuration file on the system. The command is typically used after making changes to the system’s boot configuration such as installing a new operating system or modifying the boot order of the existing operating systems. The command generates the Grub configuration file by searching for the installed Linux kernels and initial ram disk images and then adding them as boot options in the configuration file.
Conclusion
The guide introduction lets you know about the uses of Grub in different Linux-like operating systems. It tells how important it is to use it for boot loading. After this, we installed Grub on Arch Linux and discussed two different ways to update it one by one using the grub customizer and the update-grub repository of Git. Using the grub configuration file shows how you can make changes and then save it for boot loading.
About the author
Omar Farooq
Hello Readers, I am Omar and I have been writing technical articles from last decade. You can check out my writing pieces.