- QuickStart/Обновление системы
- How to Update Ubuntu Linux [Beginner's Tip]
- Method 1: Update Ubuntu via the Command Line
- Explanation: sudo apt update
- Explanation: sudo apt upgrade
- Method 2: Update Ubuntu via the GUI [For Desktop Users]
- A few things to keep in mind about updating Ubuntu
- Cleaning up after an update
- Live patching the kernel in Ubuntu Server to avoid rebooting
- Ubuntu version upgrades are different from package upgrades
- Conclusion
QuickStart/Обновление системы
После установки системы, её лучше сразу обновить до актуального состояния. Можно не обновлять и сразу приступать к работе только в том случае, если вы не планируете подключаться к сети или Интернету, не собираетесь устанавливать дополнительных программ, если всё железо успешно работает. Открываем терминал и вводим:
Примечание: Здесь и далее по тексту используются общепринятые обозначения. Команды, выполняемые с рутовыми привилегиями, отмечены символом приглашения «#». Команды, выполняемые с правами обычного пользователя, отмечены символом приглашения «$». Эти символы набирать конечно же не надо! Всё, что этими символами не отмечено – результат выполнения команды, выводимый в ответ.
Внимание! Прежде, чем двигаться дальше, посмотрите эту статью. Наиболее часто встречающаяся ошибка новичков – работа с рутовыми привилегиями в среде обычного пользователя, когда вместо «su-» или «su —» дают команду «su».
Получив рутовую консоль, набираем в ней:
# apt-get update # apt-get dist-upgrade # update-kernel # apt-get clean # reboot
После успешной загрузки на новом ядре (update-kernel) снова открываем терминал:
Такова общая схема обновления в пределах текущего бранча. А теперь подробнее со всеми тонкостями. Смотрим, какие репозитории сейчас подключены:
# apt-repo rpm [p8] ftp://ftp.altlinux.org/pub/distributions/ALTLinux p8/branch/x86_64 classic rpm [p8] ftp://ftp.altlinux.org/pub/distributions/ALTLinux p8/branch/x86_64-i586 classic rpm [p8] ftp://ftp.altlinux.org/pub/distributions/ALTLinux p8/branch/noarch classic
Допустим, нас это не устраивает. Допустим, в локальной сети уже есть NFS-сервер с зеркалом и мы хотим переключиться на него. Делаем следующее:
# apt-repo rm all # apt-repo # cat >> /etc/apt/sources.listТем самым мы указали APT'у искать репозиторий на локальном диске в каталоге /ALT/p8 , однако такого каталога ещё нет. Делаем следующее:
# mkdir /mnt/space # echo "NFSSERVER:/space /mnt/space nfs noauto,ro,soft,intr,nolock 0 0" >>/etc/fstab # mount /mnt/space && ls /mnt/space/Здесь вместо NFSSERVER нужно вписать имя или IP-адрес сервера в своей локальной сети. По аналогии замените space своим названием экспортируемого каталога NFS. Если последняя команда отработала успешно, вы увидите содержимое этого каталога, иначе – смотрите dmesg. Обратите внимание: каждый раз после перезагрузки компьютера для обновления системы придётся заново набирать:
Так задумано! Не убирайте параметр noauto, если не хотите внезапно получить не загружаемую систему, когда начнутся проблемы в локальной сети. Осталось связать каталог /ALT с тем, что мы только что смонтировали:
# ln -sf /mnt/space/ALTLinux /ALT # ls /ALT/p8/Здесь /mnt/space/ALTLinux – каталог с зеркалом репозиториев, /mnt/space/ALTLinux/p8 – каталог с зеркалом бранча P8. Пути конечно же вымышленные, замените их своим вариантом.
На этом – ВСЁ, разовая подготовка завершена! Теперь все обновления пойдут не через Интернет, а с локального зеркала. Приступаем:
# apt-get update # apt-get dist-upgradeВнимание! Не торопитесь нажимать ENTER или Y ! Внимательно изучите, что APT предлагает удалить, заменить, обновить и установить нового. Вы правда согласны с его предложением!? Обратите внимание на форму второй команды. Никогда не добавляйте «-y», никогда не используйте «apt-get upgrade»: ALT – это не Debian и не Ubuntu! Не обновляйте систему, находясь в графической среде – в редких случаях это может привести к негативным последствиям. Надёжнее завершить сеанс и перейти в текстовый терминал ( Ctrl-Alt-F2 . Ctrl-Alt-F6 ), как вариант: в рутовой консоли дать команду «init 3», снова залогиниться под рутом в открывшемся на весь экран терминале и запускать вторую команду из него.
Первая команда («apt-get update») только обновит индексы. Её надо давать всегда перед второй командой, а также перед тем, как что-либо устанавливать. Вторая команда («apt-get dist-upgrade») обновит систему, но ядро и образ диска начальной загрузки останутся нетронутыми. Так задумано! Если хотите обновить сразу и ядро, сначала загляните СЮДА и дайте команду:
другие варианты (обусловлены тем, что в актуальных дистрибутивах АЛЬТ преимущественно используется два типа ядер – std-def и un-def):
# update-kernel -t std-def # update-kernel -t un-defНовое ядро загрузится только после перезапуска системы, который рекомендуется выполнить немедленно. Если с новым ядром что-то пойдёт не так, вы сможете вернуться к предыдущему варианту, выбрав его в начальном меню загрузчика. Если с новым ядром всё в порядке, не копите старые ядра, удаляйте их (только после перезагрузки):
другие варианты (с параметром «-n» ничего не изменится, вам только покажут, что будет удалено):
# remove-old-kernels -n -t std-def # remove-old-kernels -n -t un-def # remove-old-kernels -t std-def # remove-old-kernels -t un-defЕсли пакеты ставились из сети и кэш больше не требуется, можно освободить место на диске, дав команду:
How to Update Ubuntu Linux [Beginner's Tip]
This tutorial shows you how to update Ubuntu for both server and desktop versions. Also learn the difference between update and upgrade.
Let me give you more details. Please note that this tutorial is valid for Ubuntu 20.04, 22.04, or any other version. The command line method is also valid for Ubuntu-based Linux distributions, like Linux Mint, Linux Lite, elementary OS, etc.
One more thing. This article is about keeping your Ubuntu system updated. If you are looking for upgrading from one release to another, please check my tutorial on upgrading Ubuntu version.
Method 1: Update Ubuntu via the Command Line
First, open the terminal in Ubuntu desktop. You can find it in the menu, or use the Ctrl+Alt+T keyboard shortcut. If you are logged on to an Ubuntu server, you already have access to a terminal.
In the terminal, you just have to use the following command:
sudo apt update && sudo apt upgrade -yIt will ask for a password. You can use your account’s password. You won’t see characters on the screen while typing password in the terminal, so keep on typing your password and hit enter. This will update the packages in Ubuntu.
See, how easy it is to update Ubuntu from terminal? Now let me explain the above command.
It’s actually not a single command, it’s a combination of two commands. The && is a way to run multiple commands in Linux in a way such that the second command runs only when the previous command ran successfully.
The “-y” in the end automatically enters “yes” when the command “apt upgrade” ask for your confirmation before installing updates.
Note that you can also use the two commands separately, one by one:
sudo apt update sudo apt upgradeIt will take a little longer because you have to wait for one command to finish and then enter the second command.
More than just OS updates: Unlike Windows, Linux works with a package manager. When you run the updates, it updates all the packages installed via apt. This means updating Ubuntu will update the core operating system, Linux kernels as well as the applications installed from the software center (if they were apt packages) or installed using apt command.
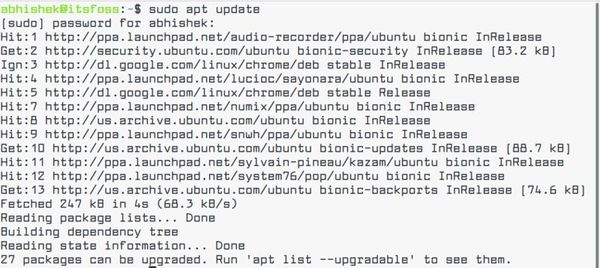
Explanation: sudo apt update
This command updates the local database of available packages. If you don’t run this command, the local database won’t be updated and your system will not know if there are any new versions of packages available.
This is why, when you run the “sudo apt update” command, you’ll see lots of URLs in the output. The command fetches the package information from the respective repositories (the URLs you see in the output).
At the end of the command, it tells you how many packages can be upgraded. You can see these packages by running the following command:
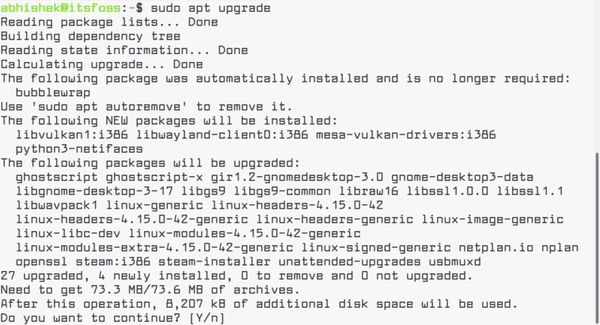
Explanation: sudo apt upgrade
This command matches the versions of installed packages with the local database. It collects all of them, and then it will list those packages that have a newer version available. At this point, it will ask if you want to upgrade the installed packages to the newer version.
You can type “yes,” or “y,” or just press enter to confirm the installation of updates.
So the bottom line is that “sudo apt update” checks for the availability of new package versions, while “sudo apt upgrade” actually installs the new versions.
The term update might be confusing, as you might expect the “apt update” command to update the system by installing new software, but that’s not how it works.
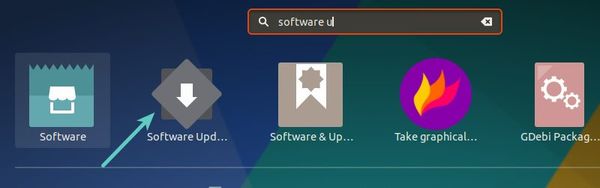
Method 2: Update Ubuntu via the GUI [For Desktop Users]
If you are using Ubuntu as a desktop, you don’t have to go to the terminal to update the system. You can still use the command line, but it’s optional for you.
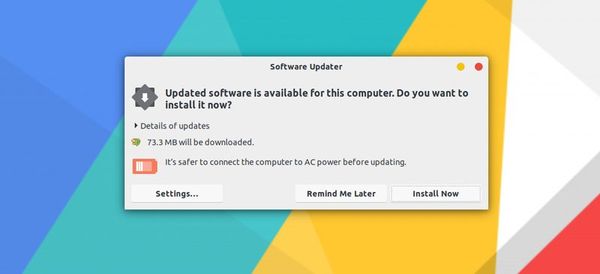
In the menu, look for “Software Updater” and run it.
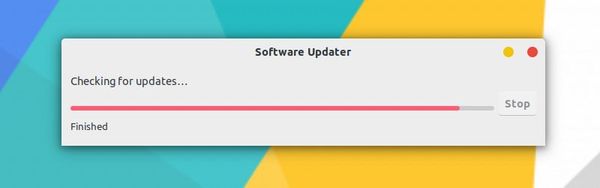
It will check if there are updates available for your system.
If there are updates available, it will give you the option to install the updates.
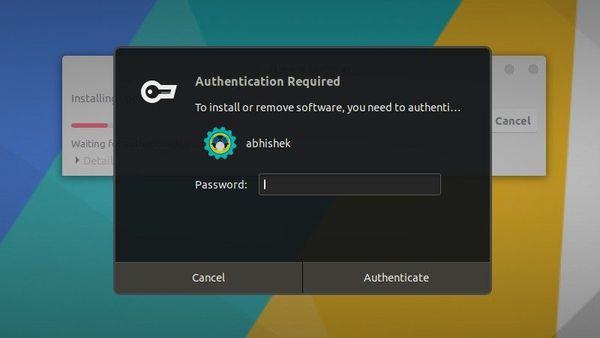
Click on “Install Now.” It may ask for your password.
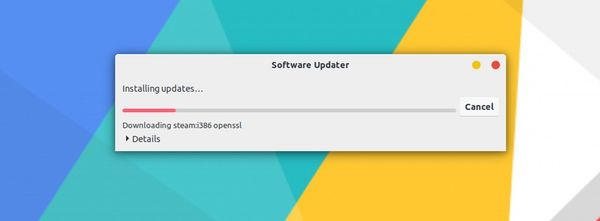
Once you enter your password, it will start installing the updates.
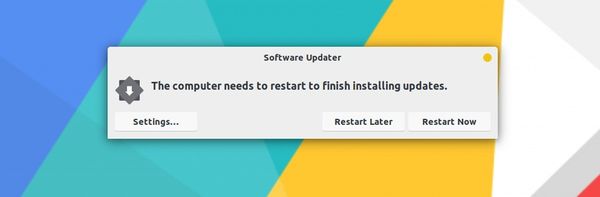
In some cases, you may need to reboot your Ubuntu system for the installed updates to work properly. You’ll be notified at the end of the update if you need to restart the system.
You can choose to restart later if you don’t want to reboot your system straightaway.
Tip: If the software updater returns an error, you should use the command “sudo apt update” in the terminal. The last few lines of the output will contain the actual error message. You can then search on the internet for that error and fix the problem.
A few things to keep in mind about updating Ubuntu
You just learned how to update your Ubuntu system. If you are interested, you should also know these few things relating to Ubuntu updates.
Cleaning up after an update
After an update, your system may have some unnecessary packages that are no longer required. You can remove such packages and free up some space by using this command:
Live patching the kernel in Ubuntu Server to avoid rebooting
In the case of Linux kernel updates, you’ll have to restart the system after the update. This can be a problem if you don’t want downtime for your server.
The live patching feature allows for the patching of the Linux kernel while it is still running. In other words, you don’t have to reboot your system.
If you manage servers, you may want to enable live patching in Ubuntu.
Ubuntu version upgrades are different from package upgrades
The update methods discussed here keep your Ubuntu install fresh and updated. It doesn’t cover OS version upgrades (for example, upgrading Ubuntu 16.04 to 18.04).
Ubuntu version upgrades are an entirely different thing. They involve updating the entire operating system core. You’ll need to make proper backups before starting this lengthy process.
Conclusion
I hope you liked this tutorial on updating the Ubuntu system, and that you learned a few new things.
If you have any questions, please fee free to ask. If you are an experienced Linux user and have some tip that can make this tutorial more useful, please share it with the rest of us.