- Как обновить ядро Ubuntu
- Как обновить ядро Ubuntu?
- Решение проблем
- Очистка системы
- Выводы
- How to Update Linux Kernel In Ubuntu
- Tutorial on Updating Ubuntu Kernel
- Option A: Use the System Update Process
- Step 1: Check Your Current Kernel Version
- Step 2: Update the Repositories
- Step 3: Run the upgrade
- Option B: Use the System Update Process to Force a Kernal Upgrade
- Step 1: Back Up Your Important Files
- Step 2: Use the Software Updater
- Step 3: Configure the Software Updater
- Step 4: Force the Upgrade
- Option C: Manually Update the Kernel (Advanced Procedure)
- Step 1: Install Ukuu
- Step 2: Launch Ukuu
- Step 3: Install the Kernel
- Step 4: Reboot the System
- Step 5: In Case of Failure
- Step 6: Uninstalling the Kernel
Как обновить ядро Ubuntu
Новые версии ядер содержат исправления, различные улучшения работы и производительности системы, а также различные нововведения, которые делают работу с Linux лучше. Поэтому было бы неплохо всегда иметь в своей системе самое новое ядро. Но большинство дистрибутивов, в том числе Ubuntu достаточно консервативны и содержат старые, проверенные версии ядер, а новые добавляются очень медленно.
Но эту проблему можно решить. Из этой статьи вы узнаете как обновить ядро ubuntu 16.04 или более поздних версий. Хотя новых версий ядра нет в репозитории, но есть программа, которая сделает всю работу за вас.
Как обновить ядро Ubuntu?
Ядро Linux делает очень много полезных вещей, кроме управления памятью, процессами и основными компонентами компьютера, все драйвера системных устройств тоже встроены в ядро, при появлении новых технологий драйвера должны обновляться, если у вашего компьютера есть какие-либо проблемы с поддержкой оборудования в Linux, то обновление ядра Ubuntu может улучшить ситуацию.
Я не буду расписывать тут все способы обновления ядра Linux, такие как загрузка и компиляция ядра, использование PPA репозиториев и так далее, все это мы уже рассматривали в статье обновление ядра Linux. Мы будем использовать утилиту UKUU или Ubuntu Kernel Update Utility. Она делает обновление ядра Ubuntu 16.04 намного проще. Утилита загружает нужные версии ядер из интернета и настраивает вашу систему, чтобы вы могли их использовать. Все что от вас требуется — это выбрать версию ядра.
Утилита не поставляется в официальных репозиториях, но вы можете установить ее из PPA:
sudo apt-add-repository -y ppa:teejee2008/ppa
$ sudo apt update
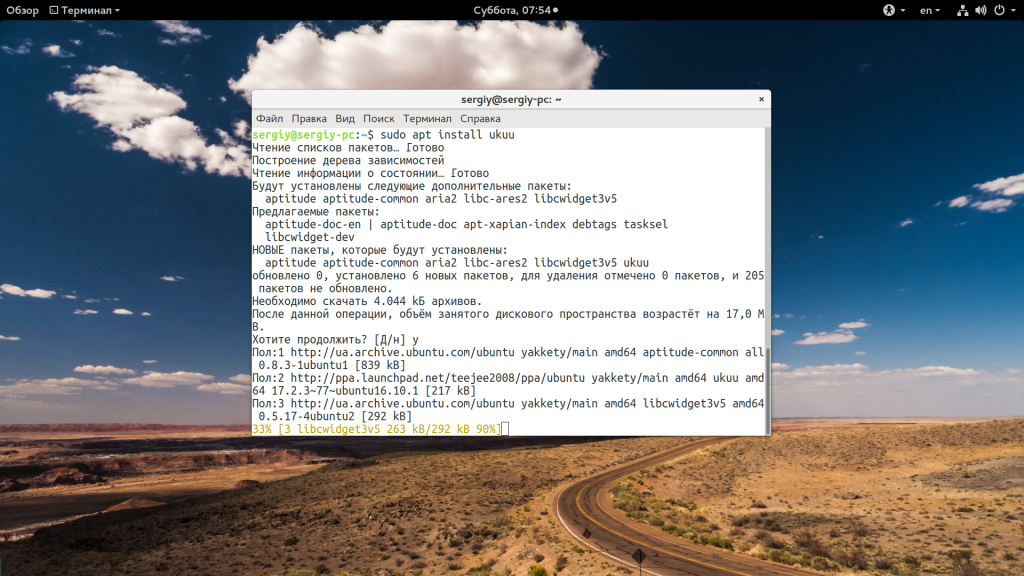
$ sudo apt install ukuu
Кроме того, вы можете установить утилиту через центр приложений Ubuntu. После установки вы можете запустить программу из главного меню:

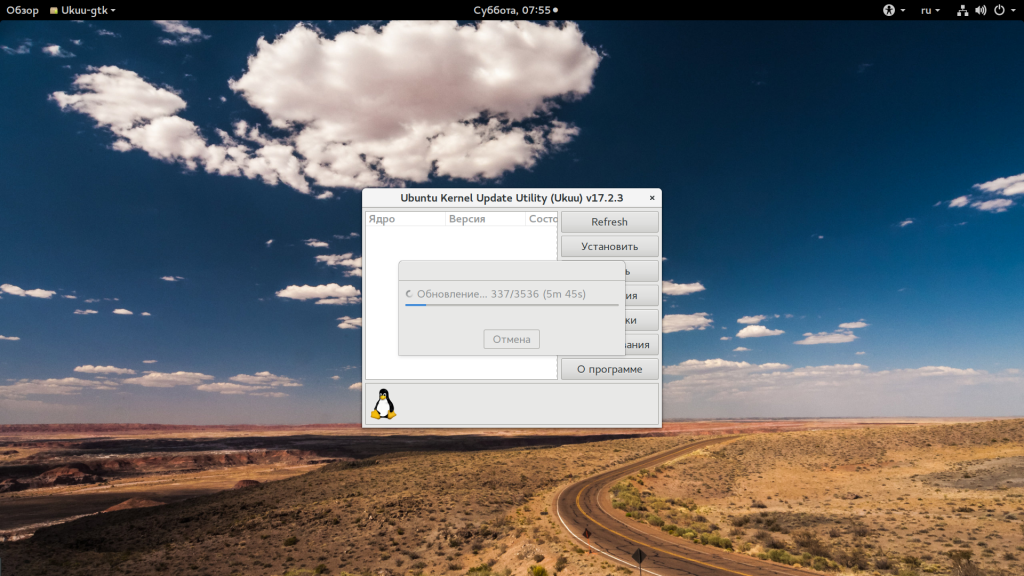
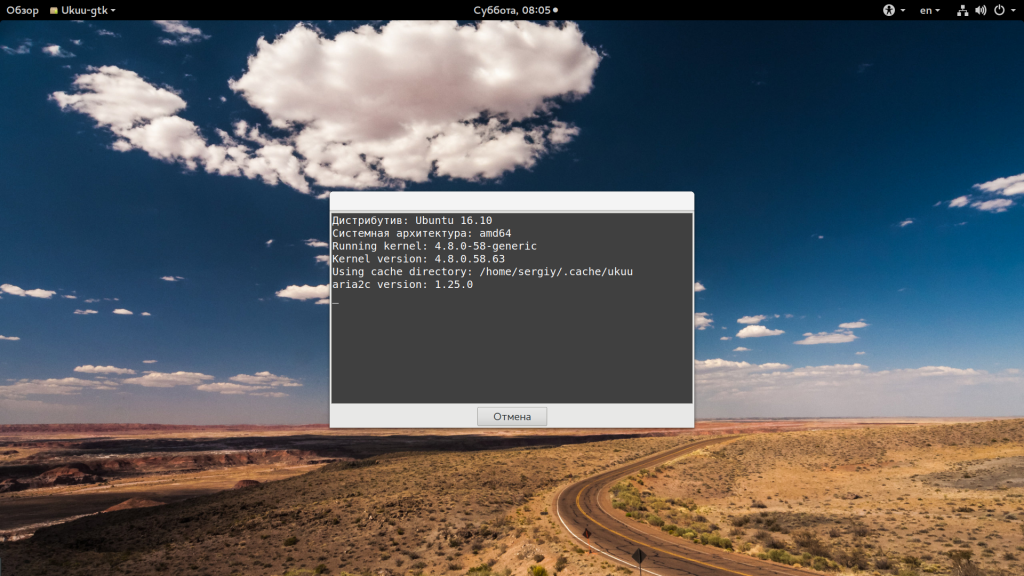
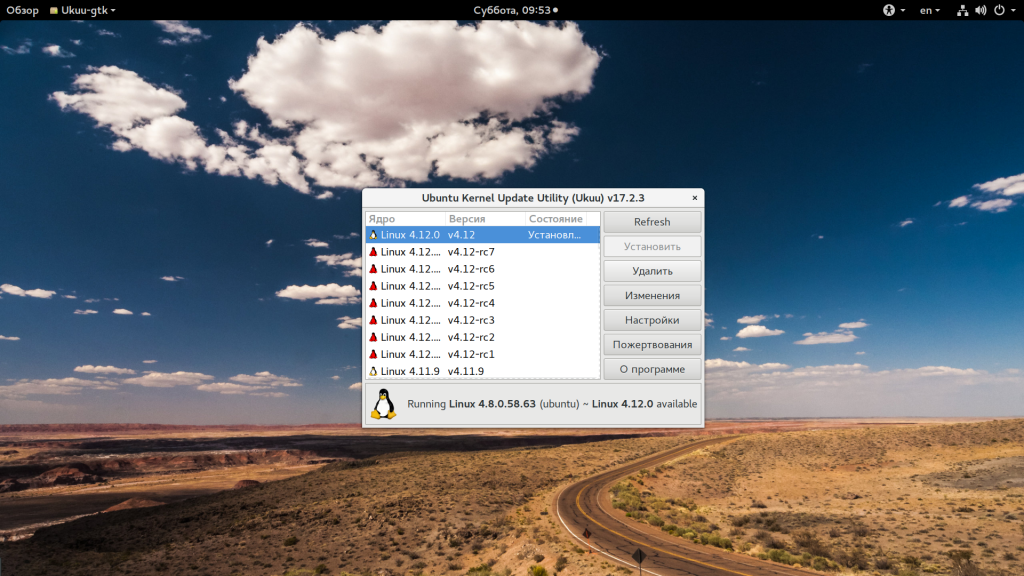
После запуска утилита синхронизирует свое состояние с сетью чтобы определить какие новые версии ядра доступны:
В списке будут отображены ядра, которые вы можете установить. Красным отмечаются кандидаты в релизы, а желтым — стабильные релизы.
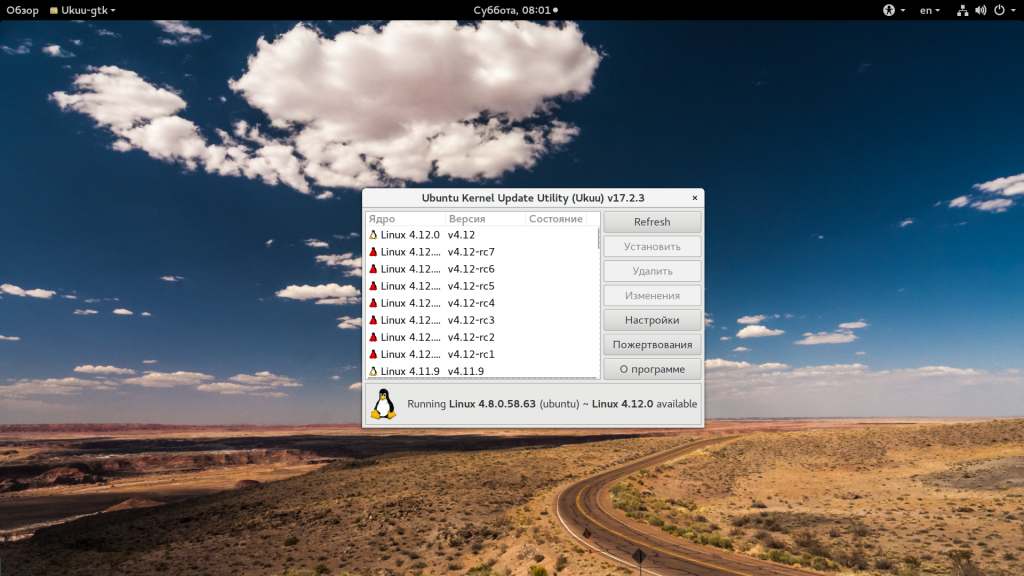
Для установки ядра просто выберите его и нажмите кнопку «Установить»:

Вам останется ввести пароль пользователя и дождаться завершения установки. Процесс установки будет показан в окне терминала:
После завершения обновления достаточно перезагрузить компьютер, чтобы использовать новую версию ядра.
Решение проблем
Новые ядра не всегда стабильные и вместе с улучшениями они могут принести проблемы. Например, перестанет работать какое-либо устройство или компьютер вообще не будет загружаться. Нужно знать что делать в таких случаях.
По умолчанию Ubuntu может не давать выбрать ядро, с которого нужно загрузиться. Поэтому сначала отредактировать /etc/default/grub. Закомментируйте эту строчку:

Теперь создайте новый конфигурационный файл grub с этими настройками:
sudo grub-mkconfig -o /boot/grub/grub.cfg
Теперь, когда вы перезагрузитесь, а что-то работать не будет, то сможете очень просто загрузить старое ядро и удалить новое. Если уже поздно, вы ничего не настроили, а Linux не загружается, то здесь тоже есть решение, просто нажимайте очень быстро и много раз клавишу вниз в то время, когда должно появиться меню Grub.
Удалить нерабочее новое ядро можно тоже с помощью UKUU, здесь есть кнопка для этого — «Удалить»:
Очистка системы
Если все работает, старые ядра можно удалить. Да, одну две предыдущие версии ядра можно оставить, но не более того. Мы рассматривали как правильно удалить старые ядра в отдельной статье.
Выводы
Теперь вы знаете как обновить ядро Ubuntu и использовать самую последнюю версию в своей системе. Надеюсь, эта информация была полезной для вас, если у вас остались вопросы, спрашивайте в комментариях!
Обнаружили ошибку в тексте? Сообщите мне об этом. Выделите текст с ошибкой и нажмите Ctrl+Enter.
How to Update Linux Kernel In Ubuntu
The Linux kernel is like the central core of the operating system. It works as sort of a mediator, providing an interface between software applications and computer hardware.
The Linux kernel is the foundation on which all the different types of Linux, operate. It is Open Source software – anyone can decompile, examine, and modify the code.
As technology progresses, developers discover patches and updates to the Linux kernel. These patches can improve security, add functionality, or even improve the speed at which the operating system functions.
If you’re running a Linux operating system (like Ubuntu), it’s a good idea to check and update the kernel regularly.

- A server running Ubuntu Linux
- Access to the Terminal (CTRL-ALT-T or Applications menu > Accessories > Terminal)
- A user account with sudo privileges
- The apt tool, built into Ubuntu
- The Update Manager, built into Ubuntu (optional)
Tutorial on Updating Ubuntu Kernel
Option A: Use the System Update Process
Step 1: Check Your Current Kernel Version
At a terminal window, type:
The terminal returns an output similar to:
The first two digits (in this case, 4.4) are the overall kernel package. The third digit is the version, and the fourth digit shows you the level of patches and fixes.
For more details, refer to our full guide on checking the Linux kernel version. While inspecting the system, you can also check which version of Ubuntu you are running.
Step 2: Update the Repositories
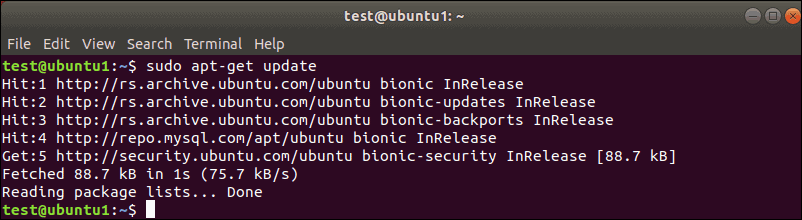
This command refreshes your local list of software, making a note of any newer revisions and updates. If there’s a newer version of the kernel, the command will find it and mark it for download and installation.
Step 3: Run the upgrade
While still in the terminal, type:
The “dist-upgrade” switch asks Ubuntu to handle any dependencies intelligently. That is, if a particular software package is dependent on another software package to run, this command will make sure that the second package is upgraded before upgrading the first one.
This method is a safe way to upgrade your Ubuntu Linux kernel. The kernel updates accessible through this utility have been tested and verified to work with your version of Ubuntu.
Option B: Use the System Update Process to Force a Kernal Upgrade
There are instances in which a newer kernel has been released but not thoroughly tested with your version of Ubuntu. For example, you might be running Ubuntu 17.10 (Artful Aardvark), and you know that Ubuntu 18.04 (Bionic Beaver) is available.
Updating the kernel in this way requires a more substantial process.
Step 1: Back Up Your Important Files
You’ve probably already done this, but it’s important enough that it’s worth repeating.
Step 2: Use the Software Updater
Launch the software updater by hitting the super key (the “windows” key on most keyboards), and search for Update Manager.
The update manager will notify you if there are any updates needed. If you performed the steps in Part A, it should say your computer is up to date.
Click the Settings button.
A new window should open up with several tabs.
Step 3: Configure the Software Updater
Click the Updates tab.
Tick the first three checkboxes, under “Install updates from:”
Then, at the bottom of this tab, look for a drop-down labeled “Notify me of a new Ubuntu version:”
Click that drop-down, and select:
- For long-term support versions (If you want to stick with tested and reliable versions with full support)
- For any new version (If you like playing with the latest-and-greatest, and don’t mind if things are a little buggy)
Close this window, and then re-open it. It should offer the option to upgrade if there’s a new version out. (It usually takes a few days after release for the upgrade to become available, and for the server traffic to lighten up.)
Step 4: Force the Upgrade
If for some reason the system does not offer an upgrade, you can force it by opening a terminal and typing:
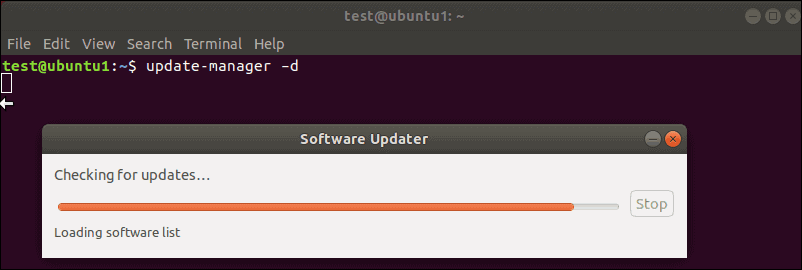
The system should respond with a window showing release notes for the new kernel (and version) of Ubuntu.
If everything looks good, click upgrade, and the process will proceed.
Option C: Manually Update the Kernel (Advanced Procedure)
If you just want to upgrade to the latest (untested) kernel available, and you’re aware of the risks, there’s a third procedure for selecting and installing a new kernel.
Before performing this step, it’s worth checking your system configuration. Are you running any custom drivers (especially video drivers)? Any custom configurations or packages? Those may not be compatible with the new kernel.
If you make a mistake and find that the new kernel is incompatible, a recovery option should be available. But it’s better to take precautions and prevent a problem than to try to fix one.
It’s also a good idea to research the release notes for the kernel you want to install. Note the revision number and any features that you intend to work with.
This process will use Ukuu, a graphical utility for updating the kernel. There are other methods, including manually downloading and installing the kernel, or even getting a copy of the source code and compiling it. Those methods are more complicated, and outside the scope of this guide.
Step 1: Install Ukuu
At the terminal, type the following (hit enter after each line):
sudo apt-add-repository ppa:teejee2008/ppaThe first command adds the TeeJeeTech repositories of open-source software for Linux to your basic repositories. The second command refreshes the database, so you’ve got a list of the latest revisions. The third command installs the Ukuu software.
Step 2: Launch Ukuu
The Ukuu utility will launch and should display a list of the available Linux kernel versions.
Step 3: Install the Kernel
Select the kernel you wish to install, then click the “Install” button on the right-hand side.
Step 4: Reboot the System
Once the kernel finishes installing, reboot your system. Once you’re back into the operating system, you can relaunch Ukuu to verify the installation.
Step 5: In Case of Failure
If there’s a catastrophic problem, the GRUB, or boot utility, will keep a copy of the old kernel that you can select and boot into.
On the boot screen, select Advanced options for Ubuntu – then select the previous kernel (identified by the revision number). There’s no need to use the “upstart” or “recovery mode” options.
Step 6: Uninstalling the Kernel
The Ukuu utility also offers the ability to remove old kernels on Ubuntu. Simply click the same kernel that you installed previously, and click Remove on the right-hand side.
For most users, upgrading the kernel in Ubuntu is pretty straightforward. Most systems will prompt when the upgrade is ready. But if you’re looking for a custom kernel, or want to override the automatic process, this guide provides a good foundation for doing so.