- Saved searches
- Use saved searches to filter your results more quickly
- License
- jinwyp/one_click_script
- Name already in use
- Sign In Required
- Launching GitHub Desktop
- Launching GitHub Desktop
- Launching Xcode
- Launching Visual Studio Code
- Latest commit
- Git stats
- Files
- README.md
- About
- How to Install Ubuntu Linux in the Simplest Possible Way
- How is this the simplest way of installing Ubuntu?
- Install Ubuntu by replacing Windows and other operating systems
- Step 4: Install Ubuntu
- What next?
- One Click Install
- Users
- Software Vendors
- Developers
Saved searches
Use saved searches to filter your results more quickly
You signed in with another tab or window. Reload to refresh your session. You signed out in another tab or window. Reload to refresh your session. You switched accounts on another tab or window. Reload to refresh your session.
install latest or LTS linux kernel and enable BBR or BBR plus
License
jinwyp/one_click_script
This commit does not belong to any branch on this repository, and may belong to a fork outside of the repository.
Name already in use
A tag already exists with the provided branch name. Many Git commands accept both tag and branch names, so creating this branch may cause unexpected behavior. Are you sure you want to create this branch?
Sign In Required
Please sign in to use Codespaces.
Launching GitHub Desktop
If nothing happens, download GitHub Desktop and try again.
Launching GitHub Desktop
If nothing happens, download GitHub Desktop and try again.
Launching Xcode
If nothing happens, download Xcode and try again.
Launching Visual Studio Code
Your codespace will open once ready.
There was a problem preparing your codespace, please try again.
Latest commit
Git stats
Files
Failed to load latest commit information.
README.md
Easy install latest or LTS linux kernel and enable BBR or BBR plus
Thanks for support this project. Check on patreon
- Easily switch Linux kernel for all versions, including latest kernel, 5.16, 5.10 LTS, 5.4 LTS, 4.19 LTS, 4.14 LTS
- Easily enable BBR or BBR plus congestion control algorithm with FQ / FQ-Codel / FQ-PIE / CAKE.
- Support Debian9+, Ubuntu 16+ and CentOS 7+ operation systems
- Install wireguard and Cloudflare WARP client to avoid Google reCAPTCHA and unlock Netflix ip geo-restriction
bash <(curl -Lso- https://git.io/kernel.sh) via curl to install script
curl -O https://raw.githubusercontent.com/jinwyp/one_click_script/master/install_kernel.sh && chmod +x ./install_kernel.sh && ./install_kernel.sh
via wget to install script
wget --no-check-certificate https://raw.githubusercontent.com/jinwyp/one_click_script/master/install_kernel.sh && chmod +x ./install_kernel.sh && ./install_kernel.sh

Install latest or LTS linux kernel and enable BBR or BBR Plus
- On CentOS / AlmaLinux / Rocky Linux, run script then choose 31 to install latest 5.16 kernel or choose 35 to install LTS 5.10 kernel (recommended). It will reboot twice duiring the whole installation.
- On Debian run script then choose 41 to install LTS 5.10 kernel, on Ubuntu please choose 45 to install LTS 5.10 kernel. It will reboot twice duiring the whole installation.
- After finished new kernel installation, rerun the script and choose 2 to enable BBR congestion control algorithm with Cake(recommended) or FQ.
- To enable BBR Plus. run script then choose 61 to install BBR Plus 4.14.129 kernel , or choose 66 to install BBR Plus 5.10 LTS kernel. It will reboot twice duiring the whole installation. After finished new kernel installation, rerun the script then choose 3 to enable BBR Plus.
- Duiring the the whole installation when show the big warning screen(see below pics), please choose «NO» to continue installation. Do not abort kernel removal.


- To install XanMod kernel and enable BBR2 on Debian or Ubuntu. Run script then choose 51 to install XanMod LTS 5.10 kernel, after reboot and finish kernel installation, rerun the script then choose 2 to enable BBR2 congestion control algorithm.
Unlock Netflix(Youtube/Hulu/HBO Now/Disney+) region restriction and avoid Google reCAPTCHA human verification
- Unlock with Cloudflare WARP sock5 proxy. Run script then choose 11 to install Cloudflare WARP linux client sock5 proxy, After finish installation, rerun script then choose 21 to test whether Netflix is unlock or not through the WARP sock5 proxy.
- Unlock with Cloudflare WARP IPv6. Run script then choose 12 to install Wireguard and Cloudflare WARP. After finish installation, The VPS will enable IPv6. As default the VPS is to use IPv4 to access the network. Rerun script then choose 21 to test whether Netflix is unlock or not through the IPv6.
- To unlock Netflix and other stream website. Using the script in the same repo to install v2ray. During the v2ray installation follow the instruction and select different v2ray routing rules (IPv6 or WARP sock5 or DNS or other unlocked v2ray server) to unlock netflix.
- To avoid Google reCAPTCHA human verification. Using the script in the same repo to install v2ray. During the v2ray installation follow the instruction and select different v2ray routing rules (IPv6 or WARP sock5 or other unlocked v2ray server) to avoid Google reCAPTCHA. Recommended to use IPv6 to avoid Google reCAPTCHA.
Netflix non-self produced drama test script for regions. Support test with IPv6 and Cloudflare WARP Sock5 proxy
via wget to install script
wget --no-check-certificate https://raw.githubusercontent.com/jinwyp/one_click_script/master/netflix_check.sh && chmod +x ./netflix_check.sh && ./netflix_check.sh
via curl to install script
curl -O https://raw.githubusercontent.com/jinwyp/one_click_script/master/netflix_check.sh && chmod +x ./netflix_check.sh && ./netflix_check.sh
- Netflix non-self produced drama test script can’t test through v2ray routing rule. The VPS is already unlocked but the result of the test could not show the right unlocked answer. You can use the test script on the V2ray client computer which connected the unlocked netflix V2ray server to get the right unlocked result. The Netflix non-self produced drama test shell script can be running on Mac and linux. On Windows you can use Ubuntu (windows linux sub-system) to run the test script.
About
install latest or LTS linux kernel and enable BBR or BBR plus
How to Install Ubuntu Linux in the Simplest Possible Way
The method I am going to show in this tutorial is the fourth one. You wipe out the entire system and let Ubuntu be your only operating system. In my experience, this is the easiest way to install Ubuntu without any hassle.
How is this the simplest way of installing Ubuntu?
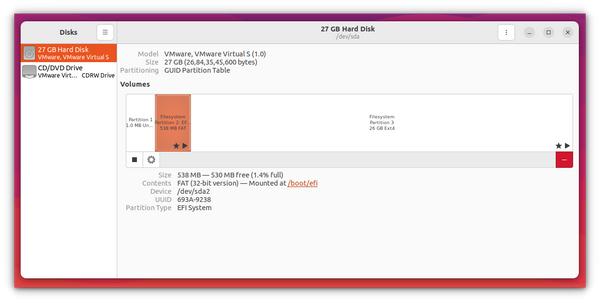
You don’t have to worry about creating partitions on your own. It automatically creates an ESP partition for UEFI.
It uses the rest of the disk space in creating a single root partition. The root partition (normally) has a 2 GB of swapfile. You don’t need to create a separate swap partition and if they need to be, you can increase the size of the swapfile.
The root partition also has the boot directory for grub related files. It also contains the home directory that is used for storing user related files like documents, pictures, music, videos, downloads etc.
It is a no-brainer. You let Ubuntu do the work for you instead of wondering about creating ESP, root, Swap and Home partitions.
Of course, this is the best way if you do not want any other operating system besides Ubuntu on your machine.
The procedure shown here works for Ubuntu and all other distributions based on it, such as Kubuntu, Xubuntu, Lubuntu, Ubuntu Budgie, Linux Mint, Linux Lite etc. The screenshot might look a bit different, but the steps are basically the same.
Suggested Read 📖
Install Ubuntu by replacing Windows and other operating systems

What do you need to install Ubuntu:
- A USB of at least 8 GB in size, preferred.
- Internet connection (for downloading Ubuntu and live-USB making tool, not required for installing Ubuntu)
- Optionally, you may need an external USB disk for making a backup of your important data (if any) present on the current system
If you are going to install the default Ubuntu GNOME, the system requirements are:
- A system with a 2 GHz dual-core processor or better
- 4 GB of RAM or more
- At least 25 GB of hard disk space
This method removes all the other operating systems along with the data present on the disk.
You may save your personal files, documents, pictures etc on an external USB disk or cloud storage if you want to use it later.

The entire idea is that you put USB (or removable media) on the top of the boot order. Save the changes and exit.
Step 4: Install Ubuntu
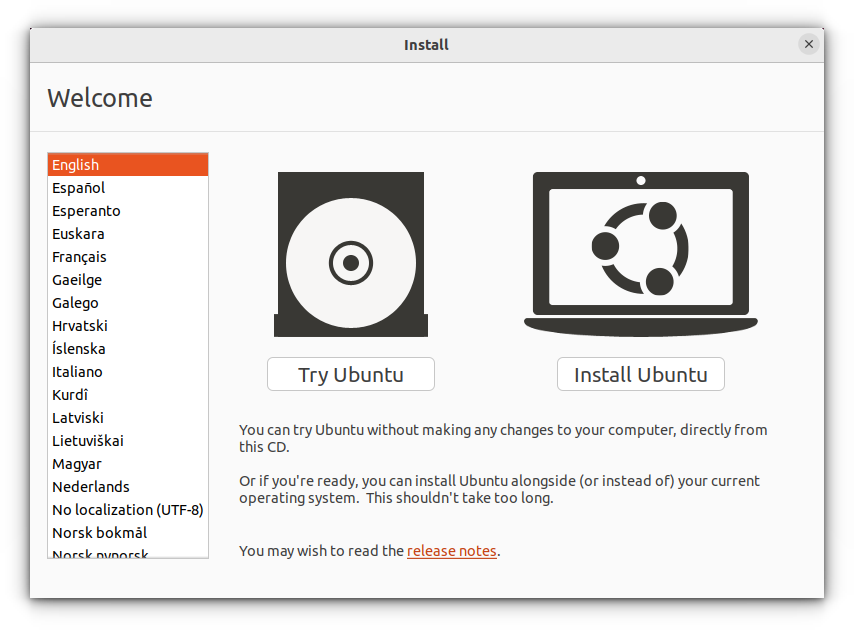
Now you should boot into the live Ubuntu environment. You’ll have the grub screen that gives you the option to either try Ubuntu without installing or install it right away.

Once you select it, you will be prompted to proceed with “Try Ubuntu” or install it.
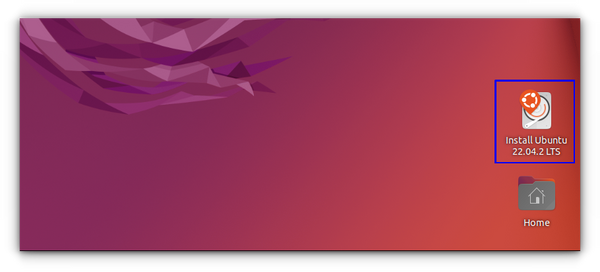
Alternatively, you can click the installation icon on the desktop to initiate the installation if you dismiss the above window.
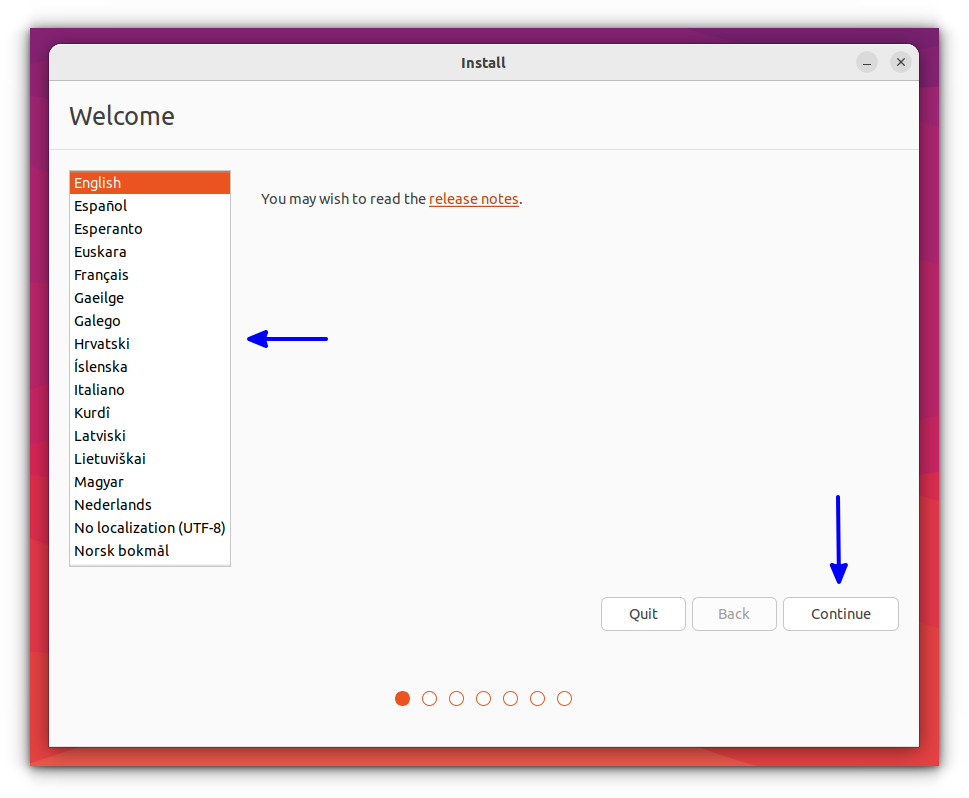
It will ask you to choose some basic configurations like language and keyboard layout. Select the most appropriate ones for your system.
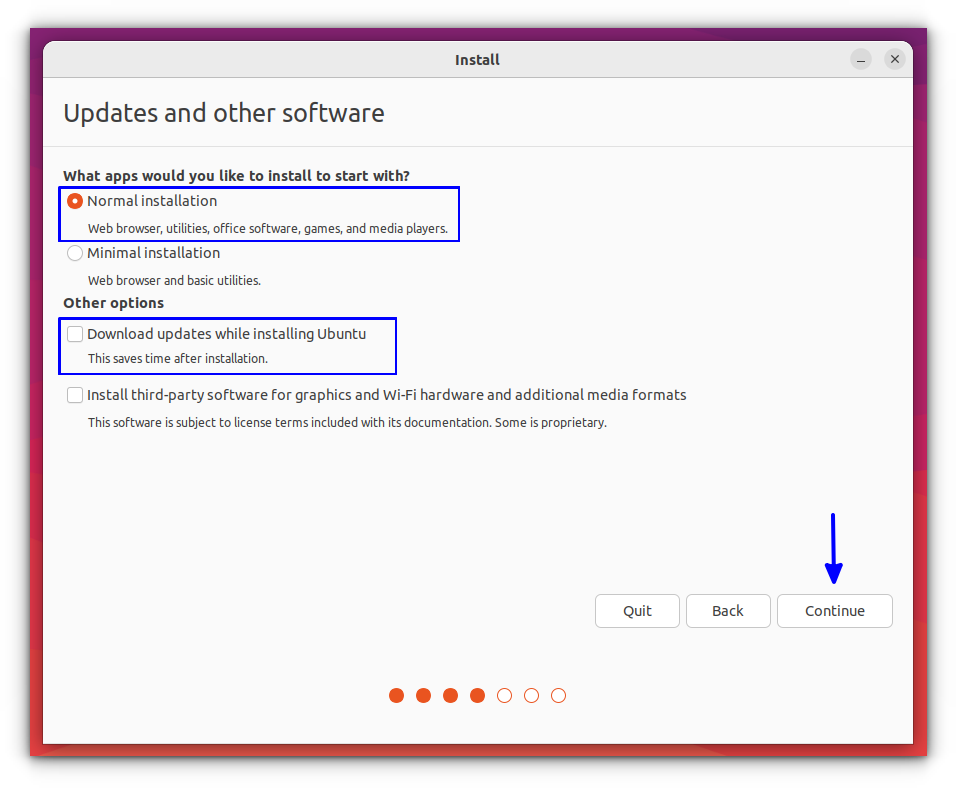
You should go for the normal installation here because it will install some software like a music player, video players and a few games.
If you are connected to the internet, you’ll get the option to download updates while installing Ubuntu. You may uncheck it because it may increase the installation time if you have a slow internet. You can update Ubuntu later as well without any issues.
The most important screen comes at this time. If there are other operating systems installed, you may get the option to install Ubuntu along with them in dual boot.
But since your goal is to only have Ubuntu Linux on your entire system, you should go for the Erase disk and install Ubuntu option.
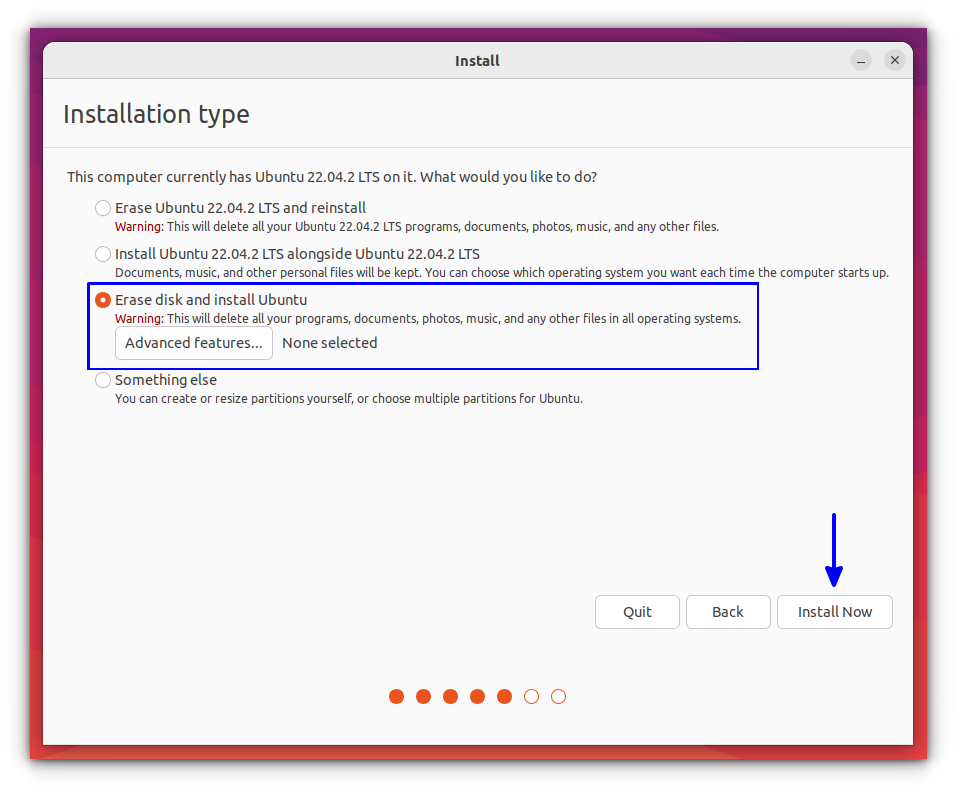
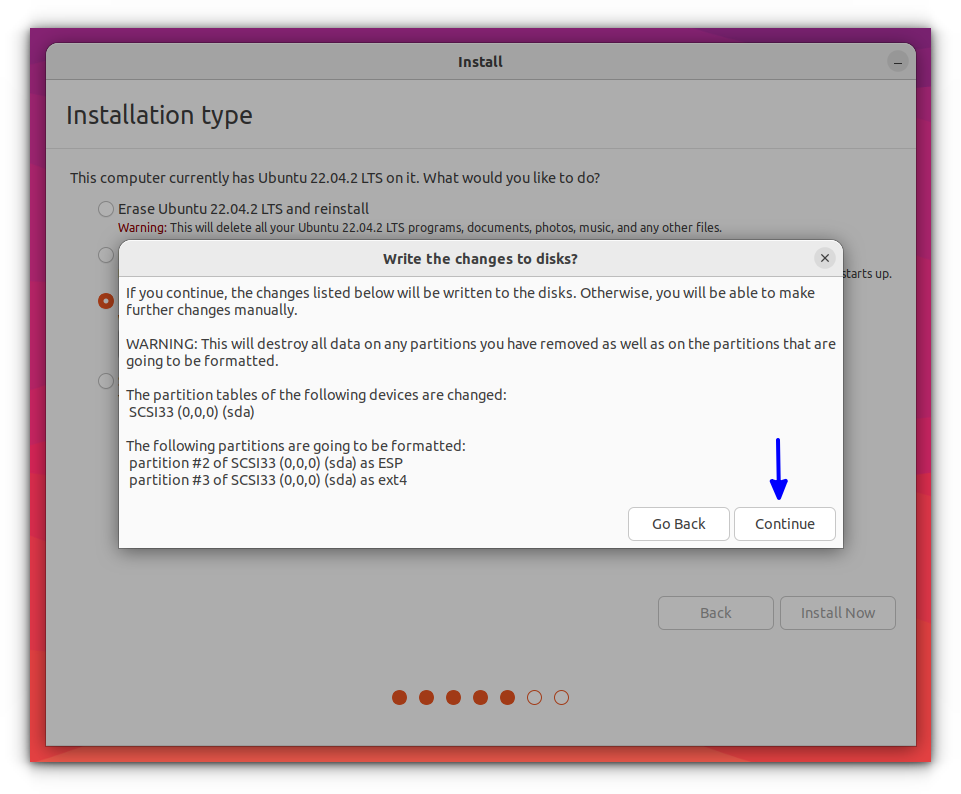
When you hit the “Install Now” button, you’ll see a warning that you are about to delete the data. You already know it, don’t you?
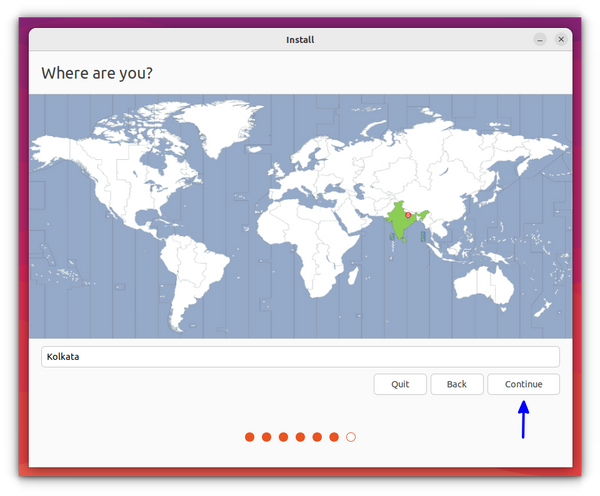
Things are straightforward from here. You’ll be asked to choose a timezone.
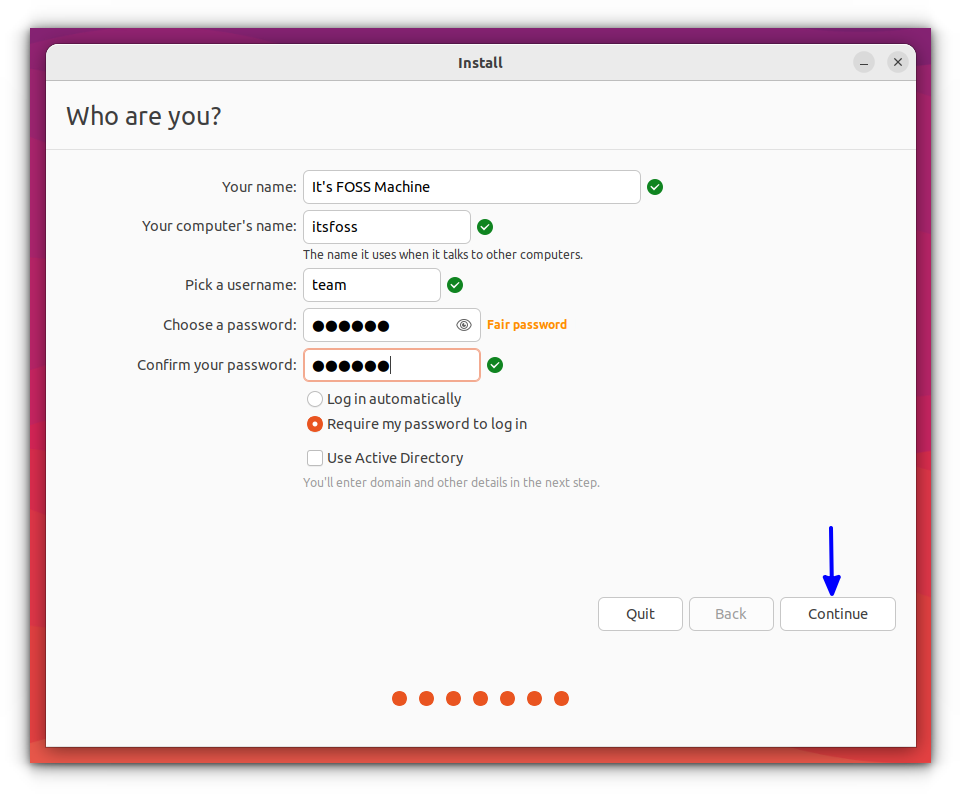
And then you’ll be asked to create a username, computer’s name (also known as hostname) and set a password.
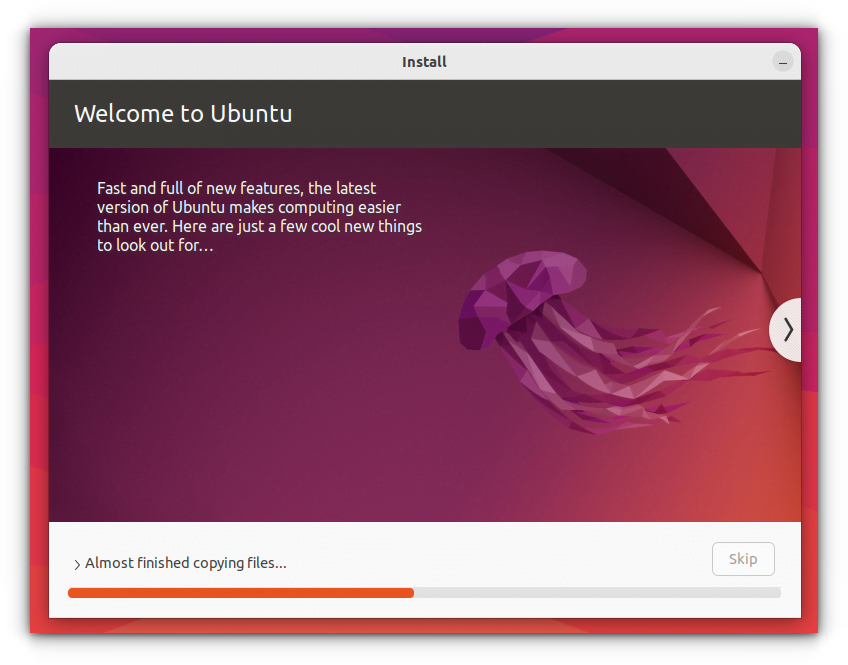
Once you do that, you just have to wait and watch for like 5–10 minutes. You’ll see a slideshow of Ubuntu features in this time.
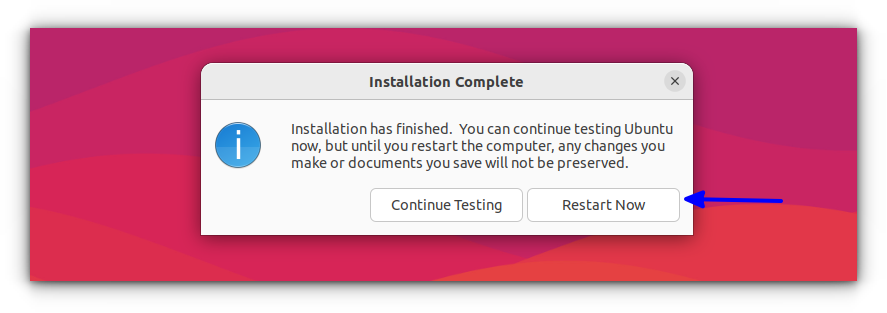
Once the process finishes, you will be asked to restart the system.
When you restart the system, you might encounter a shutdown screen that asks you to remove the installation media and press enter.
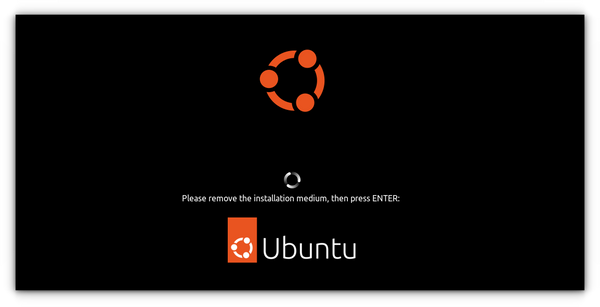
Remove the USB disk and press enter. Your system will reboot and this time, you’ll boot into Ubuntu.
That’s it. See, how easy it is to install Ubuntu. You can use this method to replace Windows with Ubuntu.
What next?
Now that you have successfully installed it, I strongly suggest reading this guide on things to do after installing Ubuntu to make your Ubuntu experience smoother.
I also recommend going through this list of Ubuntu tutorials and learning to do various common things with Ubuntu.
I hope you find this tutorial helpful in installing Ubuntu. If you have questions or suggestions, please feel free to ask it in the comment section.
One Click Install
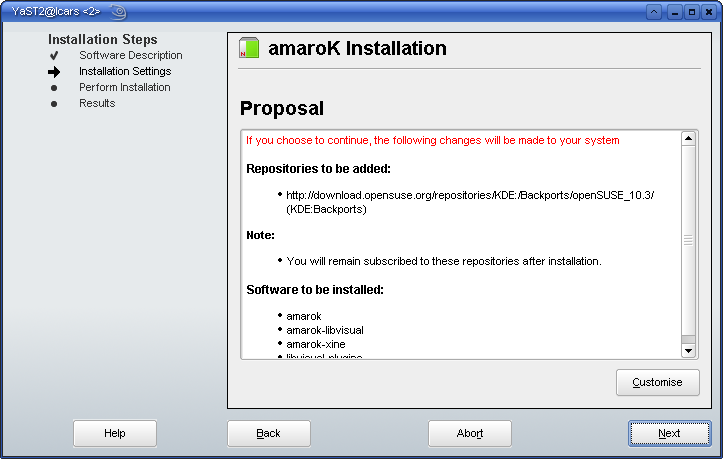
One Click Install makes it easy for users to install software, no matter where that software is located.
In the past, users would have to follow instructions explaining how to add package repositories, and select certain packages for installation. Now a user need only click on a link on a webpage, or a Setup file on a CD. Upon doing so, he or she will be presented with a wizard which will guide him or her through the installation process.
If you are an openSUSE user, you will probably have noticed these install links appearing in various places.
One Click Install works by using a special file format called YMP. This YMP file contains instructions which tell the package management system which packages to install, and where they are located. It is essentially a tutorial for installing the software that can be understood by the system.
It is possible to specify instructions for multiple operating systems in one file. So adding support for One Click Install to another distribution is just a matter of implementing an application that will take one of these instructions files and convert into instructions for your own package management.
Users
If you are an openSUSE user and have a question about One Click Install, see the Questions & Answers page.
Software Vendors
If you are a software vendor or developer and wish to use One Click Install to make your software easily installable by openSUSE users, see the ISV Page.
Developers
If you are a developer for another Linux distribution and are interested in implementing One Click Install or a similar concept for your distribution, see the developer page.