- Access Server Quick Start Guide
- OpenVPN Server
- Admin Web UI
- OpenVPN Connect
- Choosing Your Platform
- Linux OS
- Virtual machine
- Cloud service provider
- Obtain Admin Web UI login details
- Next Steps
- Interfaces
- The Admin Web UI
- OpenVPN Connect
- OpenVPN Connect for Desktop
- OpenVPN Connect for Mobile
- Helpful Configuration Tips
- Updates & Announcements
- Cyber Shield Released
- Release Notes 2.12.0
- Access Server
- CloudConnexa™
- Настройка и использование OpenVPN на Ubuntu
- Подготовка Ubuntu
- Установка, настройка и запуск VPN-сервера
- Установка OpenVPN
- Создание сертификатов
Access Server Quick Start Guide
Access Server fits seamlessly with Linux. Our latest releases come through our software repository. It provides you with the following three components:
OpenVPN Server
The VPN server is the underlying component in Access Server.
- Routing
- User management
- Tunneling
- Authentication
- Encryption
Admin Web UI
The online admin web interface provides an easy UI for managing the server.
- VPN settings
- Network settings
- User permissions
- Web server certificates
OpenVPN Connect
This is the client app to connect users to the VPN. Your server comes with a web-based Client Web UI with pre-configured apps available for download. You can also download a configuration file.
Choosing Your Platform
You can host a server on-premise, with a virtual machine, or through a cloud service provider. Start by choosing the appropriate platform from inside the Access Server portal. Then you’ll launch your new VPN server.
We provide specific quick start guides for each option. These make it easy for you to get your VPN up and running.
Linux OS
Copy and paste the repository commands and execute with root privileges:
Virtual machine
Select one of our pre-configured appliances:
Cloud service provider
Select the OpenVPN instance from their marketplace:
Obtain Admin Web UI login details
Once you install Access Server on your selected platform from above, you can configure your VPN using the web-based Admin Web UI. In the last step of the installation process, a randomly generated password for the openvpn administrative account will be shown on the console.
Then connect to the Admin Web UI with that username and password. The URL will be along the pattern of https://[youripaddress]/admin/
Replace “[youripaddress]” with the static IP address of your server.
Note: Access Server versions older than 2.10 don’t automatically generate a password. On older versions, set the password manually by typing passwd openvpn on the command line.
Next Steps
Once you’ve signed in to your web-based Admin Web UI, you can configure your VPN. These next steps will guide you through setting up a custom hostname, configuring network settings, adding users, and additional security steps.
Interfaces
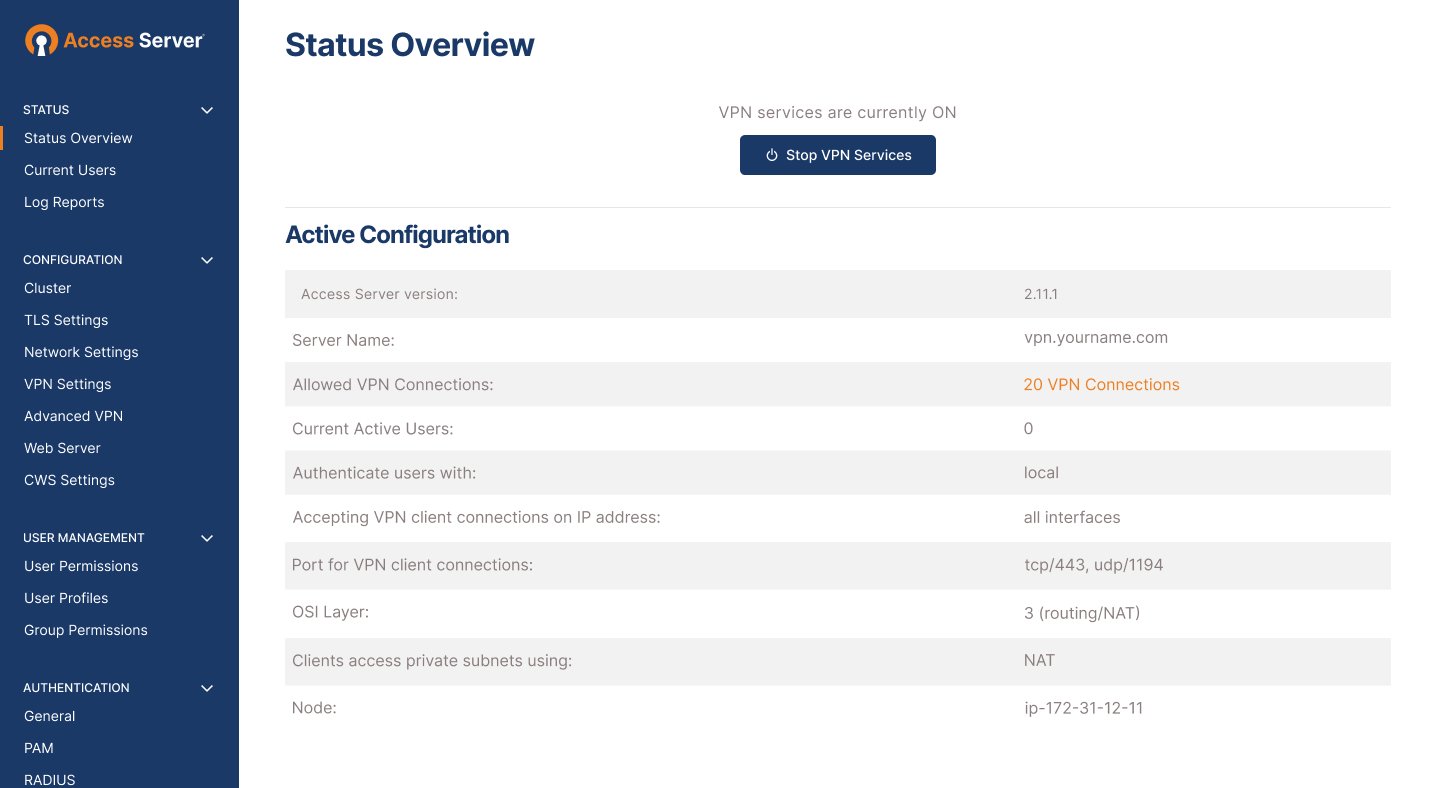
The Admin Web UI
The Admin Web UI provides an intuitive tool to manage settings for your VPN server. Refer to the Access Server User Manual for details about the configuration options and functionality within the tool.
OpenVPN Connect
OpenVPN Connect is our free, full-featured VPN Client.
To download a pre-configured app via web browser, simply navigate to the IP address or hostname of your VPN server: https://[youripaddress]

You may also download OpenVPN Connect directly here, and import the config file.
OpenVPN Connect for Desktop
OpenVPN Connect for Mobile
Helpful Configuration Tips
- Successfully running the Linux commands here require that they are executed with root privileges logged in as a root user or sudo up.
- To reach OpenVPN Access Server via the Internet, set the Hostname or IP address to one facing the public internet.
- The default subnet for Access Server’s internal DHCP system is 172.27.224.0/20. This may be changed to a subnet that might work better for your current network.
- Make sure the time and date on the Linux server are correct as Access Server generates certificates with both a start and expiration date. It can also affect the use of multi-factor systems such as Google Authenticator. If needed, install a Network Time Protocol (NTP) client program on the server to correctly and automatically sync the time.
- For licensing an Access Server without internet access, it requires contacting the OpenVPN team for an offline activation procedure.
- If you install versions older than Access Server 2.9, you need to manually set the password for the openvpn account: passwd openvpn .
Updates & Announcements
Cyber Shield Released
Cyber Shield protects you from cyber threats without requiring you to tunnel internet traffic. Turn Shield ON.
Release Notes 2.12.0
Access Server 2.12.0 comes with support for Data Channel Offload, a kernel accelerated method of encrypting/decrypting VPN traffic. It also allows setting unique global group subnets so routing in clustering mode is possible. Aside from this numerous fixes and improvements are included.
Access Server
Our popular self-hosted solution. Comes with two free connections. No credit card required.
CloudConnexa™
Cloud-delivered, as-a-service solution. Comes with three free connections. No credit card required.
OpenVPN is a leading global private networking and cybersecurity company that allows organizations to truly safeguard their assets in a dynamic, cost effective, and scalable way.
© Copyright 2023 OpenVPN | OpenVPN is a registered trademark of OpenVPN, Inc. |
CloudConnexa is a trademark of OpenVPN, Inc.
Настройка и использование OpenVPN на Ubuntu

Обновлено: 05.03.2023 Опубликовано: 23.01.2019
Тематические термины: VPN, Ubuntu, OpenVPN. В инструкции рассмотрим процесс установки и настройки VPN сервера OpenVPN на Linux Ubuntu.
Подготовка Ubuntu
* в данном примере московское время. Если в нашей системе используется брандмауэр, открываем порт, на котором будет слушать OpenVPN:
* в данной инструкции предполагается, что мы настроим VPN-сервер на UDP-порту 443, однако, по-умолчанию, OpenVPN работает на порту 1194. Для сохранения правила используем iptables-persistent:
Установка, настройка и запуск VPN-сервера
Обязательные шаги для развертывания сервиса — установка программного обеспечения, генерация сертификатов, настройка OpenVPN. Рассмотрим эти процессы по шагам.
Установка OpenVPN
Создание сертификатов
export KEY_COUNTRY=»RU»
export KEY_PROVINCE=»Sankt-Petersburg»
export KEY_CITY=»Sankt-Petersburg»
export KEY_ORG=»DMOSK COMPANY»
export KEY_EMAIL=»master@dmosk.ru»
export KEY_CN=»DMOSK»
export KEY_OU=»DMOSK»
export KEY_NAME=»name-openvpn-server.dmosk.ru»
export KEY_ALTNAMES=»name-openvpn-server»
* где KEY_CN и KEY_OU: рабочие подразделения (например, можно указать название отдела); KEY_NAME: адрес, по которому будет выполняться подключение (можно указать полное наименование сервера); KEY_ALTNAMES — альтернативный адрес. Следующие действия будут записеть от версии OpenVPN. Более новая позволяет создавать сертификаты на основе Easy RSA 3, старая работает на базе 2-й версии. Понять, какой вариант наш можно посмотрев на содержимое каталога easy-rsa:
Либо мы увидим в нем утилиту easyrsa (новая версия), либо набор утилит, начинающихся на build. Рассмотрим процесс формирования сертификата с использованием как RSA3, так и RSA2. а) Если используется новая версия (утилита easyrsa) 1. Инициализируем PKI:
* после вводим дважды пароль, который хотим использовать для ключа центра сертификации. На запрос «Common Name» можно просто нажать Enter:
* nopass можно упустить, если хотим повысить безопасность с помощью пароля на сертификат. На запрос «Common Name» можно просто нажать Enter: