- Bridged AP
- Configuration
- Step 1: Change the LAN interface
- Step 2: Configure and enable the wireless network
- Step 3: Disable dnsmasq
- Step 4: Connect host router and openwrt router correctly
- Apply changes
- Wireless Access Point (aka «Dumb» Access Point)
- External Videos for Reference
- Configuration via LuCI, the OpenWrt Web Interface
- Configuration via OpenWrt command line tools
- Настраиваем Wi-Fi на OpenWRT как WAN интерфейс
Bridged AP

Bridged AP is to extend your existing wired host router to have wireless capabilities. Clients connecting to OpenWRT will get an IP address from the wired host router.
OpenWrt bridges the LAN network with the WLAN of the device in Access Point mode. The advantage of bridging is that broadcast traffic from Wireless to LAN and vice versa works without further changes.
This document outlines the steps necessary to implement such a setup.
Note: This recipe results in a bridged LAN that will work fine for home and small networks. It is similar to the “Dumb AP ” recipe at dumbap. These pages should probably be merged.
Configuration
The changes below assume an OpenWrt default configuration, the relevant files are:
Step 1: Change the LAN interface
Edit /etc/config/network and change the lan interface section to set the IP your access point should have in the future:
config interface lan option ifname eth0 option type bridge option proto static option ipaddr 192.168.1.2 option netmask 255.255.255.0 option gateway 192.168.1.1 option dns 192.168.1.1 This IP address must be an unused one within the network subnet of the main router. You could also change proto to dhcp and let the main router decide the access point’s address, but of course from then on the access point needs a DHCP server and you will lose the ability to directly plug into your access point for maintenance.
Step 2: Configure and enable the wireless network
In /etc/config/wireless , locate the existing wifi-iface section and change its network option to point to the newly created interface section.
config wifi-iface option device wifi0 option network lan option mode ap option ssid OpenWrt option encryption none
Naturally, you should consider securing your wifi network.
Step 3: Disable dnsmasq
Step 4: Connect host router and openwrt router correctly
Ensure the host router is connected with a lan port of the openwrt, not the wan port!
Apply changes
Enable the new wireless network.
root@OpenWrt:~# ifup wifi root@OpenWrt:~# wifi
This website uses cookies. By using the website, you agree with storing cookies on your computer. Also you acknowledge that you have read and understand our Privacy Policy. If you do not agree leave the website. OK More information about cookies
Self-registration in the wiki has been disabled.
If you want to contribute to the OpenWrt wiki, please post HERE in the forum or ask on IRC for access.
Except where otherwise noted, content on this wiki is licensed under the following license:
CC Attribution-Share Alike 4.0 International
Wireless Access Point (aka «Dumb» Access Point)
Summary: This document describes how to create and add a wireless access point ( AP ), sometimes called a “dumb AP ”, to an existing network with a single main router. The term dumb is used since the router provides no routing, DHCP or DNS services.
In truth though, a Wireless AP is anything but dumb, it just does not provide IP routing services.
One of the most common reasons for creating a Wireless Access Point is to add additional wireless coverage to an existing network, maybe on a different floor or to cover some other wireless dead spot. Adding a wireless AP will do exactly that.
The end result of following the instructions below will be a bridged LAN with no internal subnets. Devices connected to either router will “see” each other, and will be connected to the Internet through the main router. This setup is sufficient for small office or home networks but for larger networks a more sophisticated approach is often used.
TL;DR Here are the important configurations for a Wireless AP router:
The wireless AP is connected LAN -to- LAN to the main router by some means eg an ethernet cable, an 802.11s mesh, etc..
The wireless AP bridges its SSID wireless interface onto its LAN bridge interface. Wireless traffic on the wireless AP goes to its bridge LAN interface, and then to the main router.
The wireless AP bridge LAN can have a static or DHCP address on the same subnet as the main router’s bridge LAN interface, depending upon the detail of the configuration.
The wireless AP ‘s gateway ip address is set to the address of the main router, either in the configuration or by DHCP .
This article may contain network configuration that is version dependent post 2021-06
while legacy ifname syntax may work on 21.02 or recent master it is recommended that you migrate to device usage
More Information
External Videos for Reference
Several external videos are available on the topic which may be useful. These provide some background and context, but bare in mind they may have become somewhat outdated and generally do not take into account anything other than an ethernet backhaul.
Using OpenWRT v21 with DSA example:

Two-part older videos which are considerably outdated but give some background information:


WiFi roaming is much improved in more up to date mobile devices, so configuring Fast Roaming, aka 802.11r, may not be required. This video can be very misleading as 802.11r has nothing whatsoever to do with mesh networking. Nevertheless it may provide some background information:
Configuration via LuCI, the OpenWrt Web Interface
These instructions were up to date as of October 15, 2021, and refer to the interface found in OpenWrt version 21.02.0. The interface of v21 differs in some significant ways from earlier version of OpenWrt which we try to account for. but no guarantees.
This setup requires two routers, a computer with an Ethernet port, and an Ethernet cable. We refer to the routers as the main router and the wireless AP and we assume default settings on both. The main router should already be properly configured and connected to the Internet.
Disconnect the wireless AP from your network. Use an Ethernet cable to connect your computer to one of the LAN ports (not the Internet/ WAN port) of the wireless AP .
From a browser on your computer, navigate to the LuCI interface by going to http://192.168.1.1. Login. Change the admin password if necessary.
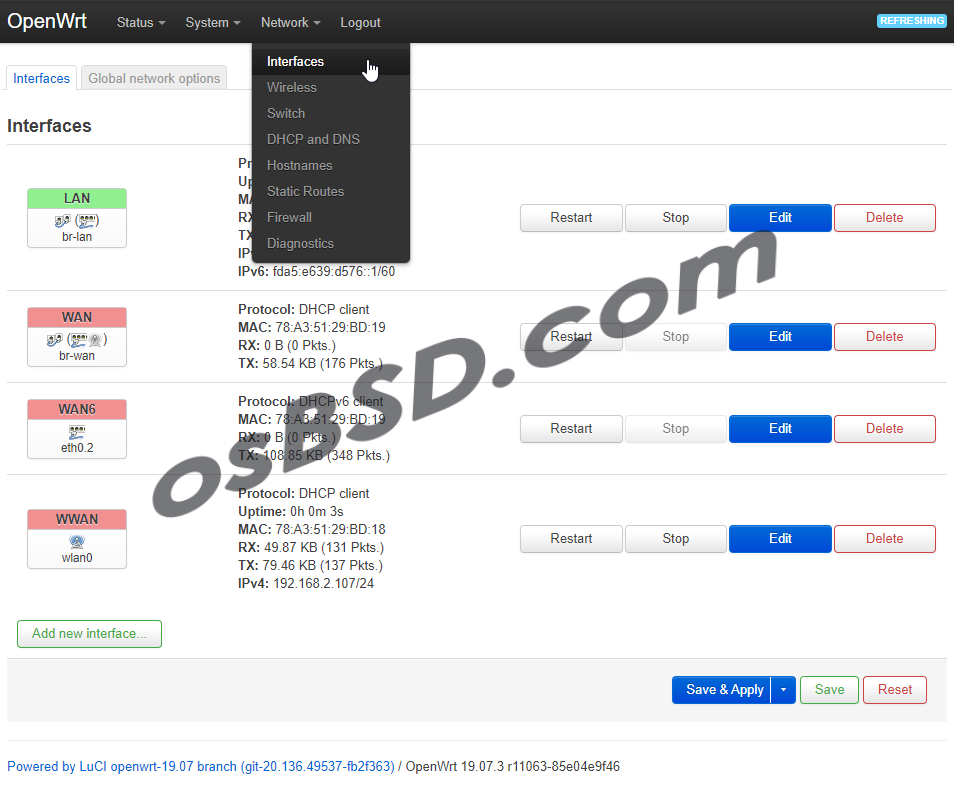
Go to Network → Interfaces and click on the Edit button of the LAN interface. Ensure you are on the General Settings tab.
It is best to configure the wireless AP to use DHCP to obtain an address from the main router, but here we will configure a static ip address. Give the wireless AP an IP address “next to” your main router. By default, the main router will have an address of 192.168.1.1, so use something like 192.168.1.2. (The address should be on the same subnet as your main router but out of the DHCP range used when assigning addresses to connected devices. By default, that means the wireless AP router IP should be between 192.168.1.2 and 192.168.1.100.) If you’re adding multiple wireless AP routers, you could use 192.168.1.3, 192.168.1.4, etc. for additional routers.
Save and apply the new IP address, then navigate back to that address (say, http://192.168.1.2). Make sure your browser uses the new IP address you assigned in the previous step. Why? Because in the next step, the gateway needs to be changed to point to the main router, and LuCI will not allow you to change the gateway to 192.168.1.1 while the wireless AP router is using that IP address. So back to Network → Interfaces, Edit the LAN interface, General Settings tab.
Change the IPv4 gateway to point to your main router, 192.168.1.1 by default. This sets the wireless AP router to use the main router for Internet access.
Use the main router for DNS . Same page but the Advanced Settings tab. Enter the IP of your main router in the Use custom DNS servers field and click +.
Use the main router for DHCP (and disable DHCP for the Wireless AP ). Same page again, now the DHCP Server tab. Should be at the General Setup sub-tab. (In version 18.06 and earlier of LuCI, no tabs: just scroll down.) Ensure the Ignore interface checkbox is checked.
Disable IPv6 DHCP . Same page, DHCP Server tab again, but click on the IPv6 Settings sub-tab. Set the RA-Service, DHCPv6-Service, and NDP-Proxy dropdowns to disabled.
In versions of OpenWrt older than 21.02.0: Under “Physical Settings” tab, ensure “Bridge interfaces” is ticked, and ensure BOTH of your interfaces (eth0, wlan0) are selected, in order to allow traffic between wireless and wired connections.
To save resources on the wireless AP router, disable some now unneeded services. Navigate to System → Startup. Disable the services labeled firewall, dnsmasq and odhcpd. (Perhaps ironically, click Enable to toggle.) Note even though these services are now disabled, after you flash a new image to the device they will be re-enabled. For a more permanent fix see Disable Daemons Persistently.
Optionally, remove or disable the WAN and WAN6 interfaces. On the Network → Interfaces page, Edit the WAN and WAN6 interfaces to uncheck the Bring up on boot checkbox. Or just delete the interfaces.
Note that by default OpenWrt does not enable wireless access. So, from a default installation, at the very least you will need to review the wireless SSIDs, enable wireless security, and then enable the wireless networks from the Network → Wireless page.
Use an Ethernet cable to connect one of the LAN ports on your main router to one of the LAN ports (not the WAN /Internet port) of the wireless AP router.
You may need to reboot or power cycle either or both routers, the device connecting your main router to the Internet, and potentially any connected devices. In many cases this will not be necessary.
Configuration via OpenWrt command line tools
The changes below assume an OpenWrt default configuration, the relevant files are:
Настраиваем Wi-Fi на OpenWRT как WAN интерфейс

На роутере с прошивкой OpenWRT настроить Wi-Fi, как внешний (WAN) интерфейс.
Обычное представление о роутере – это когда проводок от провайдера всовываете в роутер, обычно он обозначается WAN, а дальше все устройства подключаются по проводам или использую беспроводную сеть.
В нашем случае провод провайдера отсутствует, а интернет мы будем получать по беспроводной сети.
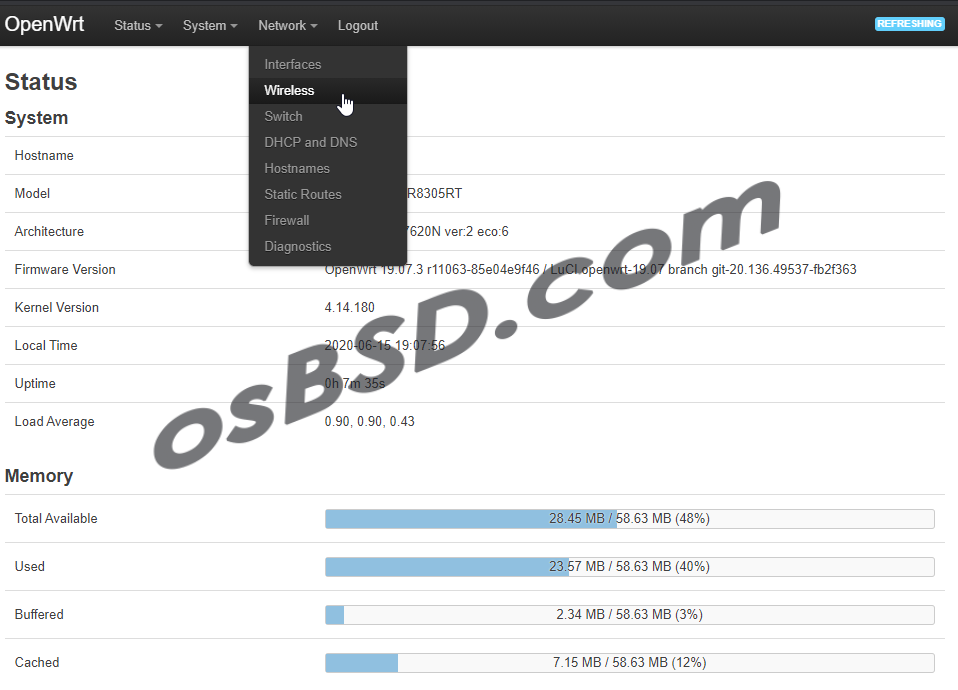
Переходим в меню: Network > Wireless

Выбираем нужную сеть и нажимаем “Join Network”

Указываем пароль для доступа в Wi-Fi
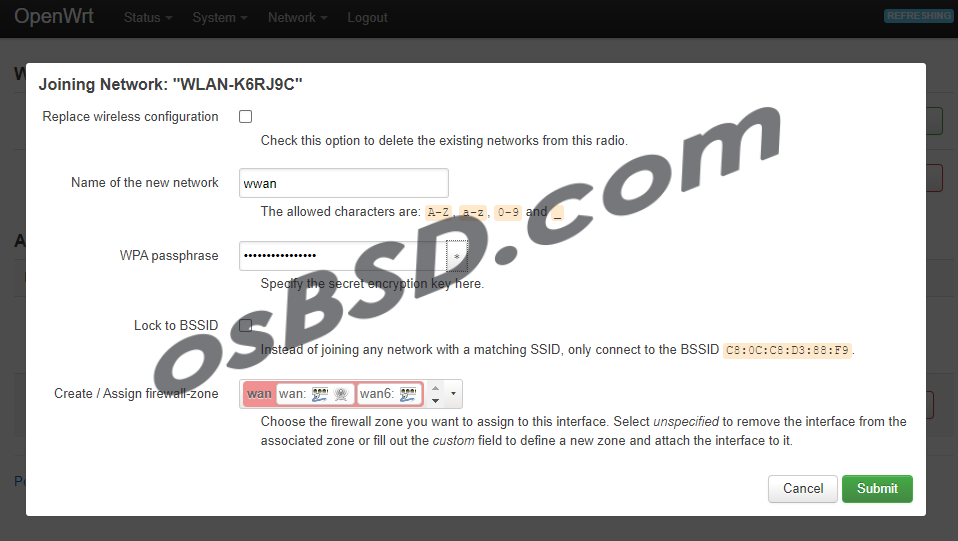
не вдаваясь в подробности, просто сохраняемся

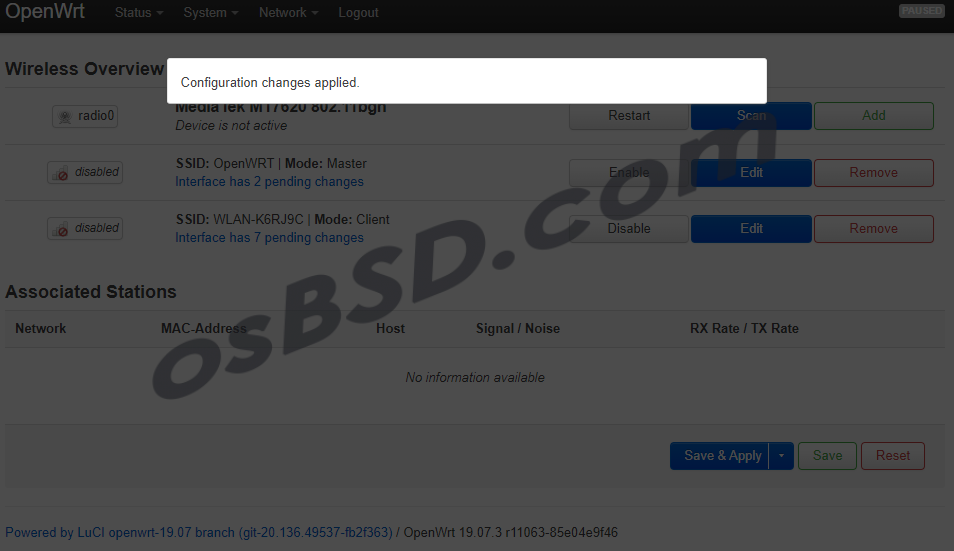
Применяем все проделанные изменения. Нажимаем в правом верхнем углу “unsaved changes”

Дожидаемся окончания применения настроек
Как видим, роутер по беспроводной сети получил сетевой адрес. Можно подключать устройства к портам локальной сети, главное не перепутать с WAN портом. Его мы оставили без настроек.
Это решение было придумано на скорую рука, как временное. Так как была проблемма с интернетом и единственным способом получить доступ к интернет – это точка доступа из соседнего здания.