How To Install Oracle Grid Infrastructure 19c on Linux

In this article, we will install Oracle Grid infrastructure 19c on Linux. Before Oracle Grid installation you need to have OS at first. You may want to read the below article to install Oracle Linux.
Also after grid installation you may want to read the below article to install Oracle RAC 19C on Linux.
First, we will configure the Disks.
Since I am running a test setup, I will use four disks. Two of these disks will be used for + DATA, the other two for + FRA.
I examine my disks. In the hypervisor environment I am working in, my disks start with SD. It may not start with SD * in your environment. You can fix it according to the situation.
SDB, SDC, SDD and SDE are the disks I added as shared. ASM will work here.
I will prepare the disks. Then we will continue with Oracle ASM.
I am doing the following operation on NODE1. (No action should be taken on NODE2)
We perform these operations for our other disks (sdc, sdd, sde). After our works are finished, there will be an output as follows.
We are restarting the NODE1 and NODE2 servers. In the next step, we will prepare our disks for ASM.
We do the following for NODE1 and NODE2.
Our disks are almost prepared. With oracleasm init, we will enable the kernel and do the stamping process.
We enable the kernel on NODE1 and NODE2 servers.
We will stamp the disks. We only do this on NODE1.
We are checking our disks.
In order for the process that we are doing to appear from node2, we run the following command.
Our disks are ready now. Now we can start the installation. First of all, we will install Grid.
Our files have been copied. Now the setup starts.
Important note: If you are installing on OEL 8.2, Oracle Database 19C currently does not officially support this version. You will need to set the parameter below.
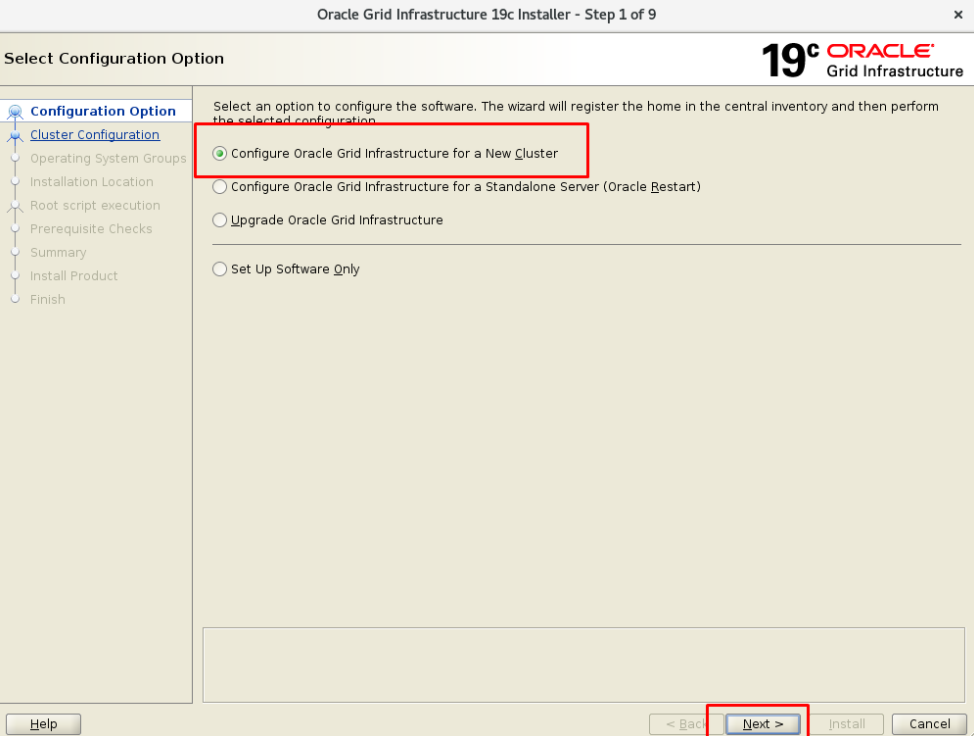
We click on “Configure an Oracle Standalone Cluster” since we will create a new Cluster.

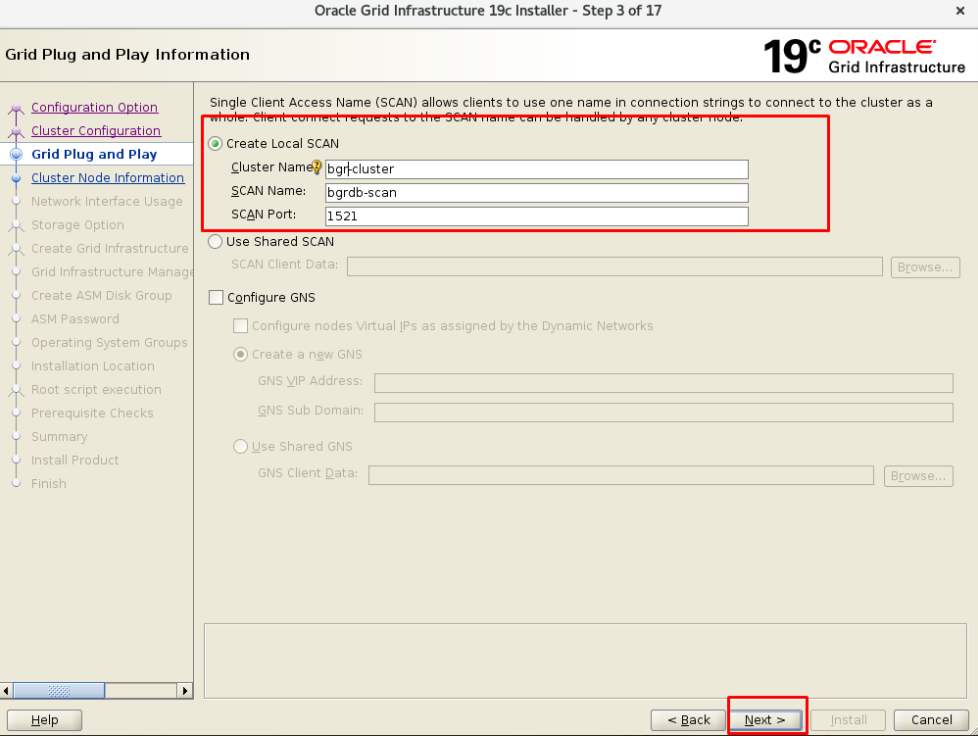
We write our Cluster Name and Scan Name information.
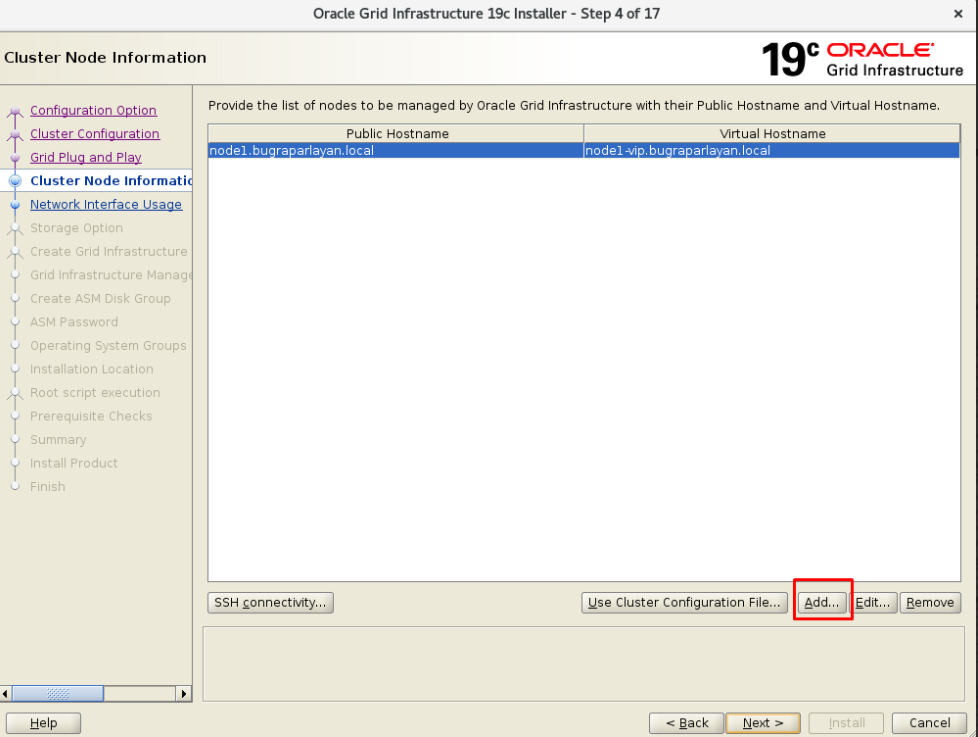
We are adding our second server.
After adding, the two servers need to talk to each other. We will use SSH for this.
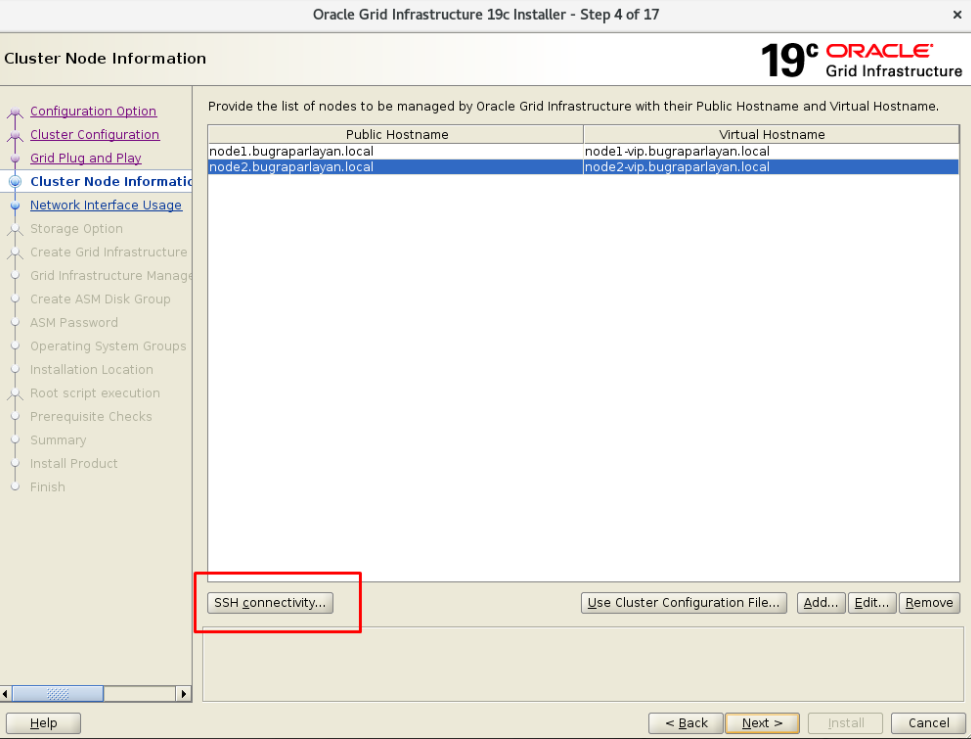
At this stage, the system will talk to each other with the user “GRID”. We write the password of our Grid user.

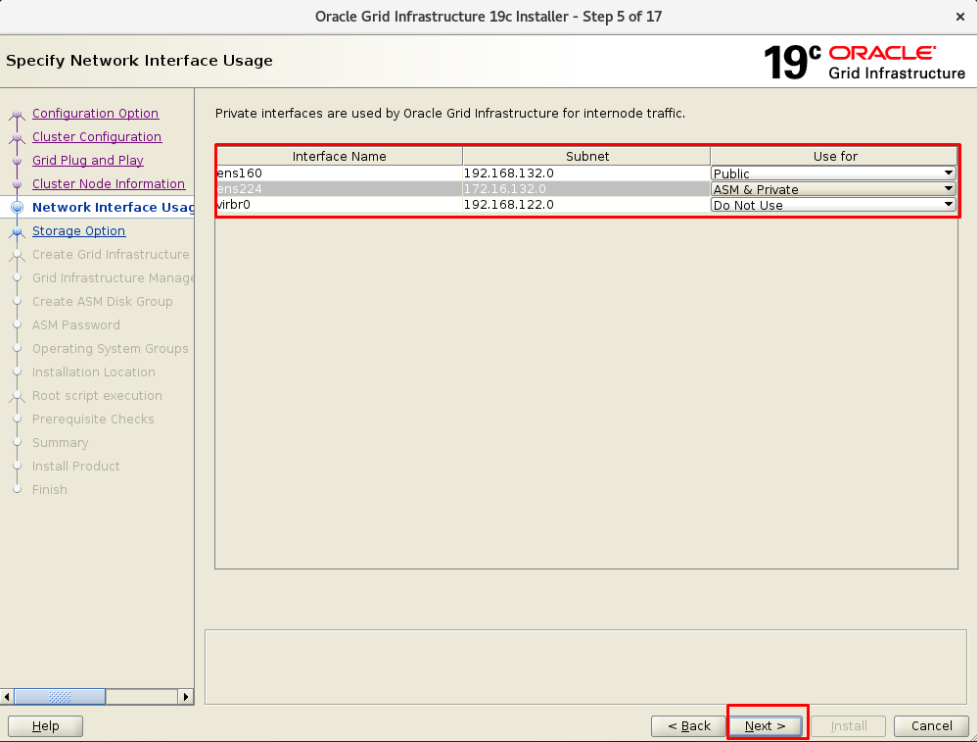
We need to write the network information. We arrange it as follows.
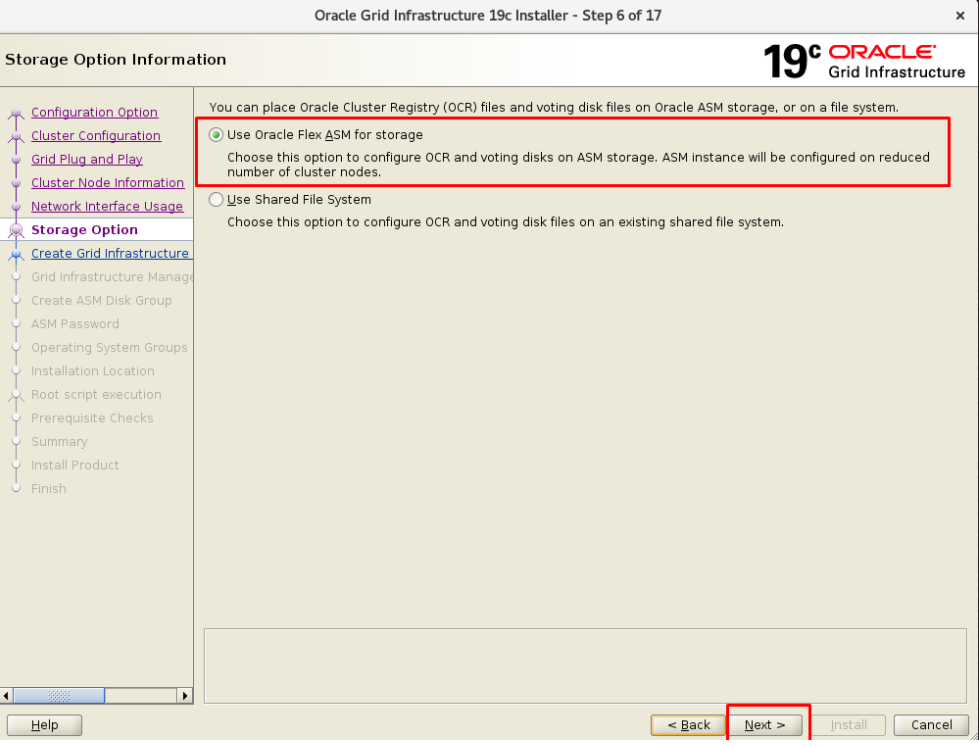
The installation will be on the 4 ASM disks we added. We click on “Use Oracle Flex ASM for storage”.
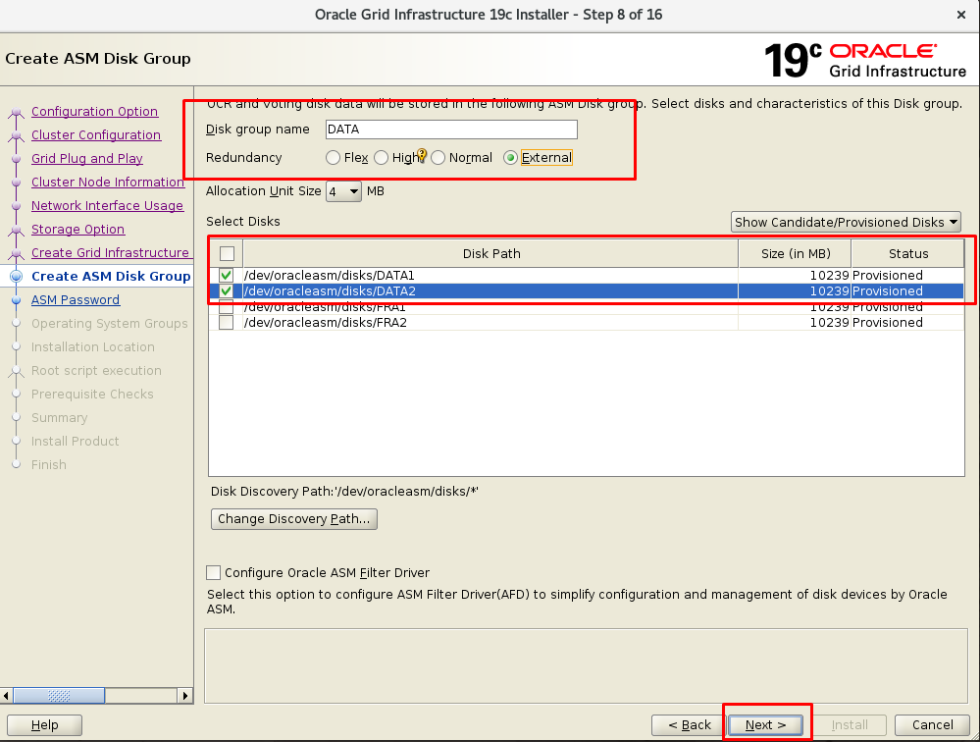
Now we will add our disks. Since I made the test installation, I will choose “EXTERNAL”.
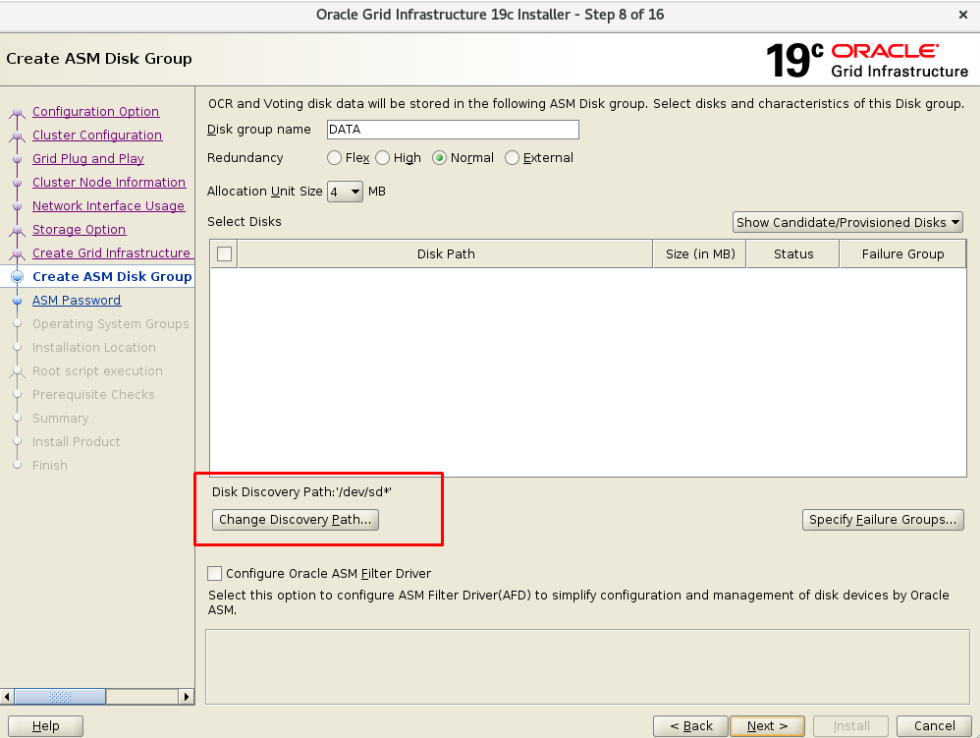
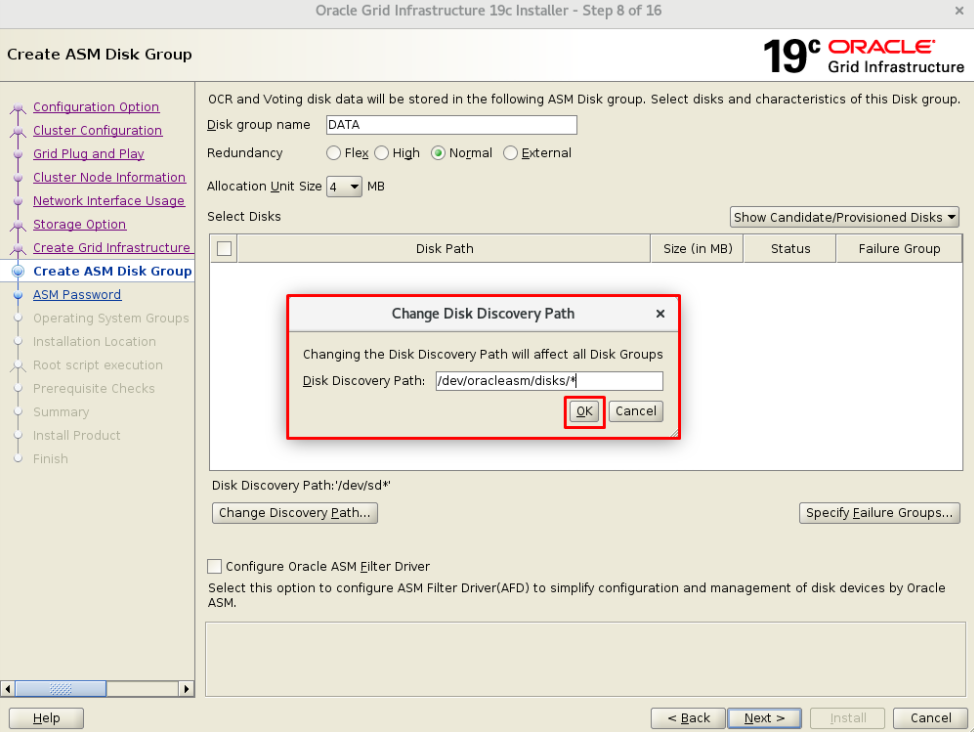
I will add my DATA1 and DATA2 disks that I prepared for the +DATA.
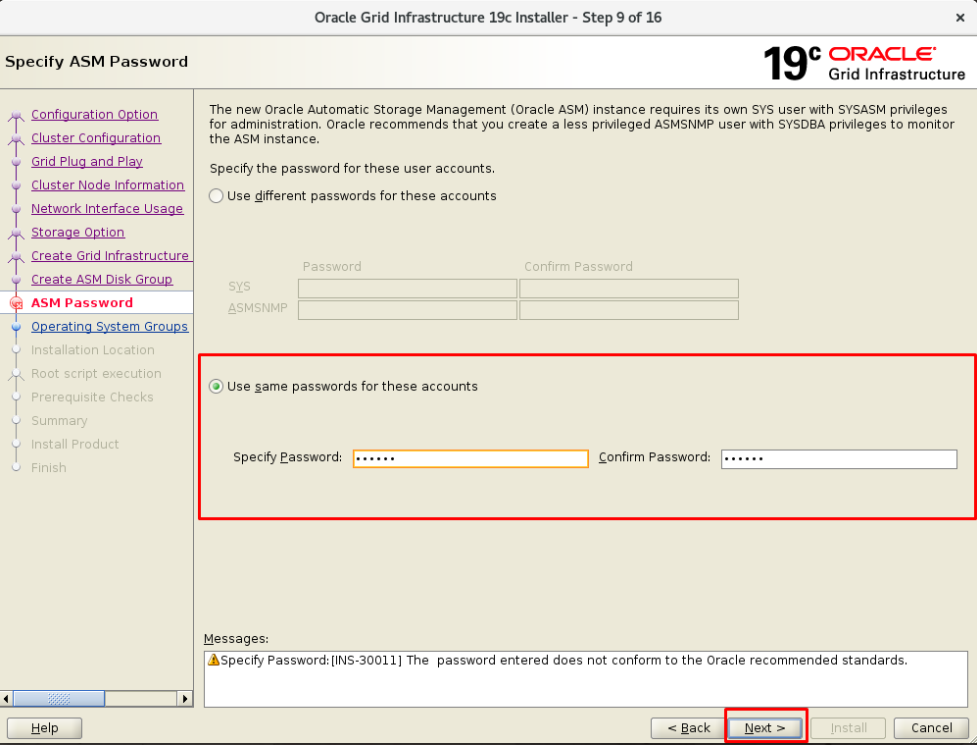
I set a password for SYS and ASMSNMP users to be used on the grid.
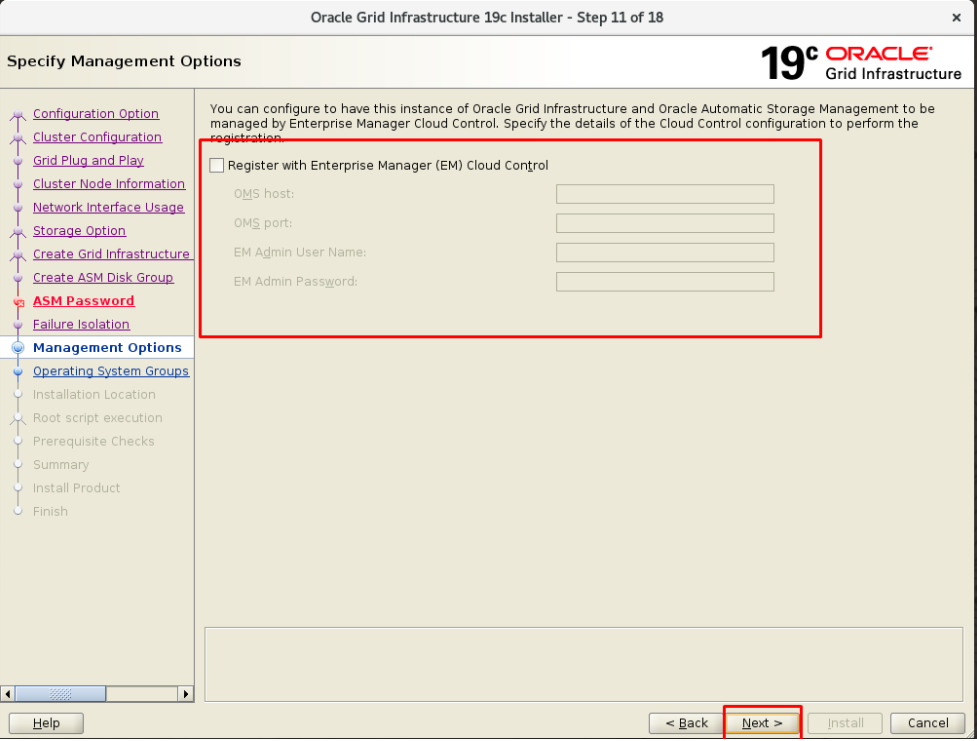
Oracle traditionally runs a script with the root user in the last step of the installation. If we want it to do this process automatically, we can fill in this field. In this way, if a script will be run with the root user during installation, it will be done automatically.

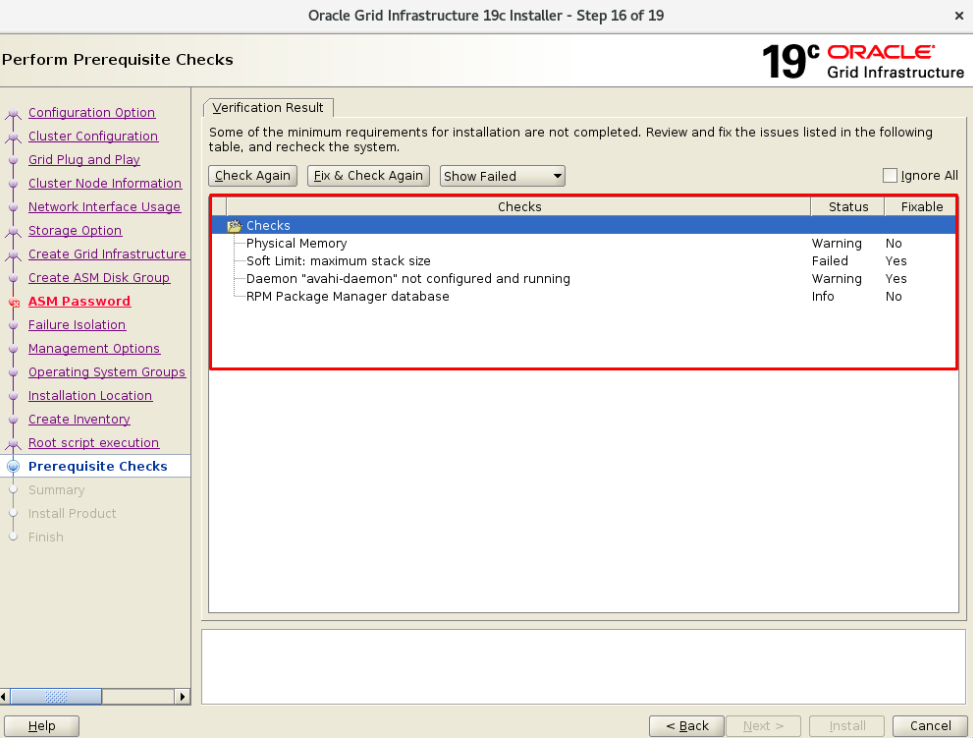
If the cvuqdisk package is seen as missing at this step, you need to do the following actions.
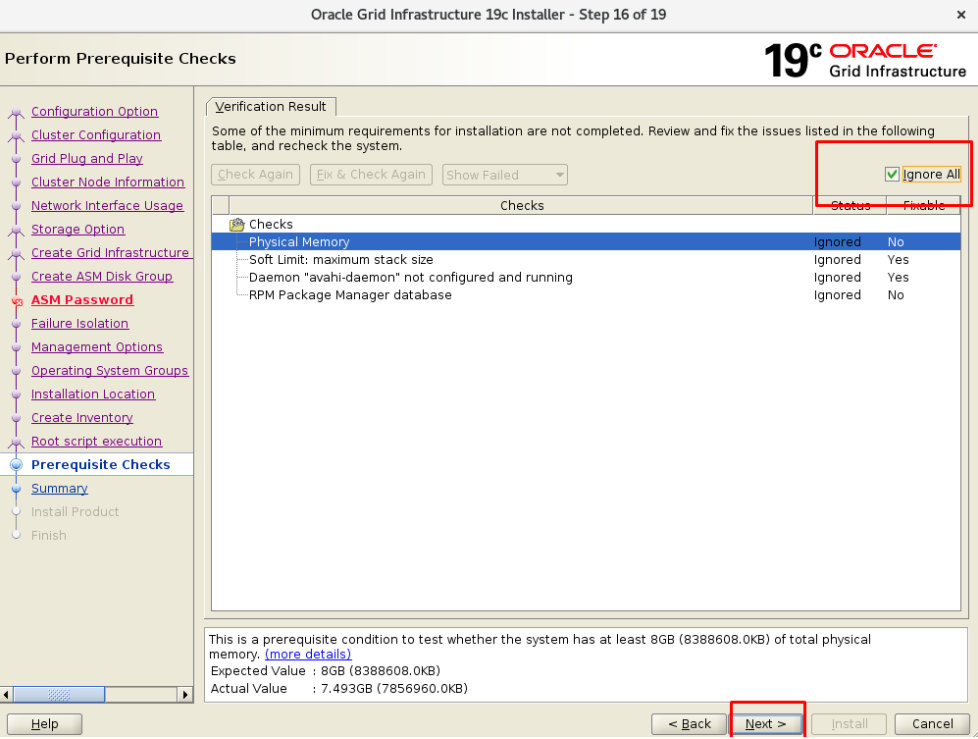
The system status is being checked. Some warnings appeared in my installation. For example, RAM is not enough because a minimum of 12GB ram is recommended. I’m going to click on “IGNORE ALL”.
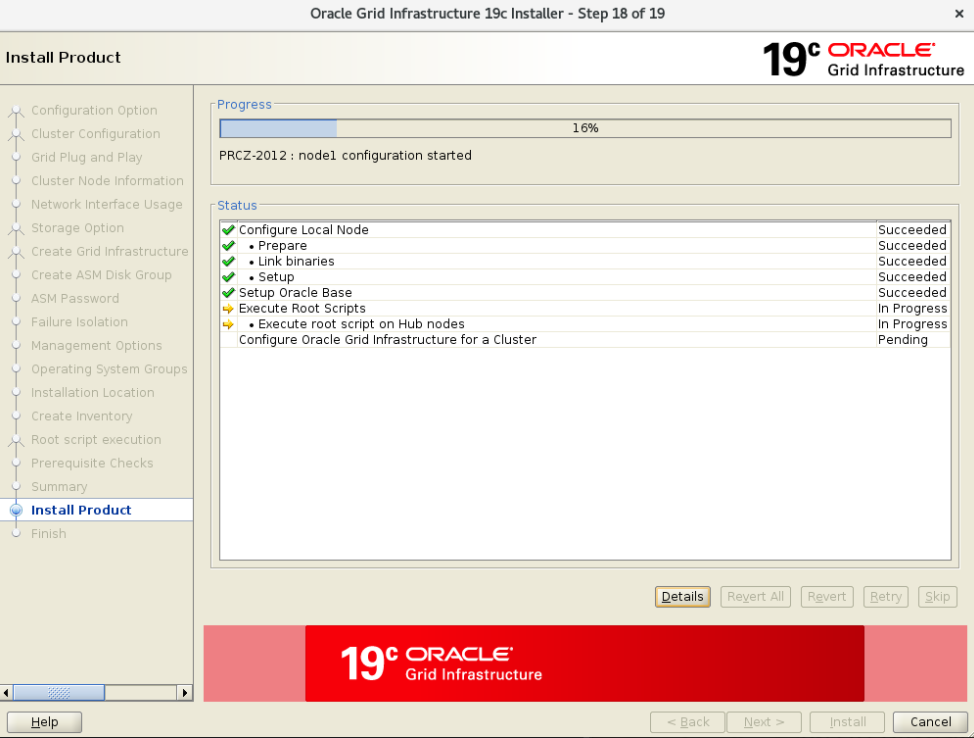
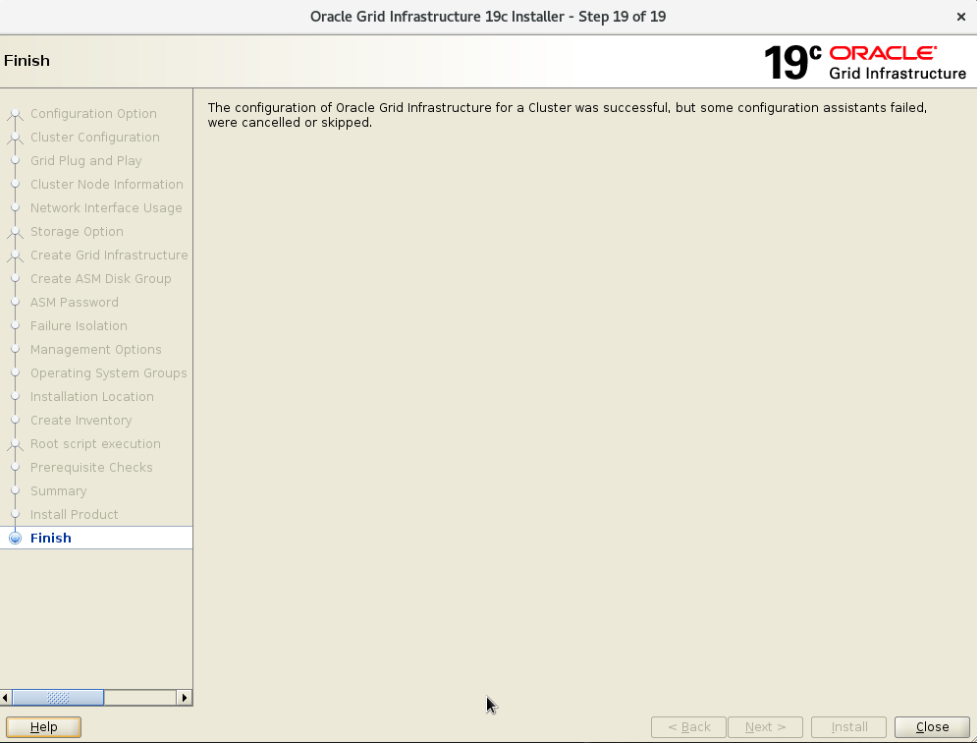
GRID installation for Oracle Database RAC is complete. In fact, the longest and most challenging is the GRID setup. GRID installation has very sensitive points. For example, if NTP is wrong, there is a problem. Due to the cluster, the clock of both servers must be equal. For this reason, a clean GRID installation is essential.
The next chapter is installing Oracle Database on RAC. Then we will do our tests.
About Buğra PARLAYAN
Burgra Parlayan is an experienced Database and Weblogic Administrator. After completing his technical / relevant training he has got involved with a serious amount of projects. He successfully managed database upgrade, database migration, database performance tuning projects for various public institutions.Currently he has been employed by one of the leading financial institutions called Turkiye Hayat & Emeklilik as responsible administrator for Oracle Database and Oracle Middleware. He has been sharing his experience and knowledge by face to face training, personal blog and various social networking accounts to support the Oracle ecosystem continuously since 2010.
2 comments
Great article but please can you explain how you created the
shared disks in VMware. Some screenshots and explanations would be
very useful. Thanks.
Oracle grid install linux
Complete these steps to install Oracle Grid Infrastructure for a standalone server and then create a database that is managed by Oracle Restart.
Install Oracle Grid Infrastructure for a standalone server, which installs Oracle Restart and Oracle ASM, and creates one disk group.
You should have your network information, storage information, and operating system users and groups available to you before you start the installation. You should also be prepared to run root scripts or provide information to automate root scripts.
- Log in as the Oracle Restart software owner user ( oracle ).
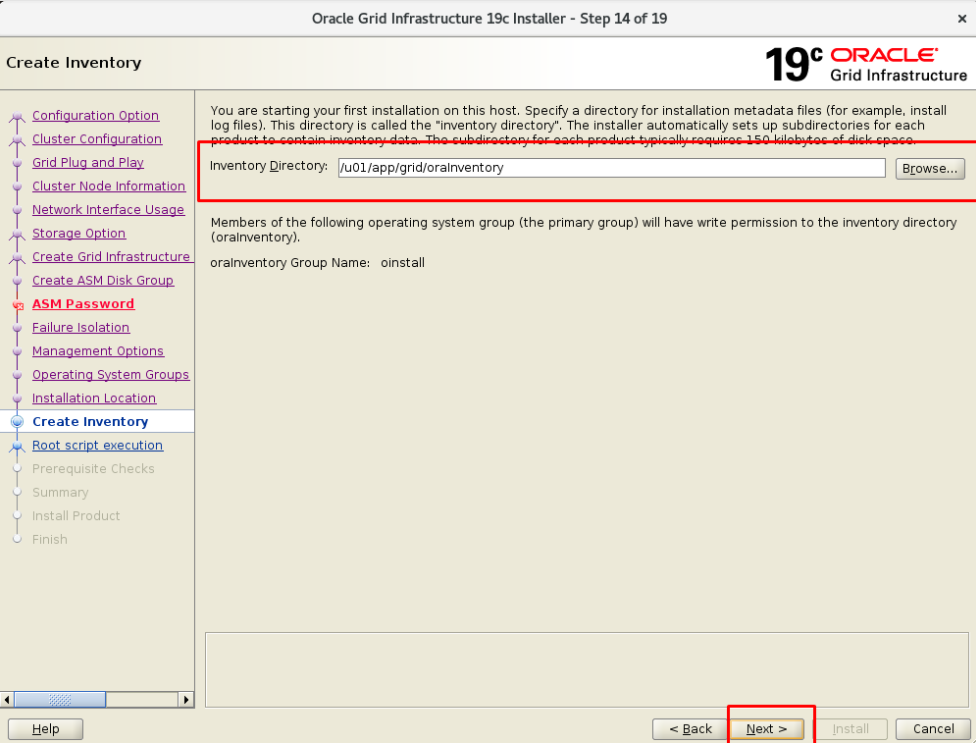
- If this is the first time you are installing Oracle software, then create the Oracle base and the Oracle inventory directories as per the Oracle Optimal Flexible Architecture (OFA) recommendations. Specify the correct owner, group, and permissions for these directories.
# mkdir -p /u01/app/oracle # mkdir -p /u01/app/oraInventory # chown -R oracle:oinstall /u01/app/oracle # chown -R oracle:oinstall /u01/app/oraInventory # chmod -R 775 /u01/app$ mkdir -p /u01/app/oracle/product/18.0.0/grid $ cd /u01/app/oracle/product/18.0.0/grid $ unzip -q /tmp/grid_home.zipNote: Ensure that the Grid home directory path you create is in compliance with the Oracle Optimal Flexible Architecture recommendations. Also, unzip the installation image files only in this Grid home directory that you created.
- Log in as root and set $ORACLE_HOME to the grid home location and $ORACLE_BASE to a temporary location.
su root # set ORACLE_HOME=/u01/app/oracle/product/18.0.0/grid # set ORACLE_BASE=/tmp You set $ORACLE_BASE to a temporary location to avoid creating diagnostic or trace files in the Grid home before the Oracle Grid Infrastructure installation.
# cd /u01/app/oracle/product/18.0.0/grid/bin # ./asmcmd afd_label DATA1 /dev/sdb --init # ./asmcmd afd_label DATA2 /dev/sdc --init # ./asmcmd afd_label DATA3 /dev/sdd --init# ./asmcmd afd_lslbl /dev/sdb # ./asmcmd afd_lslbl /dev/sdc # ./asmcmd afd_lslbl /dev/sddNote: You can use the gridSetup.sh command with the -applyRU and -applyOneOffs options to install Release Updates (RUs) and one-off patches during an Oracle Grid Infrastructure installation or upgrade.
- The default Disk Group Name is DATA. You can enter a new name for the disk group, or use the default name.
- Any additional disk devices that you create must be owned by the user performing the grid installation.
On Linux, if you want to use Oracle ASM Filter Driver (Oracle ASMFD) to manage your Oracle ASM disk devices, then you must deinstall Oracle ASM library driver (Oracle ASMLIB) before you start the Oracle Grid Infrastructure installation.
If you configure automation for running root scripts, and a root script fails, then you can fix the problem manually, and click Retry to run the root script again.
Related Topics
Oracle grid install linux
Complete these steps to install Oracle Grid Infrastructure for a standalone server and then create a database that is managed by Oracle Restart.
Install Oracle Grid Infrastructure for a standalone server, which installs Oracle Restart and Oracle ASM, and creates one disk group.
You should have your network information, storage information, and operating system users and groups available to you before you start the installation. You should also be prepared to run root scripts or provide information to automate root scripts.
- Log in as the Oracle Restart software owner user ( oracle ).
- If this is the first time you are installing Oracle software, then create the Oracle base and the Oracle inventory directories as per the Oracle Optimal Flexible Architecture (OFA) recommendations. Specify the correct owner, group, and permissions for these directories.
# mkdir -p /u01/app/oracle # mkdir -p /u01/app/oraInventory # chown -R oracle:oinstall /u01/app/oracle # chown -R oracle:oinstall /u01/app/oraInventory # chmod -R 775 /u01/app$ mkdir -p /u01/app/oracle/product/21.0.0/grid $ cd /u01/app/oracle/product/21.0.0/grid $ unzip -q /tmp/grid_home.zip- Ensure that the Grid home directory path you create is in compliance with the Oracle Optimal Flexible Architecture recommendations. Also, unzip the installation image files only in this Grid home directory that you created.
- Oracle home or Oracle base cannot be symlinks , nor can any of their parent directories, all the way to up to the root directory.
- Log in as root and set $ORACLE_HOME to the grid home location and $ORACLE_BASE to a temporary location.
su root # set ORACLE_HOME=/u01/app/oracle/product/21.0.0/grid # set ORACLE_BASE=/tmp You set $ORACLE_BASE to a temporary location to avoid creating diagnostic or trace files in the Grid home before the Oracle Grid Infrastructure installation.
# cd /u01/app/oracle/product/21.0.0/grid/bin # ./asmcmd afd_label DATA1 /dev/sdb --init # ./asmcmd afd_label DATA2 /dev/sdc --init # ./asmcmd afd_label DATA3 /dev/sdd --init# ./asmcmd afd_lslbl /dev/sdb # ./asmcmd afd_lslbl /dev/sdc # ./asmcmd afd_lslbl /dev/sddNote: You can use the gridSetup.sh command with the -applyRU and -applyOneOffs options to install Release Updates (RUs) and one-off patches during an Oracle Grid Infrastructure installation or upgrade.
- The default Disk Group Name is DATA. You can enter a new name for the disk group, or use the default name.
- Any additional disk devices that you create must be owned by the user performing the grid installation.
On Linux, if you want to use Oracle ASM Filter Driver (Oracle ASMFD) to manage your Oracle ASM disk devices, then you must deinstall Oracle ASM library driver (Oracle ASMLIB) before you start the Oracle Grid Infrastructure installation.
If you configure automation for running root scripts, and a root script fails, then you can fix the problem manually, and click Retry to run the root script again.
Related Topics