[Wireless Router] How to set up Virtual Server/Port Forwarding Rules on ASUS Router?
[Wireless Router] How to set up Virtual Server/Port Forwarding Rules on ASUS Router? Prepare 1. To use port forwarding on your ASUS router, your router needs to have a public WAN IP from your ISP’s internet service. This will allow devices on the internet to locate your ASUS router via a public WAN IP. 2. This only article applies to these models after updating tofirmware version 3.0.0.4.384.40000.Please refer to[Wireless Router] How to update the firmware of your router to the latest version ?3. Models that do not support the way this article is set:RT-N12_D1, RT-N12VP, RT-N12HP_B1,RT-N300, RT-AC52U, RT-AC54U, RT-AC51U, RT-AC52U, RT-AC1200HP, RT-AC55UHP, RT-AC55U, RT-N14U, RT-AC58U/RT-ACRH13/RT-AC1300UHP/RT-AC1300G+, 4G-AC55U, BRT-AC828, RT-AC1200GU, RT-AC1200, RT-N600, RT-AC53/RT-AC750GF, RT-AC51U+/RT-AC51UP/RT-AC52U_B1, RT-N11P_B1/RT-N300_B1/RT0N12 VP_B1, RT-N12+ B1, RT-N12+ PRO, RT-N12E C1.Click here for detailed steps Each computer connected to a router has an assigned LAN IP address and is authorized to transfer files to each other. However, computers on a LAN connection cannot access data or devices on a specific computer thru an Internet connection. Similarly, computers connected thru an Internet connection cannot access data stored in LAN devices. Simply put, LAN computers that are configured as FTP servers cannot complete requests from the Internet.  By setting up port forwarding rules, routers will apply these rules to send requests coming from the Internet to a specific LAN device to complete each task. For example, you can set up a LAN IP 192.168.1.103, port 80, to accept external requests.
 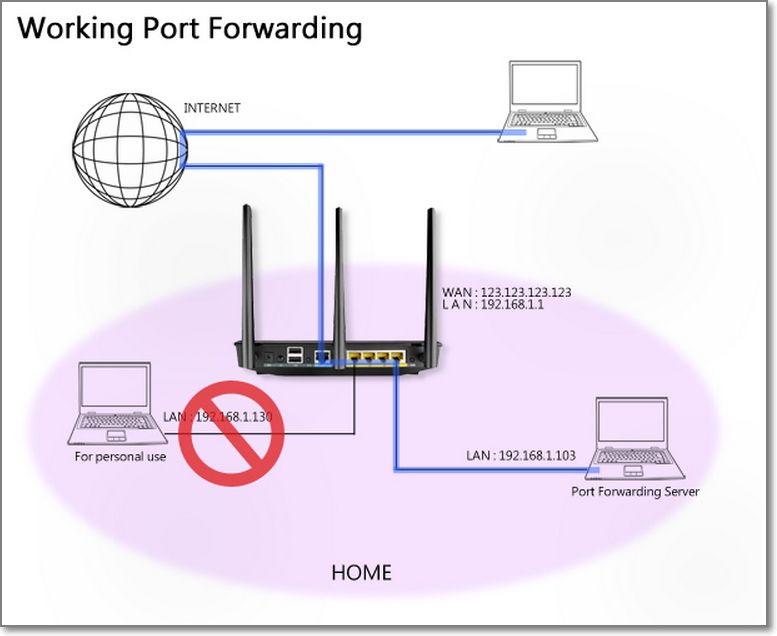 Please note that each port can only be used by a single LAN device. Two PCs cannot communicate via the same port. If you have added a FTP service using port 21, port 21 will no longer be available for the next service. Please avoid port conflicts as they will lead to rule failures. Here is a list of well-known services with their default port numbers for quick refernce. Choose one of the services below and your system will automatically fill in the assigned port number.
 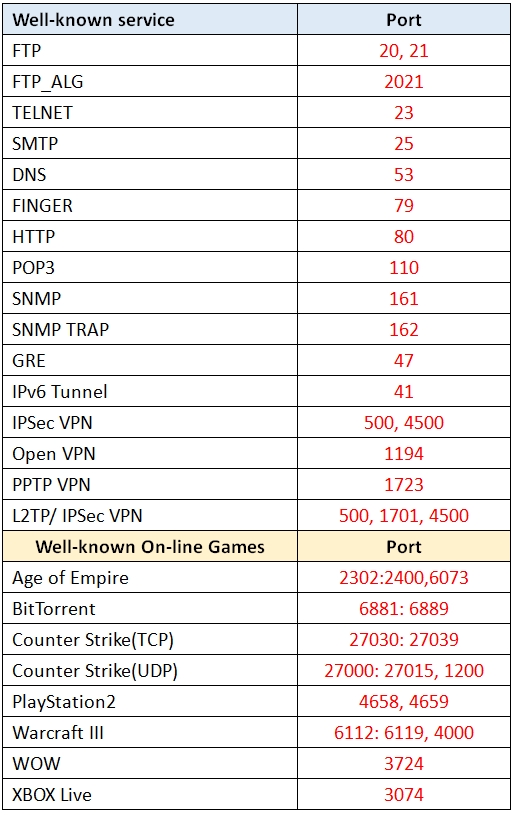 Set up Virtual Server/Port forwardingStep 1. Connect your computer to the router via wired or WiFi connection and enter your router LAN IP or router URL http://www.asusrouter.com to the WEB GUI.
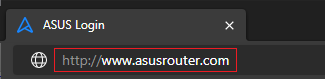 Please refer to How to enter the router setting page(Web GUI) to learn more. Step2. Key in your router’s username and password to log in.
 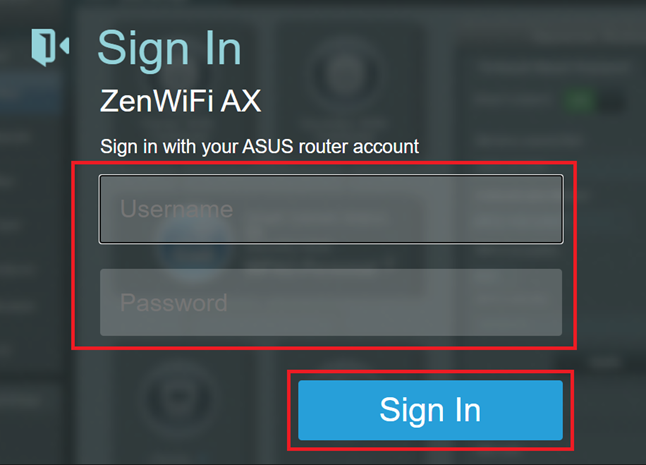 Note: If you forget the user name and/or password, please restore the router to the factory default status and setup. Please refer to [Wireless Router] How to reset the router to factory default setting? for how to restore the router to default status. Step 3. Go toWAN >Virtual Server/Port Forwarding >Switch the button on [Enable Port Forwarding] to ON (Default is OFF and click on “Add profile.”
 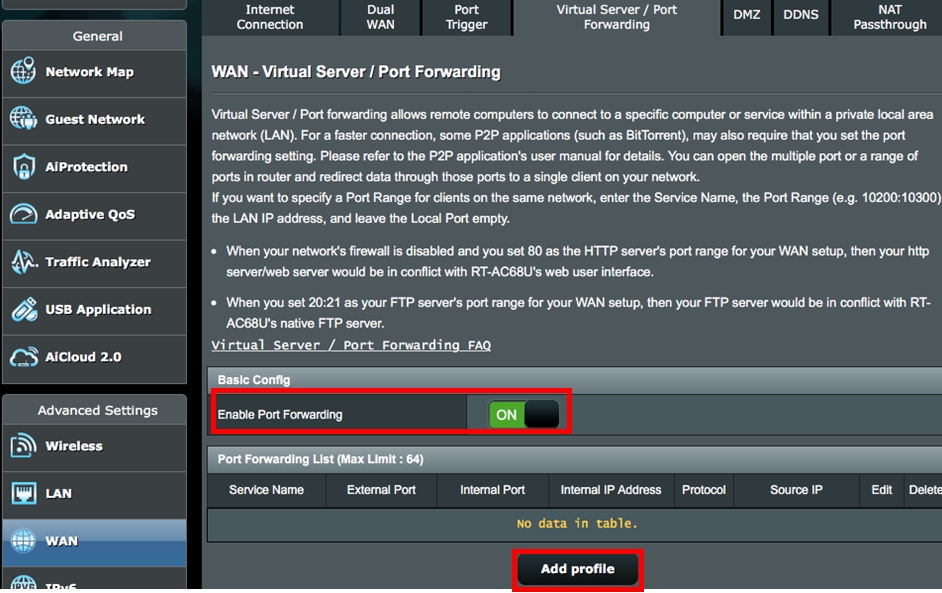 Field ExplanationsExternal Port: This field accepts the following formats
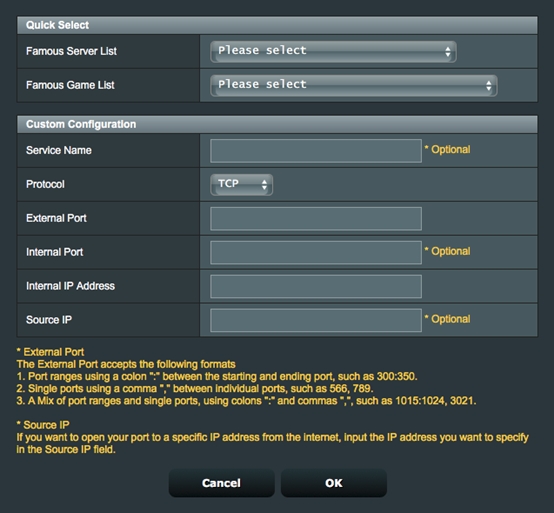
- Port ranges using colon “:”between the starting and ending port, such as 300:500.
- Single Ports using a comma “,”between individual ports, such as 566, 789.
- A mix of port ranges and single ports, using colons “:”, such as 1015:1024, 3021.
Source IP: If you want to open your port to a specific IP address from the Internet, input the IP address you want to specify in the Source IP field.
The following details how to use the port forwarding feature to set up HTTP and FTP servers.
How Do You Configure Port Forwarding for a HTTP Server?
Before setting up a port forwarding rule for a HTTP server, a PC using the Internet cannot connect to your server/PC via HTTP. Please refer to the steps below to complete the setup process.
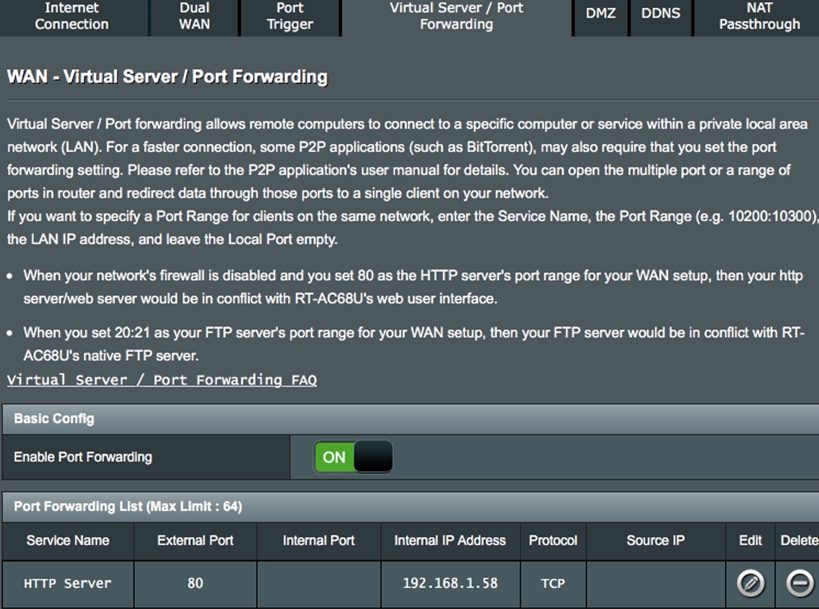
Step 1. On the Virtual Server/Port Forwarding page, enable Port Forwarding and click «Add profile«.
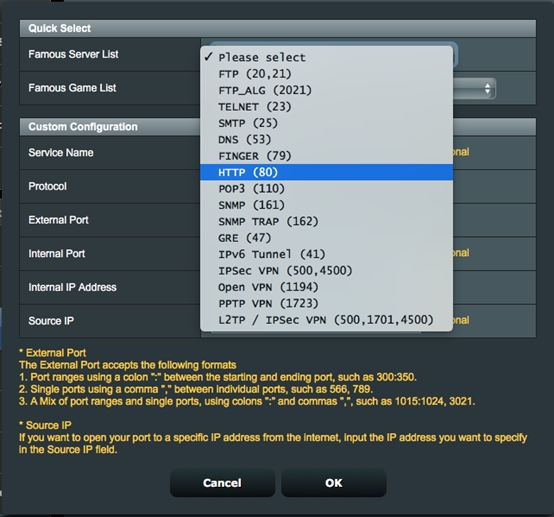
Step 2. Select HTTP (80) from the quick select list.
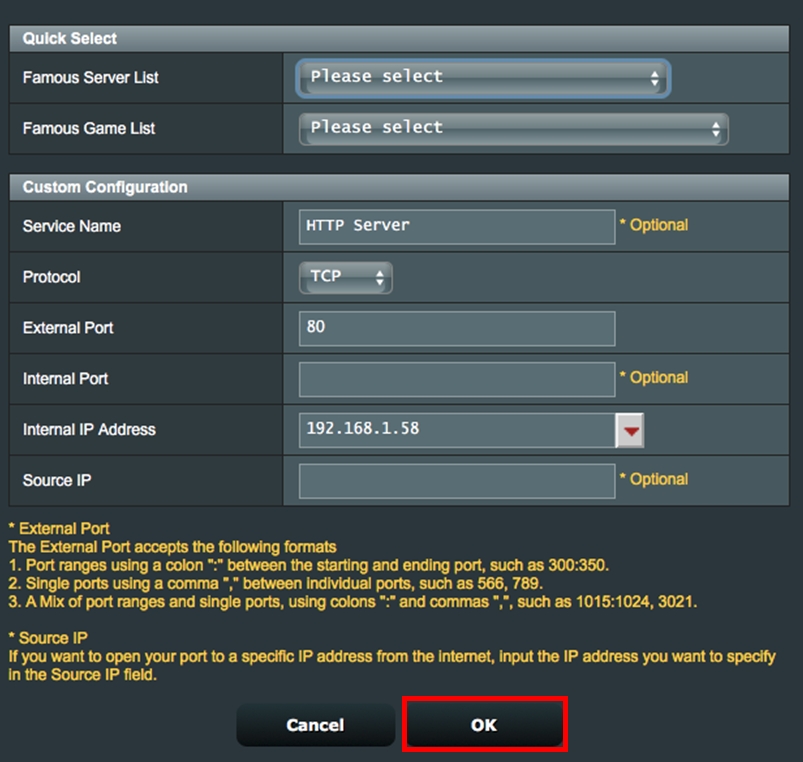
Step 3. The system will automatically fill in port 80 as the External Port and will choose the Internal IP Address. (In this demo, the Internal IP address is 192.168.1.58. Please change this to your actual address.)
Step 4. Click OK.
How to Check if a HTTP Server Has Been Successfully Set Up?
Step 1. Confirm your HTTP server is all set up.
Step 2. You need a PC connected to the Internet instead of under LAN.
Step 3. Open the browser on this PC and key in WAN IP of your router. If you can access the web page on the HTTP server, your port forwarding rule has been successfully set up.
How to Configure Port Forwarding for a FTP server?
This system supports dual FTP server services. You can use «FTP» and «FTP_ALG», which can be found in the quick select list, when setting up your port forwarding rules. We have provided guides to teach users how to set up port forwarding for FTP servers in 4 scenarios.
Note: The port forwarding device can be connected to AiMesh node and all setting should be configured from primary router.
Scenario 1 : You only have a LAN PC/NAS as a FTP server.
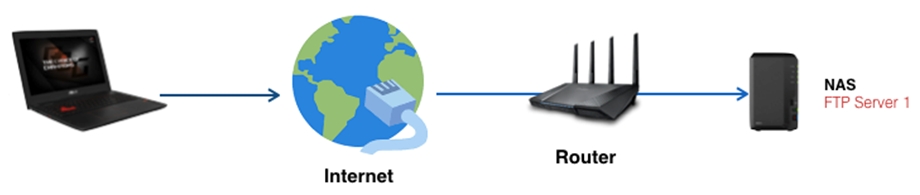
Use FTP (20, 21) in the quick select list and then follow the steps below to add a new rule. Click here for detailed steps.
Scenario 2 : You have two FTP servers. One is this router, and the other is a LAN PC/NAS.
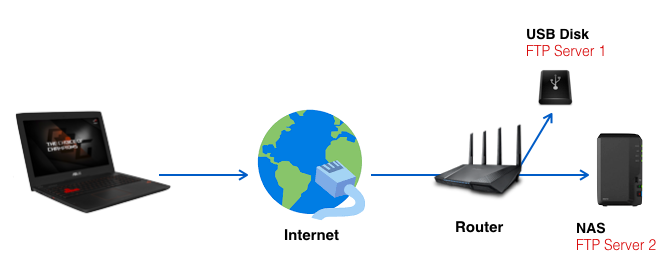
Please add the two rules for each server.
- Rule 1 If the current router is a FTP server: Use FTP (20,21) in the quick select list.
- Rule 2 for a LAN PC/NAS: Use FTP_ALG(2021) in the quick select list. Click here for detailed steps.
Scenario 3 : You have two LAN PC/NAS as FTP servers.
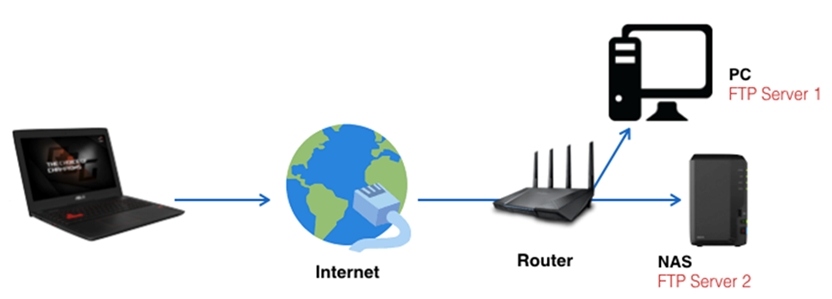
Please add two rules for each server.
- Rule 1 for the 1 st LAN PC/NAS as a FTP server: Use FTP(20,21) in the quick select list.
- Rule 2 for the 2 nd LAN PC/NAS as a FTP server: Use FTP_ALG(2021) in the quick select list. Click here for detailed steps.
Scenario 4 : You only have this current router as a FTP server.
You can use the default port (21) without adding any rules on the port forwarding setup page. Click here for detailed steps.
Frequently Asked Question(FAQ)
1. Is it possible to configure port forwarding rules for IPv6, or is it only applicable to IPv4?
Port forwarding is currently not supported for IPv6, and we currently do not have plans to support it.
How to get the (Utility / Firmware)?
You can download the latest drivers, software, firmware and user manuals in the ASUS Download Center.
If you need more information about the ASUS Download Center, please refer this link.
Как открыть порты на роутере Asus
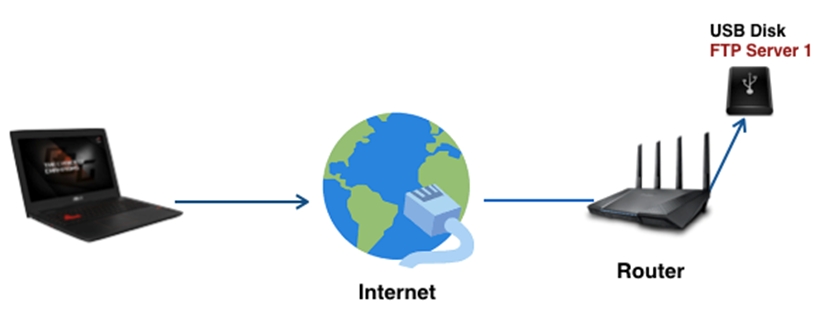
Если вы используете роутер для подключения к Интернету, то вы наверняка сталкивались с тем, что к вам никто не может подключиться по Интернету. Это происходит из-за того, что внешний IP адрес есть только у роутера, тогда как компьютеры внутри сети получают внутренние IP адреса.
Решить эту проблему можно с помощью открытия портов. В данной статье мы продемонстрируем, как открыть порты на роутере Asus.
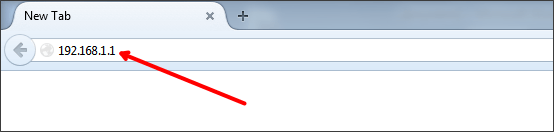
Шаг № 1. Войдите в веб-интерфейс роутера.
Для того чтобы открыть порты на роутере Asus вам необходимо войти в его веб-интерфейс. Делается это очень просто. Откройте любой браузер и в адресную строку введите IP адрес вашего роутера. Обычно роутеры Асус доступны по IP адресу 192.168.1.1. Если же данный IP адрес не подойдет, то попробуйте 192.168.0.1. В большинстве случаев по одному из этих адресов и доступен ваш роутер.
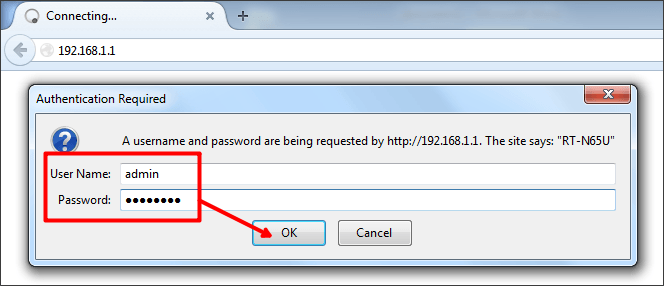
После ввода IP адреса на экране появится всплывающее меню с требование ввести логин и пароль для доступа к веб-интерфейсу. В зависимости от вашего веб-браузера это окно может выглядеть по-разному. В Браузере Mozilla Firefox данное окно выглядит так, как на скриншоте внизу.
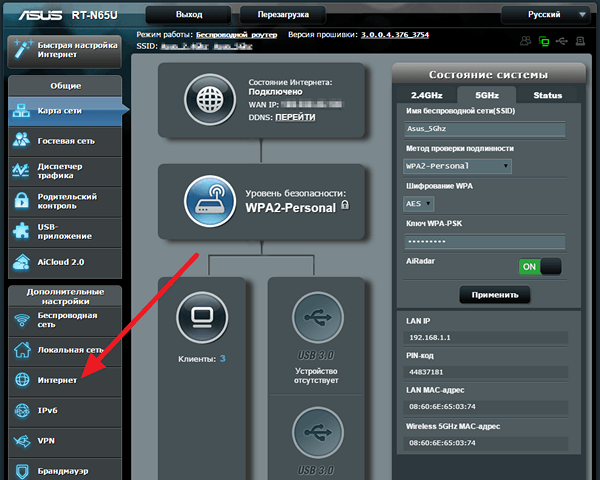
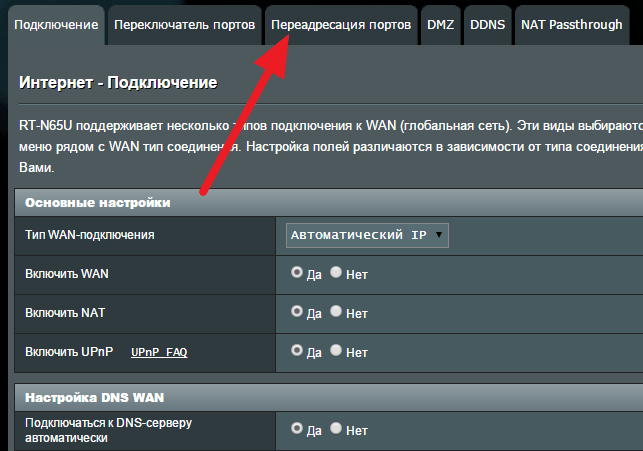
Шаг № 2. Переходим в раздел «Интернет» на вкладку «Переадресация портов».
После ввода правильного логина и пароля от роутера перед вами откроется главная страница веб-интерфейса. На роутерах Asus она выглядит примерно так, как на скриншоте внизу. Теперь, когда у вас есть доступ к веб-интерфейсу, можно приступать к настройке.
Для того чтобы открыть порты на роутере Asus вам необходимо перейти в раздел «Интернет», который находится блоке «Дополнительные настройки» (указано стрелкой).
После открытия разделf «Интернет» вам необходимо перейти на вкладку «Переадресация портов» (указано стрелкой).
Шаг № 3. Включаем переадресацию портов и открываем нужные нам порты.
После попадания на вкладку «Переадресация портов» вы увидите два блока настроек «Основные настройки» и «Список переадресованных портов». В блоке основных настроек вам нужно включить переадресацию портов (переадресация портов и открытие портов это одно и тоже). Для этого просто переместите переключатель в положение «Да».
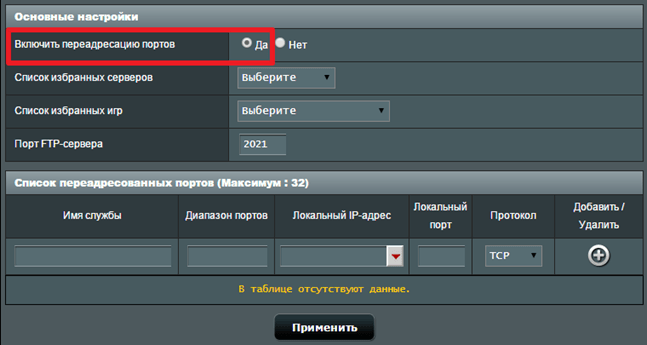
После этого можно начинать открывать порты. Для этого нужно заполнить форму в верху списка портов, нажать на кнопку «Добавить» и сохранить настройки нажатием на кнопку «Применить» (скриншот внизу).
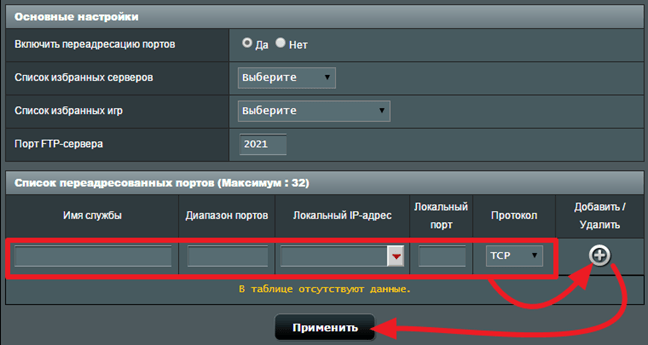
Заполнять данную форму достаточно просто. Сейчас мы рассмотрим все поля, которые нужно заполнить для того чтобы открыть порт на роутере Asus.
- Имя службы – просто название службы или программы, которая будет использовать данный порт. Это информационное поле и на работу открытого порта оно никак не влияет.
- Диапазон портов – диапазон портов или один порт, трафик по которому будет перенаправляться на выбранный вами компьютер.
- Локальный IP адрес – внутренний IP адрес компьютера, для которого вы хотите открыть порты.
- Локальный порт – номер порта на локальном компьютере, который должен получать перенаправляемый трафик.
- Протокол – протокол, трафик по которому должен передаваться. Можно указать TCP, UDP, BOTH (все протоколы) или OTHER (другие).
Важное замечание. В большинстве случаев в поле диапазон портов и в поле локальный порт, указывается один и тот же порт. Это тот порт, который вы хотите открыть.
Например, если вы хотите открыть порт 27016 для игры Counter-strike, то вам нужно ввести в таблицу следующие данные:
- Имя службы – Counter-strike;
- Диапазон портов – 27016;
- Локальный IP адрес – ваш локальный IP адрес, например, 192.168.1.233.
- Локальный порт – 27016;
- Протокол – BOTH;
После заполнения формы нужно нажать на кнопку «Добавить» и на кнопку «Применить». Для того чтобы было понятней приводим скриншот с заполненной формой.

На этом открытие портов на роутере Asus можно считать законченным. После применения настроек можно проверять результат, если все было сделано правильно, то порт должен быть открыт.