- Oysters T72ER 3G: Root and Install TWRP Recovery
- Android Rooting Process
- What is Rooting An Android Device Mean?
- Disclaimer
- Pre-Requisites
- How To Root Oysters T72ER 3G and Install TWRP Recovery
- Unlock the Bootloader Of Oysters T72ER 3G
- How To Install TWRP Recovery On Oysters T72ER 3G
- How to Root Oysters T72ER 3G
- How To UnRoot Oysters T72ER 3G
- Oysters T72ER 3G
- Характеристики Oysters T72ER 3G
- Прошивка для Oysters T72 3G
- Заводская прошивка T72M-3G_fw_20140823 для Oysters T72M 3G
- Cкачать:
Oysters T72ER 3G: Root and Install TWRP Recovery
How To Root Oysters T72ER 3G and Install TWRP Recovery: The Oysters T72ER 3G was released in 2015 and it was an entry-level Android Tablet. It has a 7-inch TFT display screen with 1024×600 Pixel Screen Resolution. It is powered by MediaTek MTK 8312 CPU with ARM Cortex-A7, 1300 MHz, 4 Cores processor coupled with 512 MB LPDDR3 RAM and 4 GB ROM storage capacity. It houses non-removable 2000 mAh Lithium-Ion battery. It runs on Android 4.4 KitKat out of the box and its other features include Wi-Fi, a 0.3 MP front camera, Bluetooth, OTG Support, USB, and more.
Now here we come with a full working guide on how to install TWRP Recovery and Root Oysters T72ER 3G. While rooting you have to be very careful and proceed with great caution, anything wrongs you may get your device bricked. Rooting Oysters T72ER 3G gives you additional benefits like you can install special apps, flash custom ROMs, you can streamline your phone performance and many extra features. The real performance of an Android smartphone can only be unlocked once it is rooted. Rooting your Oysters T72ER 3G, lets the user flash different Custom MODs, ROMs, and such stuff onto the device.
If you own a Oysters T72ER 3G device and wanted to root your device for quite some time then this post is the best place for you to be. Here, we will give you all the basic information you need to have before you begin to root your device. We will also give you the answers to the frequently asked questions like What is rooting? How do you root an Android device? What benefits does rooting have?
Android Rooting Process
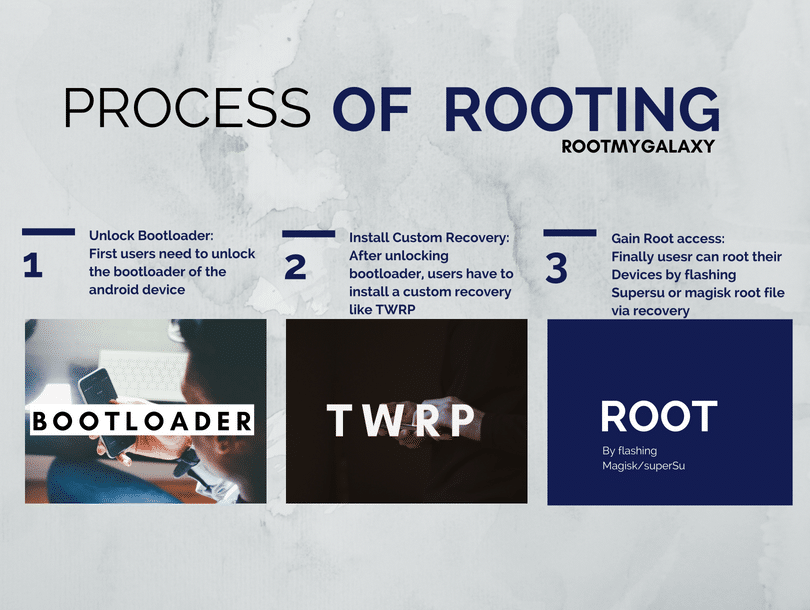
Rooting may seem very difficult but it is not. In the earlier days, users were afraid to root their device as there were not many guides available and the process was very hard, but now things have changed. Nowadays, rooting is very simple and can be achieved in a few minutes. First, you have to unlock the bootloader, after which you can install TWRP recovery. Once TWRP is installed, you can root the device by flashing supersu or magisk root file.
New Android 9.0 Pie ROMs
Now here we come with a full working guide on how to install TWRP Recovery and Root Oysters T72ER 3G. While rooting you have to be very careful and process with great caution, anything wrongs you may get your device bricked. If you want to root your device without a PC or Laptop using one click root tools, then you can follow our guide linked below.
If you are new to TWRP recovery and rooting then here we first share some facts about Android rooting.
What is Rooting An Android Device Mean?
Rooting is the process of gaining full admin control of the Android device. You can use the device to its full potential,‘Rooting’ means giving yourself special privilege or “root permissions” on your phone. It’s similar to running plus grams as administrators in Windows.
After rooting your device you can install different MODs, kernel, ROMs on your device. You can install the latest Android updates (like the Android 6.0.1 Marshmallow) On old device by installing third party ROMs like CyanogenMod 13. You can overclock the CPU and GPU of your device to get the best performance. You can hibernate any app you want. You can underclock the CPU to get better battery life.
For more information about Android rooting, check out our detailed post here > What Is Rooting Android Phone? Advantages And Disadvantages
Disclaimer
rootmygalaxy.net will not be held responsible for any kind of damage occurred to your device while following this tutorial. Do it at your own risk.
Pre-Requisites
- Make sure that the USB drivers for your Android device are installed on the PC.
- Follow the below Guide Exactly or else it may lead to brick your device. RootMyGalaxy.net is not responsible for any damage.
- Enable USB Debugging. Guide >How to Enable Developer Options, USB Debugging and OEM Unlock on Android
- Take a Full backup of your device. If you have TWRP installed on your device, then create a nandroid backup.
- Maintain 50-60% battery to prevent sudden shut down between the process.
How To Root Oysters T72ER 3G and Install TWRP Recovery

Unlock the Bootloader Of Oysters T72ER 3G
How To Install TWRP Recovery On Oysters T72ER 3G
First You should try rooting tools as they are safe, Root Any Device Without PC: How To Root Any Android Mobile Without PC or Laptop. If this doesn’t work you can try the regular TWRP method.
Disclaimer: There are thousands and thousands of Android devices in the world so it is not possible to test all the TWRP recovery. Here we only share files which are already shared in the internet. So it is recommended to test these at your own risk and to be on safer side, please keep a backup of your current files.
The first method you can Install the TWRP recovery then flash the SuperSu or Magisk to get your device rooted
- Check out the Pre-Requirement Section above (Important)
- Make sure your device’s bootloader is unlocked. Check out the link given above to unlock the bootloader if you haven’t done it yet
- First of all, make sure you have followed each and every step mentioned in the pre-requisites section
- After that, you have to download the TWRP Recovery
- Once transferred, follow this guide from below to install TWRP recovery on your device
Note: Find the Scatter File from the stock ROM zip file of the device. You can find the stock ROM file zip on the internet or on our website. Rename the TWRP (.img) file to recovery.img. Now, on the flash tool interface, navigate and select the scatter file and At this stage, just leave the recovery as ticket/ checked. Now, at the location tab, click on the storage location field of the recovery and search and browse for the custom recovery image file which is device-specific
[su_button url=”https://rootmygalaxy.net/download-smart-phone-flash-tool-sp-flash-tool/” target=”blank” style=”flat” background=”#3da30d” color=”#ffffff” size=”4″ wide=”yes” center=”yes” radius=”round” icon=”icon: download” icon_color=”#ffffff” text_shadow=”0px 0px 0px #010c16″]Download Smart Phone Flash Tool (SP Flash Tool)[/su_button]
[su_button url=”https://rootmygalaxy.net/flash-mediatek-stock-roms-sp-flash-tool-mtk-android-smartphones/” target=”blank” style=”flat” background=”#f9396c” color=”#ffffff” size=”5″ wide=”yes” center=”yes” radius=”5″ icon=”icon: location-arrow” icon_color=”#ffffff” text_shadow=”0px 0px 0px #010c16″]How to Flash TWRP With SP Flash Tool[/su_button]
How to Root Oysters T72ER 3G
After Installing the TWRP recovery on your device, you can boot into TWRP recovery by following the linked guide.Then you can flash the Supersu or Magisk to get root access on your device.
[su_button url=”https://rootmygalaxy.net/different-ways-to-boot-into-android-recovery-mode/” target=”blank” style=”flat” background=”#000000″ color=”#ffffff” size=”5″ wide=”yes” center=”yes” radius=”5″ icon=”icon: external-link-square” icon_color=”#aaf4a7″ text_shadow=”0px 0px 0px #010c16″]How To to Boot Into Recovery Mode On Android (Various Ways)[/su_button]
#1 Using SuperSu (Root Oysters T72ER 3G )
- Download the latest supersu zip
- Now follow the given guide to Install SuperSu On your device to get root access
[su_button url=”https://rootmygalaxy.net/flash-supersu-using-TWRP-recovery-root-any-android-device/” target=”blank” style=”flat” background=”#000000″ color=”#ffffff” size=”5″ wide=”yes” center=”yes” radius=”5″ icon=”icon: external-link-square” icon_color=”#aaf4a7″ text_shadow=”0px 0px 0px #010c16″]How To Flash SuperSU using TWRP Recovery & Root Any Android device[/su_button]
#2 Using Magisk (Root Oysters T72ER 3G )
- Download the latest Magisk
- Now follow the guide to flash magisk via TWRP to get root access on your device
[su_button url=”https://rootmygalaxy.net/install-magisk-on-android/” target=”blank” style=”flat” background=”#000000″ color=”#ffffff” size=”5″ wide=”yes” center=”yes” radius=”5″ icon=”icon: external-link-square” icon_color=”#aaf4a7″ text_shadow=”0px 0px 0px #010c16″]How To Install Magisk On Android Device [Universal Systemless Interface for Android][/su_button]
How To UnRoot Oysters T72ER 3G
Hope you enjoy reading this article keep visiting us for such amazing updates your smartphone. If you have any queries please leave that in the comment section we will try to reach you as soon as possible. and Install TWRP Recovery
An NIT Rourkela Graduate in CS, Blogger, Android Geek, and a Tennis Fanatic. I have been writing about Android OS for Last 8 years.
Oysters T72ER 3G

Перед приобретением Oysters T72ER 3G по самой низкой цене, изучите характеристики, видео обзоры, плюсы и минусы модели, отзывы покупателей.
Характеристики Oysters T72ER 3G
Дисплей *
| Широкоформатный экран | да |
| Тип ЖК-матрицы | TFT, глянцевый |
| Тип сенсорного экрана | емкостный, мультитач |
| Число пикселей на дюйм | 170 |
| Диагональ | 7 |
Память *
| Слот для карты памяти | есть, microSDHC, до 32 ГБ |
| Размер встроенной памяти | 4 ГБ |
| Размер оперативной памяти | 512 МБ |
Поддерживаемые соединения *
| Работа в режиме сотового телефона | есть |
| Bluetooth | есть |
| Wi-Fi | есть, Wi-Fi 802.11n |
| Мобильная связь | 3G, EDGE, GPRS, GSM900, GSM1800, GSM1900 |
Интерфейсы *
| Выход аудио/наушники | есть, 3.5 мм |
| Подключение внешних устройств по USB | опционально |
| Подключение к компьютеру по USB | есть |
Функциональность *
| A-GPS | есть |
| FM-тюнер | есть |
| Автоматическая ориентация экрана | есть |
| Датчики | акселерометр |
* Точные параметры уточняйте на сайте продавца.
Прошивка для Oysters T72 3G
Если вам требуется прошивка Oysters T72 3G — напишите в этой теме полный номер вашей модели и нужную версию андройд!
| Похожие темы | Форум |
| Root права на Oysters T72 3G | Другие производители |
| Oysters T72 3G MT8312 | MediaTek |
| Прошивка для Oysters T84M 3G | Другие производители |
| Самопроизвольная установка приложений на планшете Oysters T72 3G | Другие производители |
| Oysters T72 3G | Планшеты |
привет. на KitKat, к сожалению, на твой планшет ничего нету. Или у тебя именно проблема с планшетом и надо перепрошить? Устройство работает? Root если что можешь получить при помощи framaroot
Пожалуйста помогите сделать рут права на планшете Oysters T72HRi 3G
купил карту памяти на 8 гигов, а толку от нее никакого ((((((
возможно ли что то сделать.
Пожалуйста помогите сделать рут права на планшете Oysters T72HRi 3G
купил карту памяти на 8 гигов, а толку от нее никакого ((((((
возможно ли что то сделать.
попробуй с помощью Vroot
можешь скачать свежую версию с оф. сайта
если не будет определяться планшет в программе, тогда установи этот драйвер
p.s. Отладка по USB в настройках планшета должна быть включена обязательно (Настройки-> Для разработчиков), также должна быть разрешена установка из неизвестных источников (Настройки -> Безопасность)
Заводская прошивка T72M-3G_fw_20140823 для Oysters T72M 3G
- Driver_Auto_Installer.zip — драйвера для установки по инструкции
- SP_Flash_Tool.zip — программа для прошивки
Cкачать:
убедится что прошивка реально подоходит тебе и прошиться еще раз.
можно попробовать отформатировать полностью устройство через SP Flash Tool и прошиться. у тебя Oysters T72 3G? файлы для прошивки брал из поста выше?
Помогите понять причину!
На Oysters T72M 3G каждый день слетает прошивка (прошивку скачал из поста выше,а также пробовал с других сайтов). Утром вместе с кофе прошиваю, целый день работает нормально (почти всегда), вечером заряжаю до ста процентов — утром прошивка слетает. Пробовал заряженный планшет выключать на ночь. Утром все на кругах своя. Все бы ничего, только надоедает утренняя процедура и слет прошивки в самый неподходящий момент.
Заранее благодарен за совет.
что-то в аппаратной части скорее всего, в СЦ на диагностику нужно сдавать планшет
какие приложения устанавливаешь после прошивки? может проблема в каком-то из них? рут получаешь сразу после прошивки?
если есть ещё гарантия — неси, пускай меняют