- Parallels desktop установка linux
- Установка Linux ARM
- Была ли эта статья полезной?
- Parallels desktop установка linux
- Information
- Resolution
- Была ли эта статья полезной?
- Parallels desktop установка linux
- Information
- Resolution
- Была ли эта статья полезной?
- Parallels desktop установка linux
- Question
- Information
- Installing CentOS using Free Systems
- Installing CentOS using an installation image (Express mode)
- Manual Installation (Gnome and KDE desktop environment)
- Была ли эта статья полезной?
Parallels desktop установка linux
- Актуально для:
- Parallels Desktop for Mac Standard Edition
- Parallels Desktop for Mac Pro Edition
- Parallels Desktop for Mac App Store Edition
- Последняя проверка: Янв 31, 2023
- Доступные переводы:

- Получить обновленияСкачать
Установка Linux ARM
В Parallels Desktop, в главном меню Помощника по установке, Вы можете загрузить набор готовых виртуальных машин Linux:

Для того, чтобы установить другой дистрибутив Linux ARM, пожалуйста, используйте загрузочный установочный образ ISO, но убедитесь, что это образ на основе ARM.
Была ли эта статья полезной?
Как, по вашему мнению, можно улучшить эту статью?
Parallels desktop установка linux
![]()
- Актуально для:
- Parallels Desktop for Mac Standard Edition
- Parallels Desktop for Mac Pro Edition
- Parallels Desktop for Mac Business Edition
- Parallels Desktop
- Последняя проверка: Янв 23, 2018
- Связанные статьи:
- Unable to install Parallels Tools in CentOS 5 with 2.6 kernel
- Parallels Tools installation in Kali Linux Virtual machines
- Доступные переводы:
- Получить обновленияСкачать
Information
This page provides instructions on installing Debian Linux on your Mac for the first time to use with Parallels Desktop.
Resolution
- Download the latest Debian .iso image file from debian.org.
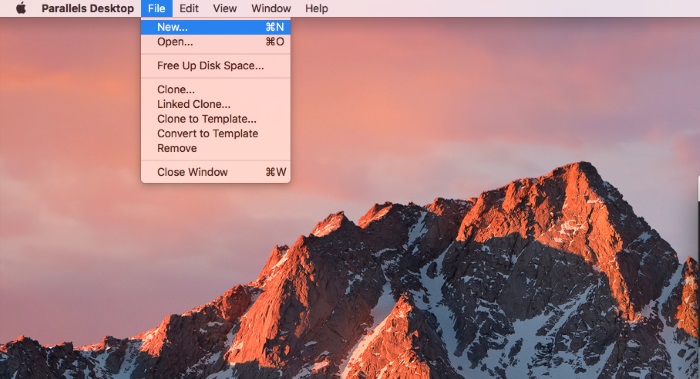
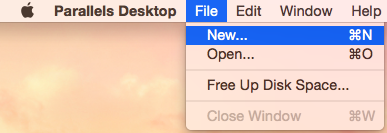
- Start Parallels Desktop, then click File -> New.
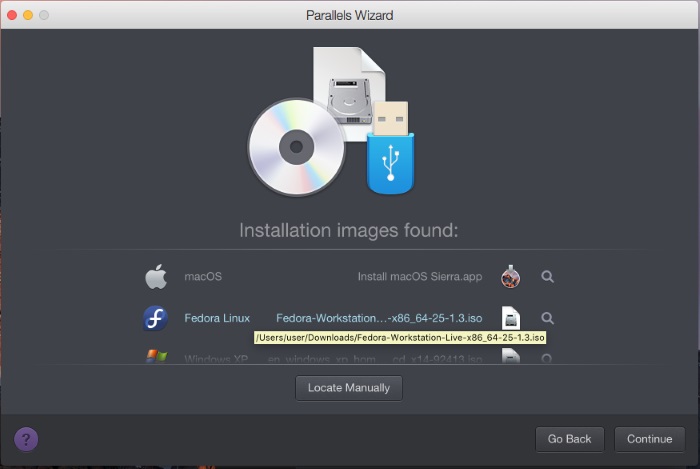
- Choose «Install Windows or another OS from a DVD or and image file», then click Continue.
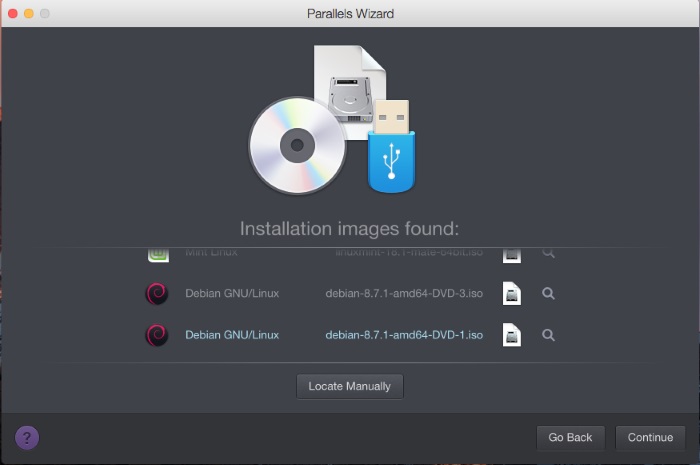
- Choose Debian Linux from the list of the operating system sources found on your Mac, then click Continue.
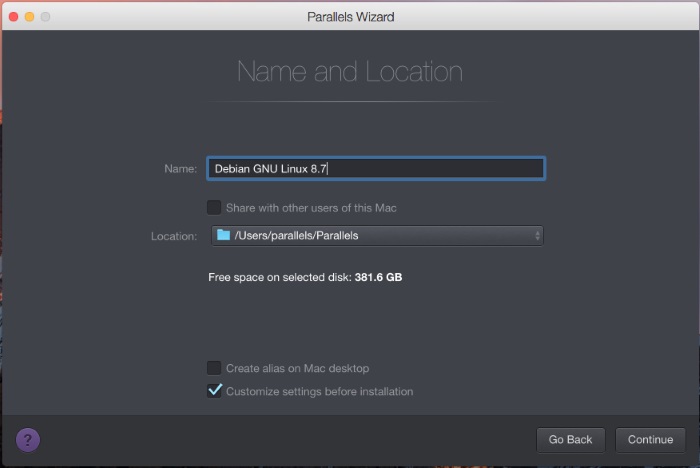
- Specify the name and location of your virtual machine or leave the default settings, then click Continue.
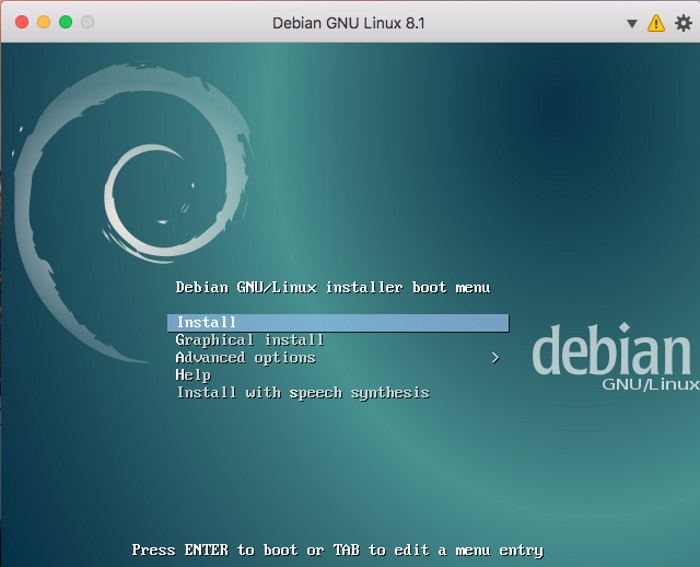
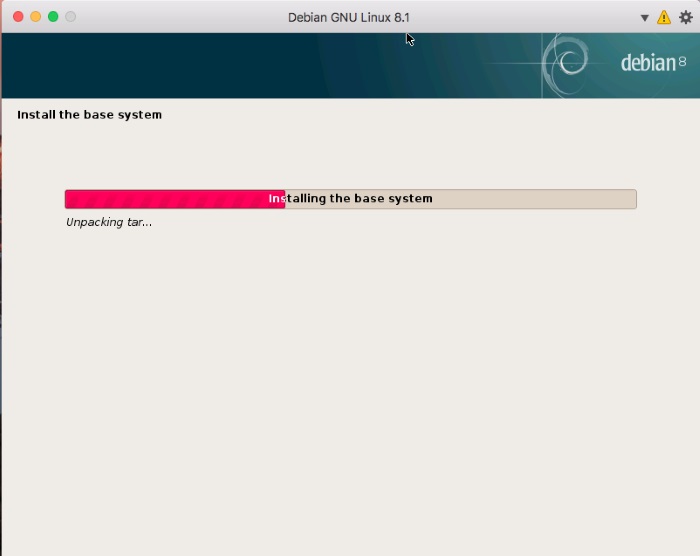
- The Debian virtual machine will be created and Debian installation setup screen will appear. Click inside the virtual machine screen, then select «Graphical Install».
- Go through the Debian installation wizard.
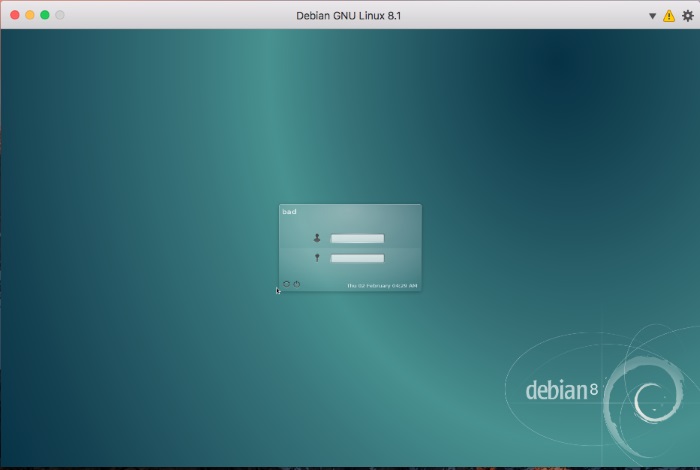
- Wait till installation is complete, then reboot your virtual machine. Log into Debian VM
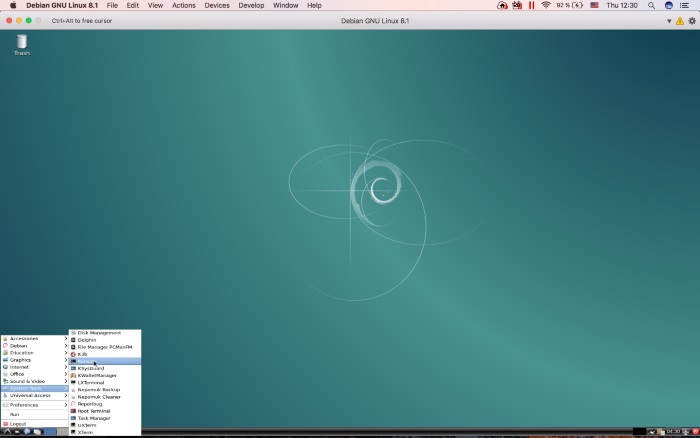
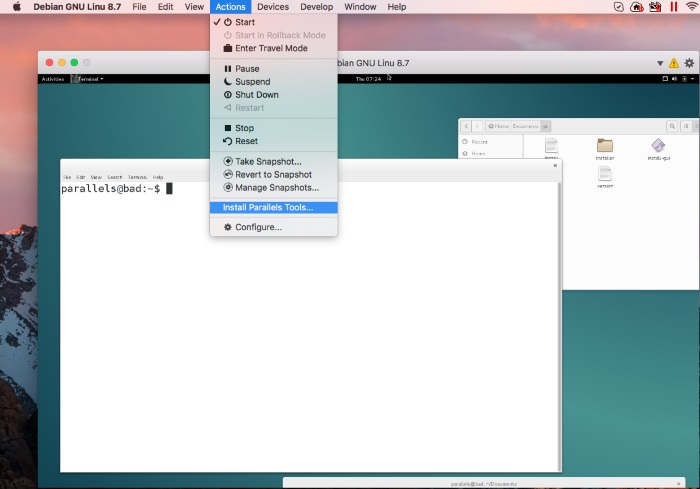
- Update Debian environment to the latest version. Also make sure that essential packages are installed as well. IMPORTANT: Before installing Parallels Tools and/or updating Debian VM we recommend to create a fresh snapshot for your Debian Virtual Machine (VM). Launch Debian Konsole (Terminal) Copy and execute the following command:

 Copy and execute the following command:
apt-get clean apt-get update apt-get upgrade -y apt-get dist-upgrade -y apt-get install linux-headers-$(uname -r) make gcc dkms kpartx 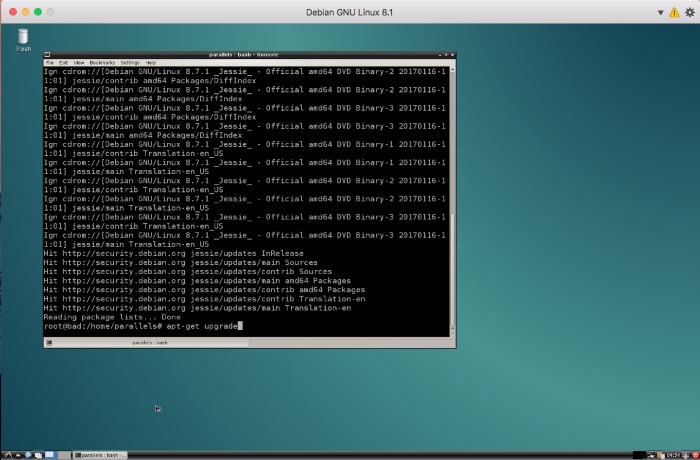
 Execute following commands in Debian Terminal:
 mkdir /home//Documents/pt cp -r /media/cdrom0 /home//Documents/pt su chmod -R 777 /home//Documents/pt cd /home//Documents/pt ./install 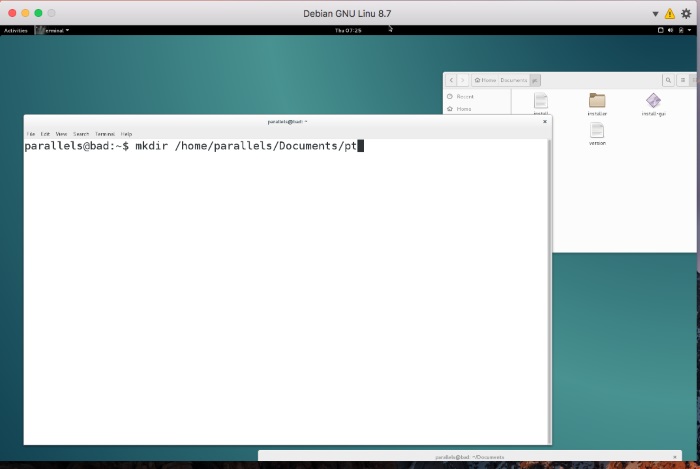
You will get an error message about missing printer driver, please ignore it and click OK
IMPORTANT: In order to be able to use Coherence view mode in Debian Linux VM, please check Disabling Desktop Visual Effects in Linux virtual machines
Была ли эта статья полезной?
Как, по вашему мнению, можно улучшить эту статью?
Parallels desktop установка linux
![]()
- Актуально для:
- Parallels Desktop for Mac Standard Edition
- Parallels Desktop for Mac Pro Edition
- Parallels Desktop for Mac Business Edition
- Parallels Desktop for Mac App Store Edition
- Последняя проверка: Апр 22, 2019
- Связанные статьи:
- Disabling Desktop Visual Effects in Linux virtual machines
- Доступные переводы:
- Получить обновленияСкачать
Information
This page has instructions on installing Fedora Linux on your Mac for the first time to use with Parallels Desktop.
Fedora Workstation is distributed as a Live image that is why it is not possible to use the Express installation method. The instructions below will guide you through the manual installation process.
Resolution
- Download latest Fedora .iso image file from getfedora.org or one of the official mirrors.
- Start Parallels Desktop, then click File -> New.
- Choose «Install Windows or another OS from a DVD or and image file», then click Continue.
- Choose Fedora Linux from the list of the operating system sources found on your Mac, then click Continue.
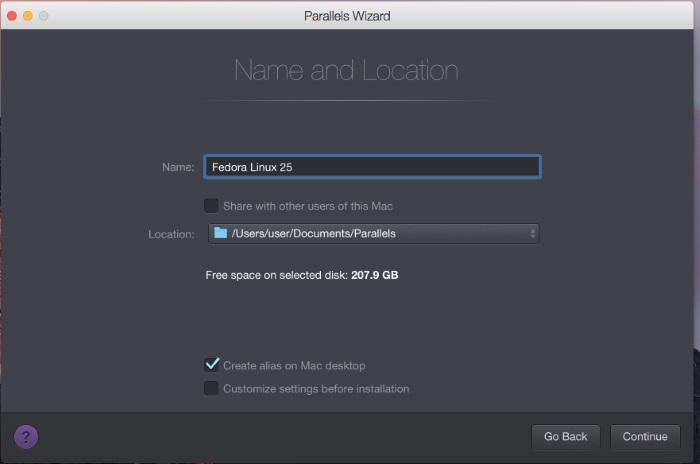
- Specify the name and location of your virtual machine or leave the default settings, then click Continue.
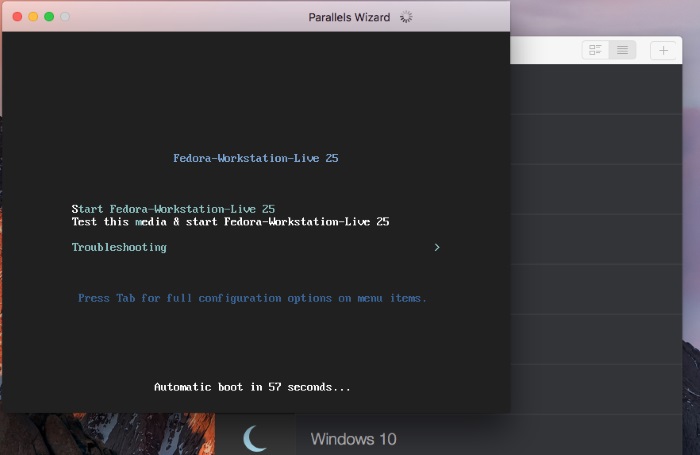
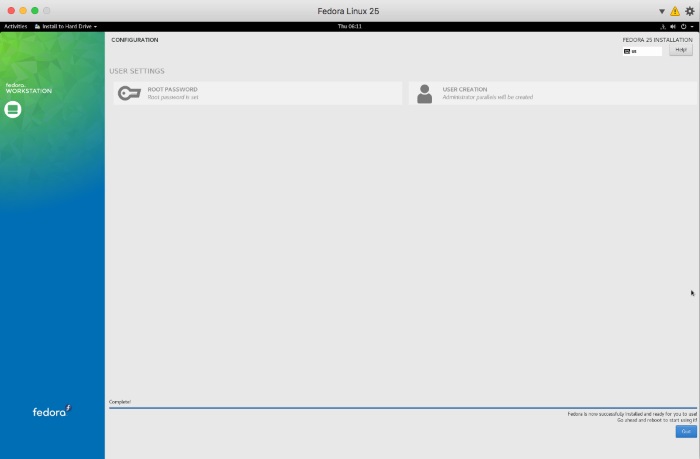
- The Fedora virtual machine will be created and the Fedora welcome screen will appear. Click inside the virtual machine screen, then choose «Install to Hard Drive». Click inside the virtual machine screen, then choose «Install to Hard Drive».
- Choose your language of installation, then click Continue.
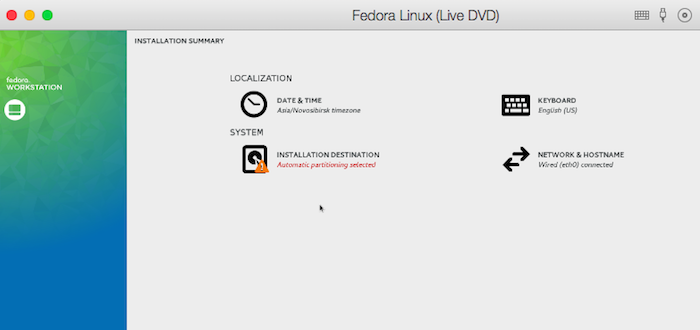
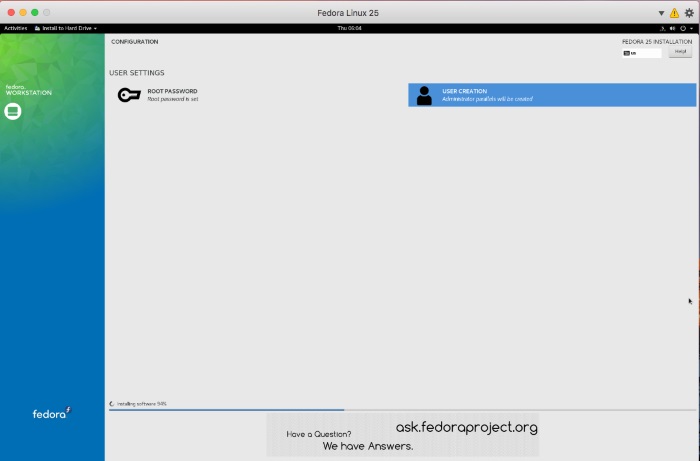
- Go through the Fedora installation wizard. Specify:
- Installation destination. The way you partition the virtual hard disk for the installation.
- Root password
- Your user login name and password
- Installation destination. The way you partition the virtual hard disk for the installation.
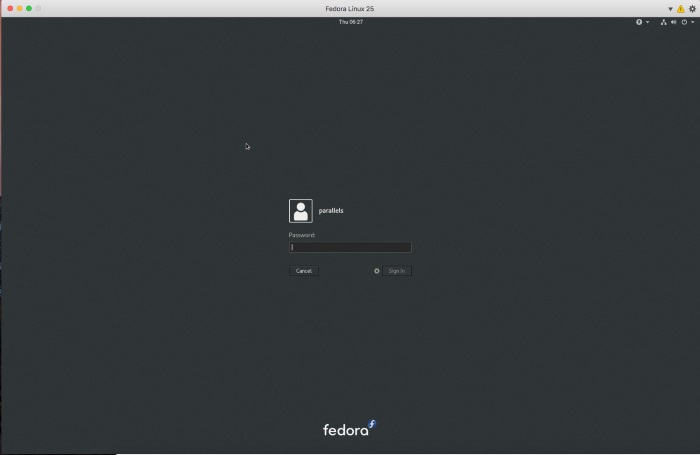
- Wait till installation is complete, then reboot your virtual machine.
- Log into Fedora VM.
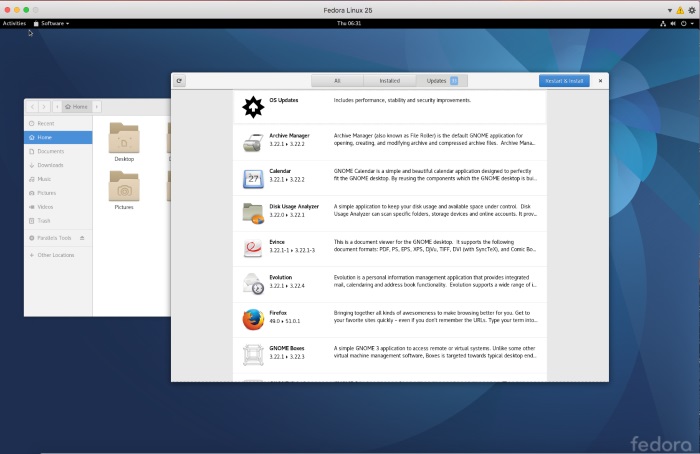
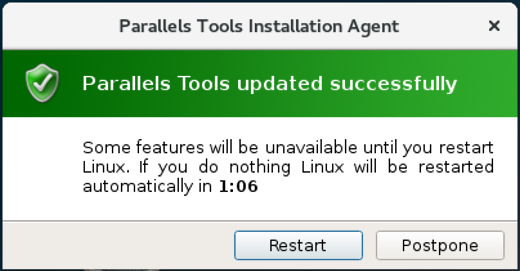
- Update Fedora environment to the latest version. Also make sure that essential packages are installed as well. IMPORTANT: Before installing Parallels Tools and/or updating Fedora VM we recommend to create a fresh snapshot for your Fedora Virtual Machine (VM).
- Restart Fedora Linux VM.
- Launch Parallels Tools installation:
- Once Parallels Tools installation is complete, restart Fedora VM.
- That’s it. Parallels Tools are now installed for your Fedora Linux VM.

 Click inside the virtual machine screen, then choose «Install to Hard Drive».

 IMPORTANT: Before installing Parallels Tools and/or updating Fedora VM we recommend to create a fresh snapshot for your Fedora Virtual Machine (VM).
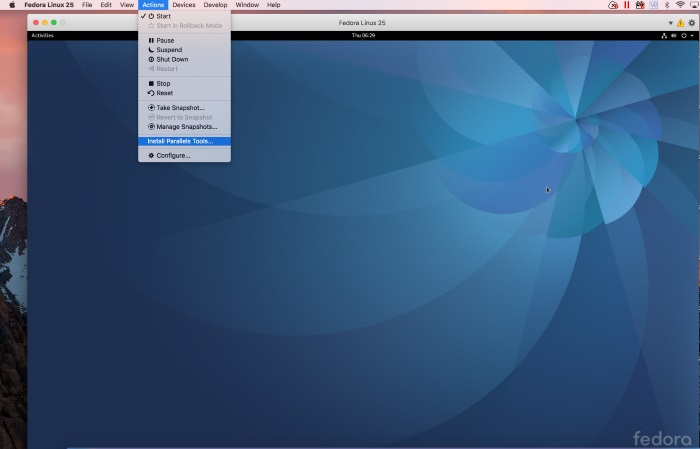
IMPORTANT: In order to be able to use Coherence view mode in Fedora Linux VM, please check Disabling Desktop Visual Effects in Linux virtual machines
Была ли эта статья полезной?
Как, по вашему мнению, можно улучшить эту статью?
Parallels desktop установка linux
![]()
- Актуально для:
- Parallels Desktop for Mac Standard Edition
- Parallels Desktop for Mac Pro Edition
- Parallels Desktop for Mac Business Edition
- Parallels Desktop for Mac App Store Edition
- Последняя проверка: Июл 30, 2020
- Связанные статьи:
- Disabling Desktop Visual Effects in Linux virtual machines
- Доступные переводы:
- Получить обновленияСкачать
Question
Information
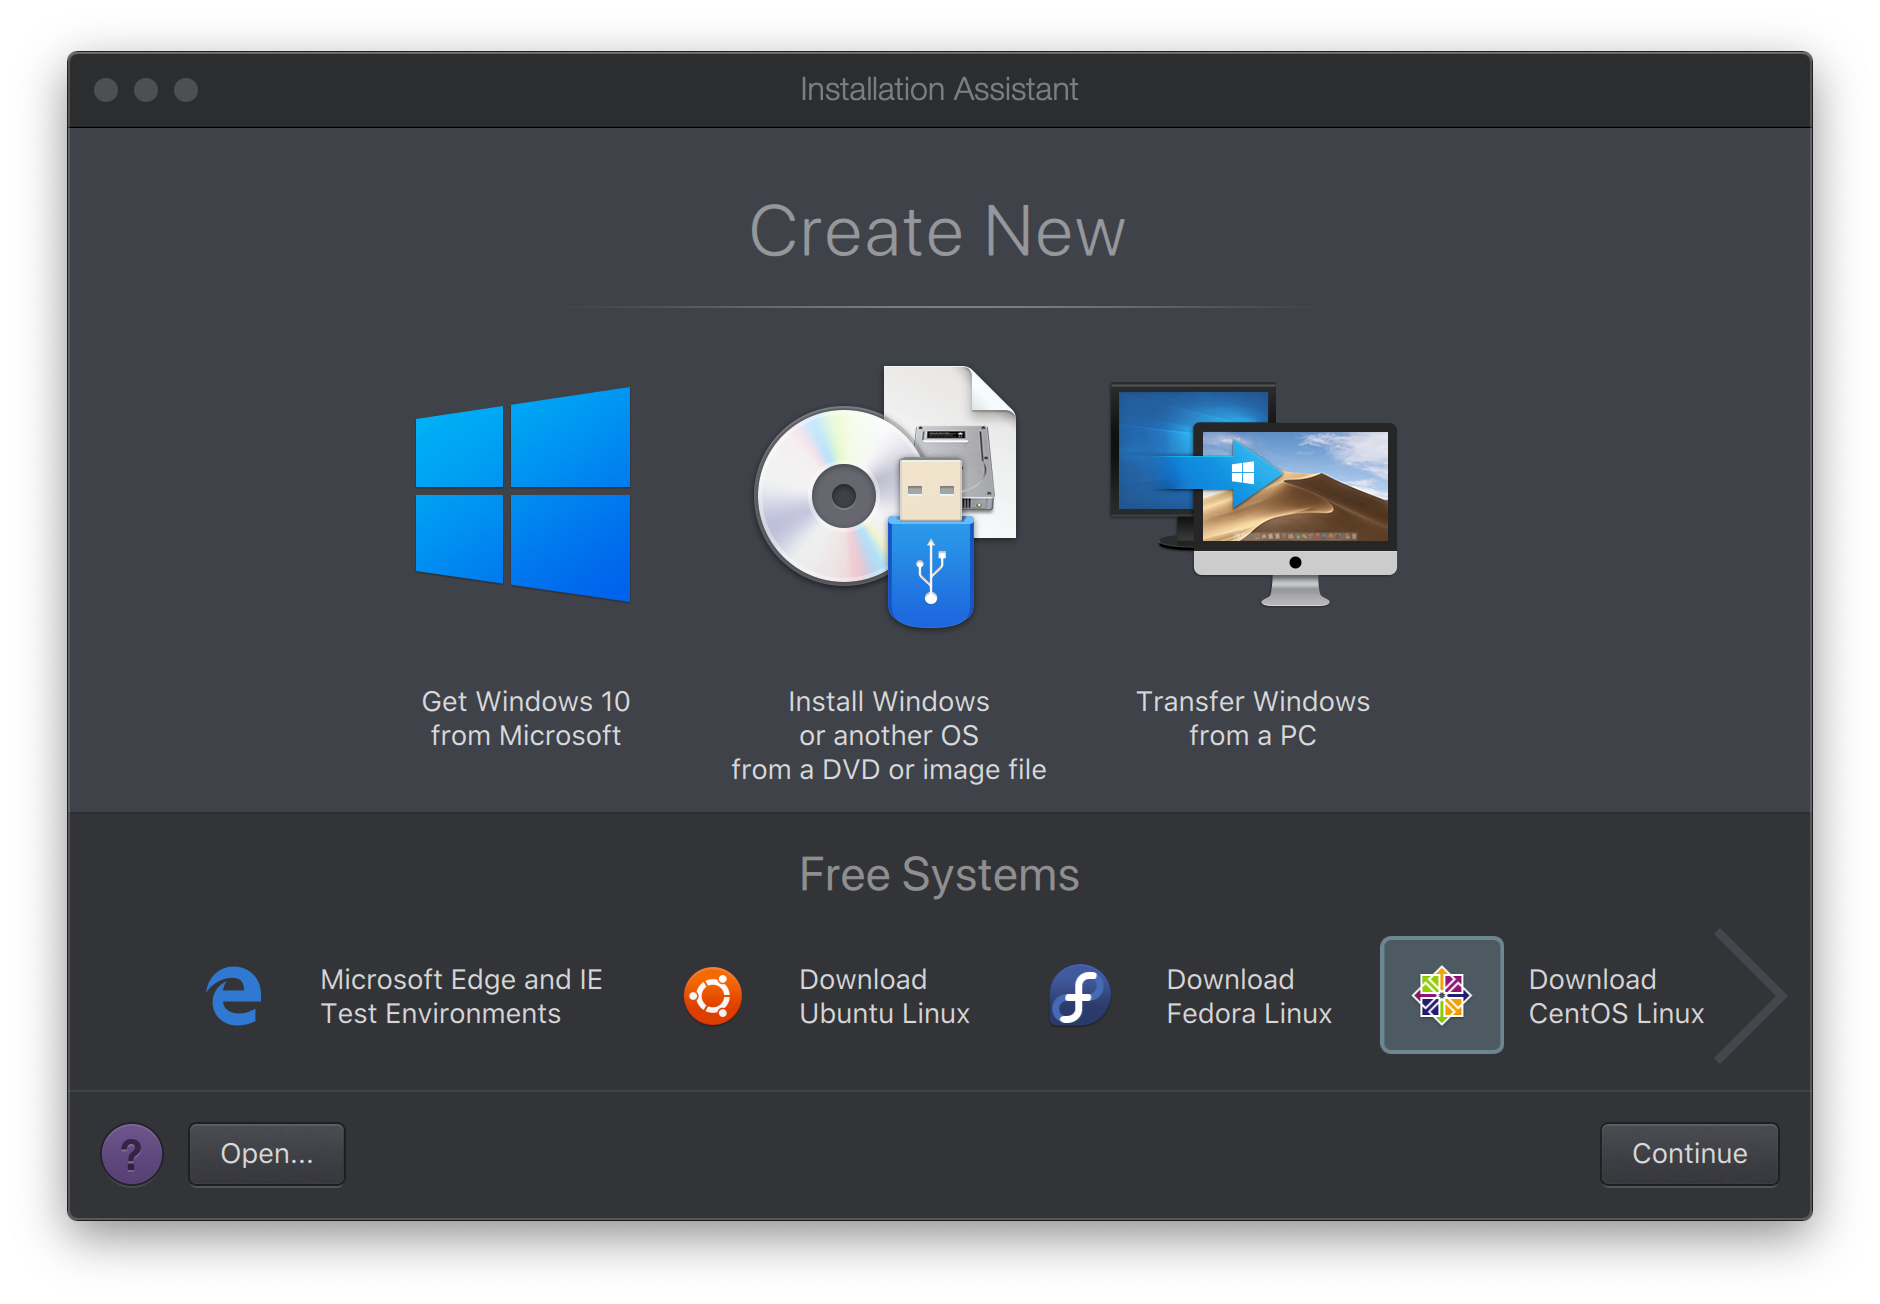
There are two ways to install CentOS Linux on your Mac using Parallels Desktop:
- By using CentOS virtual machine available in Parallels Desktop Installation Assistant.
- By manually installing CentOS using an installation image downloaded from the Internet.
Installing CentOS using Free Systems
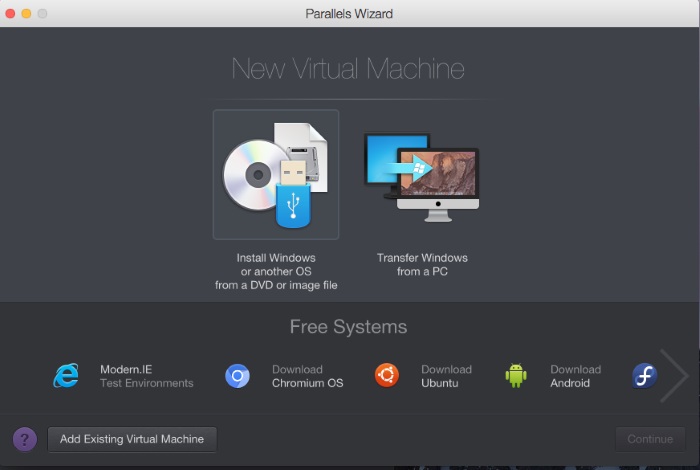
- Start Parallels Desktop and select File — New from the Mac top bar
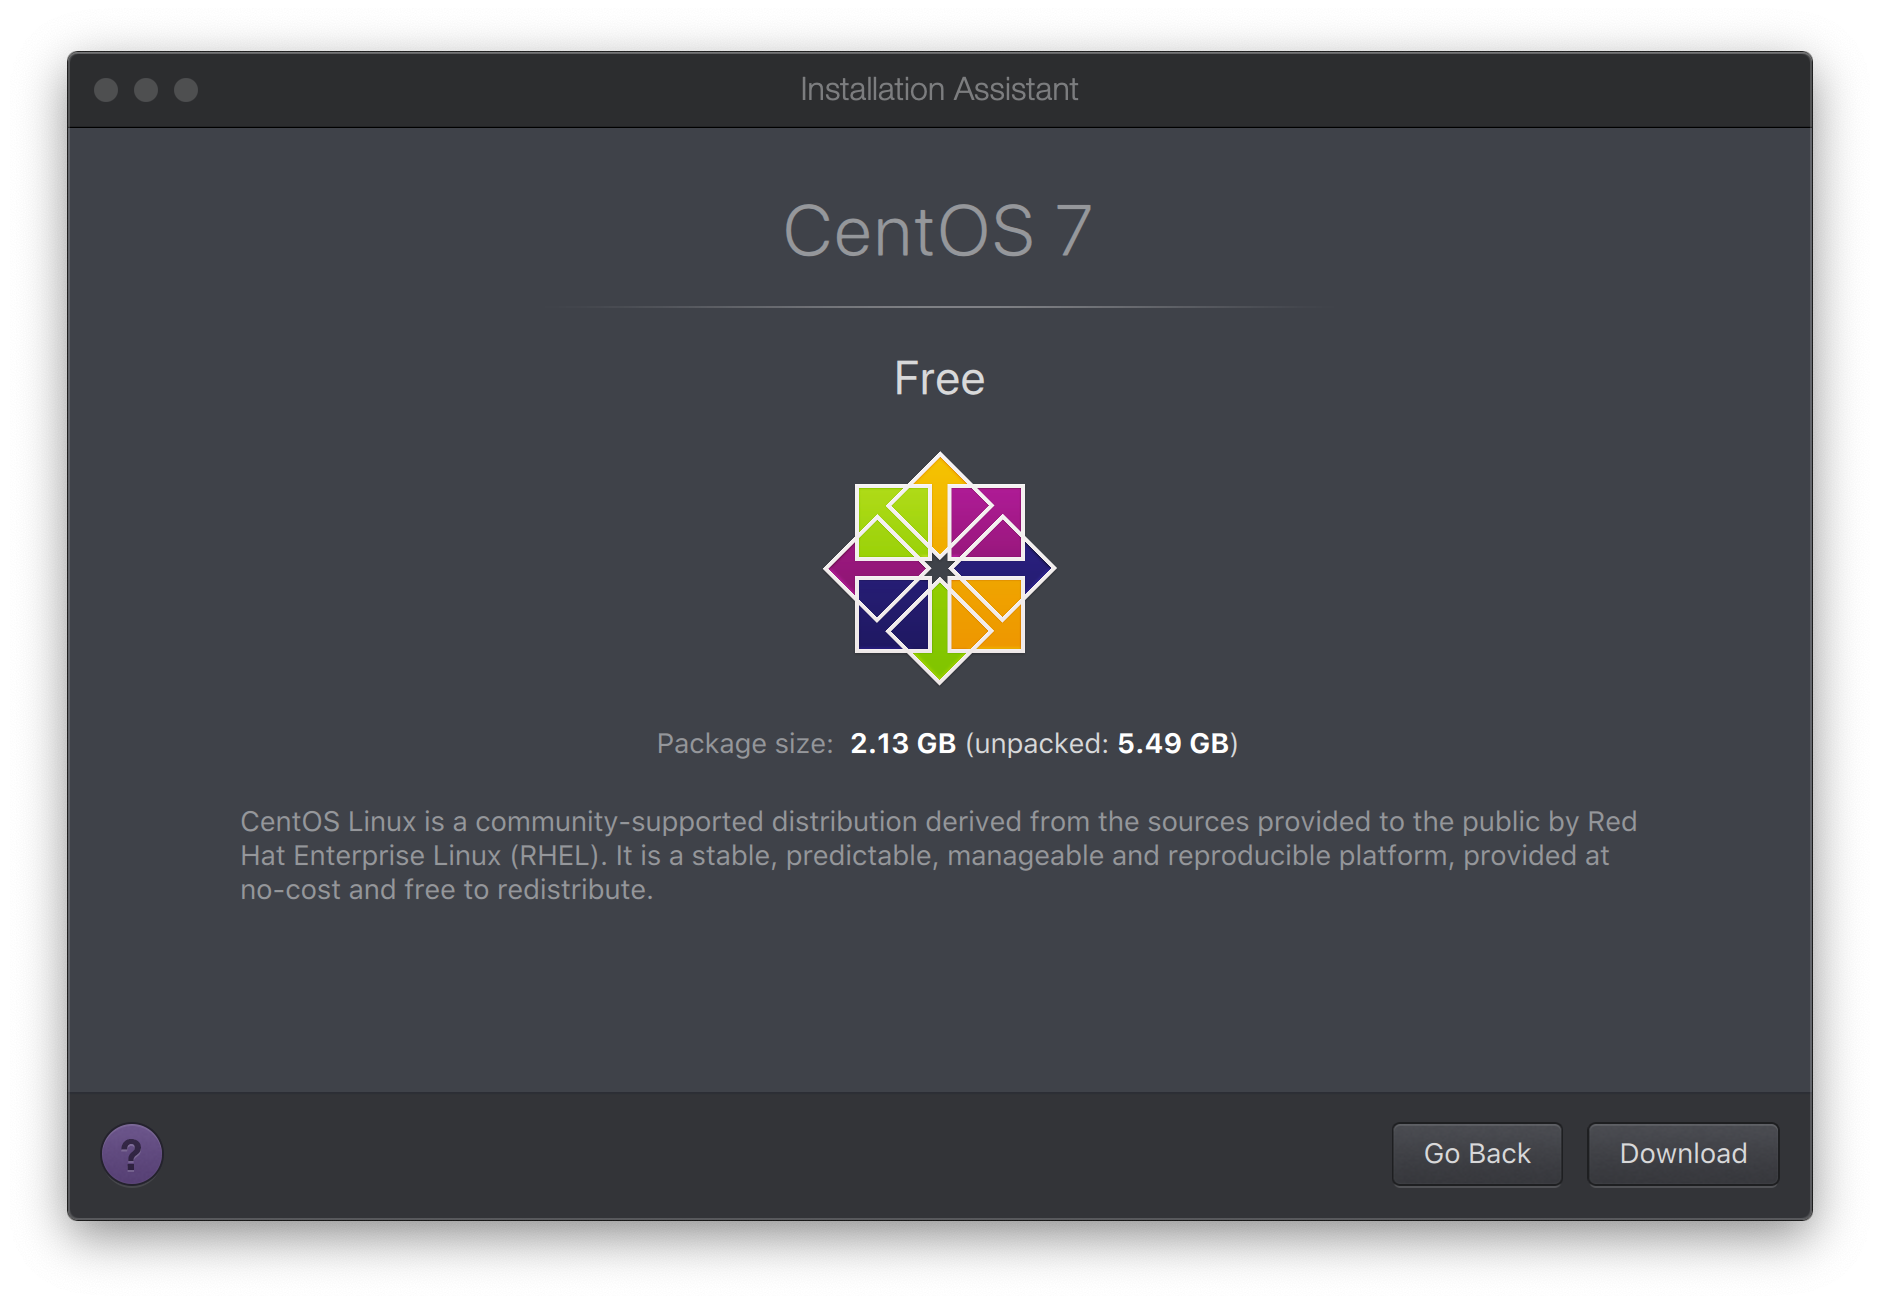
- Select CentOS from the list of available Free Systems and click Continue
On the following screen click Download button to start downloading the virtual machine
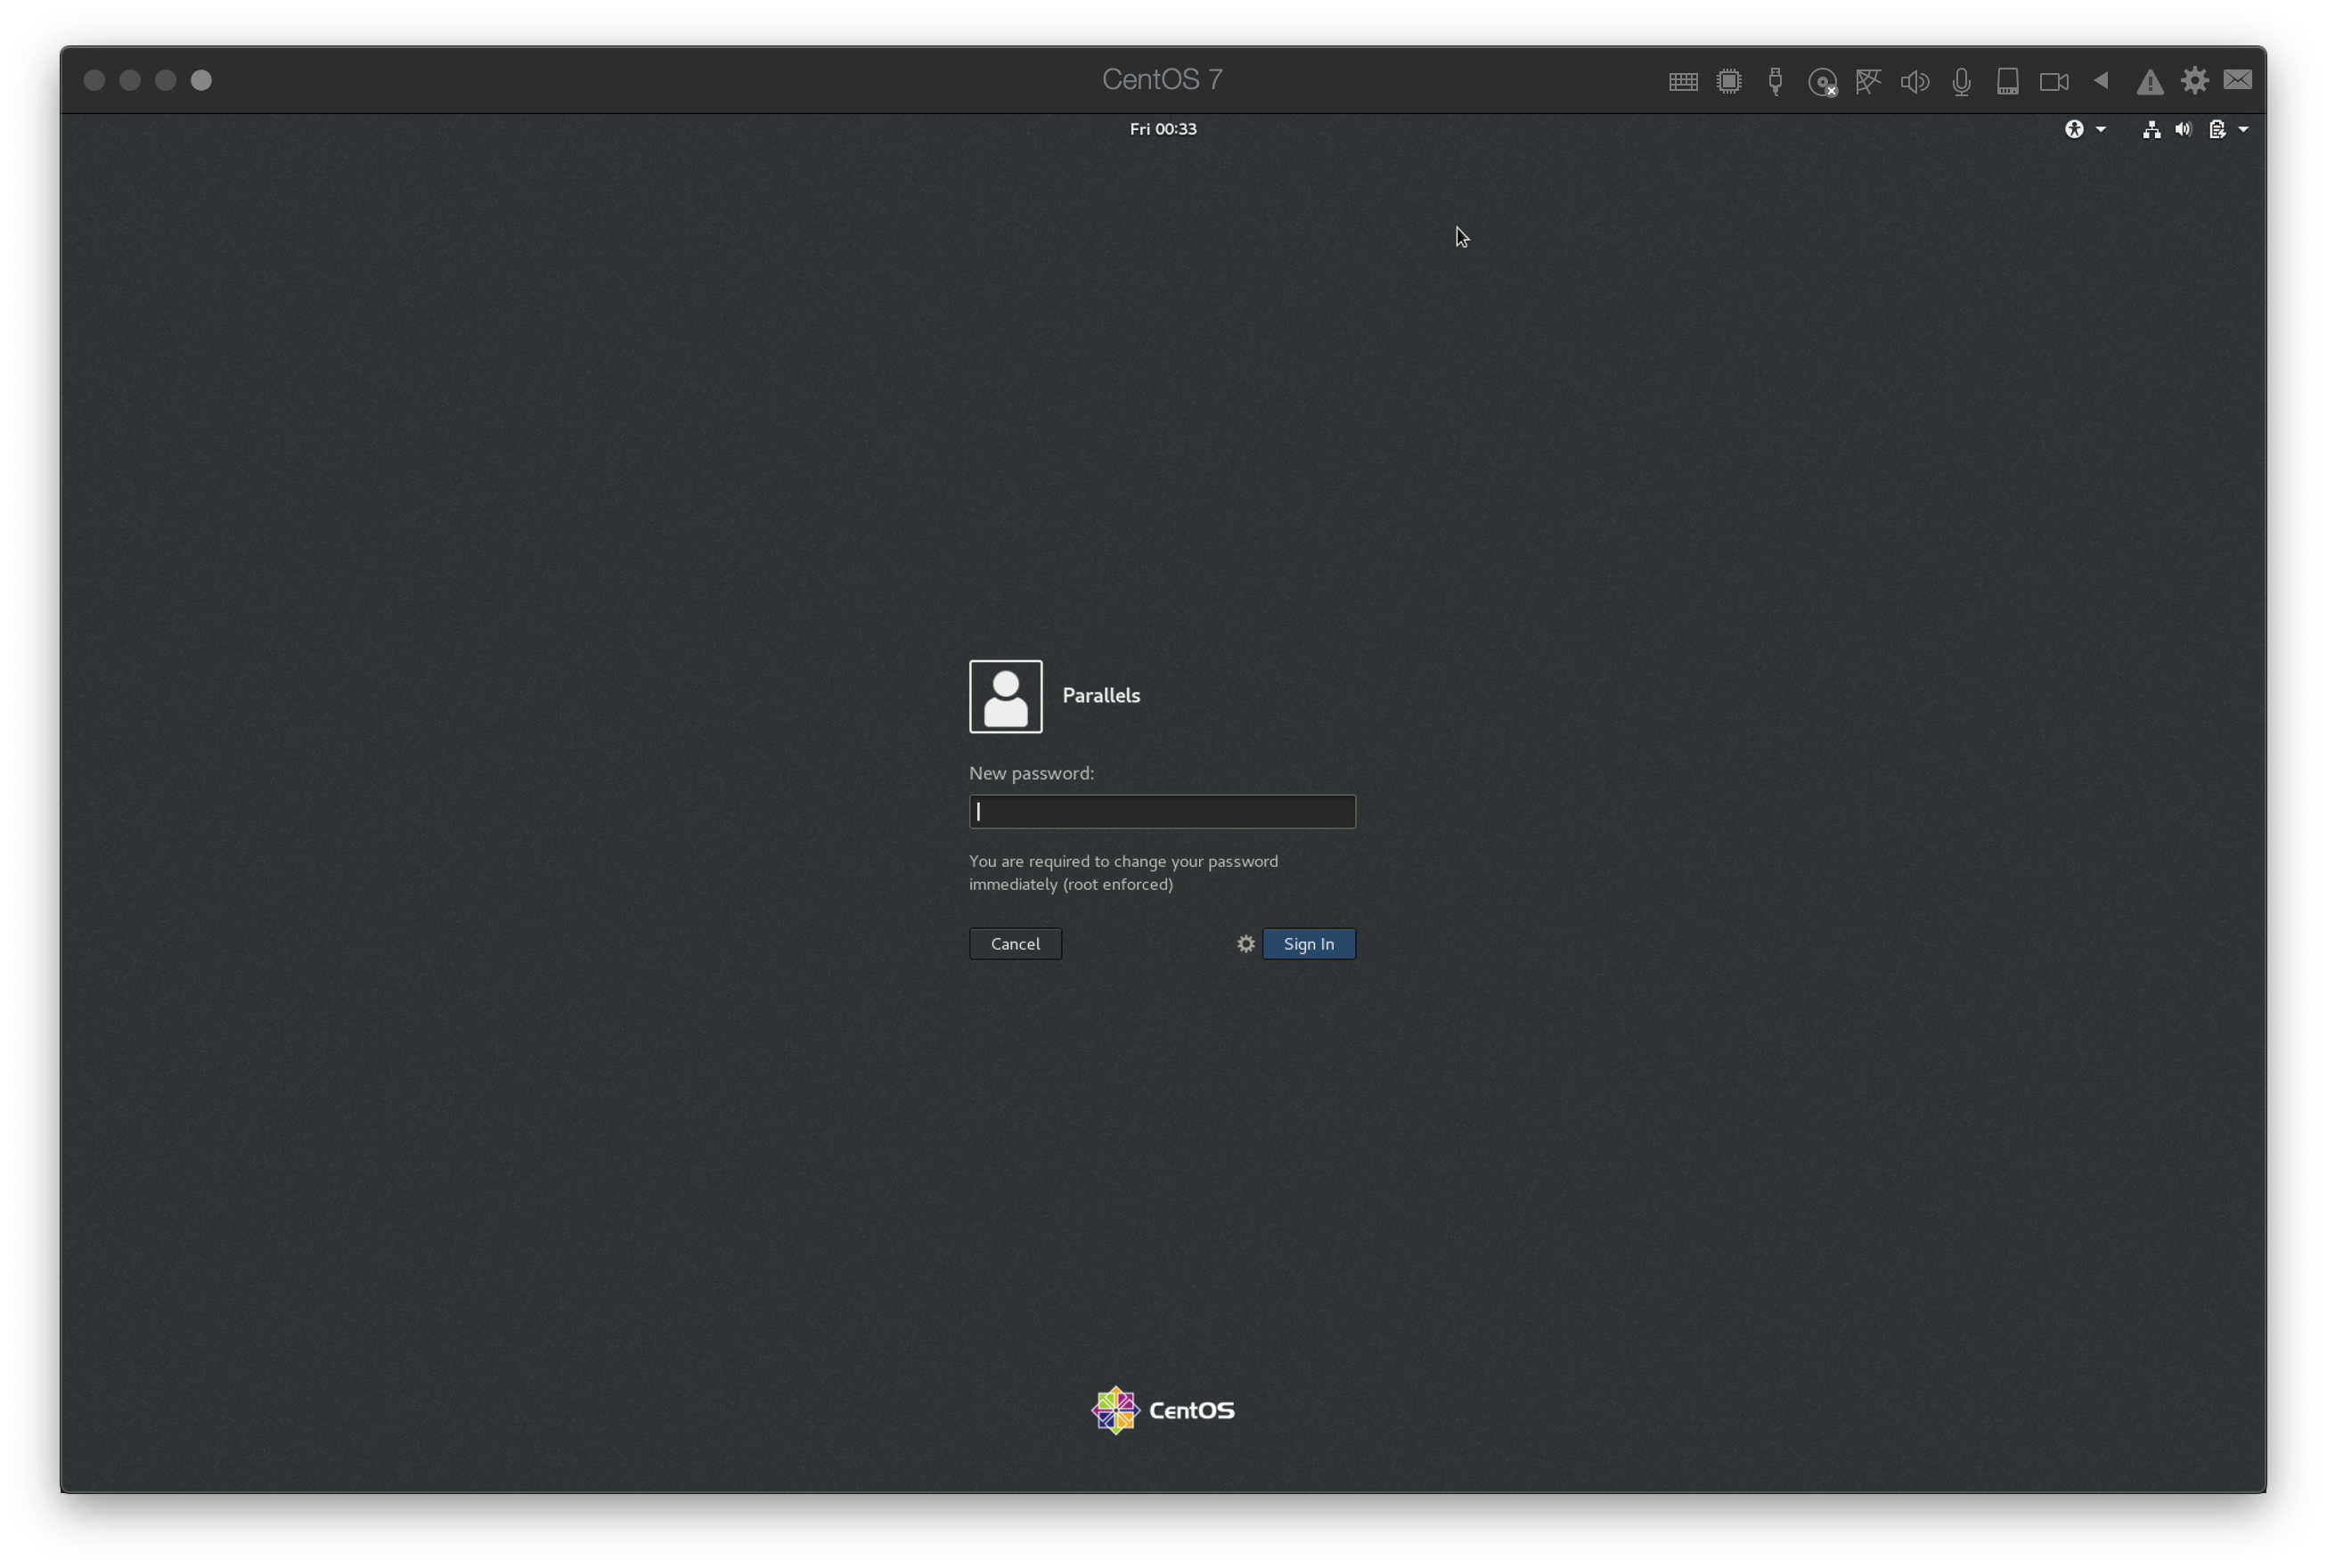
Once the virtual machine is downloaded and unpacked it will be started automatically. - After reaching the login window click on the name of the available account to start creating a password:
Note: To create a password follow on-screen instructions, then press Sign In button
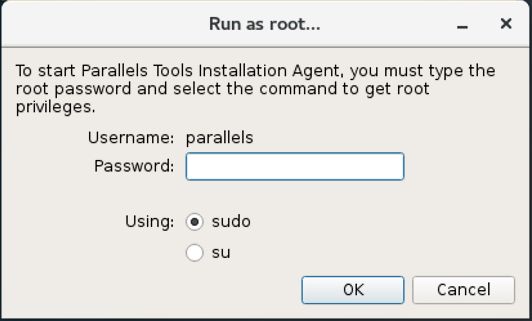
The next screen will prompt to retype new password to confirm it, after doing it click Sign In button again. - Once prompted, enter the password you created in the previous step to proceed with Parallels Tools installation:
- To finish Parallels Tools installation press Restart button.
- After restarting the virtual machine log in and finish personalizing CentOS according to your personal preferences to start using it.

Installing CentOS using an installation image (Express mode)
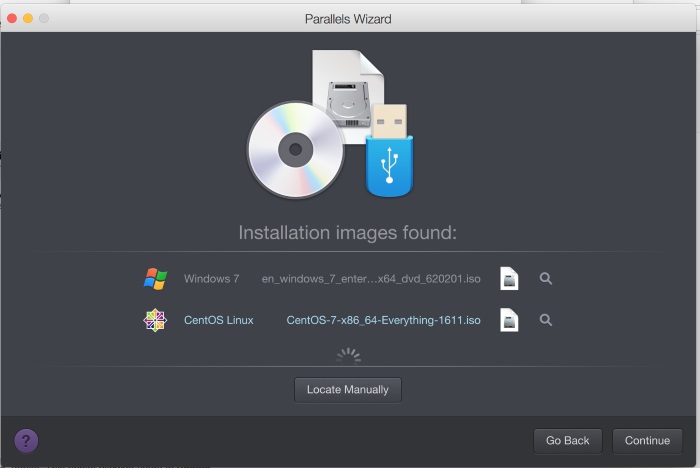
- Download the latest CentOS .iso image file from download CentOS.
- Start Parallels Desktop and select File — New from the Mac top bar
- Select Install Windows or another OS from a DVD or and image file, then click Continue.
- Select CentOs Linux from the list of the operating system sources found on your Mac, then click Continue.
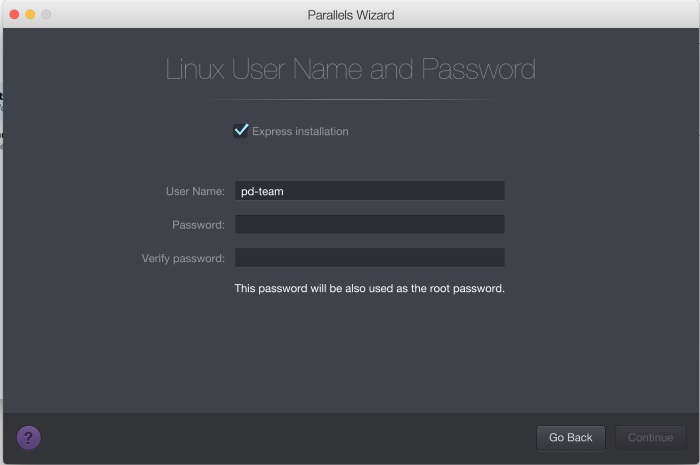
- Specify the CentOS account name or leave the default settings, then click Continue.
- Check virtual machine configuration and click Continue.
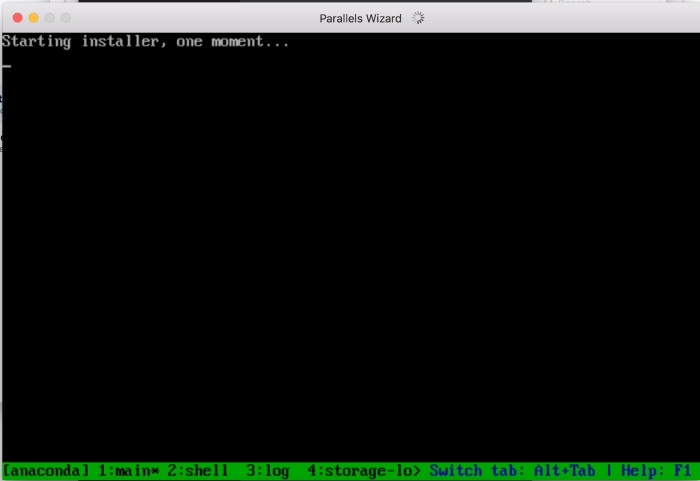
- The CentOS virtual machine will be created and the CentOs boot screen will appear. Click inside the virtual machine screen, then select «Install CentOS Linux 7».
- CentOS Linux will now automatically install on Parallels Desktop virtual machine. Wait till the process is over. Once installation is finished, virtual machine will restart.
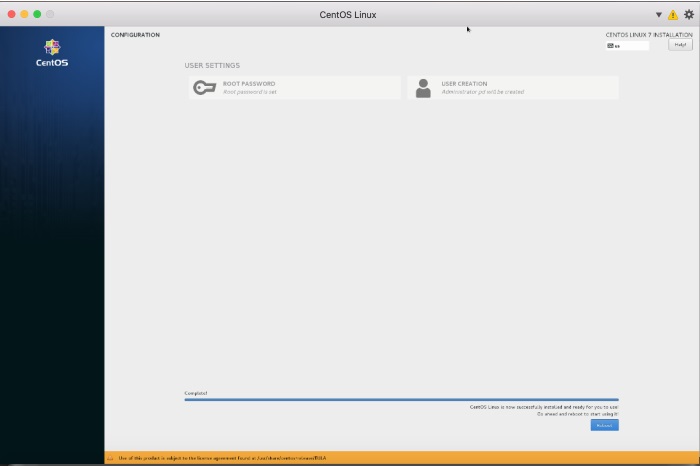
- Upon first start one should accept license agreement:
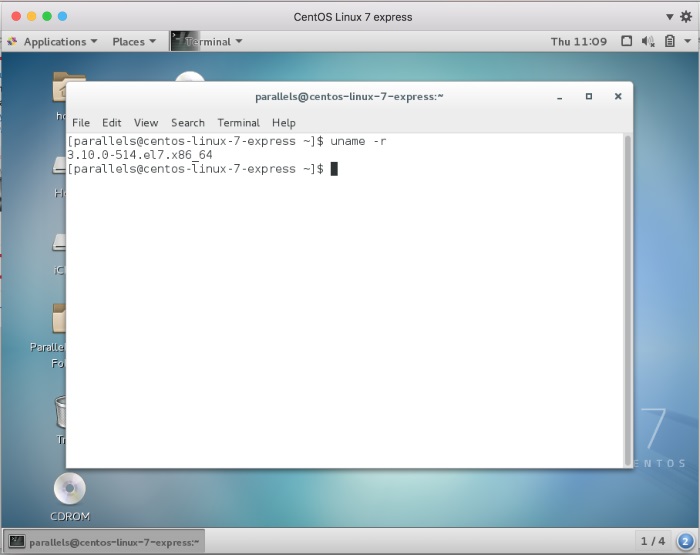
- Log into your CentOS Linux VM.
- That is it.CentOS Linux VM is now ready to be used in Parallels Desktop. Parallels Tools are already installed.


 Once installation is finished, virtual machine will restart.
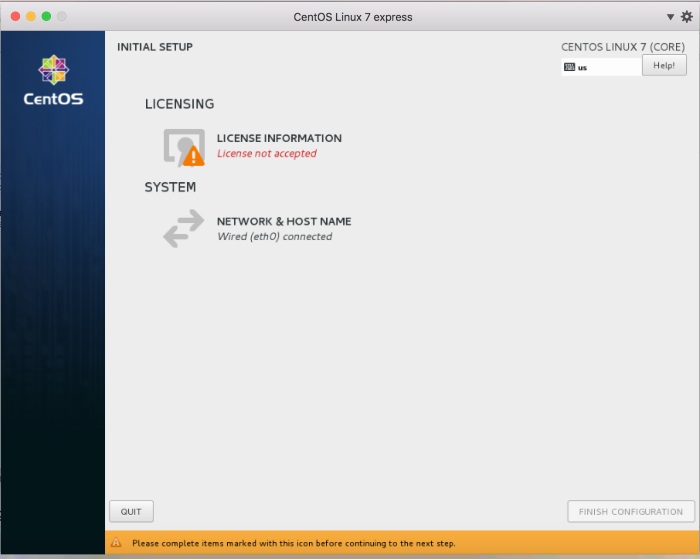
Manual Installation (Gnome and KDE desktop environment)
- Download the latest CentOS .iso image file from download CentOS (choose «Everything ISO»)
- Start Parallels Desktop, then click File ->New.
- Select «Install Windows or another OS from a DVD or and image file», then click Continue.
- Select CentOs Linux from the list of the operating system sources found on your Mac, then click Continue.
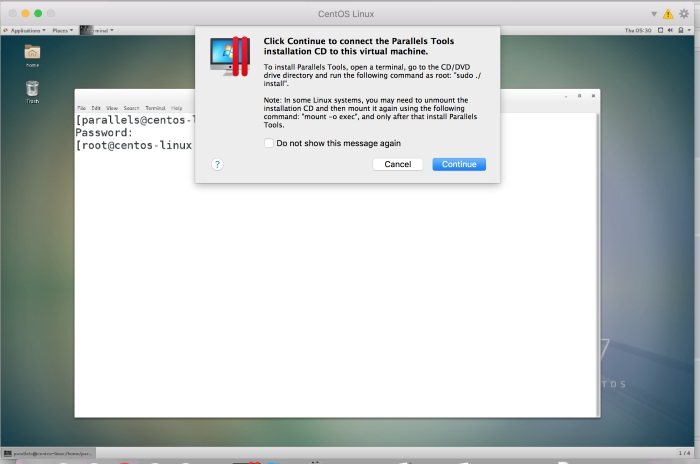
- Make sure that Express installation option is unchecked. Note: If you uncheck Express installation, you will need to install Parallels Tools manually after the virtual machine installation.
- Specify the name and location of your virtual machine or leave the default settings, then click Continue.
- The CentOS virtual machine will be created and the CentOs boot screen will appear. Click inside the virtual machine screen, then select «Install CentOS Linux 7».
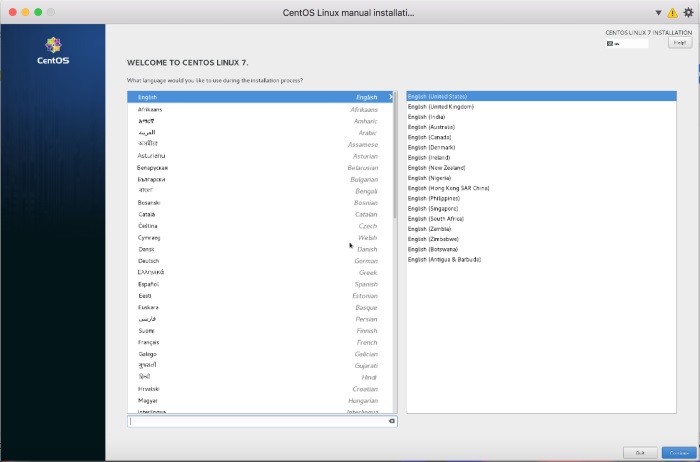
- Select your language of installation, then click Continue.
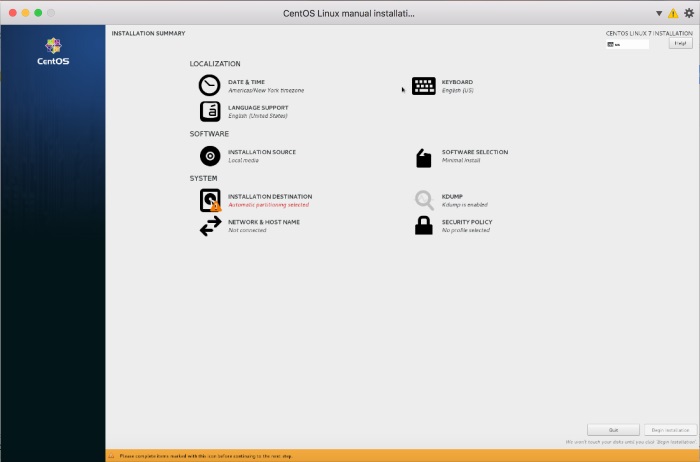
- Go through the CentOS installation wizard. Specify:
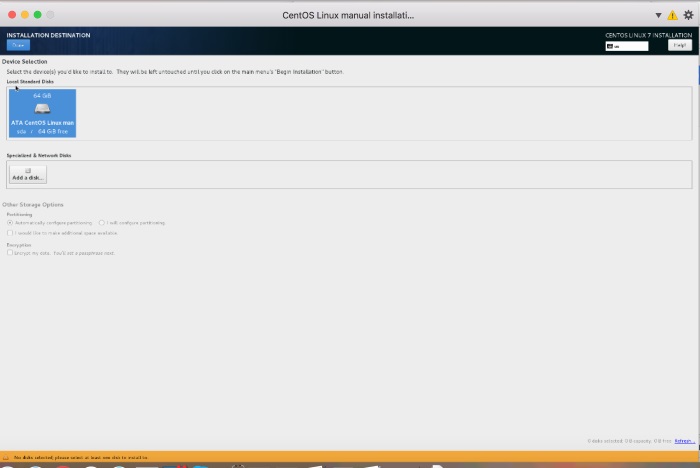
- Installation destination. The way you partition the virtual hard disk for the installation.
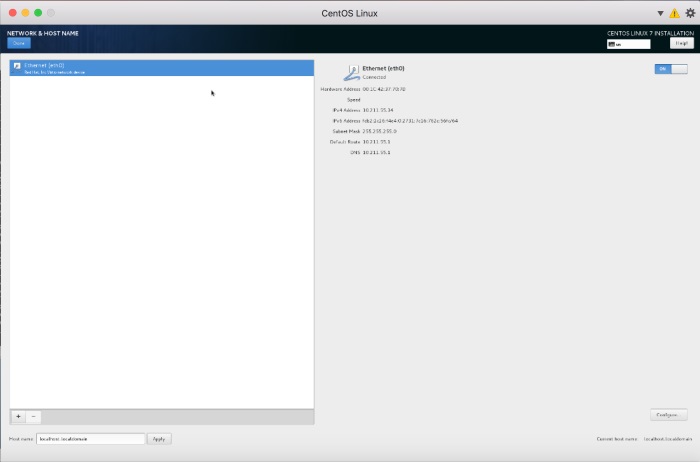
- Enable Network connection
- Select Gnome graphical environment and necessary software packages for your CentOs Linux VM
- Installation destination. The way you partition the virtual hard disk for the installation.

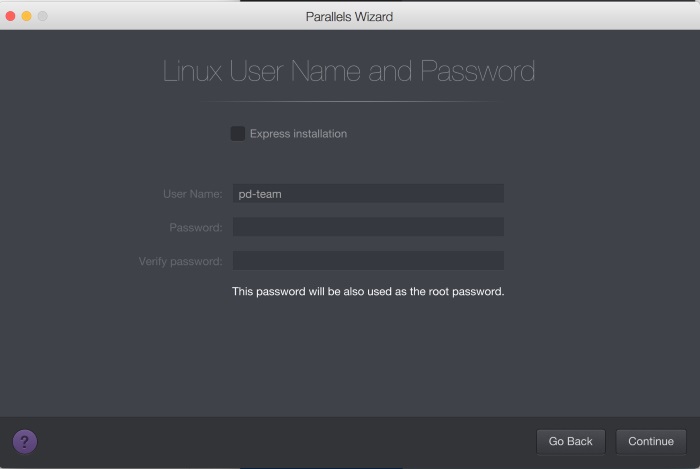 Note: If you uncheck Express installation, you will need to install Parallels Tools manually after the virtual machine installation.
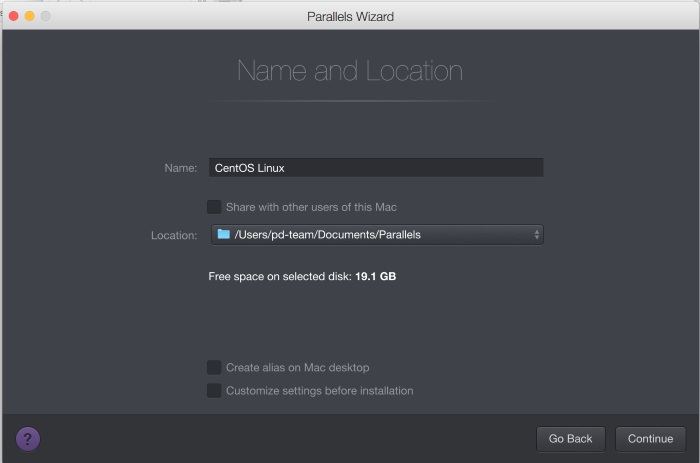

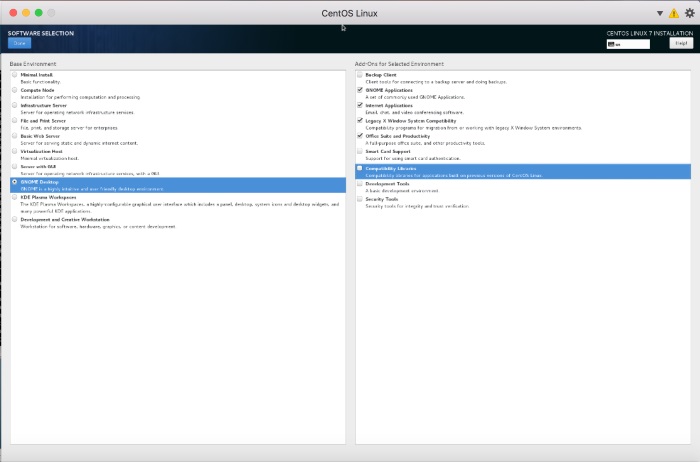
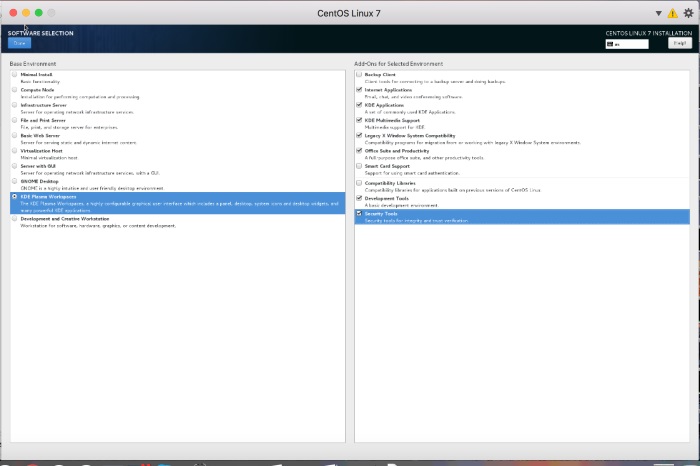
- Choose KDE graphical environment and necessary software packages
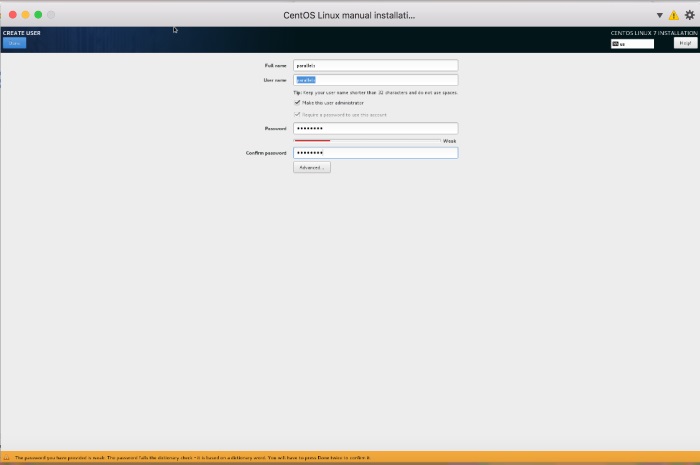
- Create root password and your user login name and password


 Go to Terminal in Fedora virtual machine and execute the following commands one by one:
 yum update yum install checkpolicy selinux-policy-devel gcc kernel-devel-$(uname -r) kernel-headers-$(uname -r) make 
Была ли эта статья полезной?
Как, по вашему мнению, можно улучшить эту статью?