- Fixing Kali Linux 2.0 Slow Internet Connection in Parallels Desktop 10
- Connecting a Wireless Adapter to a Kali Linux Virtual Machine
- Problems With Built-in Wireless Cards
- Best WiFi Adapters for Hacking (With Monitor Mode)
- Connect a Wireless Adapter to Kali Linux Virtual Machine (VirtualBox)
- Automatically Connect the WiFi Adapter to a VirtualBox VM
- Connect a Wireless Adapter to Kali Linux Virtual Machine (VMware Player)
- Conclusion
- Parallels kali linux wifi
- Wizard
Fixing Kali Linux 2.0 Slow Internet Connection in Parallels Desktop 10
Hi. Past two days I have had the opportunity to try Kali Linux 2.0 (Sana) in my Parallels and when I tried to do apt-get update and apt-get upgrade as well as apt-get dist-upgrade, the connection is really slow. I was getting about 15KB/s download speed and my Internet connection speed is actually about 3-5MB/s. Which means, my download speed should be 250-600 KB/s. This is really frustrating.
I tried investigating the problem. At first, I thought this has to be something wrong with the repository. So i changed the repo to a different mirror. Even on the nearest mirror to my country, the connection still looks shitty. Never mind, let’s try another one. Still not working. The day goes on and finally i ended up trying 5 different mirrors with no luck. Holy crap, i said to myself, this has to be something i overlooked. I changed the DNS to Google public DNS too but still, that didn’t make anything better.
I opened up Iceweasel (a Firefox clone that is preinstalled in Kali — Firefox can’t be included for some licensing issue they said) and try to run speed test by going to speedtest.net. Oh crap, I don’t even have Flash plugin installed. Should I install it? Hell no, I won’t do that. Flash is dead. Killed by series of non-stop emerging vulnerabilities. I should download Chrome and observe the speed test using it.
While downloading Google Chrome deb file, i noticed that the download speed won’t go pass 40 KB/s. WHATT?? And now I am sure that this has something to do with my connection speed. So, I try to download some random stuff using my Chrome in Mac OS X and there it is. THE DOWNLOAD SPEED IS FINE! ~500 KB/s as usual.
Now I know that my Internet connection speed is fine and Kali Linux repos mirrors are fine, but something is capping my bandwidth in Kali Linux. Is it Parallels? So I shut down the virtual machine and checked the settings. There it is. After changing some setting in Network section, my capped connection speed problem solved. Because I don’t find the solution via googling around, I posted the solution here.
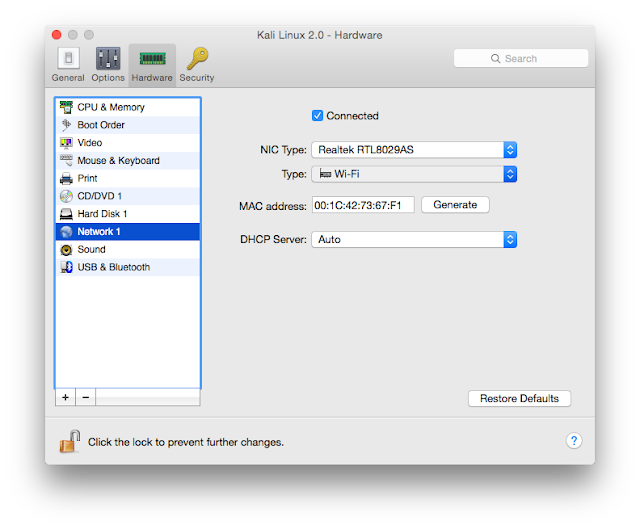 |
| Problematic settings |
This is the problematic settings. The NIC Type is set to Realtek RTL8029AS and type is Wi-fi. I believed other settings below those two matters.
 |
| Correct settings |
And this is the correct settings that solved the problem for me. NIC Type is Virtio network adapter and type is shared network.
PS: I’ve tried playing around with the settings a bit and i found that changing the type to bridged, wi-fi and so on doesn’t matter. The only problem is NIC Type and you have to choose that right.
Connecting a Wireless Adapter to a Kali Linux Virtual Machine
![]()
In “Network hacking,” most people get confused when talking about Network adapters and Network cards.
Most don’t know what they are, why we need them, and how to select the best adapter since we have so many brands and models available in the market.
A wireless adapter is a device that you connect to your computer via the USB port, and it allows you to connect to WiFi networks and communicate with other devices on the network.
However, you might wonder: “Why would I need a USB network adapter since my laptop already has an inbuilt adapter that enables me to connect to wireless networks?”
Well, this is among the topics that we will discuss in this post:
- Problems with Built-in Wireless Cards
- Best WiFi adapters for hacking
- How to connect a wireless adapter to Kali Linux Virtual machine
Table of Contents
Problems With Built-in Wireless Cards
There are two main problems with built-in WiFi adapters.
- They can’t be used in Virtual machines – Kali inside a VM does not see the built-in WiFi card of your laptop as a WiFi adapter but will see it as an ethernet adapter. Hence you can have full internet access, but you cannot do packet injection or place the WiFi card into monitor mode.
- Most built-in cards are not suitable for hacking – In wireless hacking, there are two main factors that we look out for in adapters. That is ‘packet infection’ and support for ‘monitor mode.’ Unfortunately, most of the built-in adapters support non of these two features.
Best WiFi Adapters for Hacking (With Monitor Mode)
Before diving into the different WiFi adapter brands and models, we first need to understand the Wireless Chipset present in these adapters. Like the CPU we have in a computer, this chipset is the “Brains” of the wireless adapter.
It is responsible for all the processing and calculation of data flowing through it. It also determines the capability of the wireless adapter. Whether it can support monitor mode, packet injection, and works with Kali Linux or not.
Some of the chipset supported by Kali Linux include:
- Realtek RTL8812AU
- Realtek 8187L
- Ralink RT5370N
- Ralink RT3572
- Ralink RT5572
- Ralink RT3070
- Ralink RT307
- Atheros AR9271
- MT7610U
- MT7612U
I understand all this information looks gibberish as of now; however, you will appreciate it when we look at the different WiFi adapters available and the chipset they use.
You will notice that the ALFA Networks company highly dominates the Wireless adapter market. Over the past couple of years, the company has risen to stand as the perfect supplier for efficient and reliable WIFI adapters. Other companies include TP-Link and Panda .
The table below shows a list of wireless adapters supported by Kali Linux and the Chipset, Frequency, and Protocol they are using.
| Adapter Name | Chipset | Frequency | Protocol |
|---|---|---|---|
| ALFA AWUS036NEH | Ralink RT3070 | 2.4GHz | 802.11N |
| TP-LINK TL-WN722N 2.4GHz v1 | Atheros AR9271 | 2.4GHz | 802.11N |
| TP-LINK TL-WN722N 2.4GHz v2/v3 (with some workarounds) | Realtek RTL8188EUS | 2.4GHz | 802.11N |
| ALFA AWUS036NH | Ralink RT3070 | 2.4GHz | 802.11N |
| ALFA AWUS036NHA | Atheros AR9271 | 2.4GHz | 802.11N |
| Panda PAU09 | Ralink RT5572 | 2.4GHz | 802.11N |
| ALFA AWUS036ACH | Realtek RTL8812AU | 2.4GHz / 5GHz | 802.11AC |
| ALFA AWUS036H | Realtek 8187L | 2.4GHz | 802.11b/g |
| ALFA AWUS036ACHM | MT7610U | 2.4GHz / 5GHz | 802.11AC |
| ALFA AWUS036ACM | MT7612U | 2.4GHz / 5GHz | 802.11ac/a/b/g/n |
| ALFA AWUS1900 | Realtek RTL8814AU | 2.4GHz / 5GHz | 802.11ac/a/b/g/n |
| ALFA AWUS036AC | Realtek RTL8812AU | 2.4GHz / 5GHz | 802.11ac/a/b/g/n |
| ALFA AWUS036ACS | Realtek RTL8811AU | 2.4GHz / 5GHz | 802.11ac/a/b/g/n |
| ALFA AWUS036EAC | Realtek RTL8812AU | 2.4GHz / 5GHz | 802.11ac/a/b/g/n |
| ALFA AWPCIE-1900U | Realtek RTL8814AU | 2.4GHz / 5GHz | 802.11ac/a/b/g/n |
Important: When it comes to TP-LINK TL-WN722N, it’s important to know that you can also get v2/v3 to work with a few workarounds, although it’s sometimes assumed that only v1 works.
A great and detailed tutorial on this topic is this one from David Bombal – Kali Linux TP-Link TP-WN722N .
TL-WN722N is a decent budget WiFi adapter for our purposes, but it’s sometimes difficult to find v1 in your immediate area, so v2/v3 is definitely a good option.
In some cases you won’t find the adapter’s version in the product description, so I think it’s definitely good to know you can make it work no matter which of those versions it is.
Connect a Wireless Adapter to Kali Linux Virtual Machine (VirtualBox)
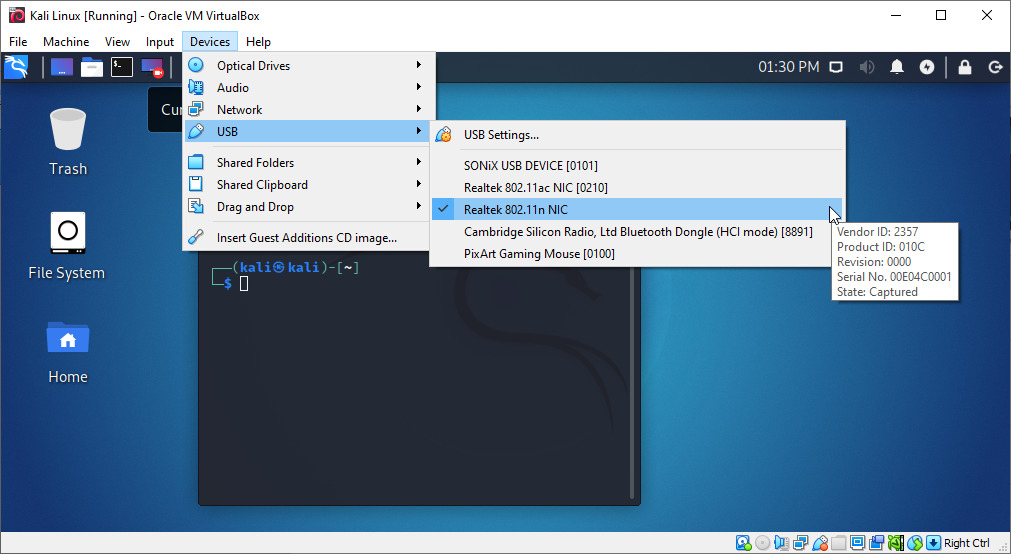
To connect a wireless adapter to your Kali Linux virtual machine, when using VirtualBox, you can go in the Oracle VM VirtualBox menu > Devices > USB > [select_your_adapter].
It may not list the name of the WiFi Adapter, but something related to the chipset, instead. Here, I’m using a TP-LINK TL-WN722N 2.4GHz v2/v3, and as you can see, it’s displaying Realtek 802.11n NC.
Automatically Connect the WiFi Adapter to a VirtualBox VM
You can also automatically connect a wireless adapter to your Kali Linux virtual machine, when running VirtualBox. This way, you don’t have to manually connect it every time
To do this follow the steps below:
- Shutdown the Kali virtual machine if it was already running
- Connect your Wireless USB adapter to your PC
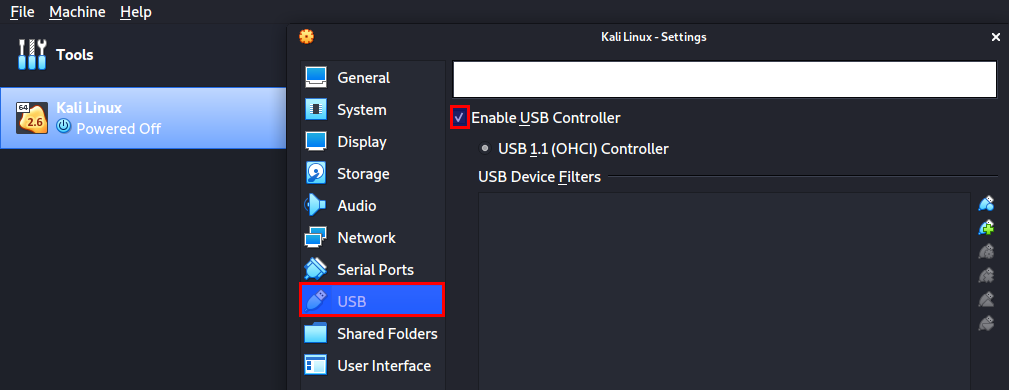
- Right-click on your Kali Virtual machine and select the Settings option. A window will open displaying all the different configuration options.
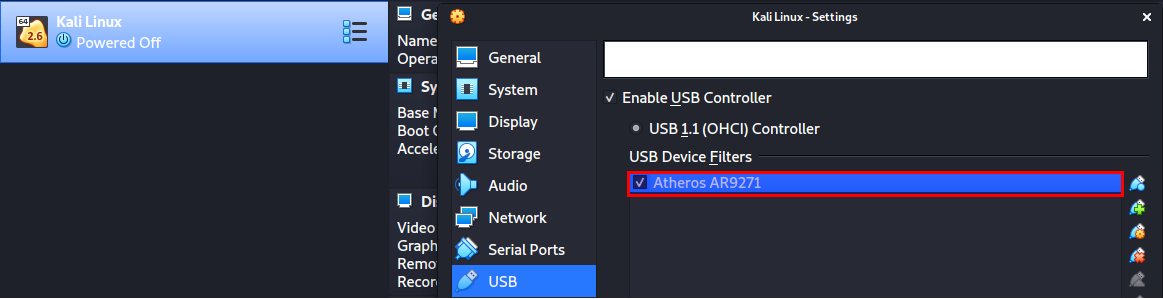
- Click on the USB option and check the Enable USB controller check box.
If you are not sure of the adapter’s name, just remove it, and you will notice the name that will disappear from the VirtualBox USB list.
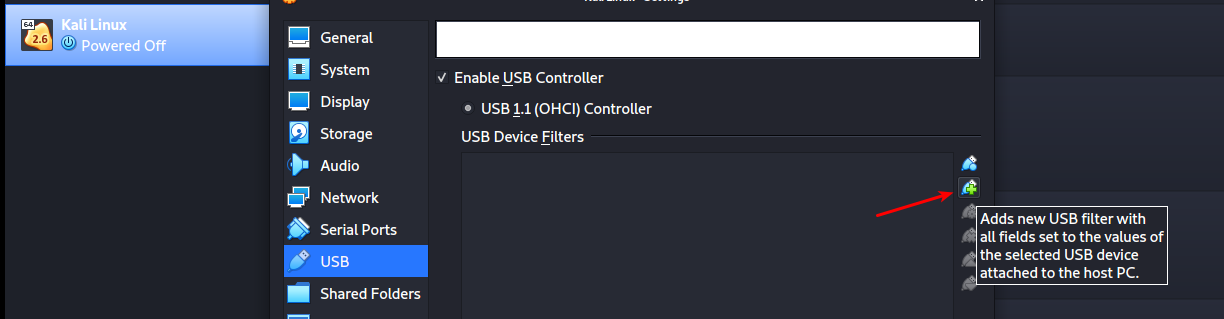
Your wireless adapter will be listed under the “USB Device Filters” section.
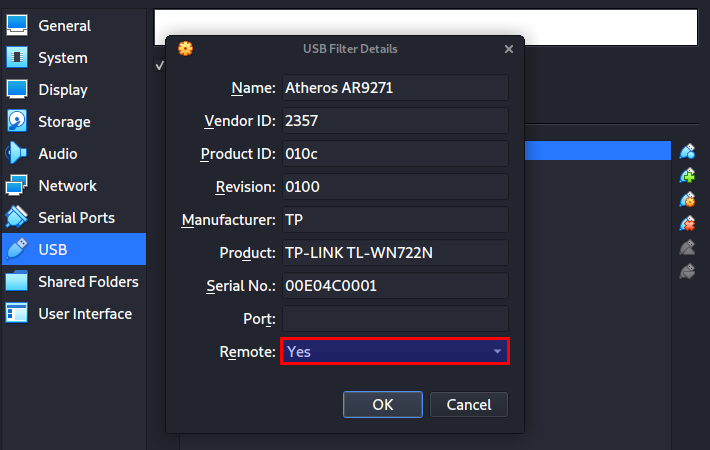
To finalize everything, right-click on your newly added USB filter and select the Edit Filters option.
A window will open listing all the details about your wireless adapter. Then, on the Remote option, click on the dropdown and select Yes.
Connect a Wireless Adapter to Kali Linux Virtual Machine (VMware Player)
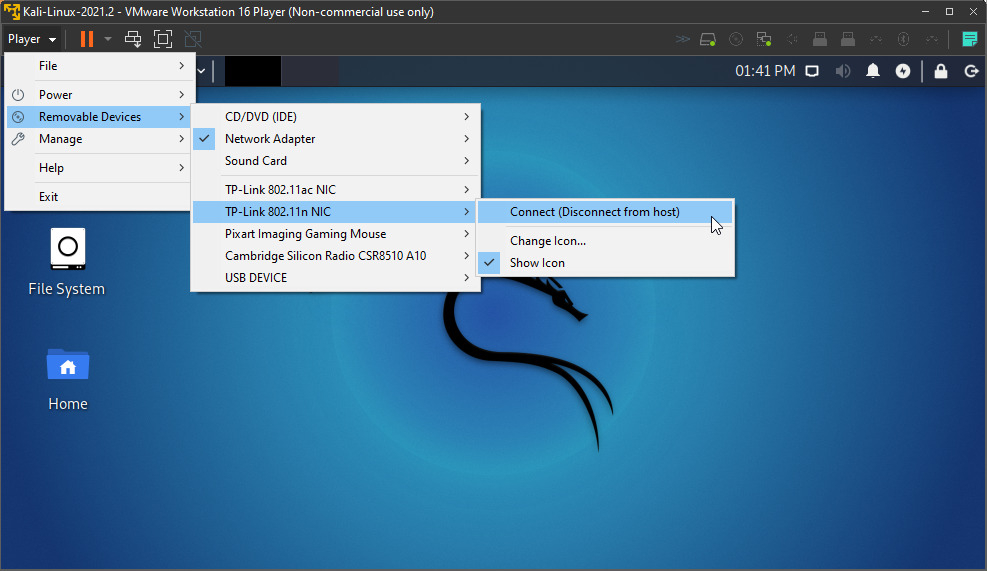
To connect a wireless adapter to your Kali Linux virtual machine, when using VMware Player, you can go to the VMware Player menu > Player > Removable Devices > [your_adapter] > Connect (Disconnect from host).
It may not list the name of the WiFi Adapter, but something related to the chipset, instead. Here, I’m using a TP-LINK TL-WN722N 2.4GHz v2/v3, and as you can see, it’s displaying Realtek 802.11n NC.
You should then receive a message informing you that the device will be safely stopped and disconnected from the host machine, so it can then be connected to Kali Linux in the VMware player.
I’m not sure of an easy way how you can automatically connect a WiFi Adapter with VMware Player, as we did with VirtualBox. The solution in VMware knowledge base seems to involve a bit of work https://kb.vmware.com/s/article/1648 , and I haven’t tried it myself. If anyone has an easier solution for this and would like to share, then we’d love to hear from you.
Conclusion
Now you can boot your Kali VM and start practicing your wireless hacking skills. You can list all the wireless networks around you and even put your card in monitor mode.
I believe up to this point, you have a working wireless adapter on your Kali Linux VirtualBox machine. Please remember when selecting an adapter for wireless hacking to ensure the chipset used is among the chipsets listed above.
Parallels kali linux wifi
This guide is about virtualizing Kali Linux inside of Parallels, allowing you to have a Kali VM. This is a great way to use Kali, as it is completely separate from the host, allows you to interact with other VMs (as well as the host, and other machines on the network), and allows you to revert to snapshots.
Wizard
Upon starting up Parallels, select the Plus symbol.

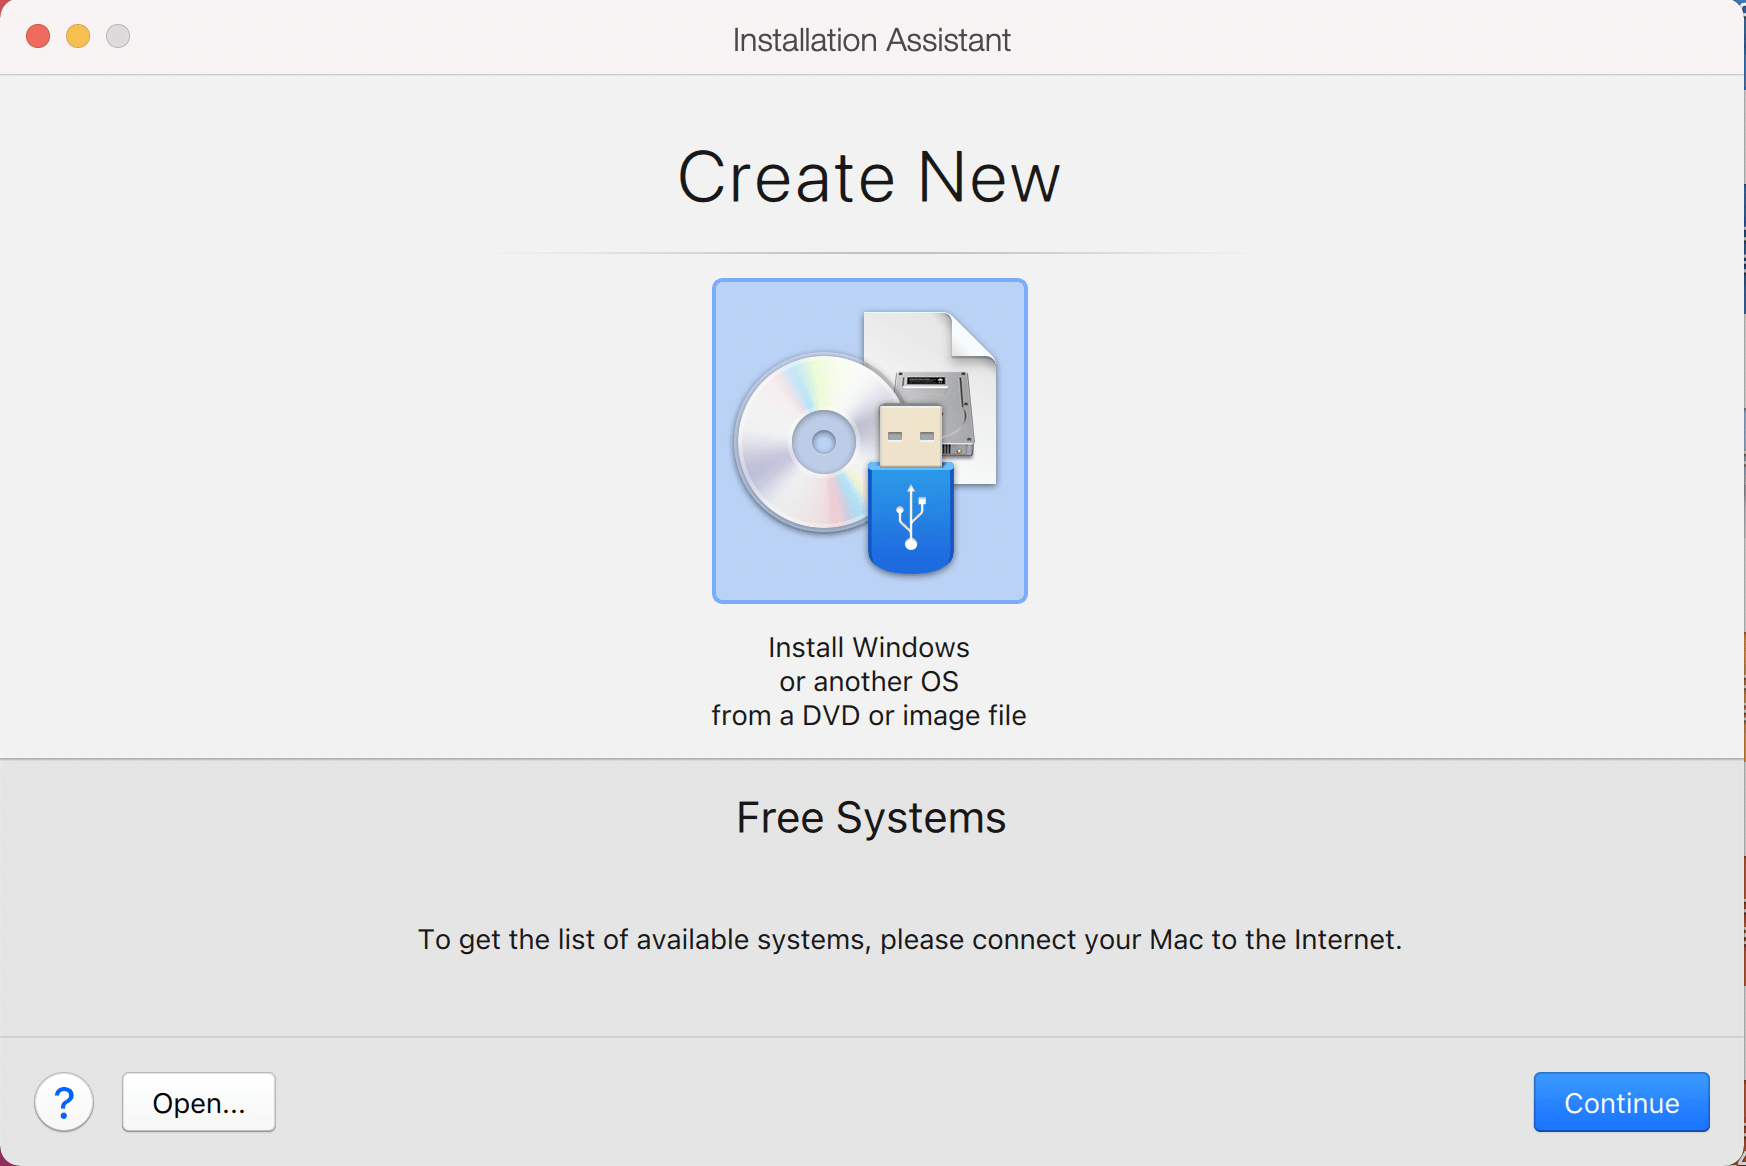
This will launch the Installation Assistant
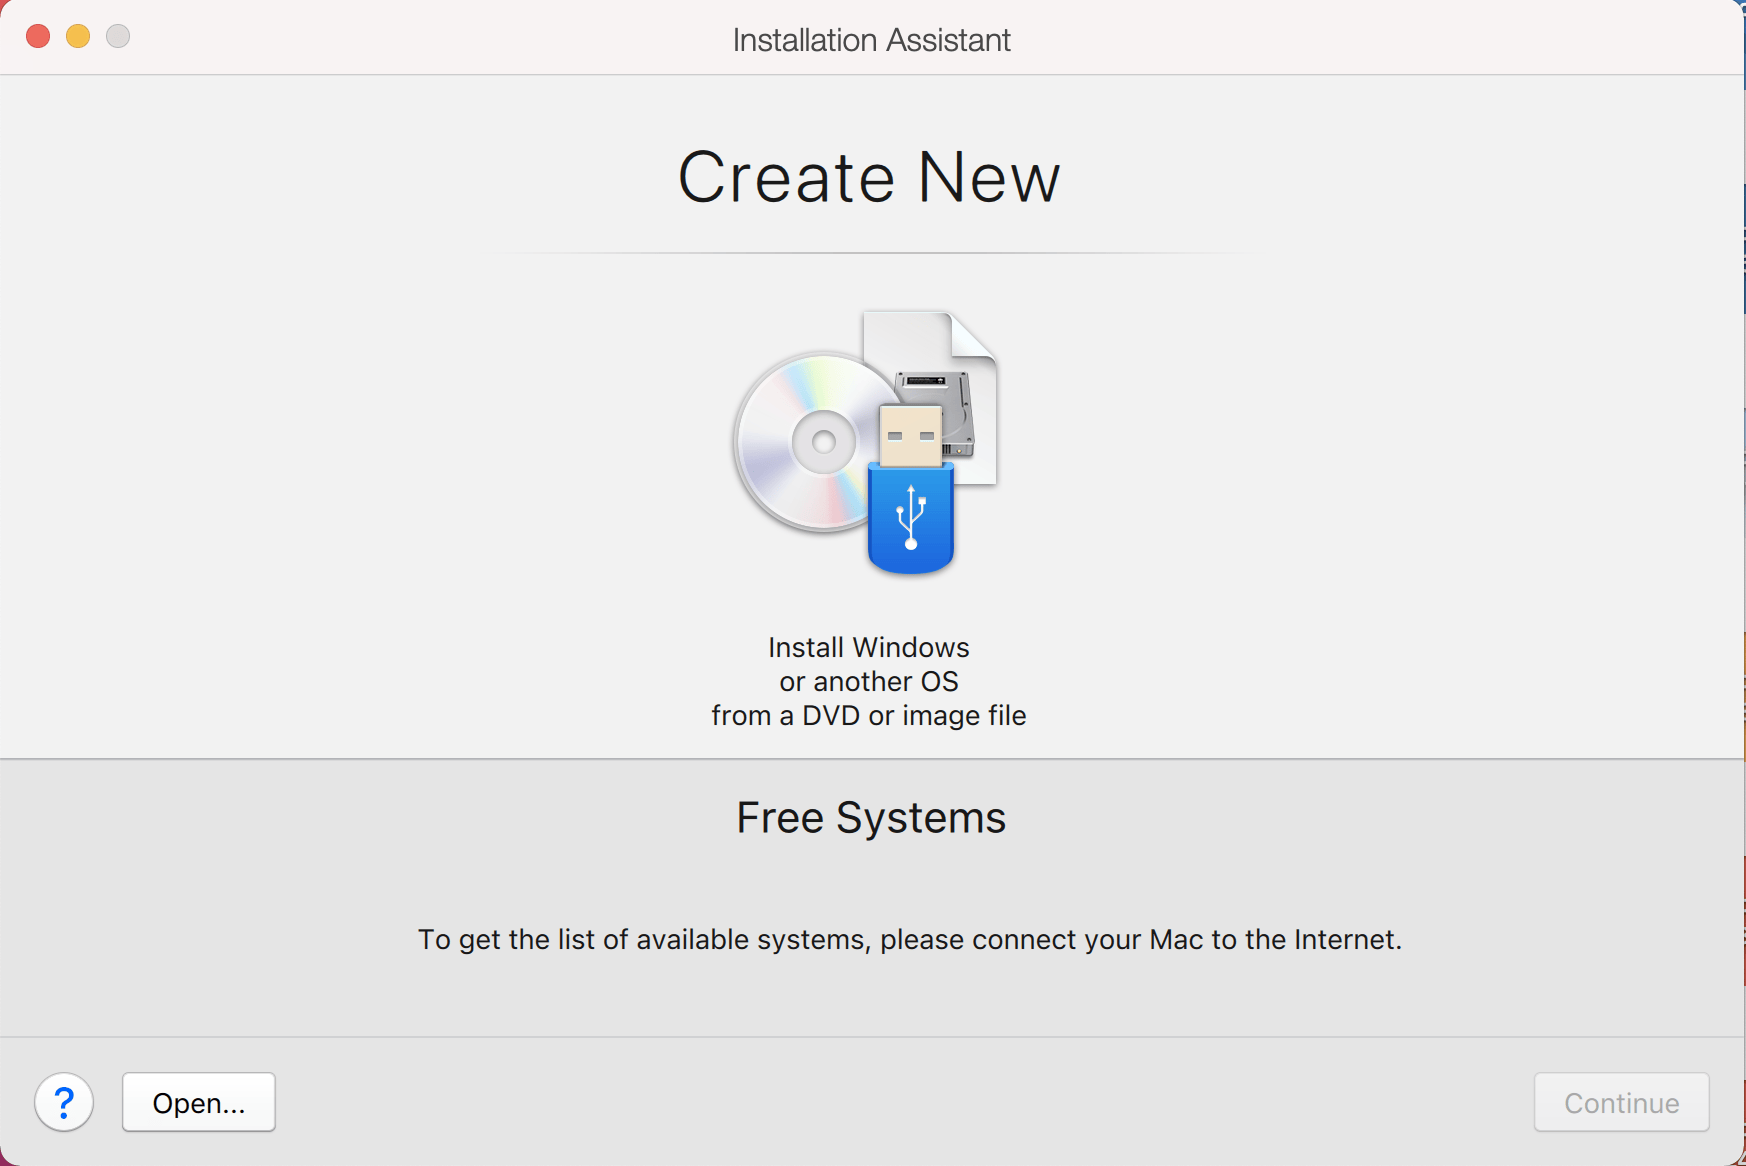
Now we choose Install Windows or another OS from a DVD or image file
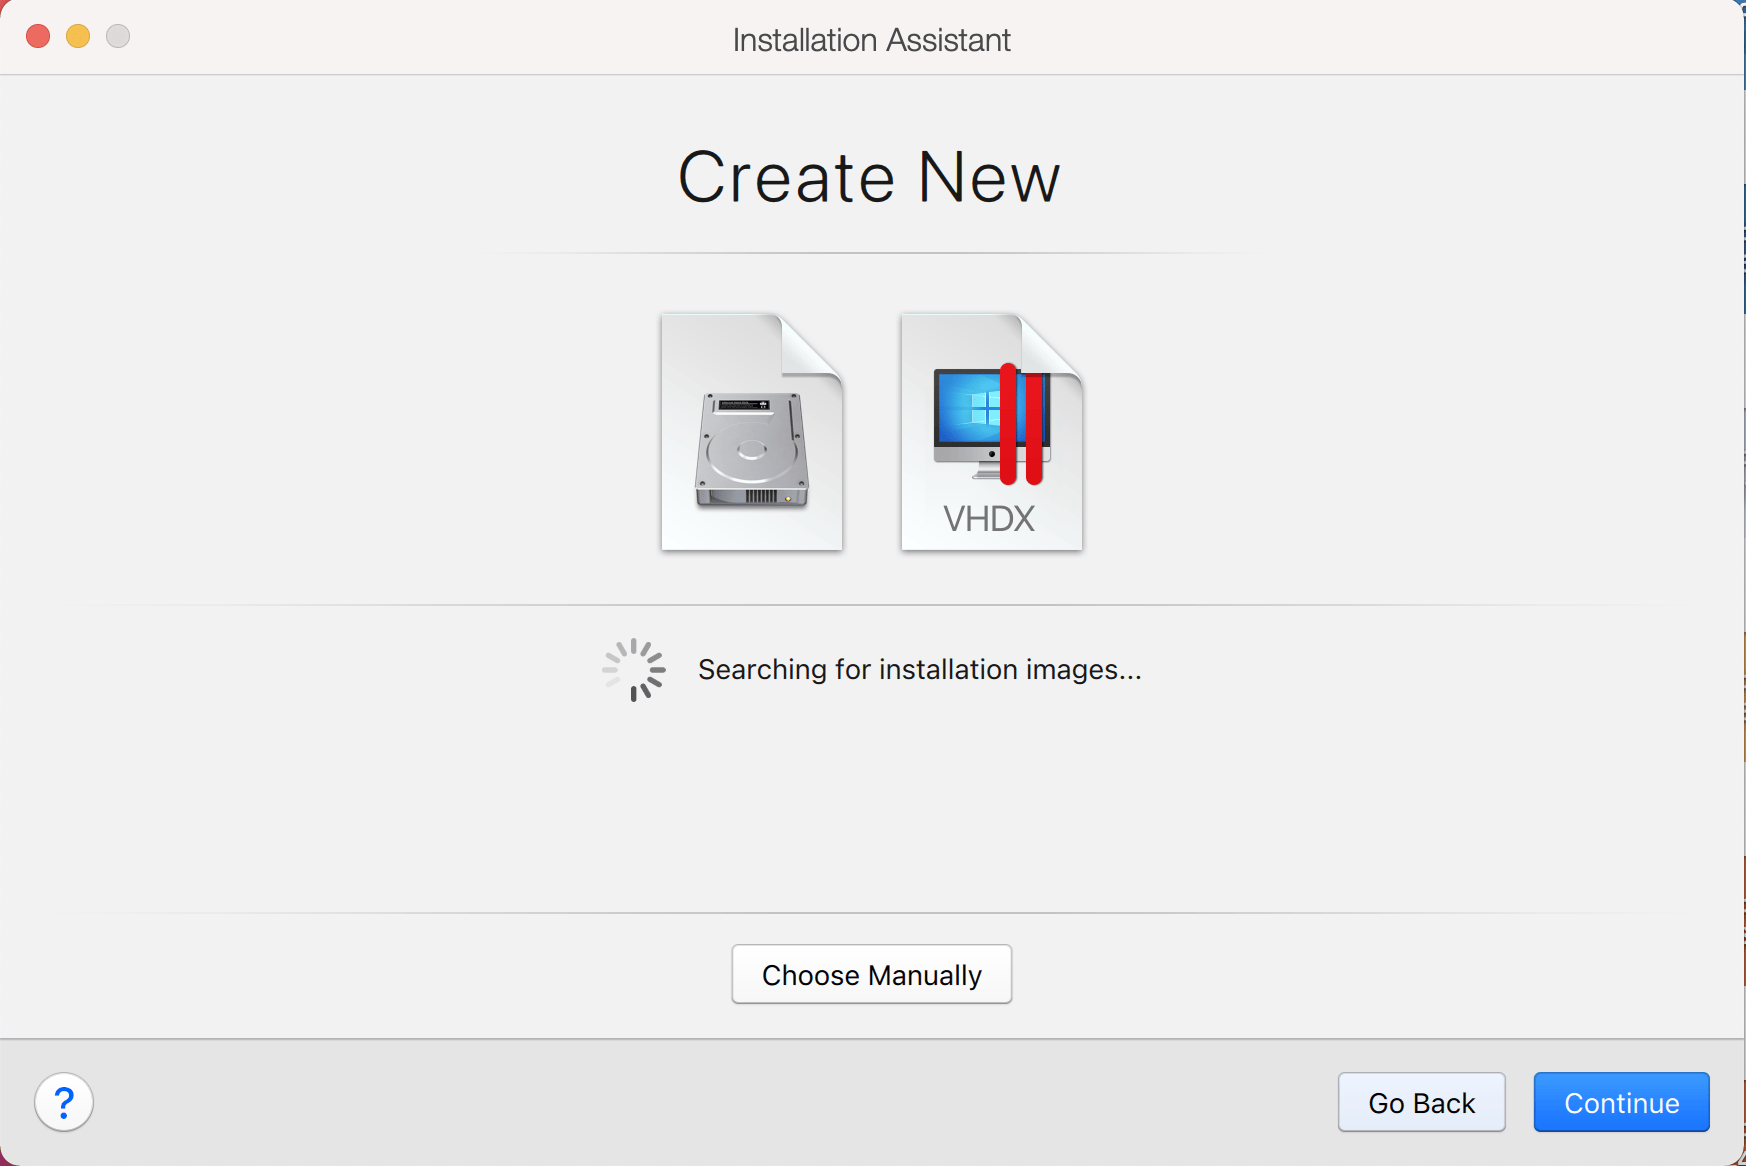
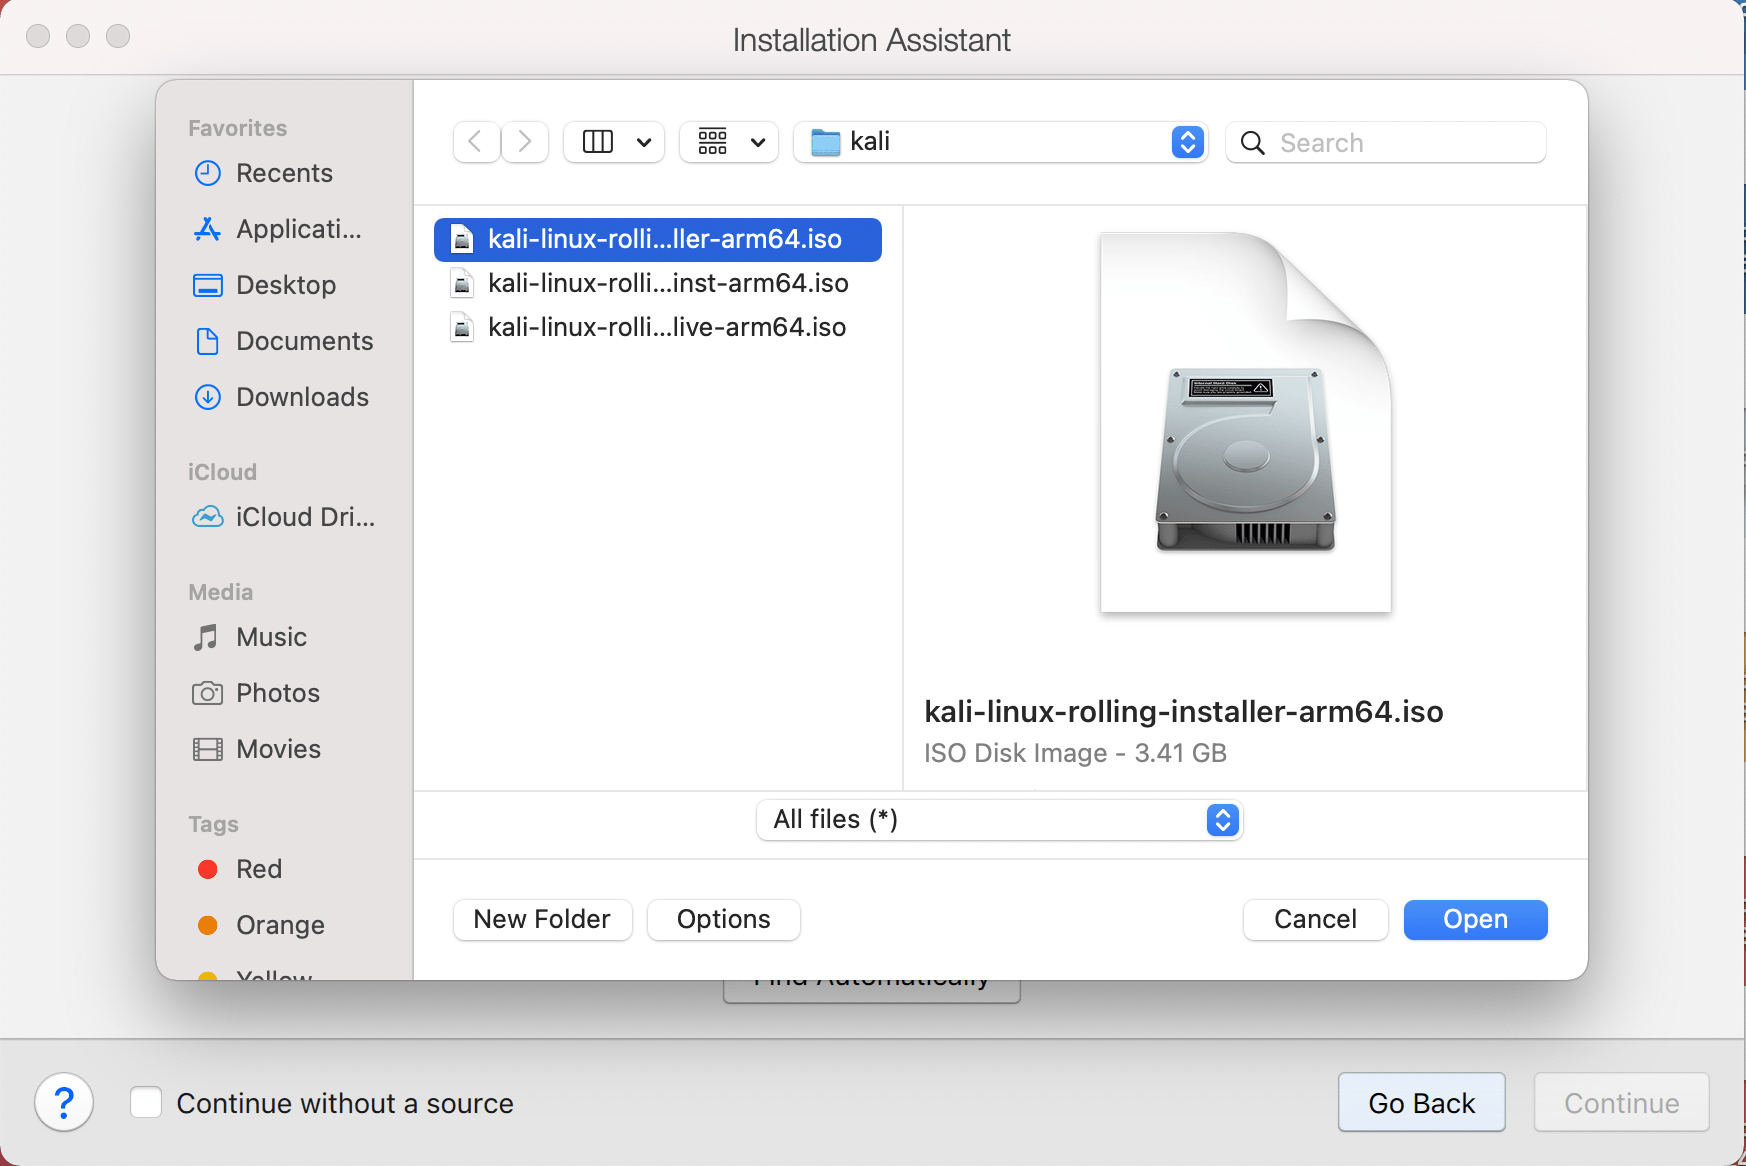
On this screen, we select the Kali Linux image to use to install from. We select “Choose Manually”, and navigate to the location of the ISO that we downloaded. For more information on what image to download, we have written up a guide.
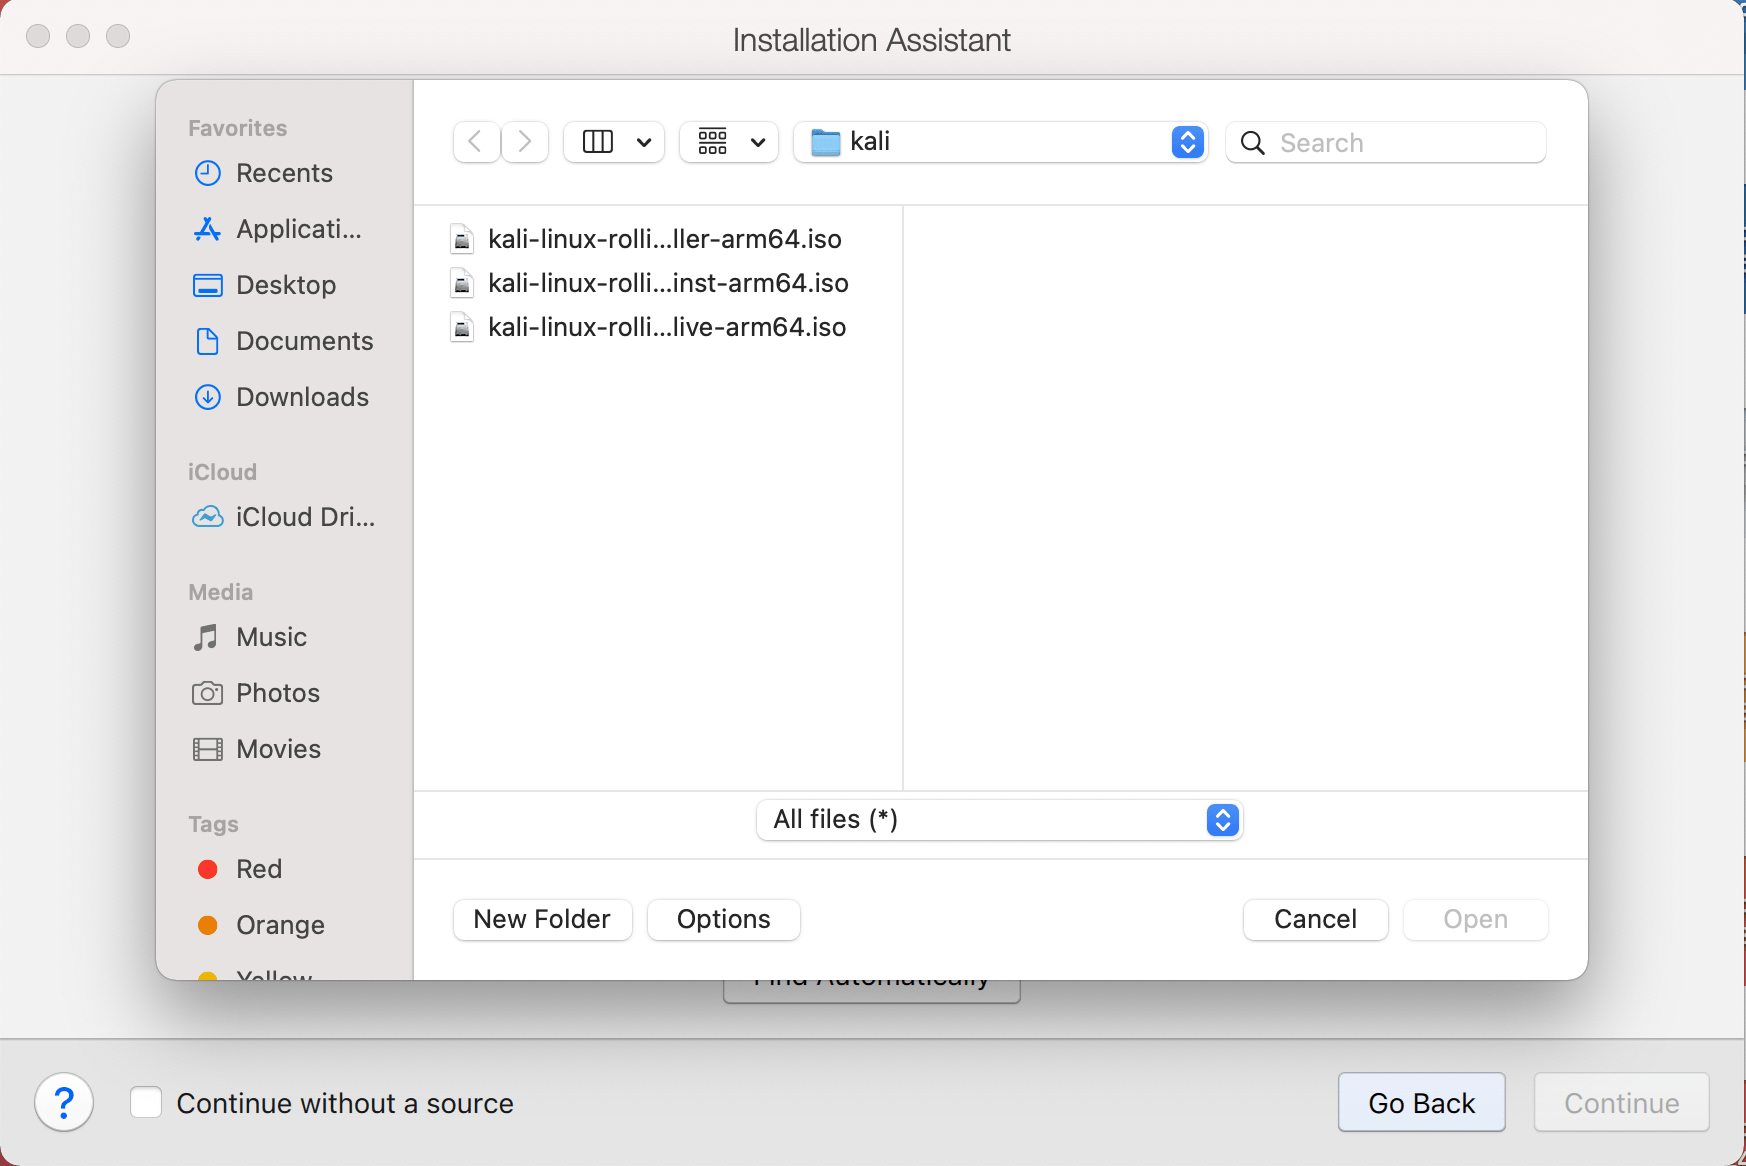
Either drag the ISO file or choose Select a file… to navigate to the downloaded ISO.
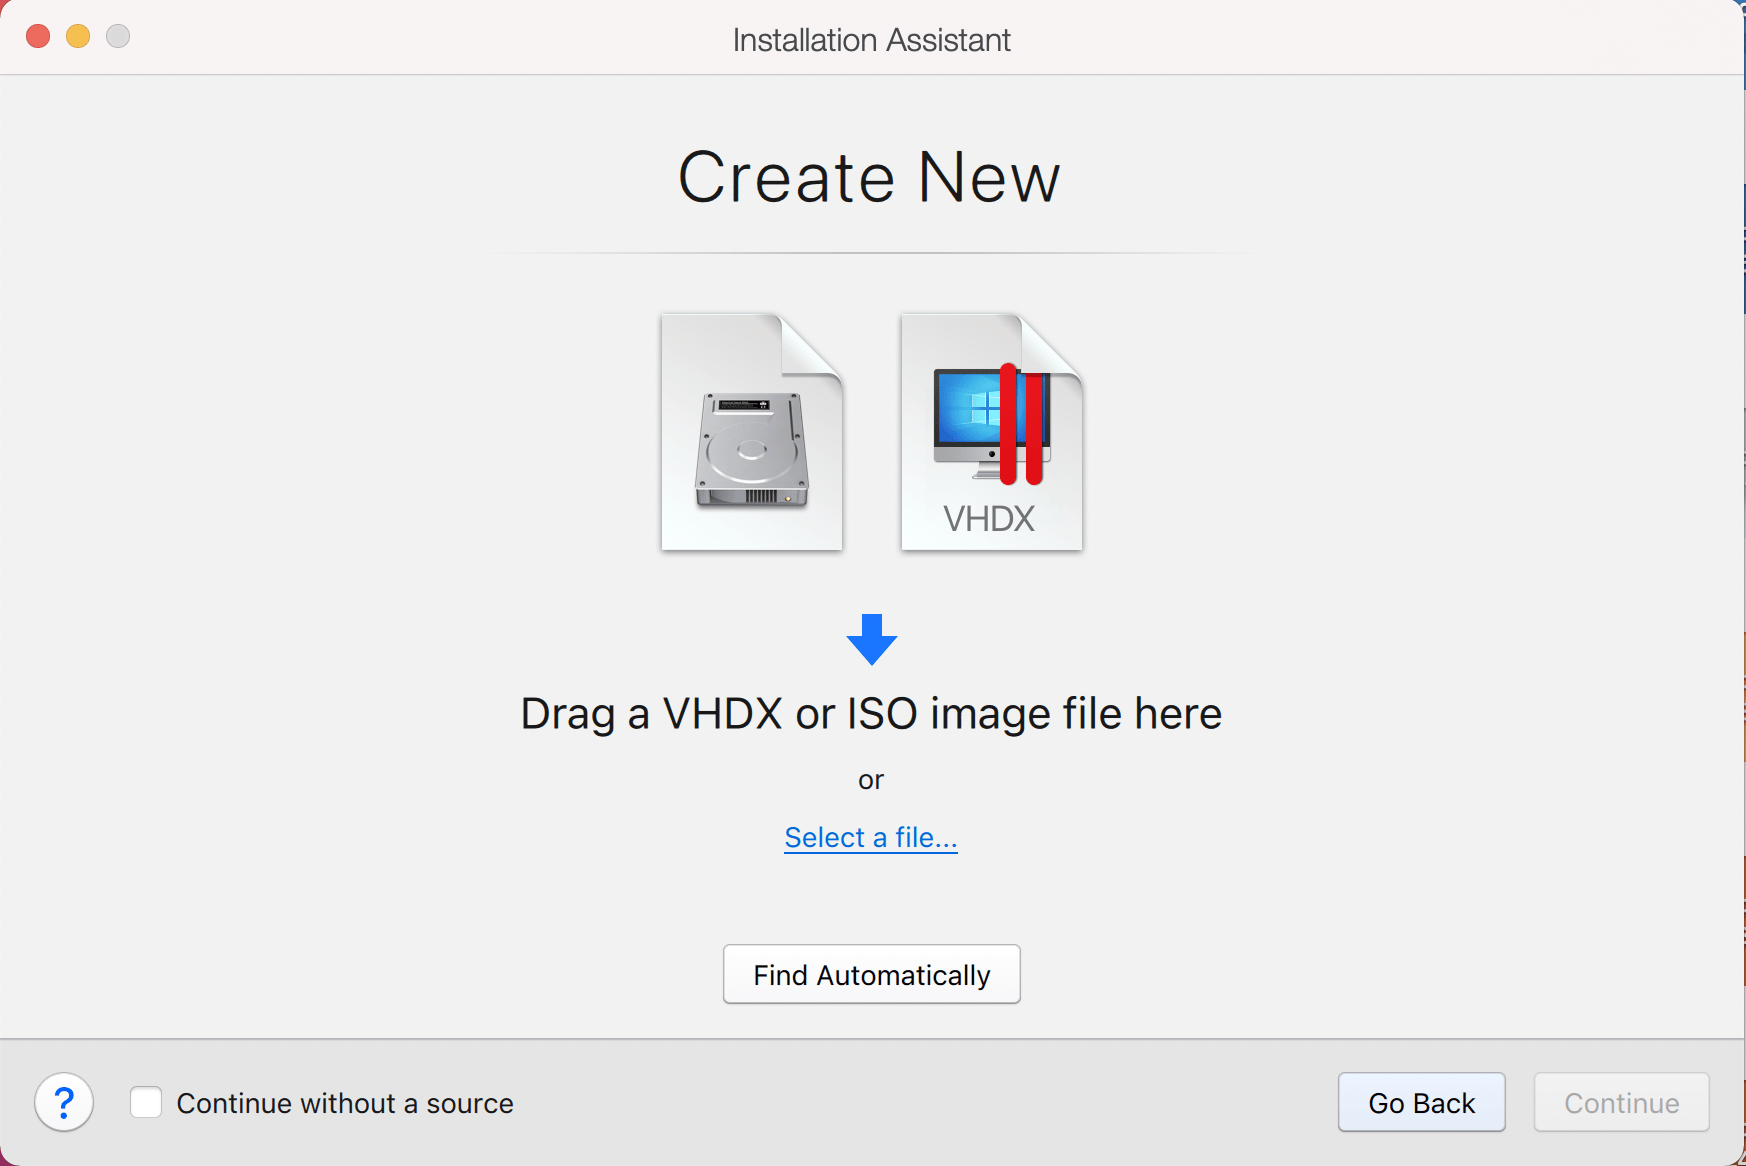
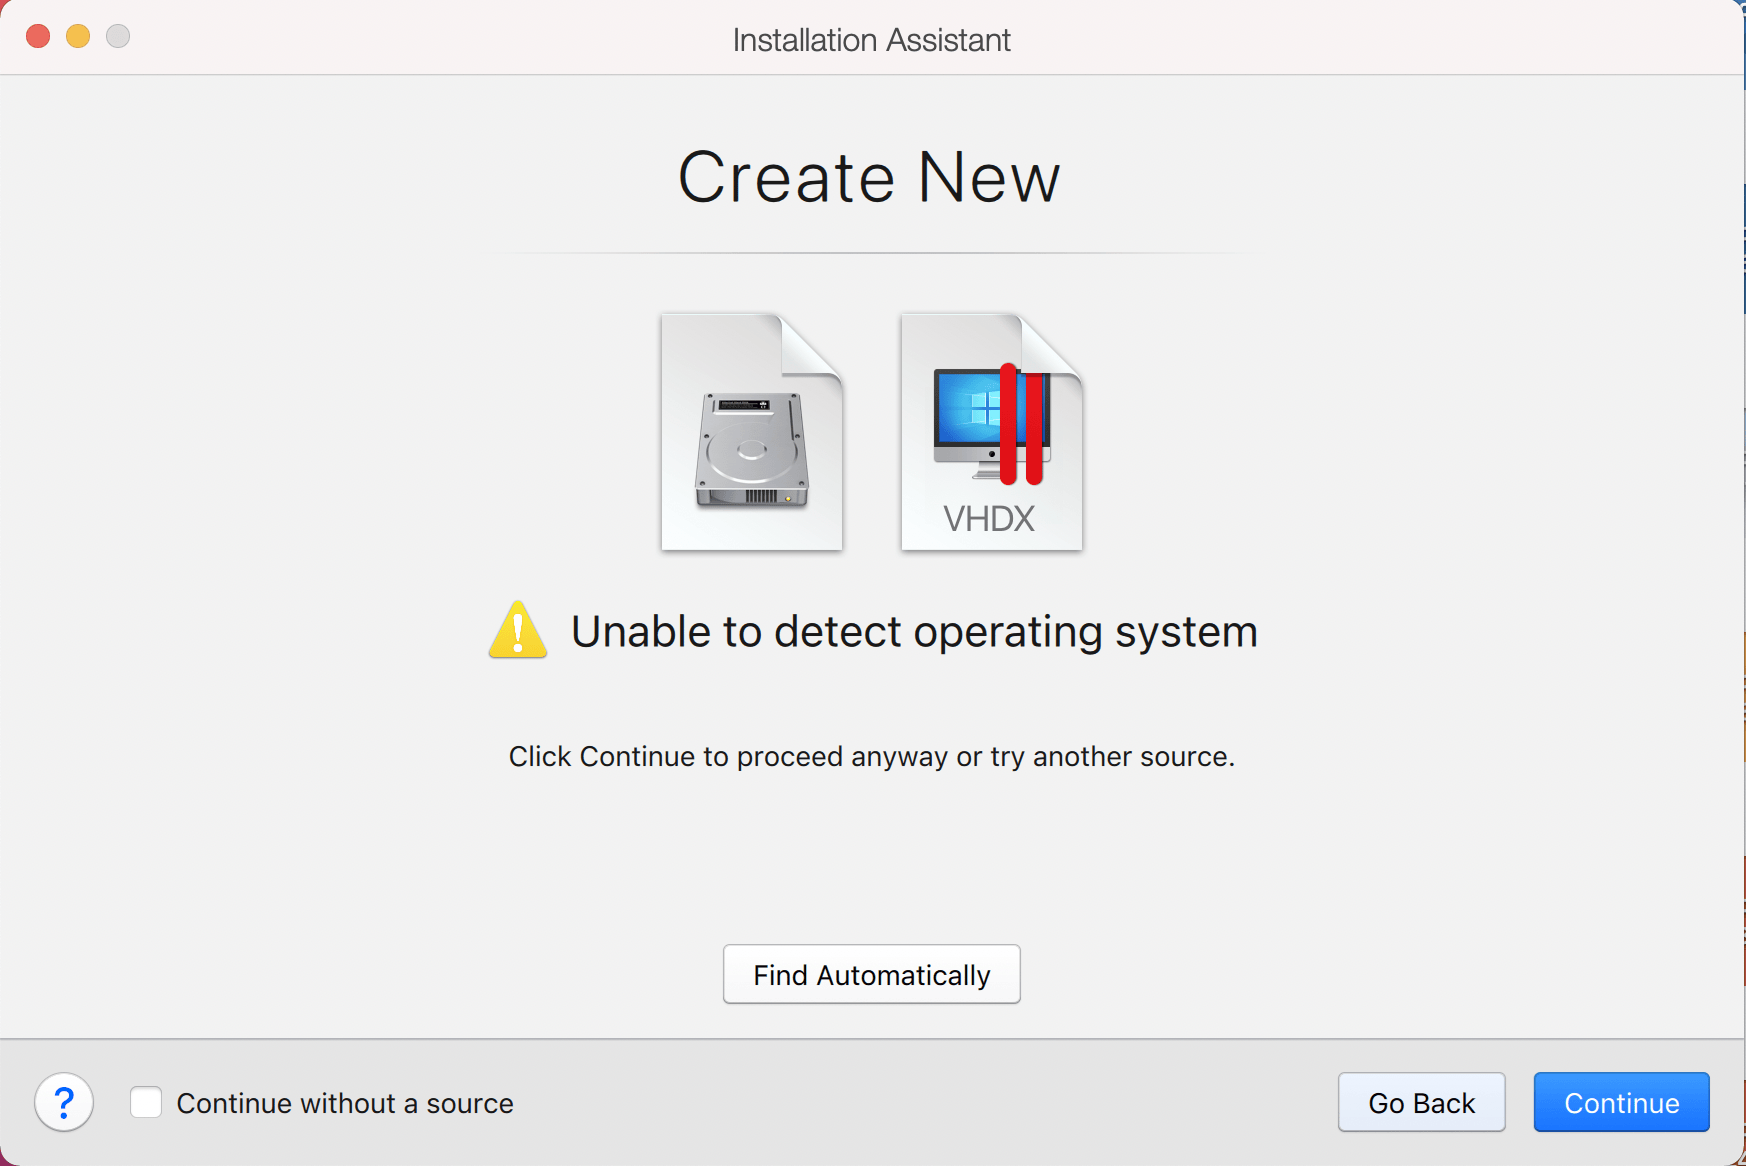
Parallels does not recognize the OS on the ISO, so we will choose Continue to proceed anyway.
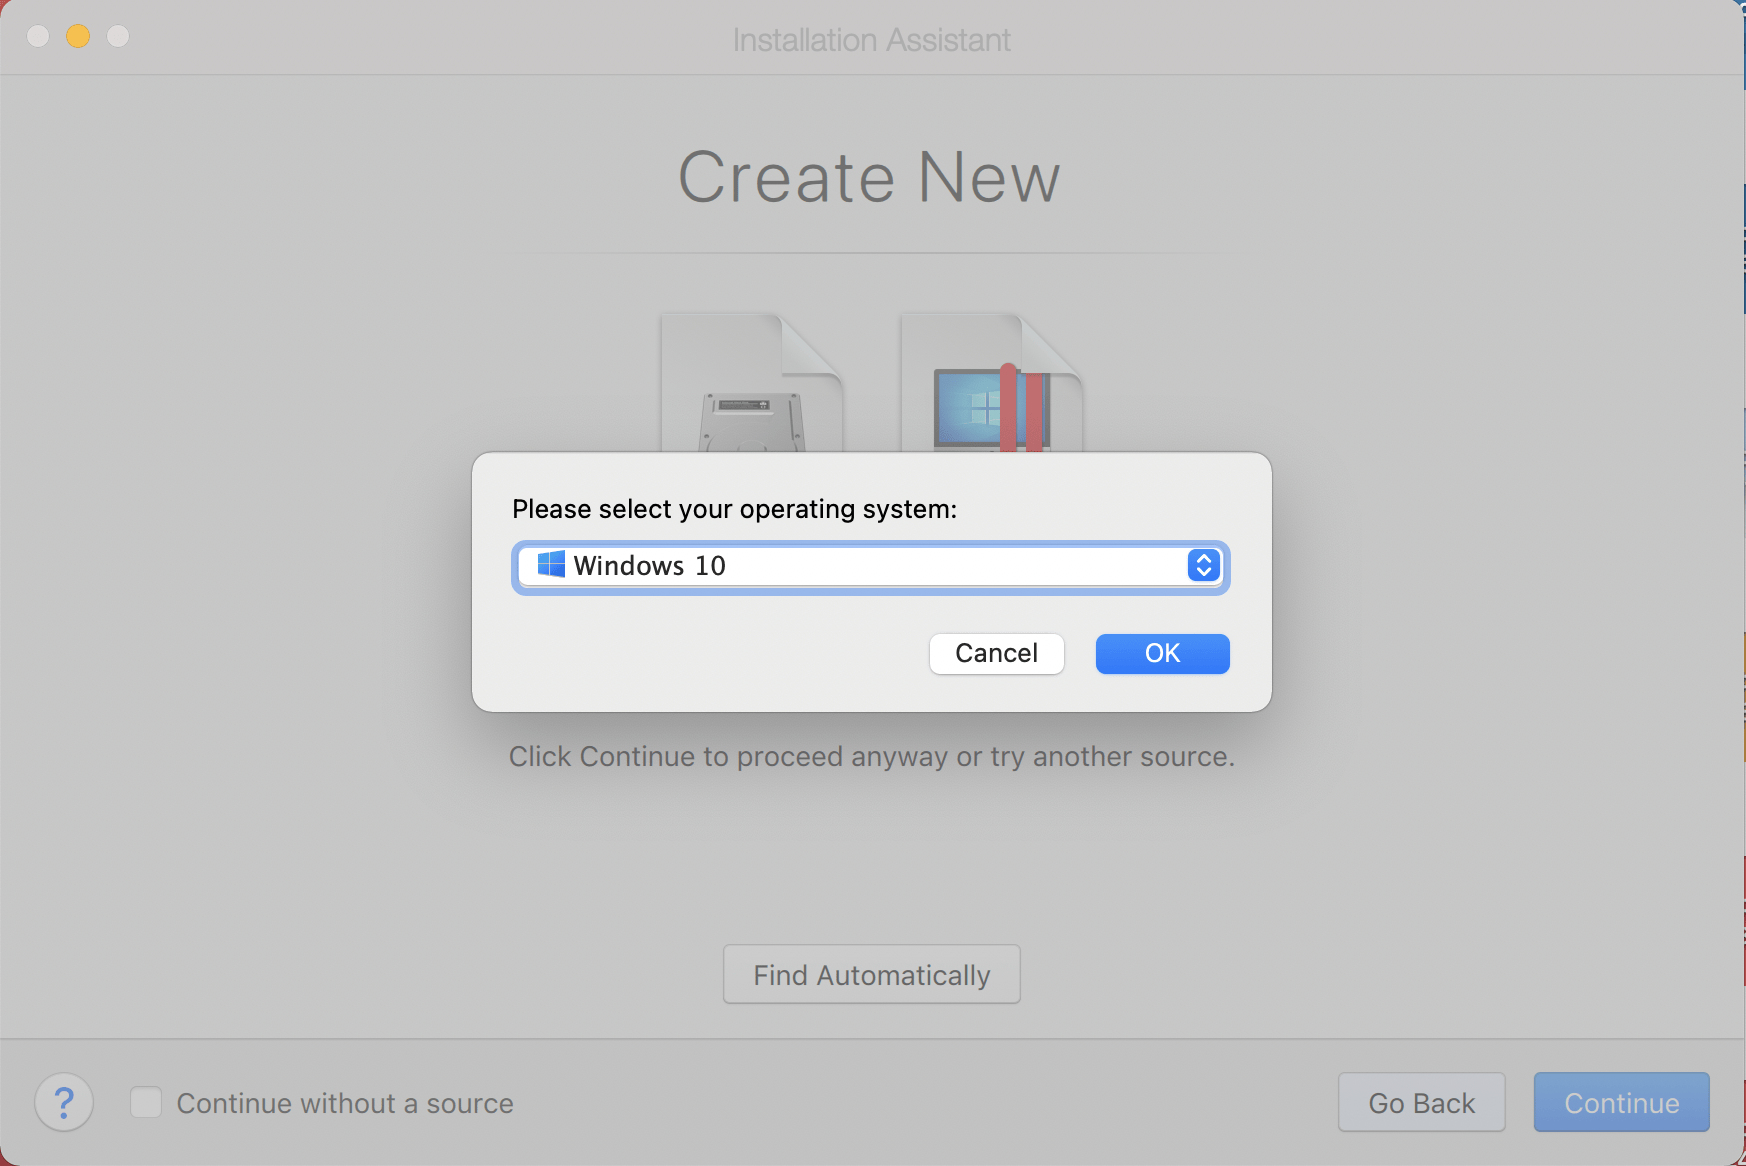
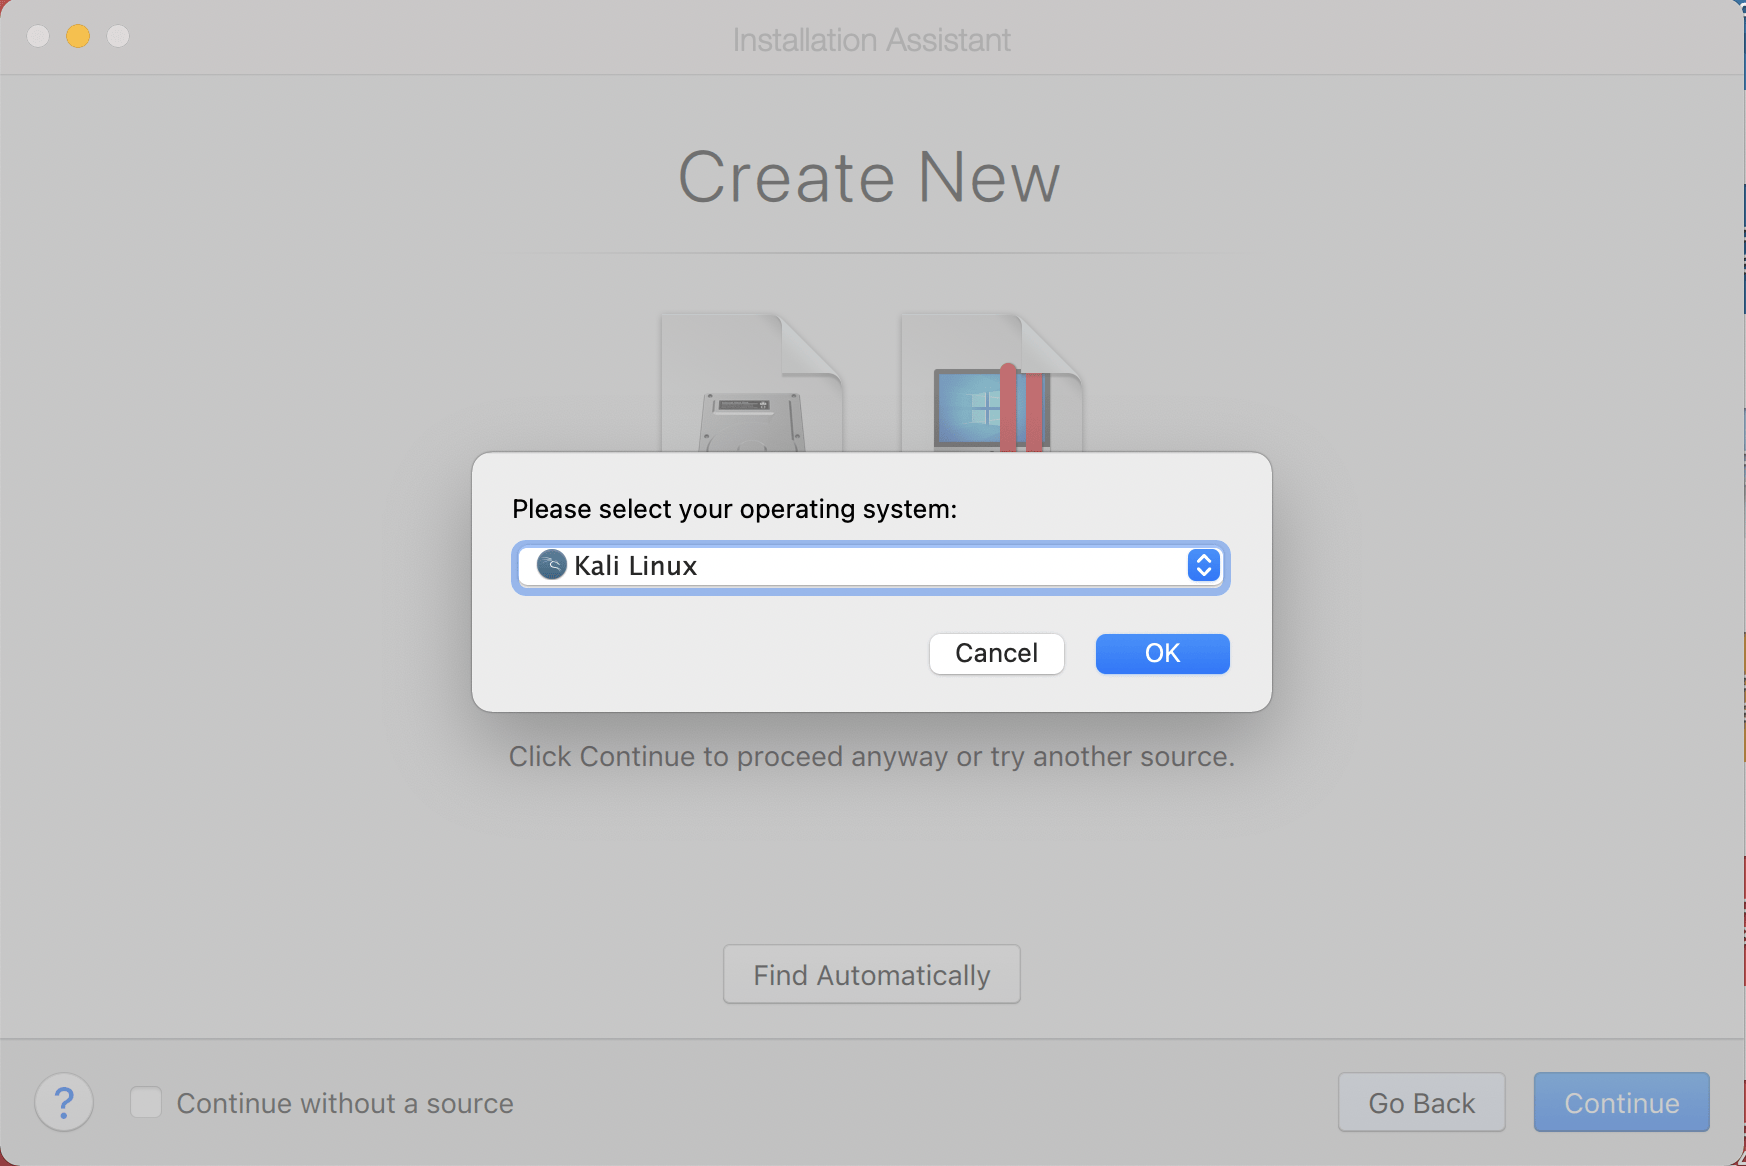
Once we have clicked Continue, we want to choose Ubuntu from the drop down list. Normally we would choose Debian however, there is a bug with the Parallels Tools, that does not occur when using Ubuntu.
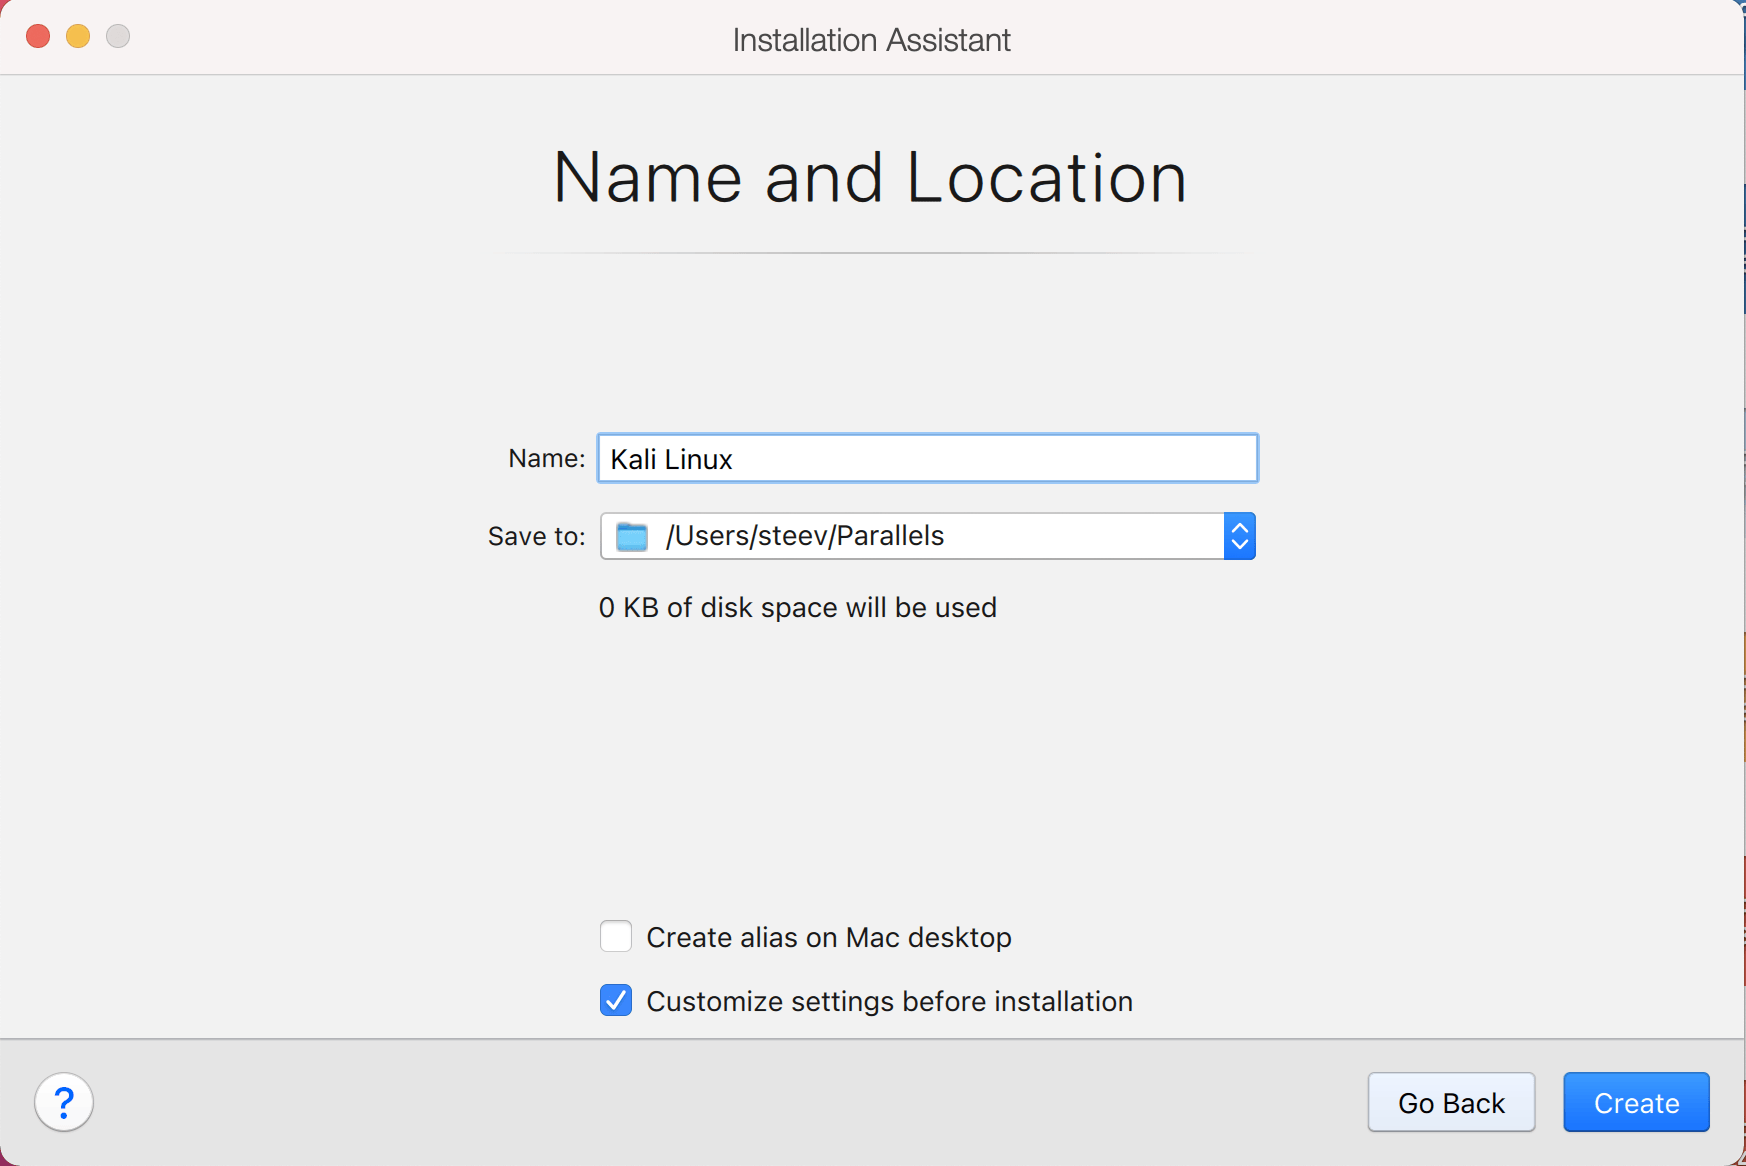
The next screen is “Name and Location”, which is where you name the VM. This name is also used as the filename (such as the configuration, hard disk and snapshot — which is not changed from this point).
We also want to mark the check box for Customize settings before installation
We are keeping it generic in this guide, by using “Kali Linux” (as Kali Linux is a rolling distribution, and we update Kali Linux).
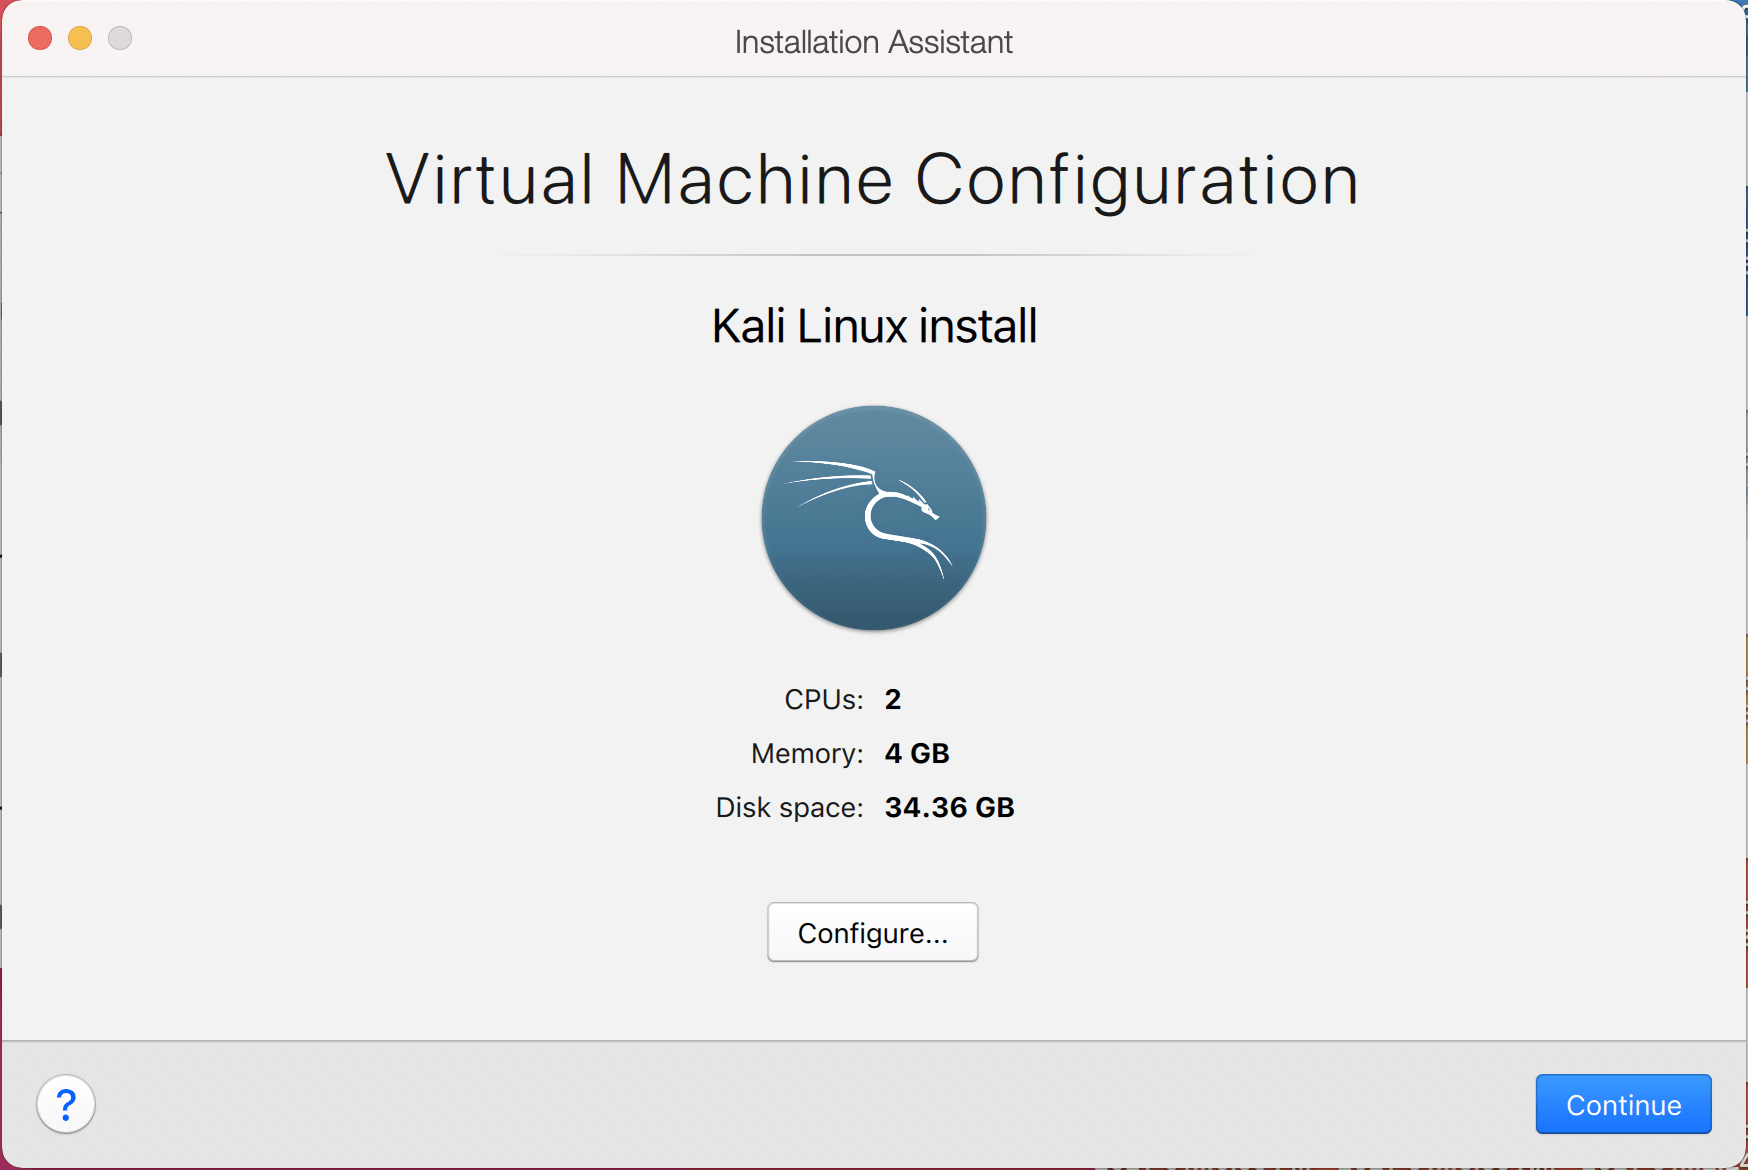
This will bring up the Configuration screen for the Virtual Machine.
The next screen is “Processors”. Here we can start to define how many resources we give the VM. Kali will be able to perform more tasks simultaneously and quicker if it is allocated more resources. We select “2 processors” and “** 2048 MB ** “, giving a total of 2 cores and 2GB of RAM. You may wish to use more or less depending on your system requirements.

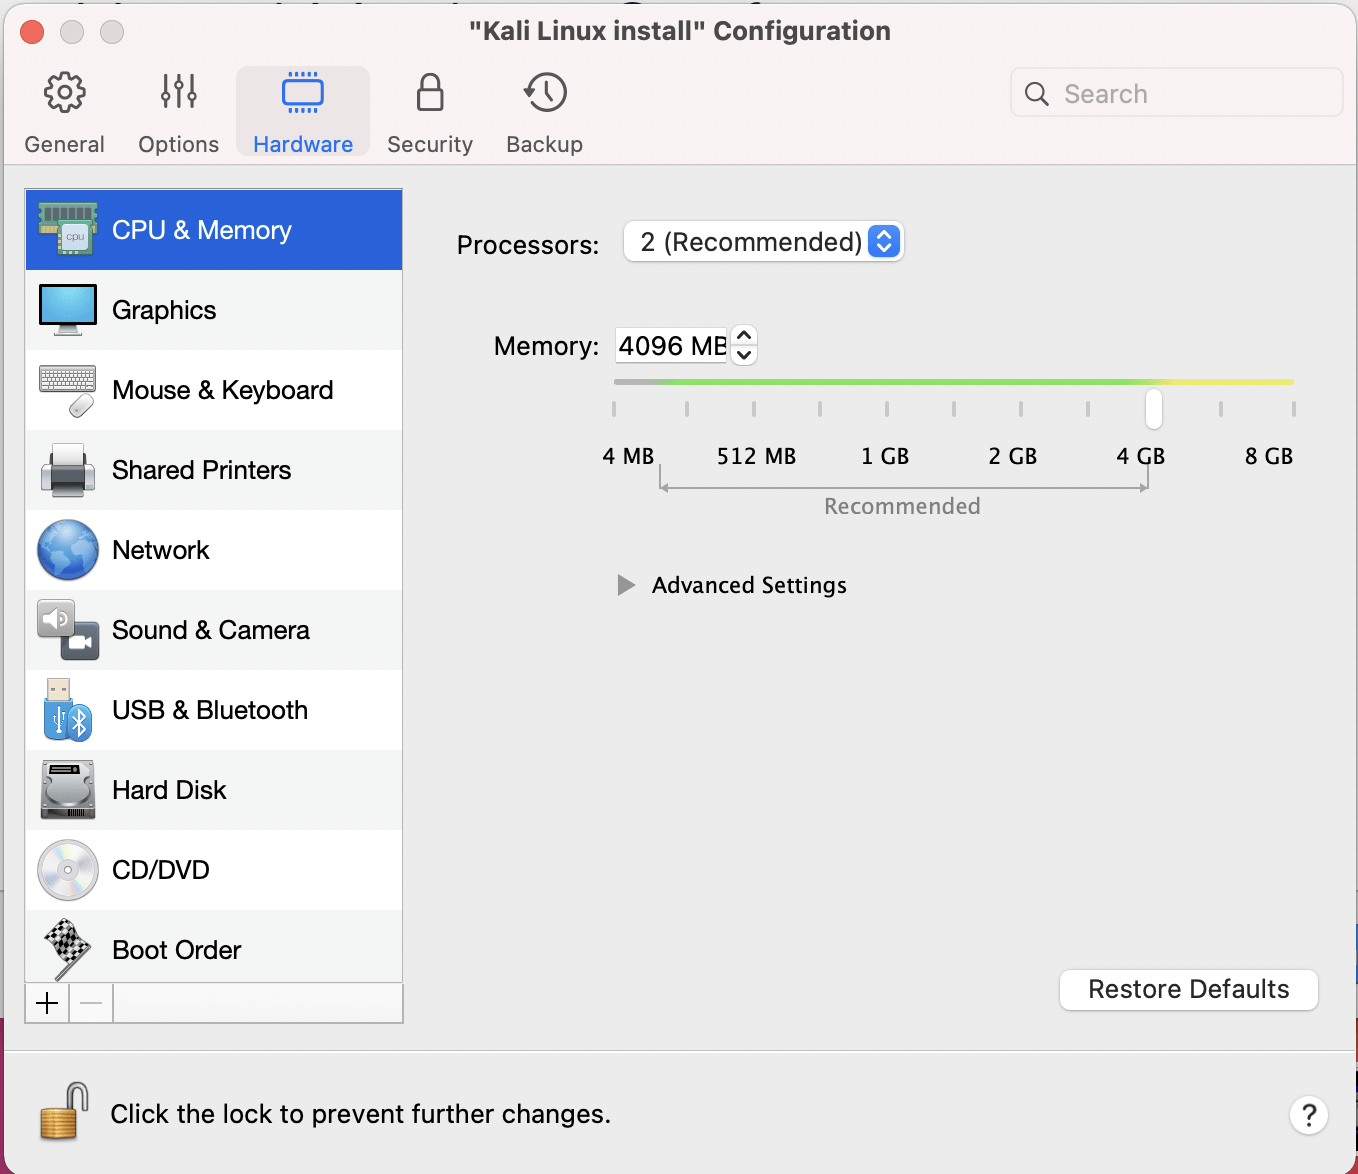
Now we want to choose Hard Disk so we can resize the hard disk.
Select the Properties button

And reduce the size to 32GB. You may wish to leave it at 64GB, or increase it, depending on your system requirements.
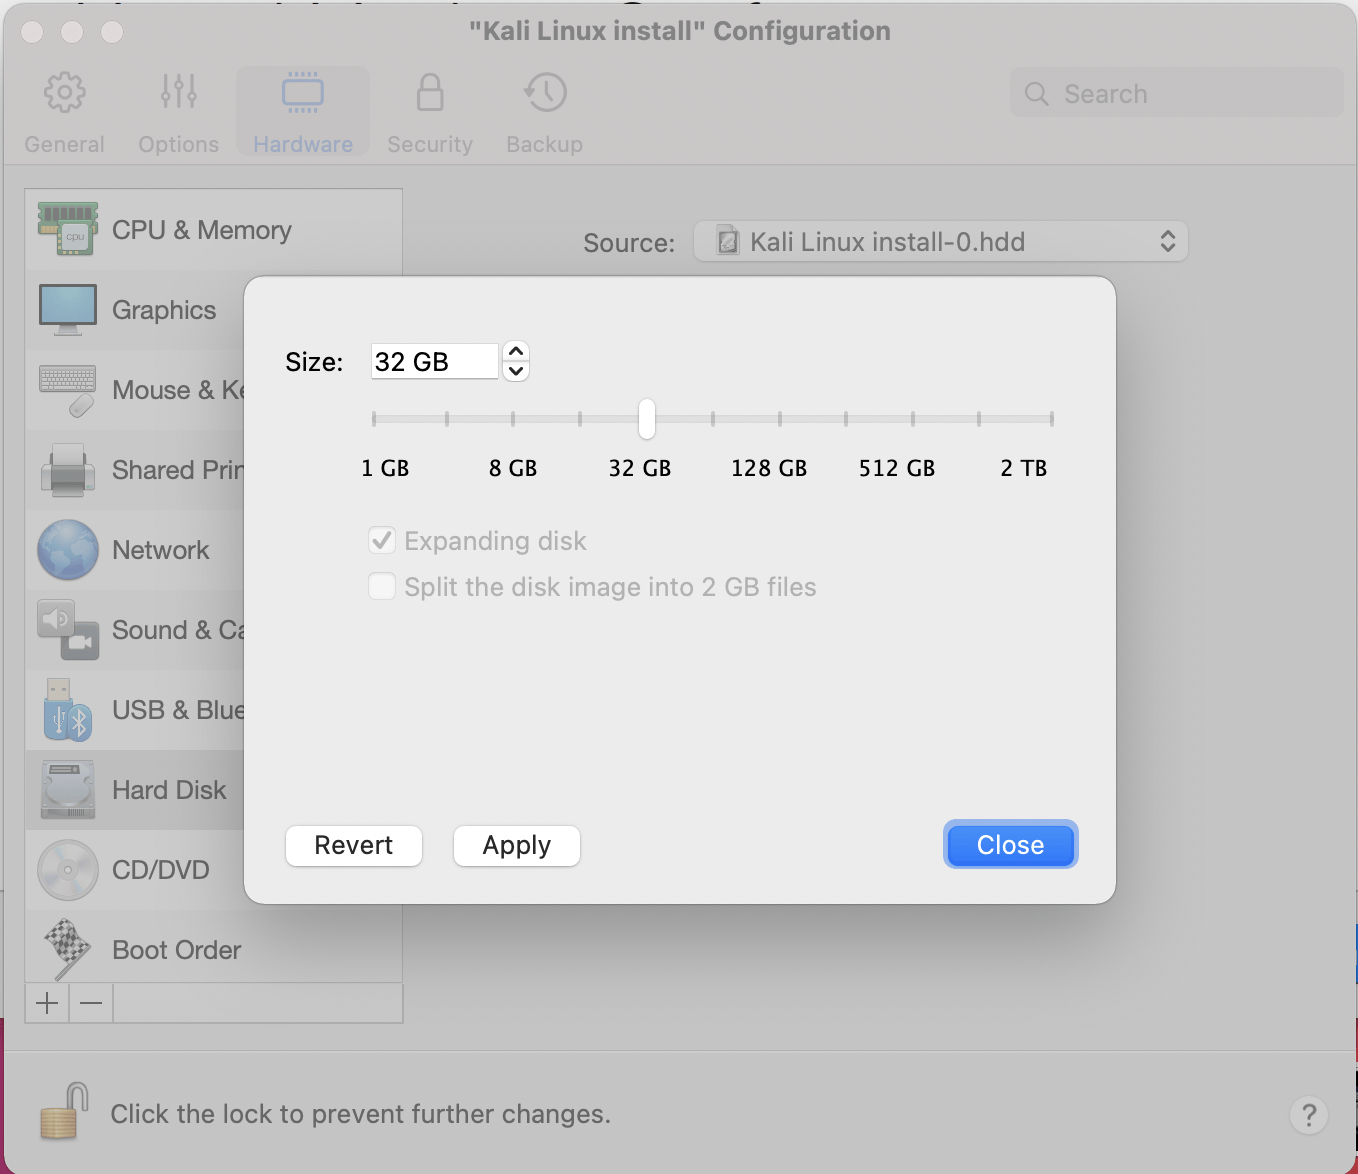
Click Apply and you will be prompted to Continue

Click Continue
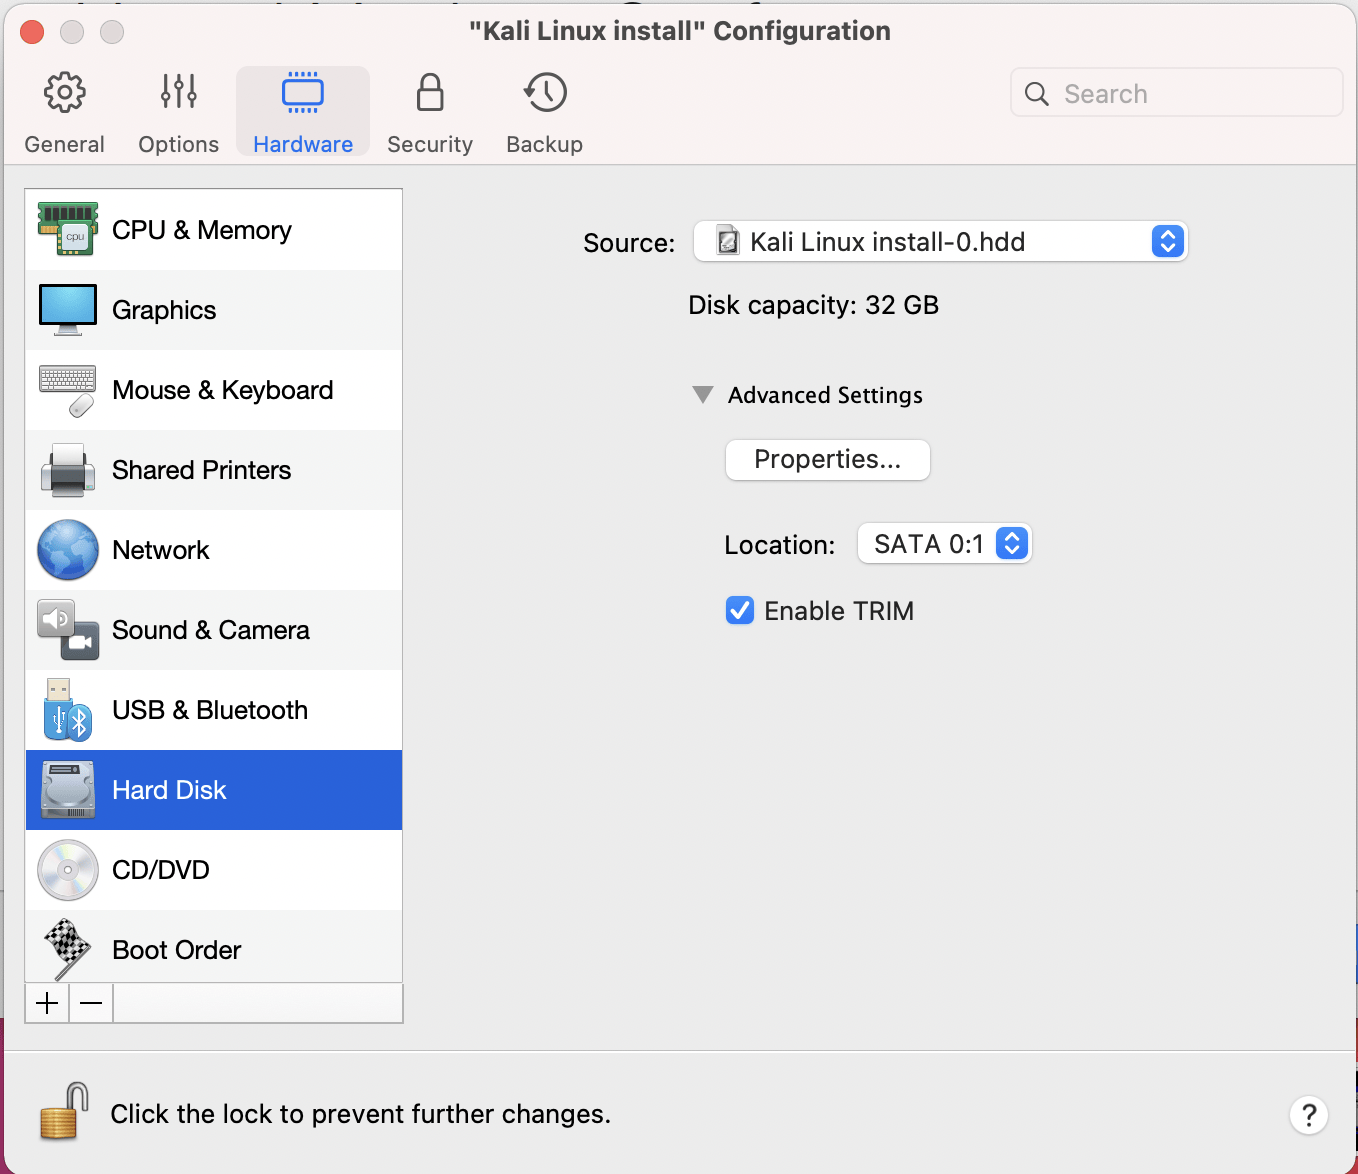
We can now close the Kali Linux Configuration window, and be back at the Installation Assistant screen.
After all this is done, we save, start up the VM, and then continue installing Kali Linux as we normally would for a bare metal install.
Updated on: 2023-Mar-06
Author: steev