- How to Run “patch” Command in Linux?
- Syntax:
- Creating a Patch File Using “diff”:
- Source Code File 1:
- Source Code File 2:
- Checking Difference:
- Applying the Patch File:
- Take a Backup Before Applying Patch:
- Setting Backup File Version
- Validate Patch Files
- Reverse/Undo a Patch
- Conclusion:
- About the author
- Aqsa Maqbool
- 7 Patch Command Examples to Apply Diff Patch Files in Linux
- 1. Create a Patch File using diff
- 2. Apply Patch File using Patch Command
- 3. Create a Patch From a Source Tree
- 4. Apply Patch File to a Source Code Tree
- 5. Take a Backup before Applying the Patch using -b
- 6. Validate the Patch without Applying (Dry-run Patch File)
- 7. Reverse a Patch that is Already Applied (Undo a Patch)
- How to Run “patch” Command in Linux?
- What is a patch Command in Linux?
- Syntax:
- How to Use the patch Command in Linux?
- Create the Patch file through “diff”
- Patching File
- Generating Backup Before Patching the File
- Generating Backup File Version
- Conclusion
How to Run “patch” Command in Linux?
![]()
The “patch” is a command for adding patch files to source code or text files. It takes input as a patch file and applies differences to original files. We use the “diff” tool to get the difference.
The “diff” is abbreviated as “differences” and is used to compare the content of two files and list the changes in standard output.
A set of source codes makes up a piece of software. Developers build the source code that evolves over time. Getting a new file for each update is unrealistic or time-consuming. Therefore, the safest method is to distribute improvements only. The modifications are made to the old file, and then a new or patched file is created for the new software version.
This guide shows you how to use the “diff” command to generate a patch file and then apply it with the “patch” command.
Syntax:
The syntax of the “patch” command is as follows:
$ patch [ options ] [ originalfile [ patchfile ] ]
Creating a Patch File Using “diff”:
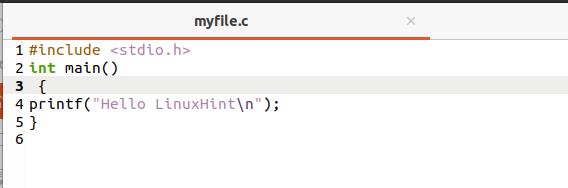
Source Code File 1:
Firstly, two different versions of a source code are required to create a patch file. The source code file I have created is named as “myfile.c”:s
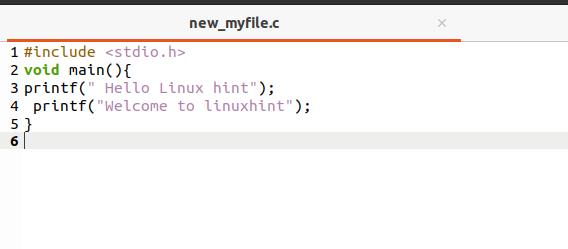
Source Code File 2:
Now, copy the content of myfile.c in the new_myfile.c, using:
Make some changes in the newly-created file:
Checking Difference:
Let’s create a patch file named as myfile.patch:

You can print the patch file by executing the command below:

Applying the Patch File:

Ensure that the patch file is in the directory where the source code file is placed.
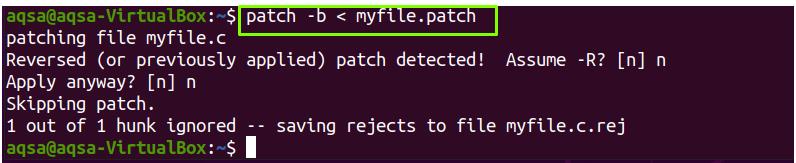
Take a Backup Before Applying Patch:
Use “-b” option to build a backup of the patch file:
Setting Backup File Version
If you need multiple backups of a single backup file, then use the “-V” option. It sets the version number of each backup file. Execute the command given below:

Validate Patch Files
If you want to verify or observe the outcome of patching, then use “–dry-run” option. It does not make any modification to the original file:

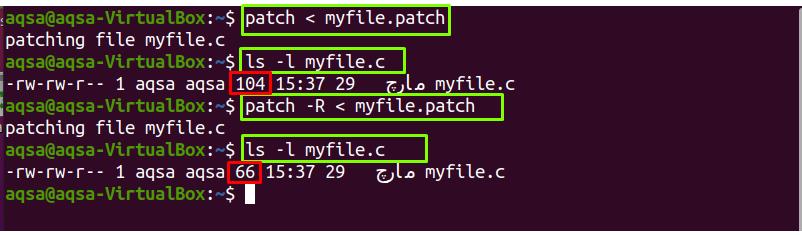
Reverse/Undo a Patch
The “-R” option is used to reverse or undo a patch that has already been applied.
Conclusion:
In Linux operating system, “patch” is a command that allows us to apply patch files to the source codes or configuration files. The patch file is used for software updating purposes. The difference between the original and new files is held in patch files and the “diff” command is used to get the difference or patch. We discussed the usage of the “diff” and the “patch” commands with a number of options such as making backups, dry-running, and reversing the applied patch.
About the author
Aqsa Maqbool
As a Software engineer, I am passionate to write about various IT related
articles but have deep interest in Linux. I spend most of my time reading Linux related blogs and IT related books. I want to serve the world with my writing skills.
7 Patch Command Examples to Apply Diff Patch Files in Linux
When there is a security fix available for a particular software, we typically do a binary upgrade using the package management tools like yum or apt-get. But, there might be situation where you have installed a software by compiling it from the source code. In those situation, how do you apply the security fix to the software? The answer is to download the security patch and apply it to the original source code and re-compile the software. This tutorial explains how to create a patch file using diff, and apply it using patch command.
A patch file is a text file which contains the differences between two versions of the same file (or same source-tree). Patch file is created by using diff command.
1. Create a Patch File using diff
#include int main(int argc, char *argv[])
$ diff -u hello.c hello_new.c > hello.patch
— hello.c 2014-10-07 18:17:49.000000000 +0530 +++ hello_new.c 2014-10-07 18:17:54.000000000 +0530 @@ -1,5 +1,6 @@ #include -int main()
2. Apply Patch File using Patch Command
The “patch” command takes a patch file as input and apply the differences to one or more original file(s), producing patched versions.
The hello.patch file contains the name of the file to be patched. Once the file is patched, both hello.c and hello_new.c will have the content.
3. Create a Patch From a Source Tree
The above example was so simple that it works only with one file. We will see how to create and apply patch for a complete source tree by taking “openvpn” source code as example. I’ve downloaded 2 version of openvpn, openvpn-2.3.2 and openvpn-2.3.4.
tar -xvzf openvpn-2.3.2.tar.gz tar -xvzf openvpn-2.3.4.tar.gz
diff -Naur /usr/src/openvpn-2.3.2 /usr/src/openvpn-2.3.4 > openvpn.patch
The above command will operate recursively and find the differences, and place those differences in the patch file.
4. Apply Patch File to a Source Code Tree
Please note that we are executing the command from /usr/src/. The patch file contains all the filenames in absolute path format( from root ). So when we execute from /usr/src, without the “-p” option, it will not work properly. -p3 tells the patch command to skip 3 leading slashes from the filenames present in the patch file. In our case, the filename in patch file is “/usr/src/openvpn-2.3.2/aclocal.m4”, since you have given “-p3”, 3 leading slashes, i.e. until /usr/src/ is ignored.
5. Take a Backup before Applying the Patch using -b
You can take a backup of the original file before applying the patch command using the -b option as shown below.
Now you will have a file name “hello.c.orig”, which is the backup of the original hello.c. You can also use -V to decide the backup filename format as shown below. Now you will have a file name “hello.c.~1~”.
6. Validate the Patch without Applying (Dry-run Patch File)
You can dry run the patch command to see if you are getting any errors, without patching the file using –dry-run option as shown below.
7. Reverse a Patch that is Already Applied (Undo a Patch)
You can notice from the filesize, that the patch, which is applied already is reversed when we used the -R option.
How to Run “patch” Command in Linux?
In Linux, the patch is the built-in utility for patching the files (source code or text files). The input is given as the patch file, and differences are applied to the original file. For differences, we use the “diff” tool. The “diff” (Differences) used for comparing the content of the two file changes is listed in the standard output.
This article will demonstrate the use of the “Patch” command in Linux. The content for the post is:
Let’s get into the basics of the patch command.
What is a patch Command in Linux?
As mentioned above, the “patch” command is a built-in utility for patching files. You can check the version of the patch command by running the given command in the terminal:
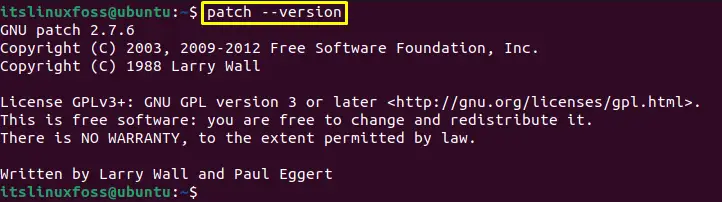
The patch version 2.7.6 is installed.
The syntax for the patch command is given below:
Syntax:
$ patch [Options] [Original_File] [Source_File]
Type the “patch” keyword, “options” for patching the files, “original file,” and the “source file”. While the options can be retrieved using the command.
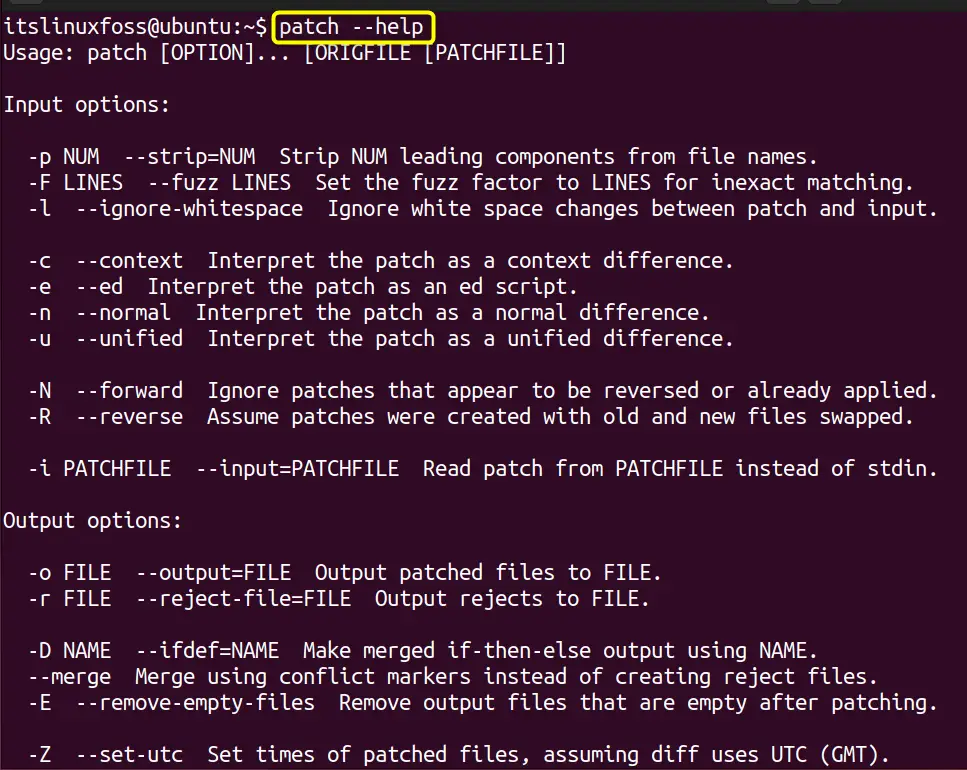
Now, let’s explore the usage of the patch command.
How to Use the patch Command in Linux?
To use the patch file in Linux, let’s create two files and apply the patch utility to these files using the “diff” tool. Check out the implementation of the following examples.
Create the Patch file through “diff”
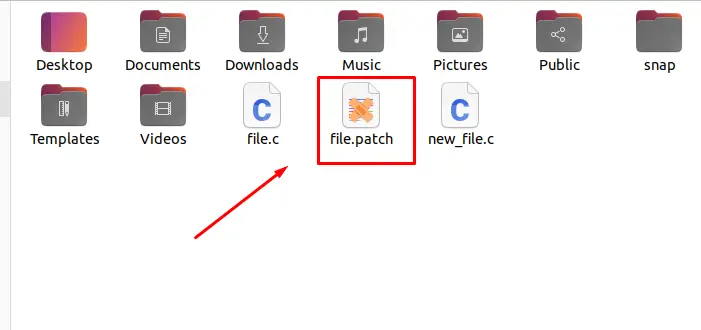
We have two files in our directory with the name “file.c” and “new_file.c” open the nano editor and add some C language code in the original file (file.c):
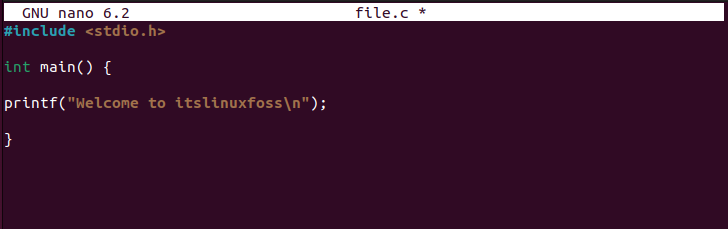
After adding the code, save the file by pressing “Ctrl+O” and exit from the terminal using “Ctrl+X”.
After that, copy the original file (file.c) to the source file (new_file.c):

The file “file.c” has been copied to the “new_file.c”.
Let’s add some modifications to the “new_file.c”
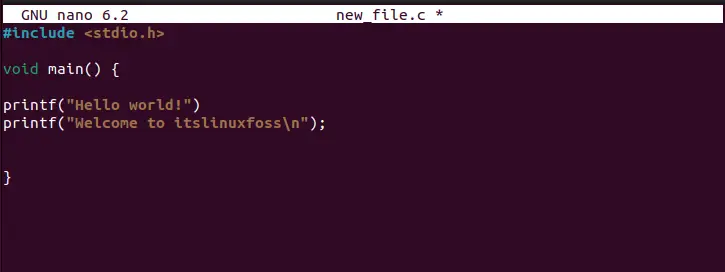
Save the file after making changes.
Now, let’s create the patch file using “diff”. To do so, run the given command in the terminal
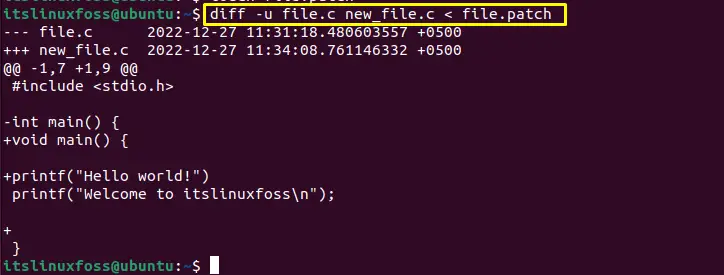
The patch has been created.
Patching File
To apply the patch, use this command in the terminal:

The patch has been applied to the file:
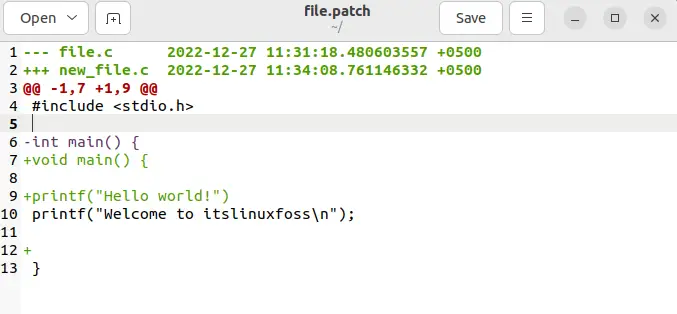
Below is the output of the patch file:
Let’s move and explore more options for patching the file.
Generating Backup Before Patching the File
To generate the backup file before patching, you can use the “b” flag in the command:

The backup file will be created before applying the patch. Let’s check it using the “ls” command:

The backup file is created with the “.orig” extension.
Generating Backup File Version
Users can also use the backup file version-wise, for doing this, use the “V” flag and type the “numbered” to specify the version in numbers:

Whenever you execute the above command, it will generate the backup file with numbers (1, 2, 3). To verify it, let’s run the “ls” command in the terminal:

We have created three versions of the files that can be seen in the above image.
That’s all about the “patch” command.
Conclusion
The “patch” is the built-in utility for patching the files (source code and text). It is used for updating the software with the new patch. The difference between the 2 files (source and original) is stored in the patch file through the “diff” tool. This write-up has illustrated the method to use the “patch” command in Linux.