- Path to jdk linux mint
- How to Install Java in Linux Mint 20.3
- How Can I Install Java in Linux Mint 20.3?
- Step 1: Install the Java Development Kit
- Step 2: Install the Java Runtime Environment
- Step 3: Check the Installed Version of Java
- Conclusion
- About the author
- Karim Buzdar
- Install Oracle Java Development Kit (JDK) 10 on Linux Mint 19
- Installing Oracle JDK 10:
- Adding Oracle JDK 10 to the PATH:
- Testing Oracle JDK 10:
- Compiling a Simple Java Program with Oracle JDK 10:
- Running a Java Program with Oracle Java 10:
- About the author
- Shahriar Shovon
Path to jdk linux mint
Just wanted to inform, this STILL works !! jdk19 ! 🙂 Thank you !
In step 8, I found I didn’t need the update-alternatives —set call. The —install call did everything I needed.
The JDK installation has several other programs besides java, such as javac, javadoc, and javap. I made a shell script of update-alternatives —install calls for each of them and ran that as root to finish the installation.
To the previous user: I suspect that the problem is that you literally copied and pasted jdk1.7.0_25 when you were actually installing a different version. Try using the actual directory name created when you unpacked the tarball.
I get the following error;
update-alternatives: error: alternative path /opt/java/jdk1.7.0_25/bin/java doesn’t exist
@matpil
Thanks for your help
@rtiwari95
Hi, you need to use sudo also on the second part of the command:
sudo apt-get update && sudo apt-get remove openjdk*
Another «issue»:
For mozilla plugin the commands are:
mkdir -p ~/.mozila/plugins
ln -s /opt/java/jdk1.7.0_25/jre/lib/amd64/libnpjp2.so ~/.mozila/plugins/
i have a problem
showing this after entering first command please help!
E: Could not open lock file /var/lib/dpkg/lock — open (13: Permission denied)
E: Unable to lock the administration directory (/var/lib/dpkg/), are you root?
Good job dudko and wolfred.It worked for me.
Linux Mint 18-1 «Serena» Mate 64 bit
java version 1.8.0_112
Java(TM) SE Runtime Environment (build 1.8.0_112-b15)
Java HotSpot(TM) 64-Bit Server VM (build 25.112-b15, mixed mode)
Appreciate it guys!!
Thanks a lot for this great tutorial.
Easy to understand and it worked for me.
Mint 17.3 KDE now
java version «1.8.0_111»
Java(TM) SE Runtime Environment (build 1.8.0_111-b14)
Java HotSpot(TM) 64-Bit Server VM (build 25.111-b14, mixed mode)
Nicely written, works like charm. Thank you!!
I have a problem when i run «Javac»:
$ javac
The program ‘javac’ can be found in the following packages:
* default-jdk
* ecj
* gcj-4.6-jdk
* gcj-4.7-jdk
* openjdk-7-jdk
* openjdk-6-jdk
Try: sudo apt-get install
So i installed default-jdk from the software manager and problem SOLVED.
In this tutorial it explain another way to solve this problem.
$ update-alternatives —install /usr/bin/javac javac /opt/java/jdk1.8.0_101/bin/javac 100
$ update-alternatives —config javac
Very nice tutorial, thank you sir 🙂
Kernel: 3.19.0-32-generic x86_64 (64 bit)
Desktop: Cinnamon 2.8.8
Distro: Linux Mint 17.3 Rosa
java version «1.8.0_91»
Java(TM) SE Runtime Environment (build 1.8.0_91-b14)
Java HotSpot(TM) 64-Bit Server VM (build 25.91-b14, mixed mode)
I followed the Tutorial that describes how to install using the ppa created by webupd8.org. (Search for the that article.)
There are simpler ways to get Java onto the machine than this convoluted article shows.
The instructions are a bit terse, there is plenty of room for stuff to go wrong,
for instance:
I have a non standard location for my downloads even though I fixed it so that it still looks like it is under my home directory so when i did your step 5 I got a mass of errors that quickly zipped off the screen and if I hadnt noticed them would have left my Java folder short of a couple of hundred of the most important files, I looked in the folder and it had lots of stuff there so thought maybe they had been warnings went and had a look it was a permission thing I went back to step 5 and added sudo to the beginning of your first line and it went thru.
Also in your final Optinal(sic) step you have mispelled mozilla — not sure if thats an issue actually but makes me a bit suspicious that you didnt actually run those commands — just typed them here. And there is simply not enough information there to know how the .mozilla/plugins folder will be used and by who, I had a look around and firefox has a couple of plugins directories but not there, and will this work for multiple users or just me?
This is all intended as constructive criticism, I appreciate the effort you put into it, I just dont want anyone to come to grief because of it.
Thanks a lot. Worked perfectly 🙂
How to Install Java in Linux Mint 20.3
![]()
Java is one of the most widely used high level programming languages available in the market. Along with that, this programming language is extremely easy to learn and once you get your hands on it, it will help you a lot with the complex programmatic tasks. In this guide, we will learn to install the Java programming language on a Linux Mint 20.3 system together.
How Can I Install Java in Linux Mint 20.3?
You can install Java in your Linux Mint 20.3 system in just three simple steps that are explained in the following:
Step 1: Install the Java Development Kit
First, you need to install the Java Development Kit (JDK) on your system with the command that follows:

Step 2: Install the Java Runtime Environment
Now, you can also install the Java Runtime Environment (JRE) by executing the following command:

Step 3: Check the Installed Version of Java
Once both the JDK and JRE are installed successfully in your Linux Mint 20.3 system, you can confirm the Java installation by checking its version with the following command:

The following image confirms the installation of Java in our Linux Mint 20.3 system:

Conclusion
By following the three simple steps explained, you can quickly install the Java programming language in your Linux Mint 20.3 system and start coding with this high level programming language right away.
About the author
Karim Buzdar
Karim Buzdar holds a degree in telecommunication engineering and holds several sysadmin certifications. As an IT engineer and technical author, he writes for various web sites. He blogs at LinuxWays.
Install Oracle Java Development Kit (JDK) 10 on Linux Mint 19
![]()
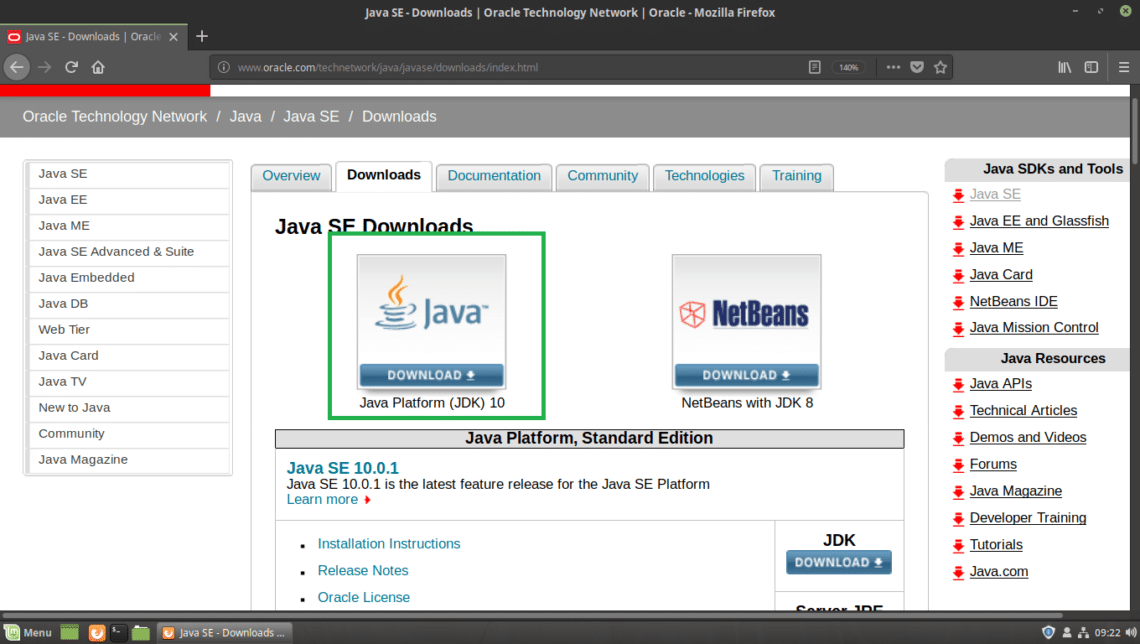
First go to the official website of Oracle Java Development Kit (JDK) at http://www.oracle.com/technetwork/java/javase/downloads/index.html and click on Java Platform (JDK) 10 download link as marked in the screenshot below.
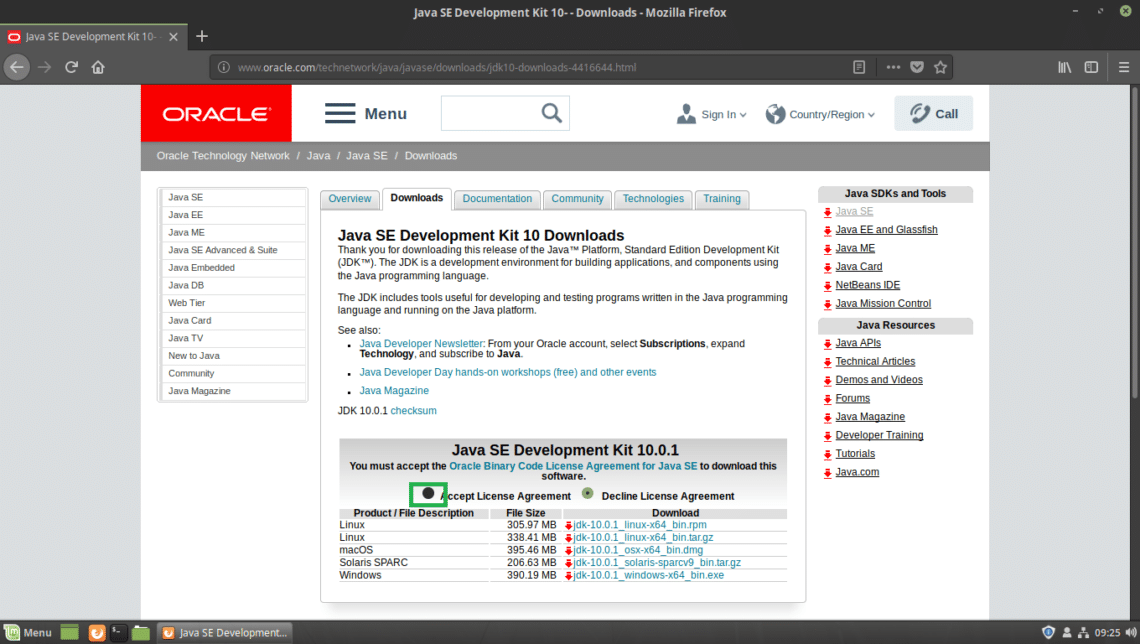
You should see the following page. Now click on the Accept License Agreement radio button as marked in the screenshot below.
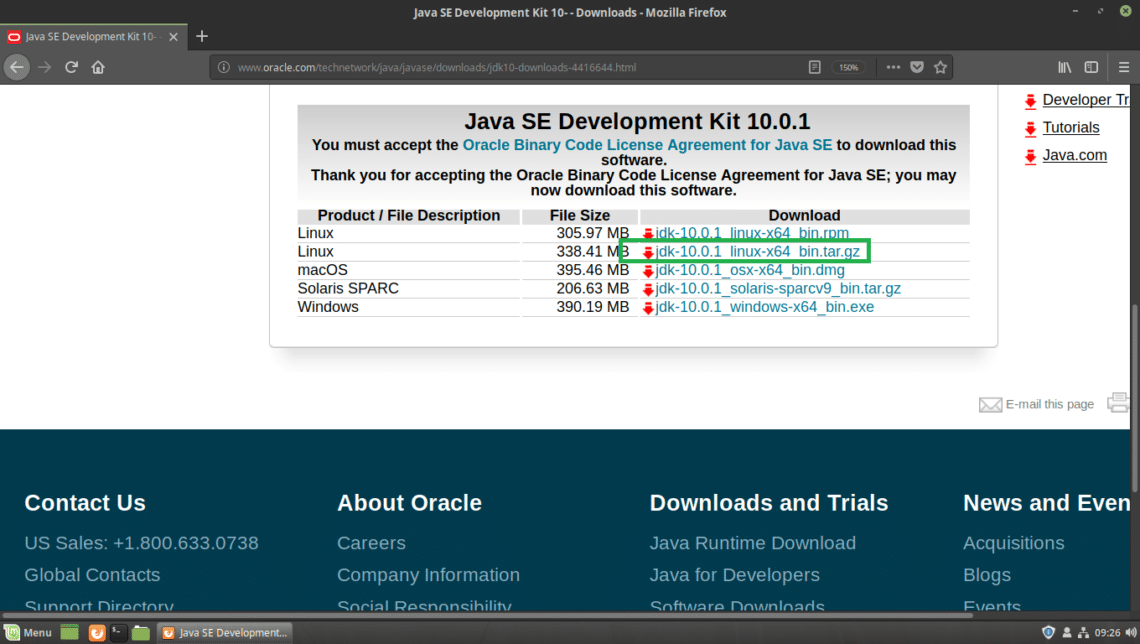
Once you accept the license agreement, you should be able to download JDK 10. Now click on the marked download link that ends in .tar.gz in the Linux section.
Your browser should prompt you to save the file. Click on Save File and then click on OK.
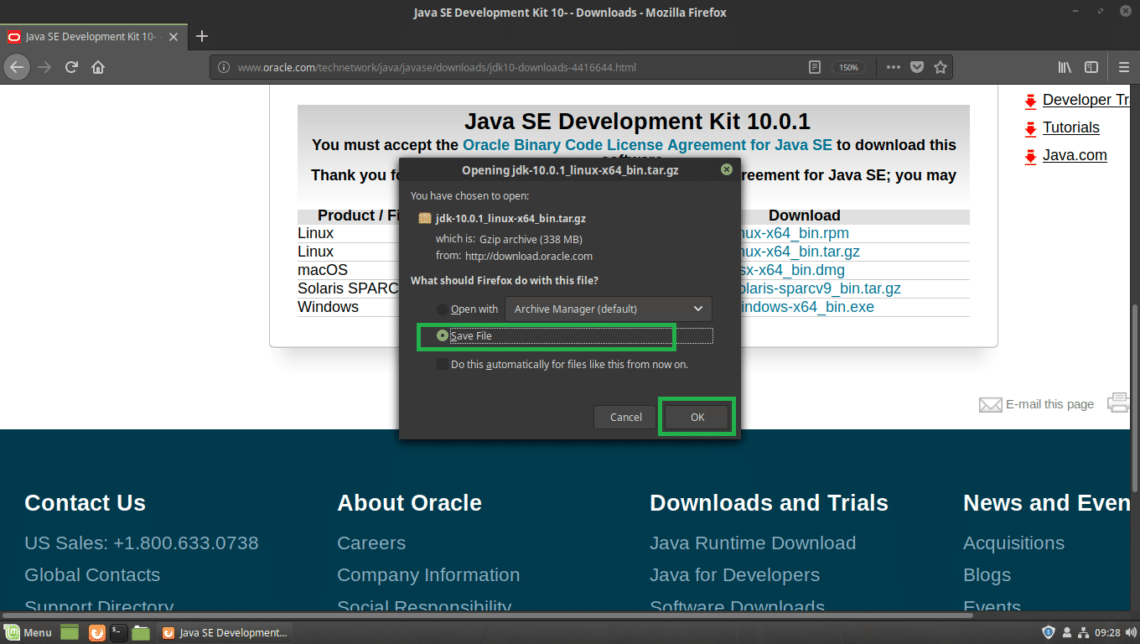
Your download should start.
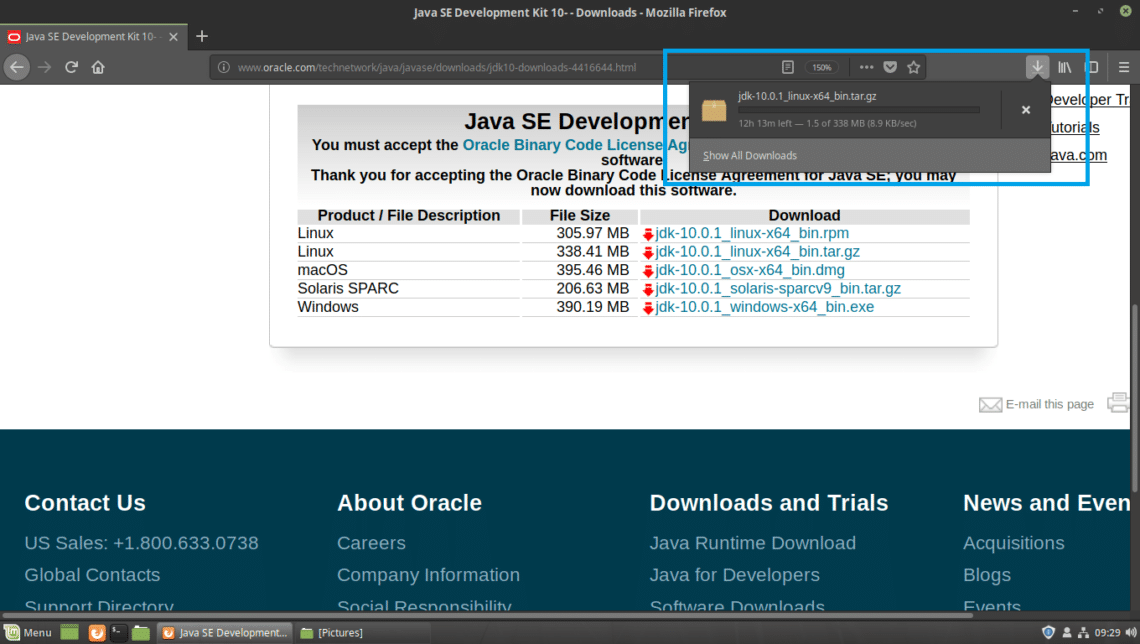
Once the download is complete, you should find the tar.gz archive file in the ~/Downloads/ directory in your user’s HOME directory. At the time of this writing, the name of the archive file is jdk-10.0.1_linux-x64_bin.tar.gz

Installing Oracle JDK 10:
I am going to extract the Oracle JDK 10 .tar.gz archive in /opt directory. You may choose to install it somewhere else. It’s up to you. Just adjust the rest of the article if you do install it somewhere other than /opt.
First extract the Oracle JDK 10 archive file, jdk-10.0.1_linux-x64_bin.tar.gz to /opt directory with the following command:
Note: In my case, INSTALL_DIR is /opt

The .tar.gz archive should be extracted to /opt directory.
Adding Oracle JDK 10 to the PATH:
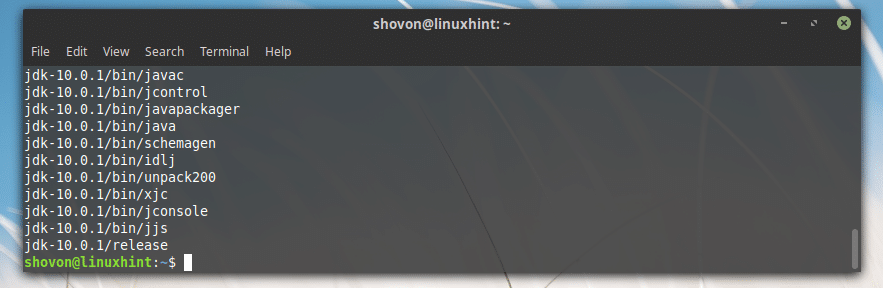
Now that Oracle JDK 10 is installed in the /opt directory, a new sub directory should be created in /opt, which you can find out with the following command:
As you can see from the marked section of the screenshot below, the directory name is jdk-10.0.1
Note the directory name, because you will need it to set up some environment variables.
Note: The directory name may change as new updates of JDK 10 is released. Adjust it in the rest of the articles, if it changes by the time you read this article.

Now you need to create an environment variable JAVA_HOME with the value /opt/jdk-10.0.1 and add /opt/jdk-10.0.1/bin to the PATH of your Linux Mint 19 operating system. So that you don’t have to type in the full path when you run Java commands.
For example, when you want to compile a Java program, you don’t have to run /opt/jdk-10.0.1/bin/javac, instead you can just run javac if you have the environment variables JAVA_HOME and PATH set up correctly. That’s what I am going to do now.
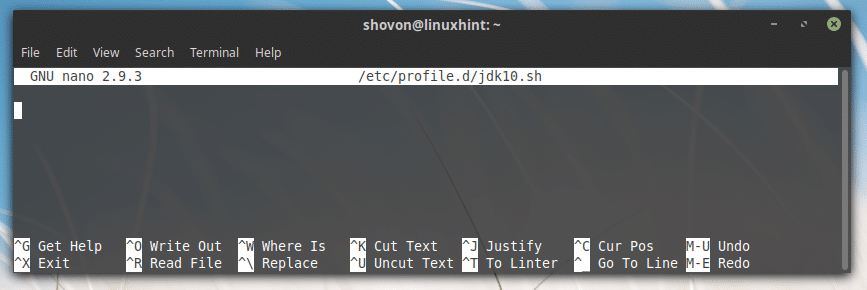
First create a new file jdk10.sh in /etc/profile.d directory with the following command:

You should see the following window.
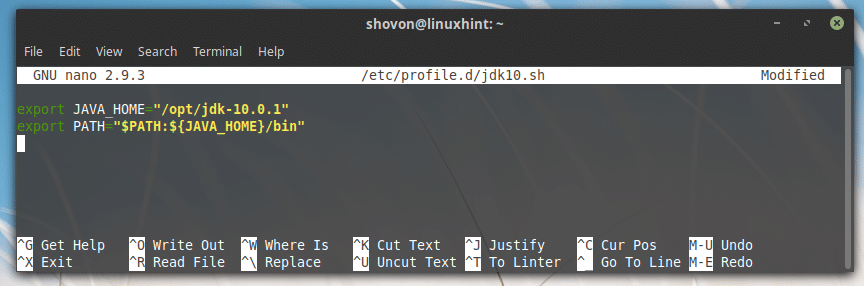
Now type in the following lines:
Note: It my case the INSTALL_DIR is /opt and the JDK_DIR is jdk-10.0.1, make sure to replace it correctly.
Finally, it should look something like this.
Now save the file by pressing + x and then press y and then press .
Now reboot your computer with the following command:

Once your computer starts, you can check whether the environment variables JAVA_HOME and PATH is set correctly.
To check whether JAVA_HOME is set, run the following command:
As you can see from the marked section of the screenshot below, the JAVA_HOME environment variable has the correct value set.

To check whether the PATH is correctly set, run the following command:
As you can see from the marked section of the screenshot below, the JDK 10’s binary directory is in the PATH.

Testing Oracle JDK 10:
Now you can test whether JDK 10 is working correctly with the following command:
As you can see from the output of the command, JDK 10.0.1 is working correctly.

Compiling a Simple Java Program with Oracle JDK 10:
In this section I am going to write a simple Java program and compile it using Oracle JDK 10 on Linux Mint 19.
I am going to create a new file Hello.java in the ~/Documents directory in my user’s HOME directory. Hello.java is the Java source code file that I will compile with Oracle JDK 10.
Here are the contents of Hello.java:
public static void main ( String [ ] args ) {
System. out . println ( «Hello from LinuxHint!» ) ;
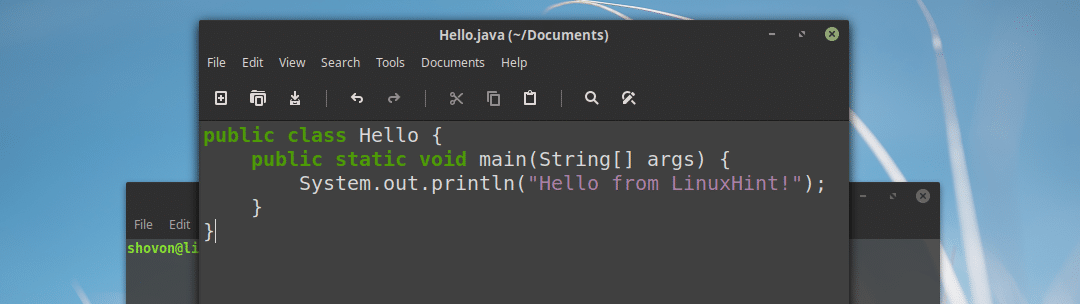
Before you can compile the Java program, go to the directory where Hello.java file is saved, which is in my case ~/Documents

Now run the following command to compile Hello.java Java source code file with Oracle JDK 10:

Running a Java Program with Oracle Java 10:
In this section, I will show you how to run the Java program that I compiled in the earlier section of this article.
To run the Hello.java Java source file I just compiled, from the ~/Documents directory where the Hello.java source file is saved and compiled, run the following command:
Note: When you run the java program, always leave the extension. For example, if the source file is Hello.java, it should be Hello when you want to run it.
As you can see from the marked section of the screenshot below, the correct output is displayed.

That’s how you install and use Oracle JDK 10 on Linux Mint 19. Thanks for reading this article.
About the author
Shahriar Shovon
Freelancer & Linux System Administrator. Also loves Web API development with Node.js and JavaScript. I was born in Bangladesh. I am currently studying Electronics and Communication Engineering at Khulna University of Engineering & Technology (KUET), one of the demanding public engineering universities of Bangladesh.