- Astra Linux Special Edition 1.5 ⬝ Настройка Samba ресурсов
- Настройка Samba
- Подключение ресурса в сессии не отличной от нуля
- Монтирование разделяемых файловых ресурсов
- Автоматическое монтирование ресурсов при входе пользователя с помощью pam_mount
- Restart Samba Server In 2 easy Commands
- What is samba?
- Installing Samba on Linux
- Installing Samba on Debian-based Linux
- Installing Samba on Arch-based Linux
- Start Samba Server
- Restart samba services
- Restart Samba Ubuntu
- Restart Samba Server on Raspberry pi
- Restart samba without disconnecting users
- Samba restart vs reload
Astra Linux Special Edition 1.5 ⬝ Настройка Samba ресурсов
Создать каталоги на сервере, которые будут содержать разделяемые файловые ресурсы и установить желаемые права мандатного и дискреционного доступа, например:
sudo mkdir /srv/share1
sudo mkdir /srv/share1/zero
sudo mkdir /srv/share1/dsp
sudo mkdir /srv/share1/secret
sudo mkdir /srv/share1/topsecret
sudo pdpl-file 3:0:-1:ccnr /srv
sudo pdpl-file 3:0:-1:ccnr /srv/share1/
sudo pdpl-file 1:0:0 /srv/share1/dsp
sudo pdpl-file 2:0:0 /srv/share1/secret
sudo pdpl-file 3:0:0 /srv/share1/topsecret
Настройка Samba
[global] #Изменить имя группы workgroup = da.net map to guest = Bad User #Сделать видимым для netbios disable netbios = no [share1] available = yes comment = For all doc's browseable = yes case sensitive = yes ea support = yes fstype = Samba path = /share1 writable = yes smb encrypt = auto read only = no #Доступно всем guest ok = yes
Для отображения ресурса в разделе сеть файлового менеджера fly-fm под меткой не отличной от нуля через протокол NetBIOS , установить опцию «disable netbios = no»
После сохранения настроек перезапустить сервис Samba:
Подключение ресурса в сессии не отличной от нуля
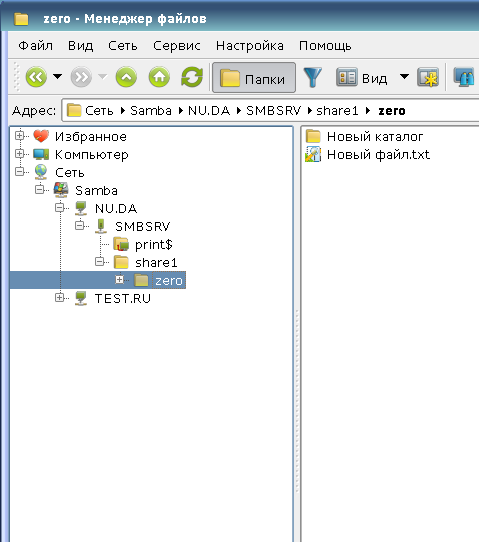
Запустить менеджер файлов (fly-fm) и открыть раздел «Сеть«, в котором отобразятся ресурсы Samba при условии включенного NetBIOS и его видимости:
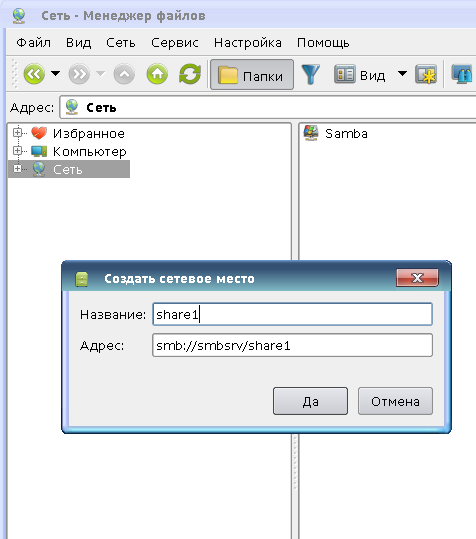
Если ресурс не виден для других и NetBIOS отключен, то его можно добавить самостоятельно, выбрав закладку «Сеть» или правым щелчком по разделу «Сеть»:
Для использования ресурсов Samba пользователь должен входить в группу fuse
- Astra Linux Special Edition РУСБ.10015-01 (очередное обновление 1.6)
- Astra Linux Special Edition РУСБ.10015-16 исп. 1 и исп. 2
- Astra Linux Special Edition РУСБ.10265-01 (очередное обновление 8.1)
- Astra Linux Common Edition 2.12
Монтирование разделяемых файловых ресурсов
Монтирование разделяемого файлового ресурса выполняется командой mount с указанием соответствующего типа сетевой ФС, например:
mount.cifs //сервер/ресурс /точка_монтирования [-o опции]
mount -t cifs //сервер/ресурс /точка_монтирования [-o опции]
В качестве опций команде могут передаваться параметры монтирования, такие как имя пользователя, используемый тип аутентификации, кодировка, использование прав доступа и т.п. Полный список опций приведен в руководстве man для команд mount и mount.cifs . Без соответствующей записи в /etc/fstab пользователь может использовать команды монтирования только с помощью sudo (точка монтирования ~/share1 должна быть создана заранее):
Для возможности монтирования разделяемого файлового ресурса пользователем в конфигурационный файл /etc/fstab:
- Должен быть установлен пакет cifs-utils:
При использовании с аутентификацией Kerberos в ЕПП в строке опций должен быть указан параметр аутентификации sec=krb5i . В этом случае при монтировании будет использоваться текущий кэш Kerberos пользователя.
Автоматическое монтирование ресурсов при входе пользователя с помощью pam_mount
Для автоматического монтирования разделяемых файловых ресурсов при входе пользователя используется pam модуль pam_mount, предоставляемый пакетом libpam-mount, который может быть установлен следующим образом:
Настройка pam модуля осуществляется с помощью конфигурационного файла /etc/security/pam_mount.conf.xml.
Использование pam модуля указывается в соответствующих pam сценариях (common-auth, common-session) в каталоге /etc/pam.d.
Описание возможностей pam модуля pam_mount и формат его конфигурационного файла приведены в руководстве man для pam_mount и pam_mount.conf.
Для монтирования с помощью pam-mount разделяемых файловых ресурсов СЗФС CIFS , представляющих собой домашние каталоги пользователей, конфигурационный файл должен быть модифицирован следующим образом (в пределах тега pam_mount ):
mount.cifs //%(SERVER)/%(VOLUME) %(MNTPT) -o %(OPTIONS)
При использовании с аутентификацией Kerberos в ЕПП в строке опций монтирования должен быть указан параметр аутентификации sec=krb5i . В этом случае при монтировании будет использоваться текущий кэш Kerberos пользователя.
Так же в строке опций монтирования должен присутствовать параметр cruid=%(USERUID) , поскольку монтирование во время создания сессии выполняется от имени привилегированного пользователя.
Для точки монтирования mountpoint должен быть указан отдельный каталог, например: /media/ald_share
path="share" mountpoint="/media/ald_share" options="user=%(USER),rw,setuids,perm,soft,sec=krb5i,cruid=%(USERUID),iocharset=utf8" />
Тег logout определяет поведение в процессе размонтирования ФС. К этому времени все процессы должны освободить точку монтирования, в противном случае им посылаются соответствующие сигналы прерывания работы.
Тег mkmountpoint отвечает за автоматическое создание и удаление точки монтирования.
Тег cifsmount определяет команду, с помощью которой монтируется указанный тип ФС.
Тег volume объявляет непосредственно параметры монтирования разделяемого файлового ресурса. Пользователь должен существовать в БД учетных записей Samba и иметь соответствующий пароль.
Restart Samba Server In 2 easy Commands

Learning to restart samba is quite essential if you run your samba server. Samba is a suite of Linux programs that could set up a full-blown server on a Linux machine. Despite being a native Linux program, it is fully interoperable and compatible with Microsft client hosts. Samba is a versatile suite of programs. It can be installed on multiple programs like Linux, Unix, FreeBSD, etc. It can interact with Windows clients remotely and send, receive, or store data on its file system using the CIFS (Common Internet File System) protocol. This article provides you with complete detail on installing, starting, or restarting the samba server.
What is samba?
According to its official website, It is a complete software package that allows the network administrator to choose the setup, configuration, and system equipment. It was initially released in the year 1992 and is still widely used. The Samba software suite is used to provide services to clients irrespective of their platform, whether Windows, OSX, Linux , or others, using the SMB/CIFS Protocols. Enthusiasts often use the samba suite of software you run their personal storage server.
Installing Samba on Linux
Samba is a free and open-source project, just like Linux itself. Anyone can download it, use it or modify it as per his needs. It can be downloaded and installed on Linux using multiple ways. It could be installed using the default package manager of your Linux distro, or you could download its source code from its official git repository and then build it locally on your computer. In this section, we show you how to install and start samba using the default package manager on Debian-based Linux distros and Arch-based Linux. After installing Samba run the “samba –version” to verify your download.
Installing Samba on Debian-based Linux
Debian-based distributions are pretty popular among users, such as Ubuntu. Mint, Kali, etc. All Debian-based Linux distributions use dpkg as their default package manager. Follow the given instructions to install and start samba on Debian Linux.
- Open the terminal emulator (CTRL + ALT + T ).
- In the bash shell, type “sudo apt update “.
- Enter your root password to continue.
- Let the repository database update.
- Now when done, type “sudo apt install samba“.
- Let the download comlplete and it would install auotmatically.
Installing Samba on Arch-based Linux
Popular Arch-based Linux distributions are Manjaro, EndeavourOS, Vanilla Arch itself, etc. The default package manager for all Arch-based Linux distributions is Pacman. Follow the given steps to install and start samba on Arch Linux.
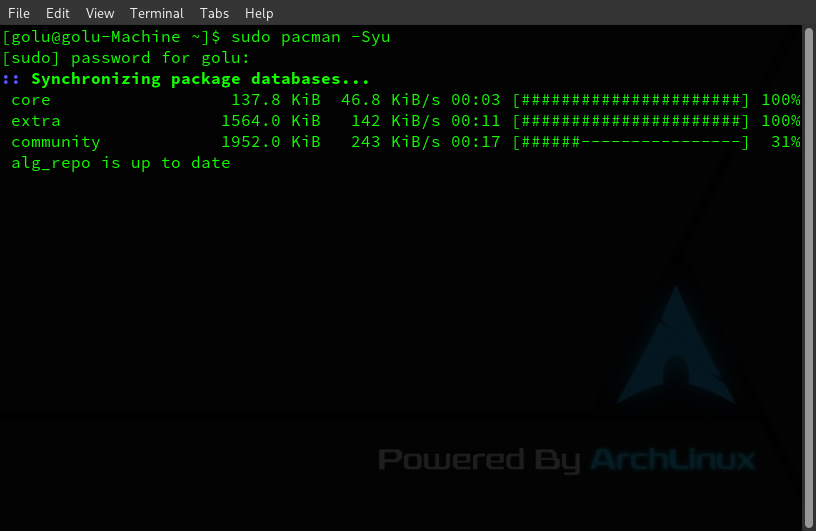
- Open the terminal emulator (CTRL + ALT + T ).
- In the bash shell, type “sudo pacman -Syu” to sync repositories.
- Enter your root password to continue.
- Let the repository database update.
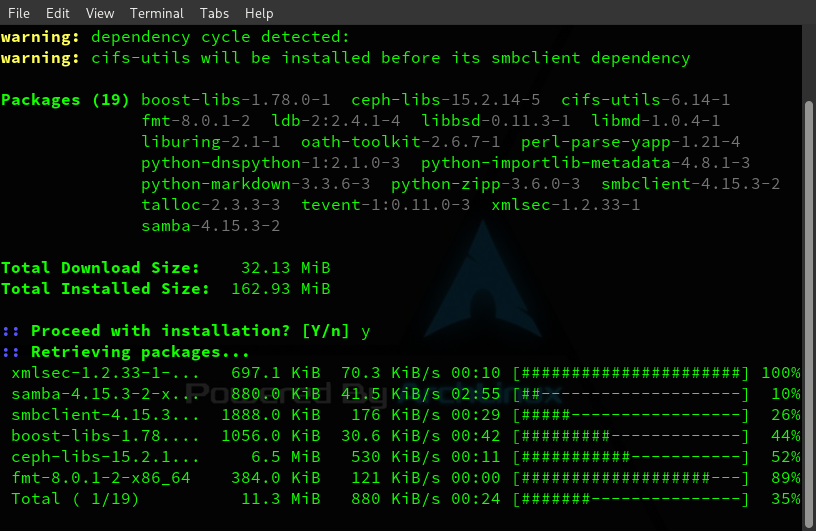
- Now when done, type “sudo pacman -S samba“.
- Let the download comlplete and it would install auotmatically.
Start Samba Server
Before you directly start or restart samba server, there are a lot of configurations and file access management stuff that need to be taken care of. We show you how to properly configure and restart the samba server without any security flaw or misconfiguration to work seamlessly with its windows or other clients. Follow the provided steps to restart samba server.
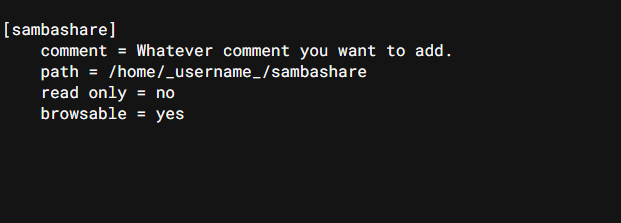
mkdir /home/_username_/sambashare/- Now add the created shared dircttory, to the samba configuration file. The following command open the samba configuration file.
sudo nano /etc/samba/smb.conf At the bottom of the configuration file, add the following information. After editing the file, press Ctrl + O to save the file and Ctrl + X to exit the nano text editor.
sudo service smbd restart- Now set-up a samba user account to connect to the samba server. The name of the account must match the system account name or it won’t work correctly, set a different password of your choise for the samba account.
sudo smbpasswd -a usernameAfter this configuration, you are ready to access the samba shared folder in your local network using the local IP of your samba installed machine. To know your local IP run the ‘ifconfig’ command in the terminal shell and look for an inet address concerning your network interface. Use this local IP from another system in your network to access the shared samba folder content.
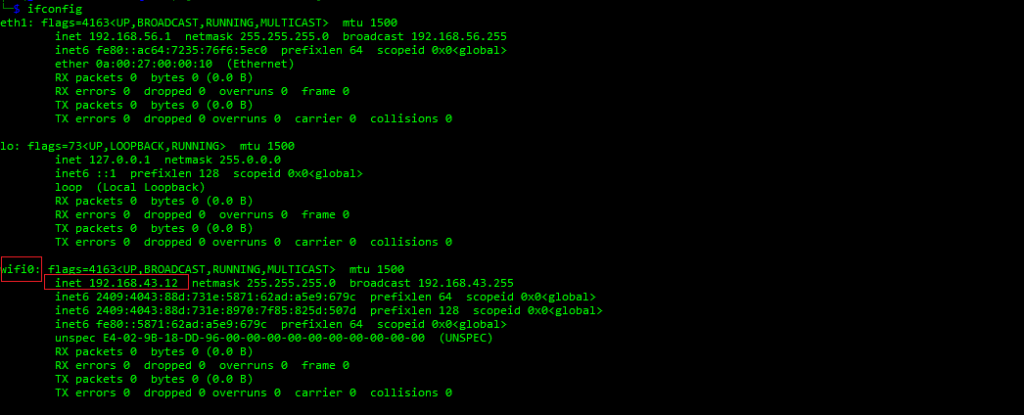
- Access the shared folder from a different system using the windows file explorer with the local IP of your samba server and shared folder. Enter the URL in “smb://192.168.43.12/sambashare” like format. you would be prompted to enter your username and password to gain access to the shared folder.
Restart samba services
If your samba version is not working as intended or you have made some changes in the smb.conf file, but the changes do not seem to appear. In such a scenario, you need to restart samba services to get them working correctly and updated as you intended. Run the following command in the terminal shell to restart samba services.
sudo service smbd restartThis command would stop the samba services and start them over again. If you recently updated or installed your samba package, then chances are this command wouldn’t work. If the above command doesn’t work, run the following command to restart samba services.
sudo /etc/init.d/samba restartRestart Samba Ubuntu
Ubuntu is by far is one of the most popular Linux distributions. Ubuntu server is used widely in the server space to run server services like Samba or apache server. The following commands can be used to restart the samba services on your Ubuntu server.
sudo service smbd restartRestart Samba Server on Raspberry pi
Raspberry pi is a mini-computer that runs the Debian-based Raspberry OS. The following commands can be used to start, restart, stop and check the status of the Samba services on the Raspberry pi computer.
sudo service smbd status. // to check the status of service sudo service smbd start. // to start the service. sudo service smbd stop. // to stop the service completely sudo service smbd restart. // to restart samba services.Restart samba without disconnecting users
If you’ve made changes in the smb.conf file and want to make the change work without disconnecting the current user, run the following command in the terminal emulator to restart only the service configuration without disconnecting the users.
smbcontrol smbd reload-config // This command would load the config changes without alterning current users.Samba restart vs reload
The main difference between samba restart and reload is that the samba restart command stops the service entirely, disconnecting all the current connected users and then starting the service again from scratch. While the samba reload command does not stop the samba service entirely, it just reloads the configuration file again in the working memory with the newly updated configuration with minimum effect on the connected users.