PFsense and Intel Wifi 6 (AX200 and AX201)
̿’ ̿’\̵͇̿̿\з=(◕_◕)=ε/̵͇̿̿/’̿’̿ ̿
Please do not use chat/PM to ask for help
we must focus on silencing this @guest character. we must make up lies and alter the copyrights !
Don’t forget to Upvote with the 👍 button for any post you find to be helpful.
@Xeno You’re better off going with a proper AP. Then you can mount it where it performs best, rather than having it wherever the computer is.
PfSense running on Qotom mini PC
i5 CPU, 4 GB memory, 32 GB SSD & 4 Intel Gb Ethernet ports.
UniFi AC-Lite access point I haven’t lost my mind. It’s around here. somewhere.
Hello All, I am in a similar situation which is to see how to move to ax also because I have an old router for ac which I don’t use for anything else than wifi to ethernet :). Therefore I was looking to see as my Pfsense is virtualized (Proxmox) if I could launch another VM just to do the AP work job and get rid of an external box. Of course I should expect a worth covering but I have external wifi antennas wired already. Any idea of a SW or distri (like OpenWRT) that would do a good job? Any limitations other than the potential coverage between a physical AP and a virtualized AP. For me everything within the same Proxmox should also be faster between the VMs and avoid traffic to my upper switch. Thanks for your insights
XabiX
Pfsense (latest 2.4) running on Proxmox 5.2 with Intel I350 quad ports
Click on the Website (small planet) to see my network diagram
You’ll be needing an «ax» based PCI NIC that supports AP mode — and an OS that support this NIC and mode. Something like OpenWRT needs . OpenWRT supported hardware which means : a ‘box’.
Thanks so i will need an extra box and can’t think of getting a virtualized solution which would be more flexible and cheaper as you change the radio without changing the hw and existing config.
Pfsense (latest 2.4) running on Proxmox 5.2 with Intel I350 quad ports
Click on the Website (small planet) to see my network diagram
You might be able to configure the wifi card in the hypervisor and then pass it through to pfSense as Ethernet. I’ve never tried that but I’ve seen people do it with other connection types. Steve
Pfsense совместимые wifi адаптеры
Страницы
4 января 2017 г.
pfSense. Настройка Wi-Fi точки доступа
Простая настройка Wi-Fi в pfSense. Включается и настраивается беспроводной адаптер в режиме Wi-Fi точки доступа, а затем реализуется мост между беспроводной сетью (интерфейс WLAN) и проводной сетью (интерфейс LAN), для межсетевого взаимодействия.

WAN — это интерфейс, который смотрит в сторону вашего Интернет провайдера;
LAN — интерфейс, смотрящий в сторону вашей локальной сети.
Настройка Wi-Fi в pfSense
Первым делом перед настройкой Wi-Fi необходимо включить беспроводной интерфейс.
Для этого необходимо перейти в пункт меню Interfaces -> WiFi.
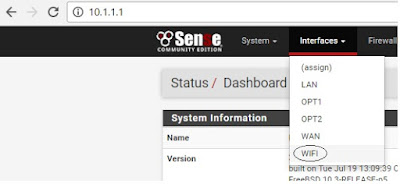
Вместо WiFi может быть другой заголовок (Description) беспроводного интерфейса, например OPT1).
В открывшейся странице Interfaces -> WiFi необходимо установить флажок в поле «Enable interface». Также обязательно нужно добавить описание для WiFi интерфейса, заполнив поле Description.


Теперь необходимо указать стандарт беспроводной связи и канал.
В поле Standard я выберу «802.11g» (из доступных мне адаптеров, поддерживаемых pfSense есть Atheros, работающий только с 802.11b/g).
В поле Channel выберу 5-й канал — «11b/g — 5».

Настроить режим работы и параметры безопасности для беспроводной точки доступа, которой и будет наш Wi-Fi интерфейс.
Параметры будут следующими:
Mode — установить режим «Access Point», т.е. точка доступа;
SSID — это имя Wi-Fi сети, написать на свое усмотрение. У меня в качестве примера «Wi-Fi_pfSense»;
Я также установлю флажки для параметров «802.11g only» и «Enable WME».
Enable WPA — установить галочку, чтобы задействовать шифрование.
WPA Pre-Shared Key — ввести пароль для подключения к точке доступа.
WPA mode — «WPA2»
WPA Key Management Mode — «Pre-Shared Key»
WPA Pairwise — «AES»
Остальные параметры оставить без изменения.

После этого необходимо сохранить наши настройки нажав кнопку «Save».
Настройка DHCP сервиса
Клиенты, подключающиеся к точке доступа должны получать IP адреса, для этого необходимо включить DHCP сервис на Wi-Fi интерфейсе.
В меню Services выбрать пункт DHCP Server.

В открывшейся странице перейти на вкладку Wi-Fi и настроить параметры:
Включить флаг «Enable DHCP server on WIFI interface»
Subnet — 10.1.2.0
Subnet mask — 255.255.255.0
Available range — 10.1.2.1 — 10.1.2.254
Range — From 10.1.2.10 To 10.1.2.250
Остальные параметры оставить без изменения.

Настройка моста
Создать мост для межсетевого взаимодействия.
Перейти в меню Interfaces -> Interface Assignments.
На вкладке «Briges» нажать «Add».
В поле «Member Interfaces» зажав клавишу «Ctrl» выбрать поочередно LAN и WIFI интерфейсы.
Параметр «Description» заполнить значением «LANWLAN».
После этого необходимо сохранить настройки нажав кнопку «Save».

Должно получиться следующее.

Создание правил для прохождения трафика
Для разрешения прохождения трафика создать всего одно правило в настройках файрвола.
Перейти в Firewall -> Rules
На вкладке «WIFI» нажмите «Add»
Параметры задать следующим образом:
Action — «Pass»
Protocol — «Any»
Source — «Any»
Destination — «Any»
Hardware
The pfSense® software distribution is compatible with most hardware supported by FreeBSD.
Current versions of pfSense software are compatible with 64-bit (amd64, x86-64) architecture hardware and Netgate ARM-based firewalls.
Alternate hardware architectures such as Raspberry Pi, other Non-Netgate ARM devices, PowerPC, MIPS, SPARC, etc. are not supported.
Hardware Compatibility
The best way to ensure that hardware is compatible with pfSense software is to buy hardware from the Netgate Store that has been tested and known to work well with pfSense software. The hardware in the store is tested with each release of pfSense software and is tuned for optimal performance.
For home-built solutions, the FreeBSD Hardware Notes for the FreeBSD version used in a given build of pfSense software is the best resource for determining hardware compatibility. pfSense software version 2.7.0-RELEASE is based on 14.0-CURRENT@0c59e0b4e581. Another good resource is the Hardware section of the FreeBSD FAQ.
Network Adapters
A wide variety of wired Ethernet Network Interface Cards (NICs) are supported by FreeBSD, and are thus compatible with pfSense software. However, not all NICs are created equal. The hardware can vary greatly in quality from one manufacturer to another.
The best practice is to use Intel NICs because they have solid driver support in FreeBSD and they perform well. Most hardware sold in the Netgate Store contains Intel NICs.
Of the various other PCIe/PCI cards supported by FreeBSD, some work fine, others may suffer from instability or poor performance. In some cases, FreeBSD may support a particular NIC but specific implementations of the chipset may be lower in quality or have poor driver support. When in doubt, search the Netgate Forum for experiences of others using the same or similar hardware.
When a firewall requires the use of VLANs, select adapters that support VLAN processing in hardware. This is discussed in Virtual LANs (VLANs) .
USB Network Adapters
USB network adapters of any make/model should not be used due to their unreliability and poor performance.
Wireless Adapters
Supported wireless adapters and recommendations are covered in Wireless .
Настройка Access Point или точка доступа wifi на pfsense

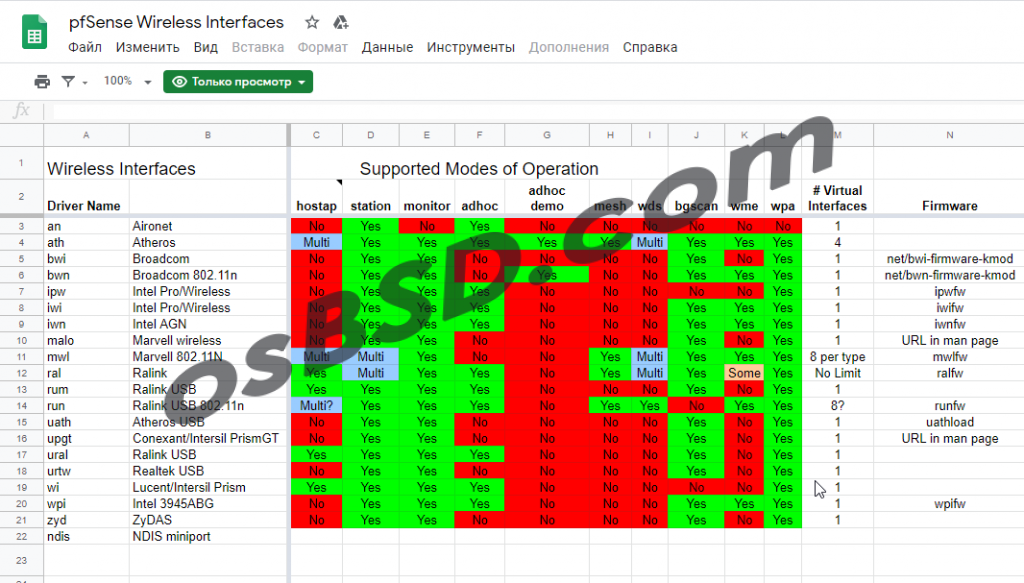
В данном примере будет использована карточка “Compex WLE200NX”. В интернете можно найти список и других совместимых wifi карт c pfsense.
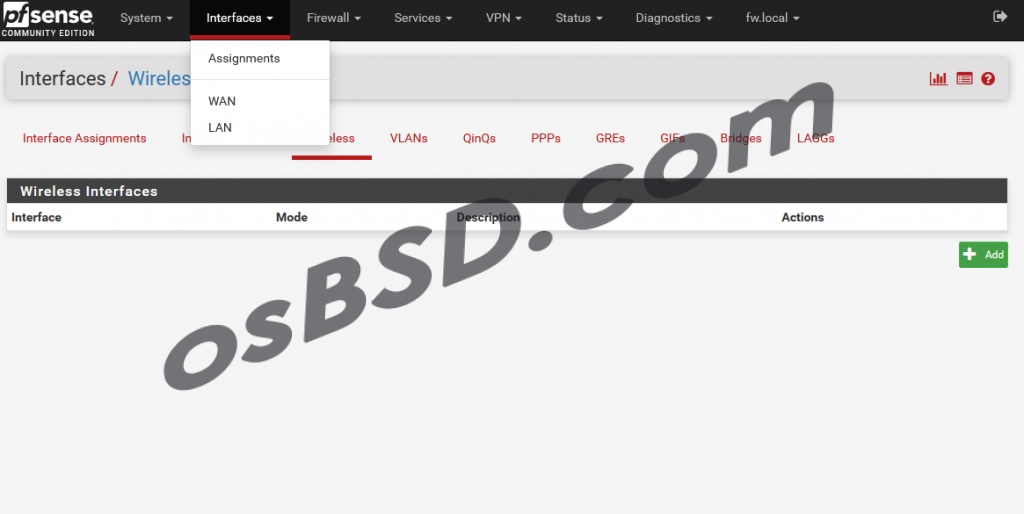
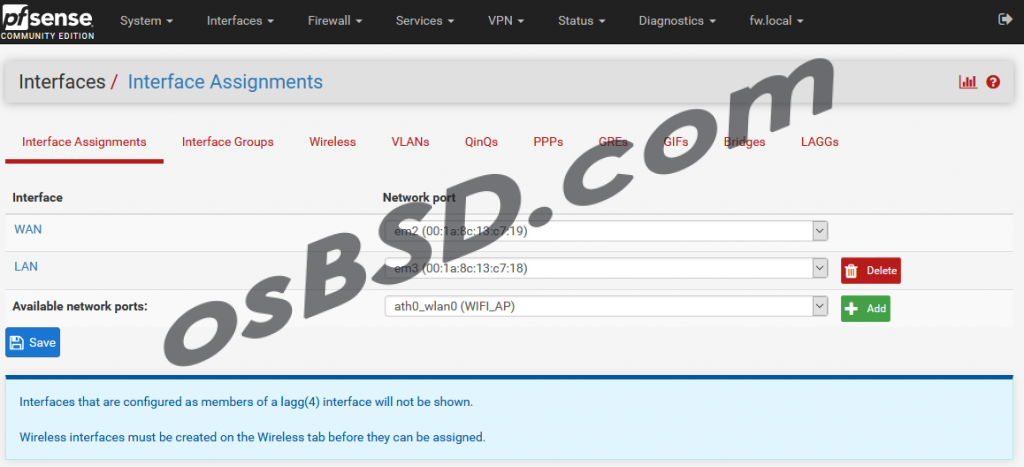
Добавляем беспроводной интерфейс. В главном меню: Interfaces > Assign > Wireless > Add
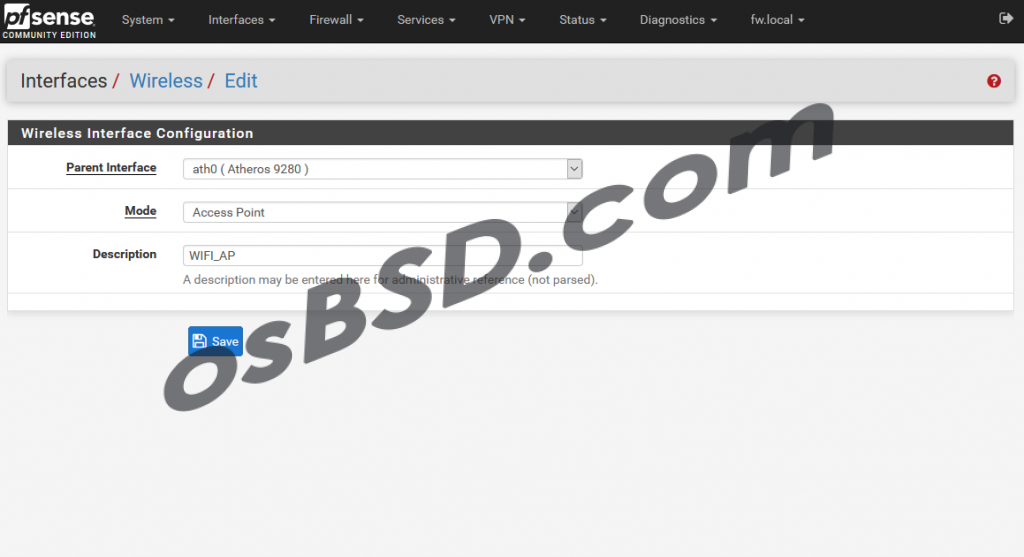
В выпадающем (drop-down) меню “Parent interface” вы должны увидеть свою карту. Если её нет, значит система её не определила. Возможно она не поддерживается pfsense или не правильно установлена. В меню “Mode” может быть несколько вариантов, все зависит от карточки
В нашем случае необходимо выбрать “Access Point”
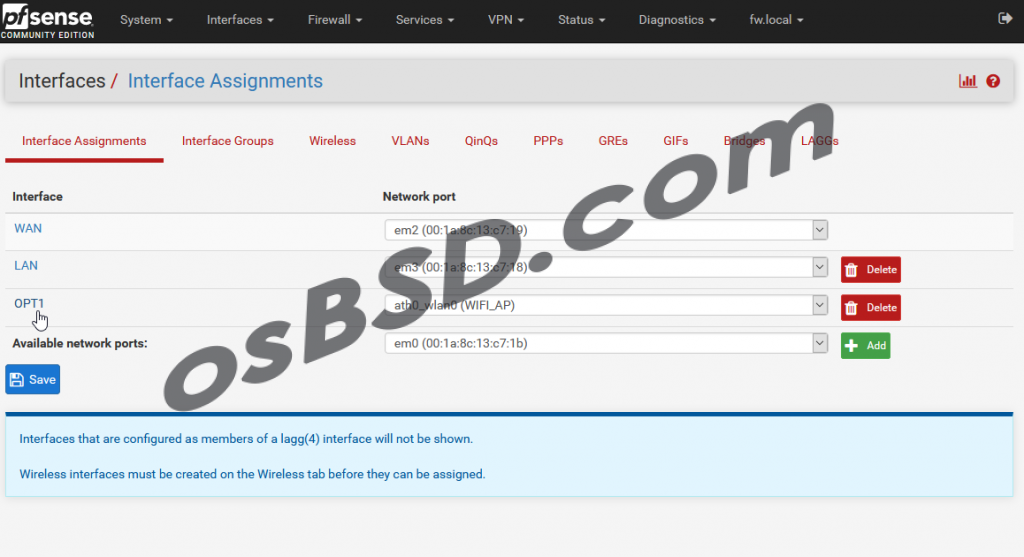
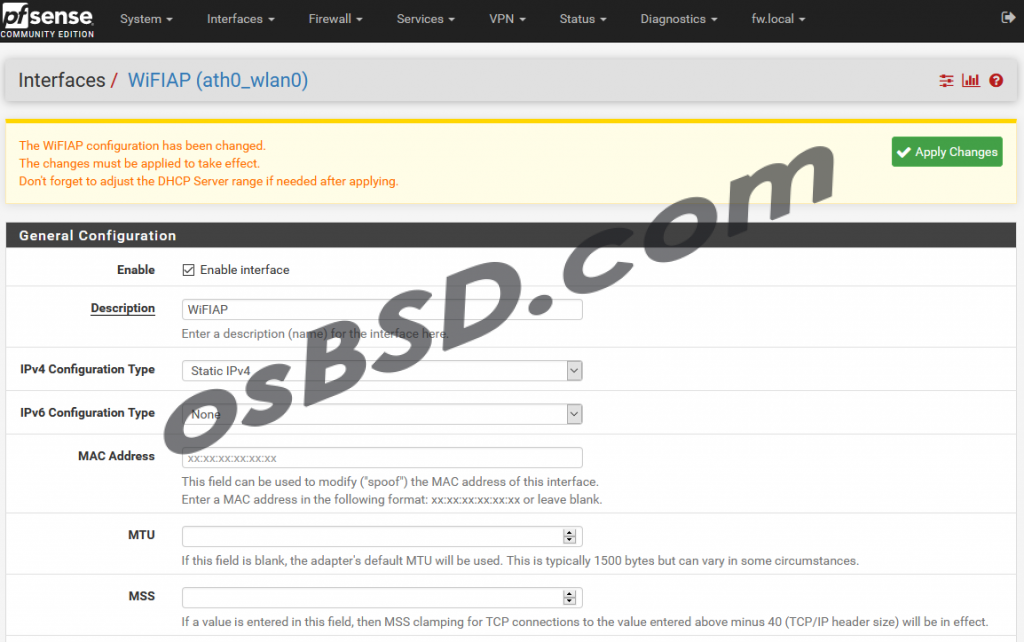
Добавляем интерфейс в pfsense: Interfaces > Interface Assignments
Настраиваем беспроводную сеть:
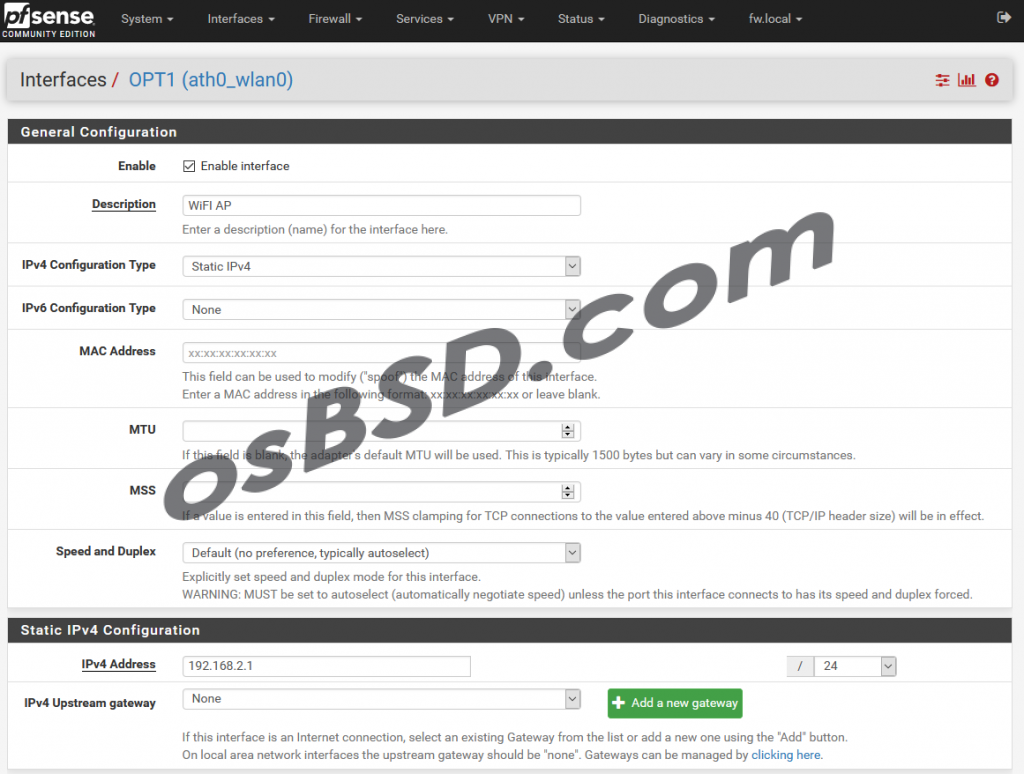
- Enable (Enable interface) – ставим галочку
- Description – WiFI AP
- IPv4 Configuration Type – Static IPv4
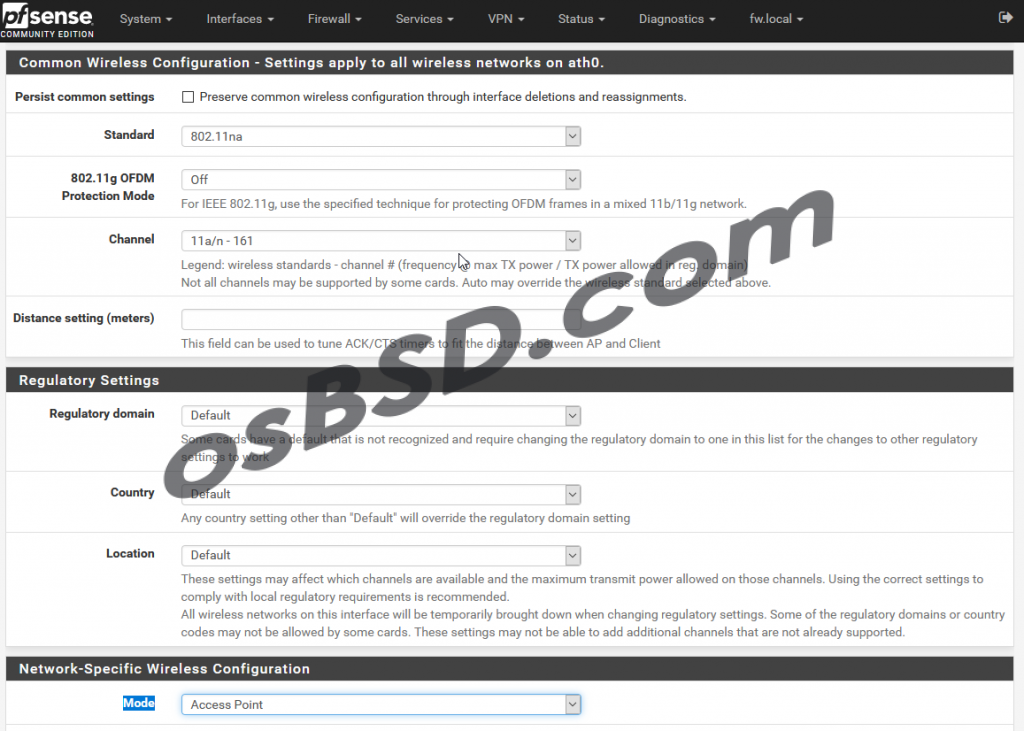
Если в сети есть старые устройства стандарта 802.11g, необходимо выбрать режим 802.11ng, иначе старое оборудование не увидит новую точку доступа. Если в сети нет старого оборудования, которые должны использовать эту точку доступа, то рекомендуется использовать режим 802.11na, потому что пропускная способность и производительность будут намного лучше.
- Standard – 802.11na
- Channel – “11a/n – 161” или “11b/g/n-11” если вы выбрали 802.11ng. Если не знаете, рекомендую выбрать “Auto”
- Mode – Access Point
- SSID – osBSD.com (это название беспроводной сети)
- Enable WME (Force the card to use WME (wireless QoS)) – включаем
- Enable (Enable WPA) – включаем
- WPA Pre-Shared Key – тут вписываем пароль для wifi
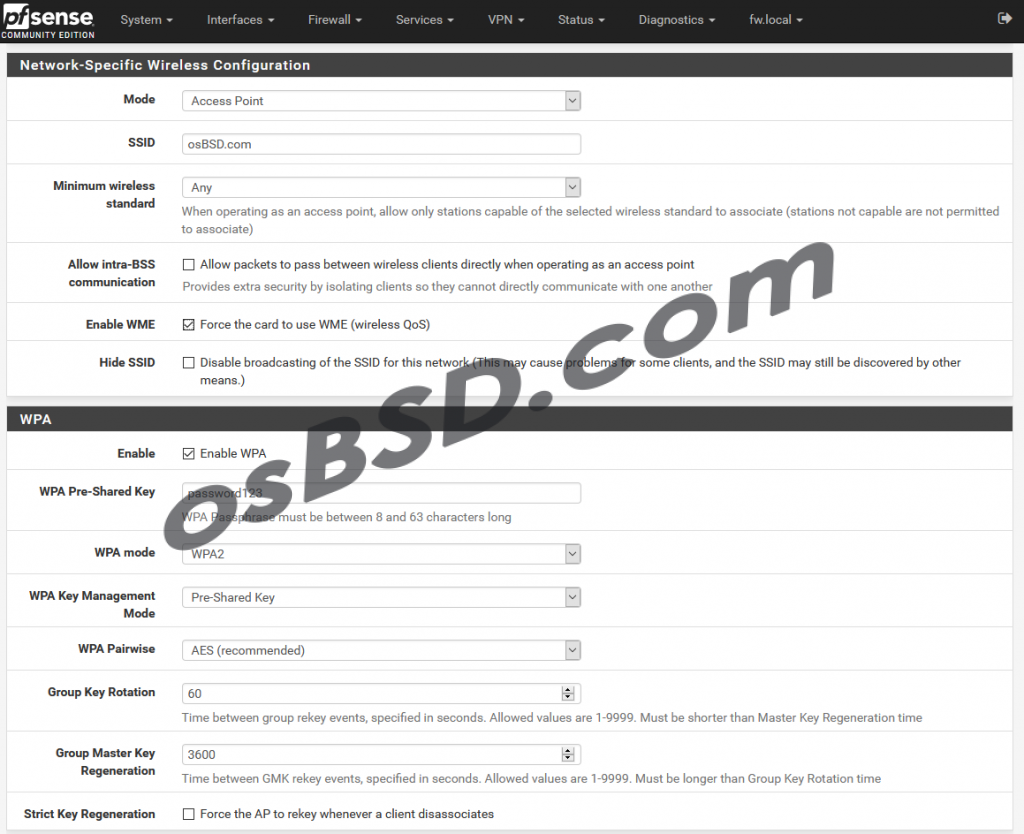
Нажимаем “Apply Changes” и сохраняем изменения
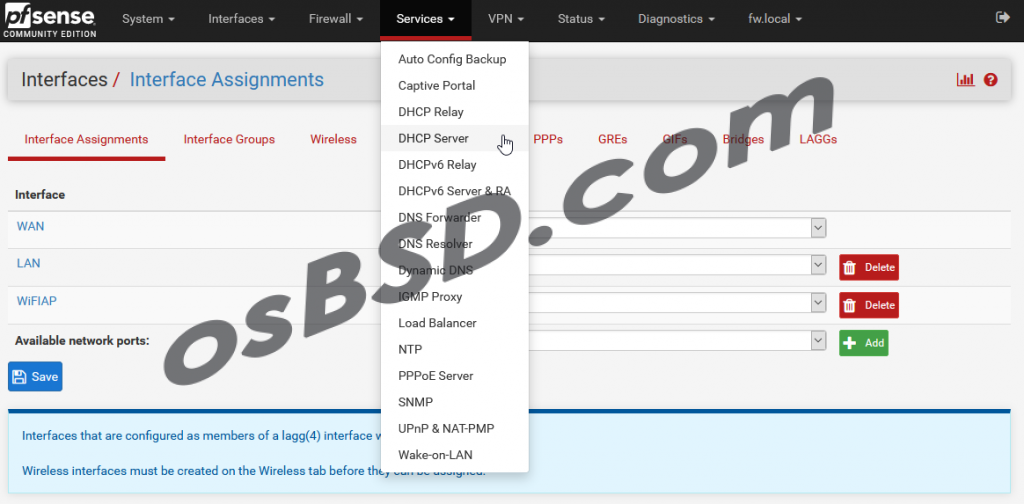
Настраиваем сервер автоматической выдачи сетевых настроек: Services > DHCP Server
Указываем диапазон адресов адресов для выдачи:
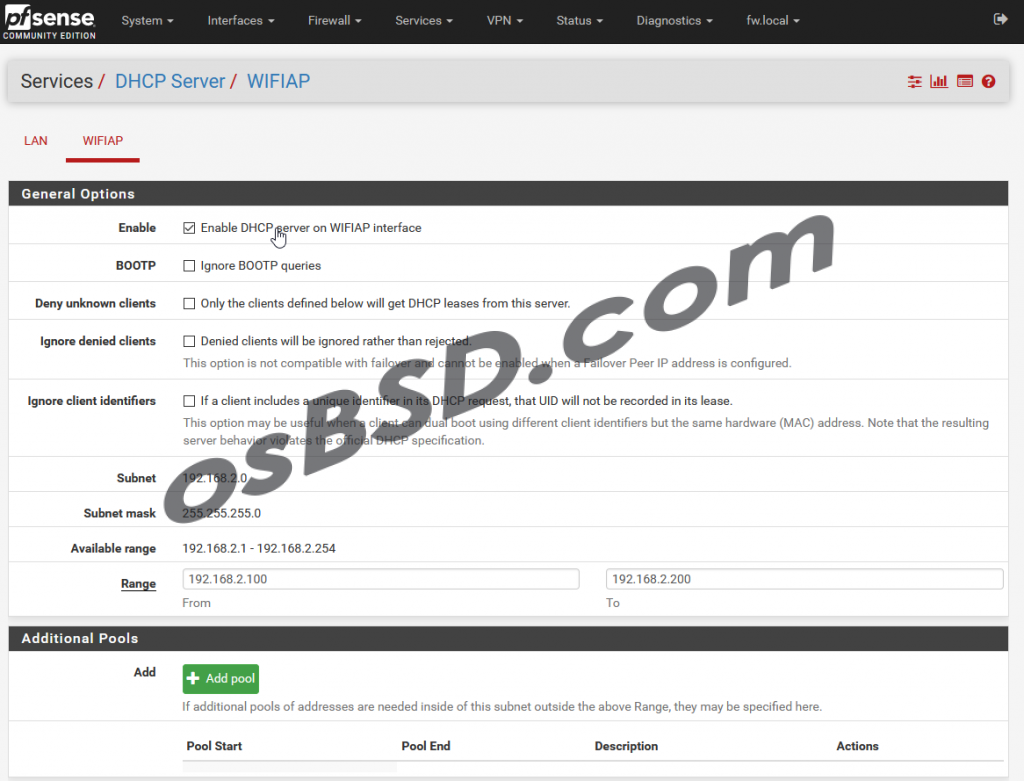
Теперь необходимо настроить Firewall > Rules > выбираем созданный ранее беспроводной интерфейс (WIFIAP) > Add
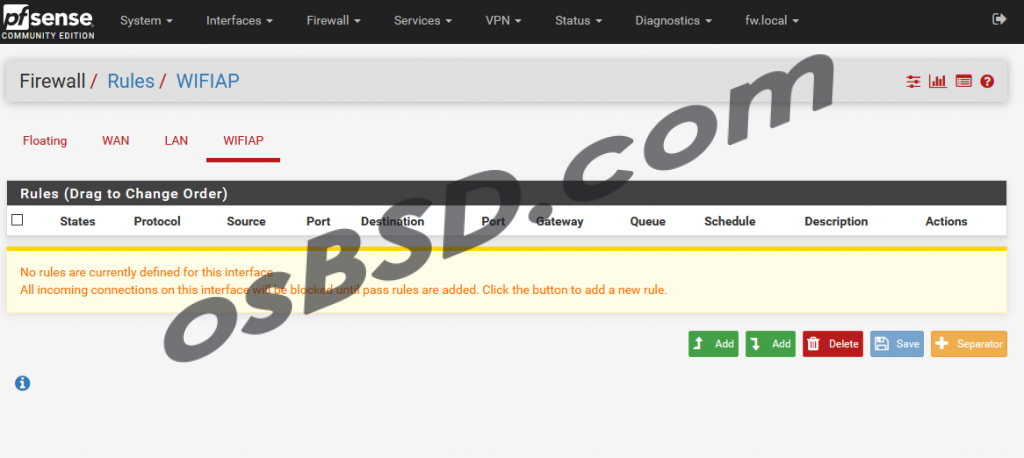
Необходимо разрешить трафик из локальной беспроводной сети в интернет. Настраиваем:
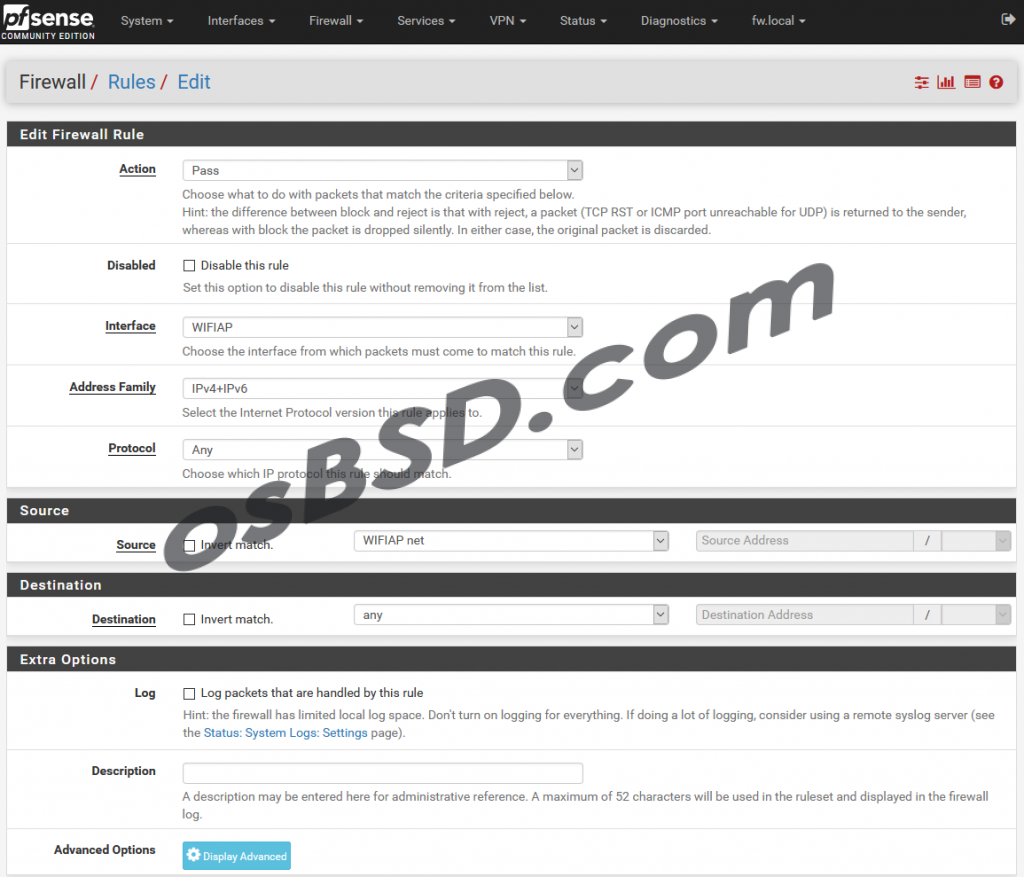
- Edit Firewall Rule
- Action – pass
- Interface – WIFIAP
- Address Family – IPv4+IPv6
- Protocol – any
- Source
- Source – WIFIAP net
- Destination
- Destination – any
Применяем правила “Apply Changes”