Using your Raspberry Pi Zero’s USB wifi adapter as both Wifi client and access point
The Raspberry Pi Zero captivates with its small dimensions. This comes at a cost, however, with only one micro USB port available for peripherals of any kind. In this scenario you’ll probably think twice about what you connect to that port. “A USB hub” may sound like a natural choice but if you’re like me, you’ll want to carry the gadget around a bit and minimize the number of accessories.
Now there are solutions to stack a USB hub onto the Pi Zero, eg. Circuitbeard’s one or Richard Hawthorn’s one, but actually I don’t want to carry around a USB keyboard, especially if I have no HDMI-capable display around at all times. Instead I want to login onto the Pi via Wifi while still having Internet connectivity even when not at home. Thus I want the Pi to be an access point AND maintain a Wifi client connection at the same time. This is rather easy to do with two USB wifi adapters — but with the Pi Zero we’ll have to do with a single one!
Turns out that there are two obstacles to achieve this goal:
Hardware issues
Running both an access point and a client configuration on the same network adapter requires support for so-called virtual interfaces. Whether a certain Wifi hardware and driver combo supports virtual interfaces and in which configurations can be found out by looking at iw list output. The following examples were not conducted on the Pi itself but on my Notebook with openSUSE Tumbleweed and Linux kernel 4.4.
Here’s the relevant iw list output for the iwlwifi driver and the Intel Wireless 7265 adapter built into my Notebook (PCI vendor ID 8086, PCI product ID 095a):
[. ] valid interface combinations: * # < managed > < = 1, #< AP, P2P-client, P2P-GO >Here's by contrast the output of the rtl8192cu driver and a RealTek RTL8188CUS-based USB wifi adapter, the Edimax EW-7811Un (USB vendor ID 7392, USB product ID 7811):
[. ] interface combinations are not supported [. ]As you can see, this driver does not support any virtual interfaces at all. The linux-wireless wiki says that it will be replaced by rtl8xxxu.
Here’s another example for the rt2800usb driver and the Ralink RT5370-based USB wifi adapter shipped in thepihut.com’s Mega Zero 8GB WiFi Pack and also available on its own (USB vendor id 148f, USB product ID 5370, recognized as “Ralink Technology, Corp. RT5370 Wireless Adapter”):
[. ] valid interface combinations: * # < AP, mesh point >< = 8, totalTo correctly understand this output, compare it to the iwlwifi output above: because managed is not explicitly mentioned here, virtual interfaces are only supported in access point mode, ie. you could create two APs with different security settings, but that's not what we're looking for here.
Doing a bit of research on the Web, you'll quickly learn that what we're looking for is an adapter with an Atheros chipset. But, as I outlined earlier, these are actually rather hard to come by. I eventually got a FRITZ!WLAN USB Stick N (carl9170 driver) via eBay. So far I didn't run into any lockup issues but then again I haven't done much testing yet.
Configuration
There are a number of guides on the Web but they all are either targeted at setups with two USB sticks or describe unnecessarily intricate configurations.
Key to our desired setup is having two network interfaces, one that we can run hostapd on and one that we can run wpa_supplicant on. Because the Atheros driver requires us to create access point interfaces before we create ordinary client interfaces, we need to delete the automatically created wlan0 interface first. And, by contrast to eg. the rt2800usb driver, all added virtual interfaces will by default share the same MAC address which would cause problems, so we need to set a different MAC address on the second interface.
Some guides suggest doing the following steps in the pre step of /etc/network/interfaces but that would require ifuping the interfaces in a certain order for the reasons described above which is hard to achieve. Also it's such a low-level thing that I believe it to be better placed upon udev.
Insert the following into /etc/udev/rules.d/70-persistent-net.rules:
SUBSYSTEM=="ieee80211", ACTION=="add|change", ATTR=="00:11:22:33:44:55", KERNEL=="phy0", \ RUN+="/sbin/iw dev wlan0 del", \ RUN+="/sbin/iw phy phy0 interface add ap0 type __ap", \ RUN+="/sbin/iw phy phy0 interface add sta0 type station", \ RUN+="/bin/ip link set sta0 address 00:11:22:33:44:56"where you replace 00:11:22:33:44:55 with the mac address of your Wifi adapter as shown on the out-of-the-box interface wlan0. Also replace 00:11:22:33:44:56 with the same mac address but with some characters modified. You can pick almost any mac address here as long as it is not otherwise used on your local network. Again, sta0 must not use the same mac address as ap0!
Raspbian’s udev will add its own rule to the file similar to this one:
SUBSYSTEM=="net", ACTION=="add", DRIVERS=="?*", ATTR=="00:11:22:33:44:55", ATTR=="0x0", ATTR=="1", KERNEL=="sta*", NAME="sta0"This rule is generated by /lib/udev/write_net_rules and while I don’t know how to keep it from doing so, it doesn’t really hurt unless you try to ifup interfaces yourself, then you might get a client interface named as sta1 and things won’t work. So remember this rule if you have to debug things and try deleting it if it causes trouble.
Now for the actual IP setup in /etc/network/interfaces:
auto lo iface lo inet loopback allow-hotplug ap0 iface ap0 inet static address 192.168.200.1 netmask 255.255.255.0 hostapd /etc/hostapd/hostapd.conf allow-hotplug sta0 iface sta0 inet dhcp wpa-conf /etc/wpa_supplicant/wpa_supplicant.confThis takes advantage of the hostapd and wpa-conf directives provided through hostapd’s /etc/network/if-pre-up.d/hostapd and wpa_supplicant’s /etc/network/if-pre-up.d/wpasupplicant and /etc/network/if-up.d/wpasupplicant helpers. This is much nicer than doing stuff such as starting wpa_supplicant yourself.
Now we will do need the two referenced configuration files, of course. Here’s a minimal sample /etc/hostapd/hostapd.conf that you should tweak for your own requirements:
ctrl_interface=/var/run/hostapd ctrl_interface_group=0 interface=ap0 ssid2="Pi Zero" country_code=DE # Change this (see the crda(8) and regulatory.bin(5) man pages) ieee80211d=1 ieee80211h=1 ieee80211n=1 hw_mode=g channel=1 # Change this to a low-traffic channel in your neighbourhood macaddr_acl=0 wmm_enabled=1 wpa=1 wpa_passphrase=yoursecret # Change this wpa_key_mgmt=WPA-PSK wpa_pairwise=CCMPLikewise edit /etc/wpa_supplicant/wpa_supplicant.conf, adding information for each Wifi network you might want to visit with the Pi zero:
ctrl_interface=DIR=/var/run/wpa_supplicant GROUP=netdev update_config=1 # Repeat this section for other Wifi networks network=
When you reboot, you might notice that the boot sequence appears to be hanging for a bit because dhcpcd appears to be waiting for IP address assignment. Running raspi-config, select Wait for Network at boot and Fast Boot without waiting for network connection will fix this. Since dhcpcd will continue running in the background, it is likely to have assigned sta0 an IP address by the time you’re logging onto the Pi through ap0.
Certainly you will be likely to connect to your Pi Zero over Wifi using NetworkManager. In that case, to keep things simple I’d recommend to edit the connection profile created for your configured SSID to use a fixed IP address. That way you don’t have to run a DHCP sever on the Pi.
Of course, if you’d like the Pi zero to act as a router you’ll really need one, eg. dnsmasq. And you’ll need to setup firewall rules accordingly (eg. masquerading). Don’t forget to enable IP routing by editing /etc/sysctl.conf:
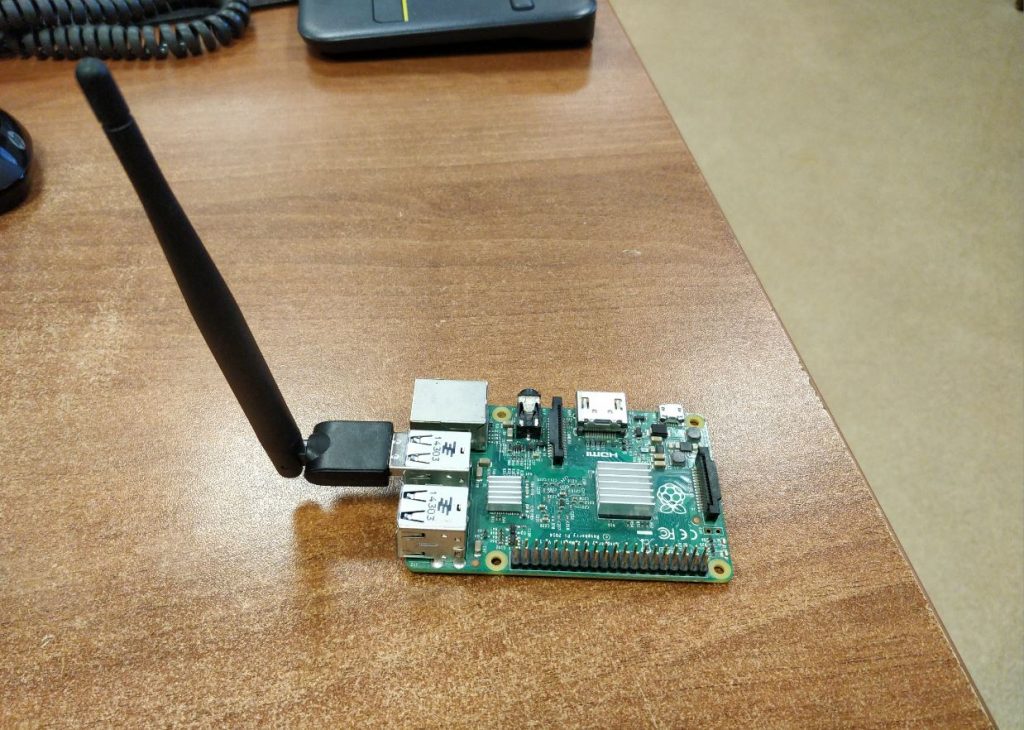
Подключение wi-fi модуля к raspberry pi
В новых версиях raspberry pi уже есть встроенный wi-fi и все работает из коробки. Но что делать с raspberry pi 1 и 2 в которых есть только Ethernet разъем, а хочется управлять данными платами через wi-fi сеть. Для этого как раз и служит данная статья, которая расскажет как подключить usb wi-fi адаптер к малинке.
В основном обычные wi-fi адаптеры работают на распространенных контроллерах. Для них уже есть драйвер в операционной системе Rasbian. К сожалению у меня нет wi-fi адаптера который был бы менее распространен и для него пришлось бы ставить сторонний драйвер (например wi-fi адаптер xiaomi). Я покажу именно настройку с уже установленным драйвером в ОС. Список поддерживаемых адаптеров можно посмотреть тут.
Ну чтож давайте приступим уже непосредственно к настройке wi-fi адаптера, опустив часть с установкой ОС на малинку и опустив часть с подключением к ней по ssh.
И так подключив наш wifi адаптер к малинке и подключившись по ssh, проверим что же за адаптер у нас, так как в моем случае на нем нет никаких опознавательных знаков.
Вводим команду: lsusb
Как видим наше устройство это MT760U и если посмотреть в списке поддерживаемых устройств, оно там есть, значит драйвер уже вшит в ОС.
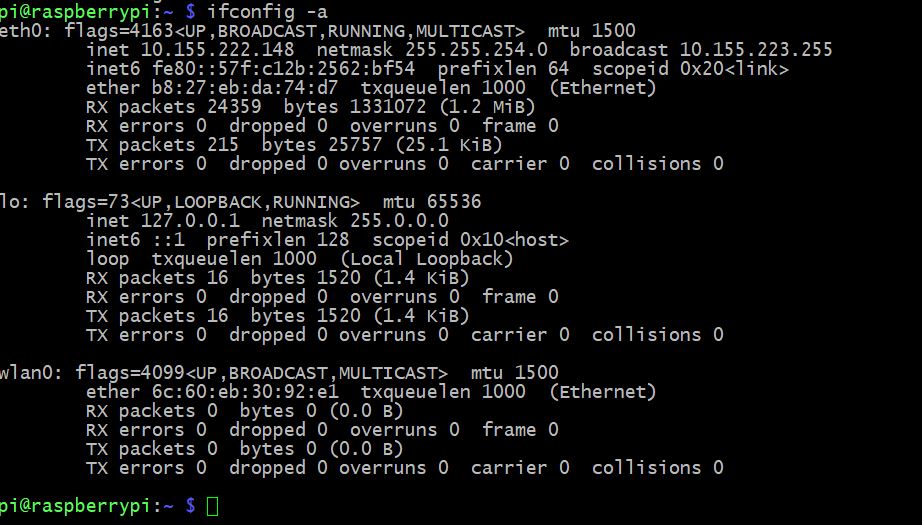
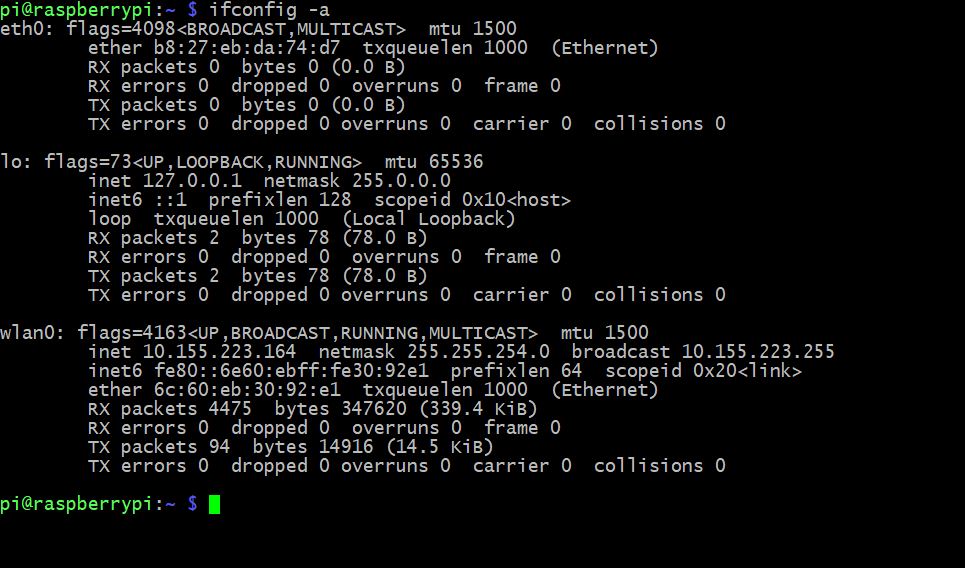
Далее вводим команду: ifconfig -a
Видим 3 интерфейса eth0 – это наш ethernet разъем. lo – это loopback на него не обращаем внимания. и wlan0 – это как раз наш wi-fi адаптер. ( Важно, если вставили wi-fi адаптер уже после того как загрузилась ОС, то в списке интерфейсов вы его не увидите, необходимо будет перезагрузить raspberry pi)
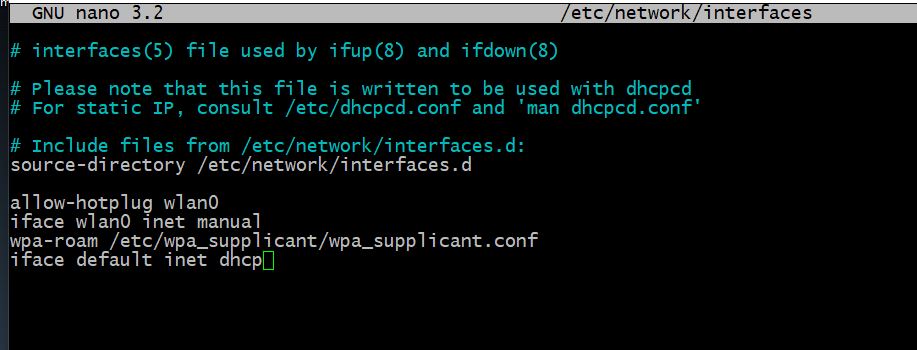
Зная что у нас интерфейс wlan0. нам необходимо настроить конфиг сетевых интерфейсов, который находится в /etc/network/interfaces
Настраивать будем командой sudo nano /etc/network/interfaces и в открывшимся окне записать настройки для wlan0:
allow-hotplug wlan0 iface wlan0 inet manual wpa-roam /etc/wpa_supplicant/wpa_supplicant.conf iface default inet dhcp
Выглядеть это должно следующим образом:
После этого комбинацией клавиш ctrl+X и Y сохраняем наш файл.
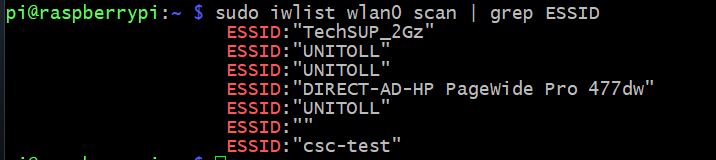
Теперь давайте посмотрим какие сети находит наш wi-fi адаптер командой: sudo iwlist wlan0 scan | grep ESSID
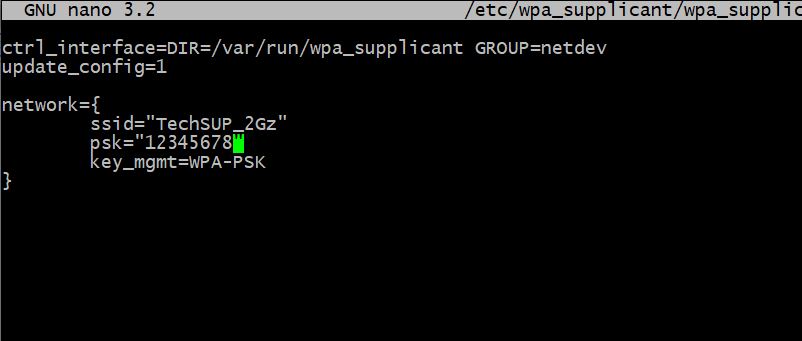
Теперь чтоб подключиться к необходимой нам wi-fi сети, необходимо в файл sudo nano /etc/wpa_supplicant/wpa_supplicant.conf записать следующее:
Выглядящее это примерно так:
Далее опять Ctrl+X и Y для сохранения.
Ну и перезагружаем raspberry pi командой sudo reboot
И уже по тому ip адресу который был мы не подключимся к малинке, теперь он выдастся уже новый wi-fi адаптеру.
Подключившись уже по другому ip адресу и введя команду ifconfig -a видим какой получил ip адрес наш интерфейс wlan0:
На этом настройка wifi закончена и теперь можно управлять малинкой через wifi.
Простой способ добавить Wi-Fi модуль к Raspberry Pi Zero
Выглядит не очень, но работает!
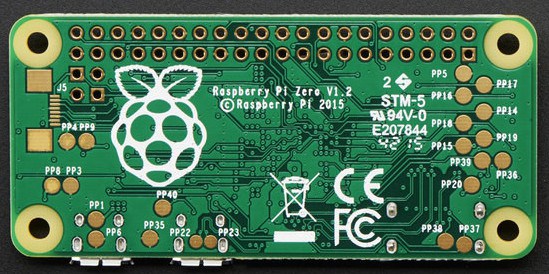
Прошло всего несколько суток после поступления Raspberry Pi Zero в продажу, а уже нашлись умельцы, которые расширили возможности этого мини-ПК. Пользователь с ником Shintaro смог добавить беспроводный модуль Wi-Fi к основному модулю. Сделал он это просто — подпаял Edimax WiFi USB Adapter. Подключение производилось к USB-контактам платы.
Корпус адаптера пользователь снял. Питание для модуля забирается с пинов PP1 и PP6 на обратной стороне платы. Это нерегулируемые выводы энергии по USB, так что работать с ними следует с осторожностью, чтобы не повредить подключаемое оборудование или саму ау. Некоторые недорогие USB-адаптеры могут подавать больше 5В, что чревато — вся схема может сгореть.
Данные на модуль и с него передаются через PP22 и PP23, они также находятся на обратной стороне платы. Провода, которыми модуль припаивается к плате, должны быть одинаковой длины, чтобы избежать искажения сигнала. SD-карта была подготовлена на Raspberry Pi B 2 для настройки пользовательских данных.


- Процессор: ARM11, Broadcomm BCM2835 на 1 ГГц
- Память: ОЗУ 512 МБ
- Накопитель: microSD
- GPIO: 26/40 отверстия
- Разъёмы USB: USB On-the-Go (OTG), Micro USB
- Видеовыход: композитное видео через два контакта на плате (помечены как TV), HDMI через разъём mini HDMI (1080p60)
К сожалению, больше информации о проекте нет, но сама модификация не слишком сложная, так что все и так понятно. Информация о проекте размещена вот на этой страничке.