- How to Set up Pix-link Repeater? Complete Guide for Login RESET and Firmware update.
- Steps to log in on Pix-link repeater
- How to upgrade the firmware for Pix-link repeater?
- How to RESET Pix-link Extender
- PIX-LINK Repeater Login
- How to login to PIX-LINK repeater?
- How to Setup PIX-LINK Wireless Repeater Mode?
How to Set up Pix-link Repeater? Complete Guide for Login RESET and Firmware update.
A wireless repeater, also known as a range extender, is a device that is used to extend the range of a wireless network. The Pix-link repeater is a popular range extender that can help you improve the coverage and signal strength of your existing Wi-Fi network. In this article, we will provide you with a step-by-step guide on how to set up a Pix-link repeater.
Step-by-Step Guide for Set up Pix-link Repeater:
- Step 1: Unbox the Pix-link repeater and connect it to a power source. Wait for the device to turn on.
- Step 2: On your computer or mobile device, go to the Wi-Fi settings and look for the Wi-Fi network named “Pix-link”. Connect to this network.
- Step 3: Open a web browser on your device and enter the default IP address of the Pix-link repeater (192.168.10.1) in the address bar. Press Enter.
- Step 4: You will be directed to the login page where you need to enter the default username and password. The default username and password are both “admin”.
- Step 5: Once you have logged in, you will see the main dashboard of the Pix-link repeater. From here, you can configure your wireless settings, network settings, and security settings.
- Step 6: Click on the “Wireless” tab and then click on “Wireless Repeater” in the left menu.
- Step 7: Select the Wi-Fi network that you want to extend and click “Scan”.
Setting up a Pix-link repeater is a simple and straightforward process. By following the steps outlined in this article, you can extend the coverage and signal strength of your existing Wi-Fi network and enjoy a better browsing and streaming experience. Remember to keep your Pix-link repeater firmware up-to-date to ensure that it works properly and has the latest security updates.
Steps to log in on Pix-link repeater
Here are the steps to log in to your Pix-link repeater:
- Connect your computer or mobile device to the Wi-Fi network of your Pix-link repeater.
- Open a web browser on your device and enter “192.168.10.1” in the address bar. This is the default IP address for most Pix-link repeaters.
- Press “Enter” to access the login page of your Pix-link repeater.
- Enter the default username and password to log in. For most Pix-link repeaters, the default username is “admin” and the default password is also “admin“. However, if you have changed these credentials, use your updated login information.
- Once you have successfully logged in, you can access the settings page of your Pix-link repeater to make any necessary changes or adjustments to your network settings.
Note: If you are unable to log in with the default credentials, you may need to reset your Pix-link repeater to its factory settings. To do this, locate the reset button on the device, press and hold it for 10 seconds, and release it. The device will reboot, and you can log in with the default username and password. However, this will erase all your previous settings, so make sure to backup your current configuration before performing a reset.
How to upgrade the firmware for Pix-link repeater?
It is important to keep your Pix-link repeater firmware up-to-date to ensure that it works properly and has the latest security updates. To upgrade the firmware for your Pix-link repeater, you can follow the instructions below:
- Step 1: Go to the Pix-link website and download the latest firmware for your repeater model.
- Step 2: Connect your computer or mobile device to the Pix-link repeater via Wi-Fi or Ethernet cable.
- Step 3: Open a web browser on your device and enter the default IP address of the Pix-link repeater (192.168.10.1) in the address bar. Press Enter.
- Step 4: You will be directed to the login page where you need to enter the default username and password. The default username and password are both “admin”.
- Step 5: Once you have logged in, go to the “System Tools” tab and click on “Firmware Upgrade” in the left menu.
- Step 6: Click on the “Choose File” button and select the firmware file that you downloaded in step 1.
- Step 7: Click on “Upgrade” to start the firmware upgrade process.
- Step 8: Wait for the firmware upgrade process to complete. This may take several minutes. Do not turn off the Pix-link repeater or disconnect it from the power source during the upgrade process.
- Step 9: Once the firmware upgrade is complete, the Pix-link repeater will automatically reboot.
- Step 10: After the reboot, log back in to the Pix-link repeater and check that the firmware version has been updated to the latest version.
By following these steps, you can upgrade the firmware for your Pix-link repeater and ensure that it is running the latest software with the latest features and security updates.
How to RESET Pix-link Extender
To reset your Pix-link repeater to its factory default settings, follow these steps:
- Locate the reset button on the device. It is usually a small hole on the back or bottom of the device.
- Insert a paperclip or pin into the reset button and hold it down for about 10 seconds.
- Release the reset button after 10 seconds, and the device will reboot automatically.
- Wait for the device to reboot and the power light to stabilize. This may take a few minutes.
- Once the device has rebooted, it will be reset to its factory default settings. You can now log in with the default username and password and configure your device as required.
Note: Resetting your Pix-link repeater to its factory default settings will erase all of your previous settings and configurations. Therefore, make sure to backup your current configuration before performing a reset, so that you can restore it later if required.
PIX-LINK Repeater Login
PIX-LINK web interface allows you to change WiFi password, Network Name (SSID), and default settings at myrepeater.net or 192.168.1.254.
How to login to PIX-LINK repeater?
- Plug and connect to your PIX-LINK MiNi Router via Ethernet Cable or Wireless, the router’s network (wireless-AC or wireless N(2.4G)).
- Open a browser and type myrepeater.net or 192.168.1.254 in the address bar.
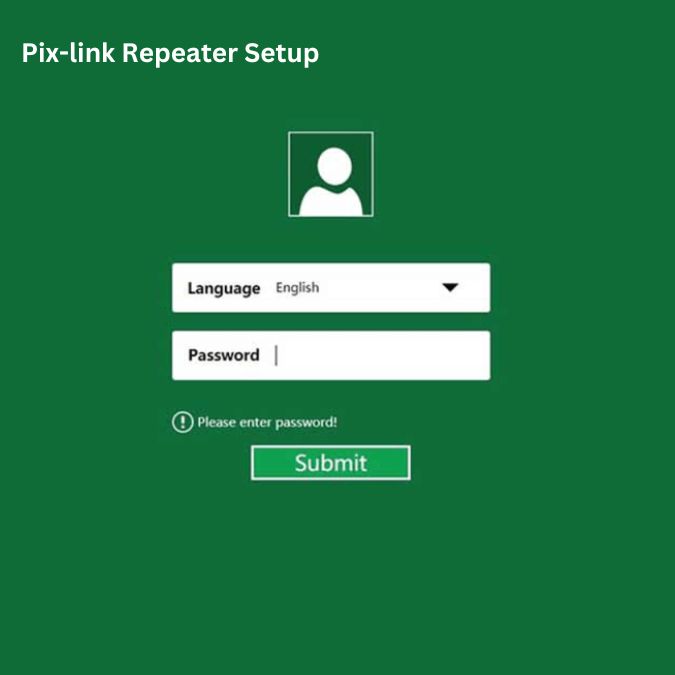
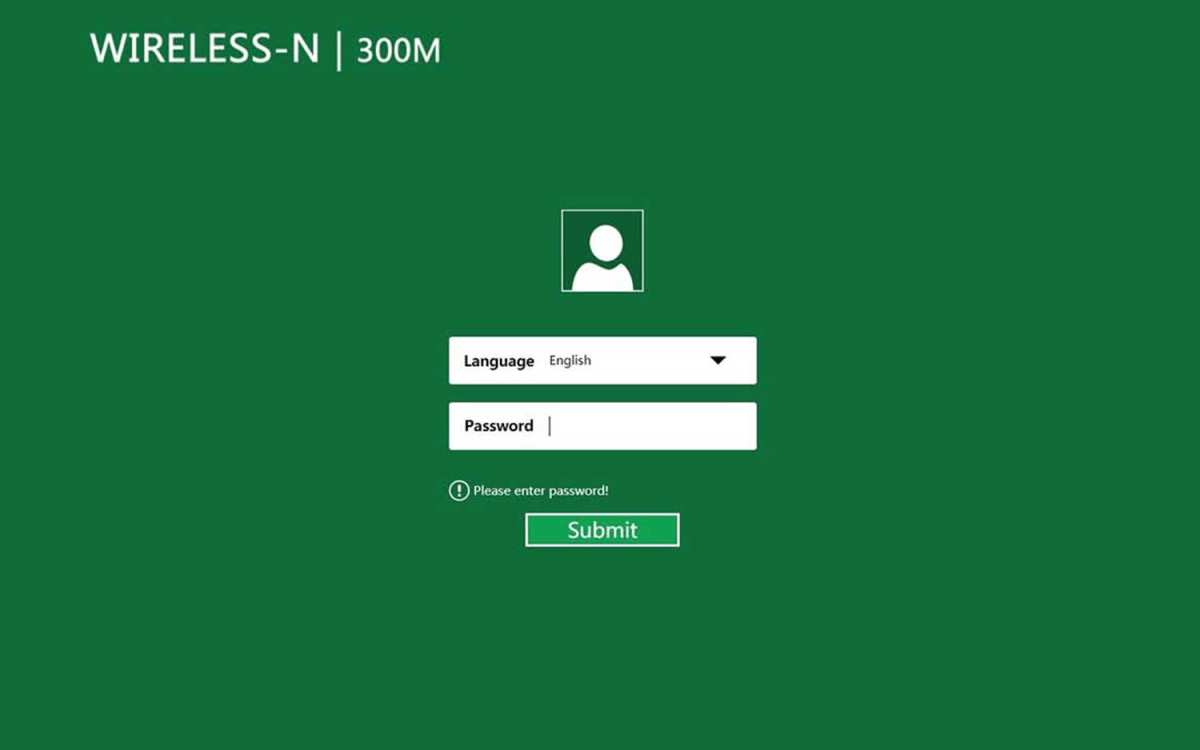
- A login screen will appear. Select the language for installation and type admin in the Password field and click Submit button.
- You will be logged in to PIX-LINK admin panel.
The default language is English. You may select any language as preferred from the drop-down list.
How to Setup PIX-LINK Wireless Repeater Mode?
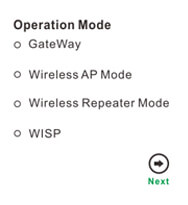
PIX-LINK MiNi Router has 4 modes: Gateway Mode, Wireless AP Mode, Wireless Repeater Mode and WISP Mode. Follow the steps below to set up the wireless repeater mode:
- Login to your PIX-LINK admin panel and click on the Wizard button.
- Now, Select Operation Mode as “Wireless Repeater Mode” and click on the Next button.
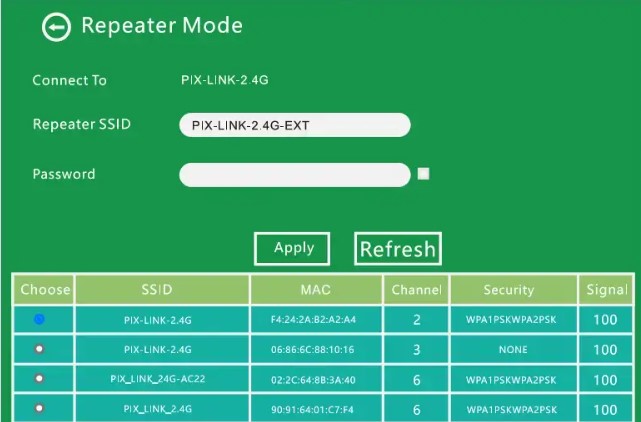
- The device will scan for all the wireless networks nearby. Select the wireless network, whose range you want to improve, from the list.
- Once you have selected the WiFi network, enter the new Extender SSID in the given field, and in the Security Key field, enter the WiFi key of your existing network.
- Click on Apply to save settings. The router will now reboot, after which you can join the new WiFi network using the same password as your original network.


