- Руководство по установке Manjaro Linux
- Подготовка к установке Manjaro Linux
- Минимальные требования к компьютеру
- Скачайте ISO-образ Manjaro
- Установка Manjaro Linux на ноутбук или настольный ПК
- UEFI — Install Guide
- Common
- Graphical Installer
- CLI installer
- Disk preparation
- Setting filesystem mount points
- Installation
- Instructions
- Manual install
- An alternative: chainloading via GRUB
- Using Rufus on Windows to create installation media
Руководство по установке Manjaro Linux

В данной пошаговой инструкции показано, как установить Manjaro 21 на примере XFСE Edition. Manjaro Linux — дружественный начинающему пользователю дистрибутив на основе Arch. Manjaro 21 «Ruah» наиболее свежая на данный момент версия ОС.
Подготовка к установке Manjaro Linux
Подготовьтесь к установке. Понадобятся USB-накопитель емкостью не менее 16 ГБ и широкополосное подключение к интернету для загрузки образа ISO. Перенесите данные с HDD или SSD ноутбука, или настольного ПК в надежное хранилище — в облако, NAS, DAS, на флешку, внешний жесткий или твердотельный диск.
Минимальные требования к компьютеру
Убедитесь, что ваш ноутбук и настольный ПК соответствует минимальным рекомендуемым требованиям для установки Manjaro:
- Не менее 2 ГБ оперативной памяти.
- Двухъядерный процессор с тактовой частотой не менее 1 ГГц
- 30 ГБ свободного места на жестком диске.
- HD-видеокарта и дисплей.
Если характеристики более мощные — тем лучше. Операционная система будет работать быстрее.
Скачайте ISO-образ Manjaro
Перейдите на официальную страницу загрузки Manjaro и скачайте ISO-образ с предпочитаемым вами окружением рабочего стола в разделе Download. Доступны различные варианты, в том числе популярные GNOME, PLASMA и XFСE. В данном примере — XFСE. Простой, удобный, легкий, подходящий слабого и устаревшего компьютера. PLASMA выигрывает в плане эстетики. GNOME выглядит продвинуто. Но интерфейс ближе к мобильному девайсу, чем к классическому ПК.

После скачивания образа ОС создайте загрузочный USB-накопитель. Для создания загрузочной флешки воспользуйтесь одним из методов, которые ранее рассмотрел «Блог системного администратора»:

Установка Manjaro Linux на ноутбук или настольный ПК
Подключите загрузочную флешку к USB-разъему вашего стационарного ПК или ноутбука. В BIOS (UEFI) обязательно установите загрузочный USB-носитель первым пунктом в разделе приоритета загрузки. В таком случае система сможет определить USB-накопитель как первое устройство. И стартует мастер установки Manjaro.
После перезагрузки компьютера установщик Manjaro Linux предложит варианты установки ОС. По умолчанию предлагается «Boot with open source drivers» — загрузка с драйверами с открытым исходным кодом. Можете выбрать вариант «Boot with proprietary drivers». При таком сценарии установки выше вероятность, что все драйвера установятся и ваше оборудование будет работать корректно.

Дождитесь завершения подготовки мастера к установке операционной системы. На данном этапе никаких действий от пользователя не требуется. Только немного терпения.

Дождитесь загрузки рабочего стола Manjaro Linux. Вы можете протестировать операционную систему без установки. Кликните по значку Install Manjaro на рабочем столе, чтобы установить операционную систему на ваш компьютер.

После старта программы установки Manjaro Linux выберите из выпадающего списка язык. Нажмите кнопку «Далее» в нижней части окна установщика.

Выберите регион и часовой пояс (Зона). От вашего выбра зависит ряд других параметров. В том числе — язык интерфейса операционной системы, формат чисел и дат. Кликните по кнопке «Далее».
Не забудьте подписаться на наш Дзен

Выберите раскладку клавиатуры. Нажмите «Далее».

Выберите «Стереть диск», если планируете сделать Manjaro Linux основной операционной системой вашего компьютера. Данные на диске будут потеряны. В том числе — видео, фотографии, текстовые документы, электронные таблицы и презентации. Если на диске остались важные файлы, прервите процесс установки и создайте копии в надежном хранилище. При необходимости выберите тип раздела подкачки. Выберите «Ручная разметка», если желаете выделить под Manjaro лишь часть накопителя вашего ноутбука или настольного ПК. Нажмите «Далее».

Придумайте надежные пароли учетной записи и администратора. Пароли необходимо вводить дважды в соответствующие поля ввода.
Вы можете выбрать опцию «Использовать тот же пароль для аккаунта администратора», чтобы не создавать два пароля. В таком случае пароль учетной записи пользователя и администратора будет одинаковым. Выберите «Автоматический вход, без запроса пароля», если хотите, чтобы ОС не спрашивала пароль при каждом запуске компьютера. Данные опции немного упрощают пользователю работу. Но снижают безопасность данных на ПК. Нажмите «Далее».


Появится всплывающее окно с вопросом: «Продолжить установку?» Нажмите «Приступить к установке», если все подготовительные настройки были сделаны правильно.

Стартует установка Manjaro Linux. Смотрим слайды и ждем завершения. Программный мастер отображает прогресс процесса установки в процентах. Знакомит пользователя с важнейшими функциями и возможностями ОС. На данной стадии пользователю ничего делать не придется.

После сообщения о завершении установки Manjaro Linux, активируйте опцию «Перезагрузить». Нажмите кнопку «Готово».

Используйте ОС и предустановленное ПО. Устанавливайте дополнительные приложения.

Manjaro — один из наиболее популярных на сегодня дистрибутивов Linux. Востребован начинающими пользователями благодаря интуитивно понятному интерфейсу. Как и Linux Mint, инструкцию по установке которого ранее публиковал:

Собираетесь переходить на Linux или останетесь на Windows? Расскажите в комментариях.
UEFI — Install Guide
The following guide aims to install Manjaro on a machine with UEFI enabled, Secure boot disabled, and using GUID Partition Table (GPT) disk(s).
For multi-boot, the EFI system partition which is already present (or will be created), can usually be shared amongst multiple Linux installs.
Common
- 1. Download your preferred Manjaro version: XFCE, Gnome, KDE, Budgie, Cinnamon, I3, Sway or Mate.
- 2. Burn the .iso to USB or DVD. See Burn an ISO File for more details.
- 3. Check your BIOS, UEFI must be ON and Secure boot OFF.
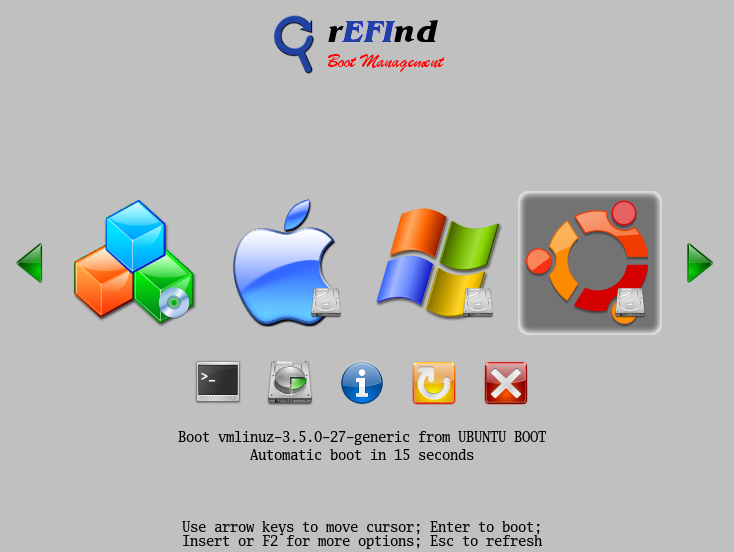
- 4. Boot with your USB or DVD & use the rEFInd — Main Menu. to choose which GPU drivers you want to have installed, the open-source or proprietary:
* Boot with open source drivers - This chooses the open-source - free GPU drivers. * Boot with proprietary drivers - This option chooses the proprietary GPU drivers from Nvidia or ATI.
Graphical Installer
tip Since Manjaro-0.8.9, UEFI support is also provided in the Graphical Installer, so one can simply try the Graphical installer and skip the instructions given below for the CLI installer.
To use the Graphical Installer select the Install Manjaro option from the Manjaro Welcome screen or from the desktop.
For the ESP (EFI system partition) which will store the EFI Grub binary, a 512mb partition of type fat32 can be created in the partitioning step, and mounted to /boot/efi
If you are dual booting then an EFI partition from a previous install can also be used.
CLI installer
- 6. Now, we are in the CLI Installer.
- 7. Choose 1. Set date and time — an easy intuitive configuration.
Disk preparation
tip If your hard disk is already partitioned the way you want, then this step can be skipped.
* When you click 2. Partition Hard Drives, you get a dialog saying "Do you want to use GUID Partition Table (GPT)", choose Yes. * Partition your disk(s) as you want (Instructions on manually partitioning are beyond the scope of this guide, some deatils are available here). * Important Step: Create a 50~250MB EFI Partition, mine is 100MB (code: ef00)
Setting filesystem mount points
* After the partitioning is done, go to 4. Set Filesystem Mountpoints. * Important Step: Format the EFI Partition you created as VFAT and mount on /boot/efi
note If you are re-using your EFI partition (that was created by Windows previously (or any other OS), then there is no need to format. Formatting will wipe the previous bootloader. Only mounting the EFI partition as /boot/efi is required in that case.
Installation
- 9. Choose 3. Install system and wait.
- 10. Now, go to 4. Configure System and configure it the way you like (username, password, mirrorlist, system-name, . ).
- 11. When you are done, go to 5. Install bootloader. Choose EFI_x86_64 > GRUB (2) UEFI x86_64, DON’T select BIOS GRUB.
- 11.1 It will ask to format the EFI Partition you created earlier as FAT32, yes can be chosen.
- 12. If it gives a error in the final stages saying «efivars kernel module was not properly loaded», don’t worry, the system will work fine!
- 13. If the installer asks you about copying grub/efi files to another folder in order to maintain compatibility in some systems, choose Yes.
- 14. Click 6. Quit
- 15. Shutdown, remove the DVD or USB, and boot. Your system should appear now!
1) You need to create an ESP (EFI System Partition).
It is a FAT32 partition which has the .efi files for booting, which you can create using gparted or gdisk. (Size at least 200-300 MiB.) Ensure the flags `boot` and `esp` are set on this partition.
You should also install/check whether following packages are present:
1. efibootmgr 2. dosfstools 3. grub
2) Create the /boot/efi directory
3.) Mount the EFI partition as /boot/efi
sudo mount /dev/sdXY /boot/efi
X = Alphabet of the drive = a,b,c . Y = Partition number of the EFI partition = 1,2,3,4.
4.) Install Grub according to UEFI
user $ sudo grub-install —target=x86_64-efi —efi-directory=/boot/efi —bootloader-id=manjaro —recheck COPY TO CLIPBOARD
5.) Update Grub configuration file.
path '/boot/grub' is not readable by Grub on boot. Installation is impossible. Aborting
Then you will need to chroot as described here, and then perform Step 5 again.
EFI variables are not supported on this system.
then you could load the efivarfs module :
tip Some manufactures EFI implementations cause GRUB not to be showed in the Boot Menu, or even if its there it can’t be made default.
In such cases rEFInd can be used.
There are two ways to install rEFInd:
1.Install rEFInd from its website (detailed) or install using pacman(preferred):
Files will be present in /usr/share/refind .
2.Or using the instructions on the rEFInd website
Instructions
The refind-install command can be used to automatically install rEFInd (the EFI partition may need to be mounted for this to work). See the Arch wiki for more details.
Manual install
Inside the refind folder (/usr/share/refind), copy the files and folders to /boot/efi/EFI/Boot/ .
You need to copy these files to the Boot folder on your EFI partition, and the Boot folder itself will be present inside the EFI folder on the EFI Partition, so take note of it.
You can check which partition is your ESP using Gparted; find which partition is formatted as fat32 and has size around 200MiB-1GiB.
Can mount it as /boot/efi by
X=a,b,c. N=1,2,3. These depend on which partition your ESP is present which can be obtained via Gparted as mentioned earlier.
Now inside the /boot/efi/EFI/Boot/ folder, there should already be a file present:
You can rename it as windows.bootx64.efi Then you can rename refind_x64.efi to bootx64.efi
The bootx64.efi files boot by default, hence rEFInd should now boot by default, and detect grubx64.efi(linux-manjaro) and efibootmgfw.efi (windows) automatically.
note A folder Manjaro (name could be some other also) containing the file grubx64.efi should also be present in /boot/efi/EFI/ folder, which should contain the grubx64.efi file which will be used by rEFInd to boot Grub.
/boot/efi/EFI/Manjaro/grubx64.efi
rEFInd would use this file for booting Manjaro.
If you do not have this file or folder, try:
user $ sudo grub-install —target=x86_64-efi —efi-directory=/boot/efi —bootloader-id=Manjaro —recheck COPY TO CLIPBOARD
to create /boot/efi/EFI/Manjaro/grubx64.efi
An alternative: chainloading via GRUB
menuentry 'Windows8 (UEFI)' < insmod ntfs set root=(hd0,gpt4) chainloader ($)/EFI/Microsoft/Boot/bootmgfw.efi boot >
In this case (hd0,4) or /dev/sda4 is the EFI System partition where the Windows bootloader is present.
After adding the above entry, running sudo update-grub updates the GRUB configuration file so that an entry named Windows8 (UEFI) is added to the GRUB boot menu.
The chainloading will fail on some hardware (Lenovo Ideapad 110) with the «invalid signature» message — the Refind method will still work.
Using Rufus on Windows to create installation media
Rufus users can use the following settings:
* Click on the DVD icon and load your .iso * In the menu left of the DVD icon, select DD Image * Device: "choose your USB" (Attention: choose correctly, the device selected here will be formatted. ) * Partition scheme: GPT partition scheme for UEFI computer * File system: FAT32 * Cluster size: "Don't modify" * Volume label: "Don't modify" * Click Start, and you are done (takes 2~5 min to complete).
Questions, suggestions, critics? Please post here