- Права суперпользователя линукс кали
- Enabling the root account
- Enabling root for SSH
- Enabling root for GNOME and KDE login
- Как получить root-доступ в Kali Linux
- Как получить root-доступ
- Проверка учетной записи пользователя для входа в систему
- Вход в терминал под учетной записью root
- Установка пароля root в Kali Linux
- Вход в систему как root в Kali Linux
- Похожие записи:
- How do I get root permission in Kali Linux?
- Method 1:
- Method 2
- Conclusion
Права суперпользователя линукс кали
There are some cases where you may need to use superuser, root, for an extended period of time. In these cases we can easily access the root account with a simple sudo su (which will ask for the current user’s password), selecting the root terminal icon in the Kali menu, or alternatively using su — (which will ask for the root user’s password) if you have set a password for the root account that you know of. When finished, exit or CTRL+D will take us out of this elevated shell.
However, there may be other times where you may want to use root across multiple sessions without the hassle of elevating privileges. In these situations we will need to install a package and make a few modifications to fully enable the root account for use due to security reasons of keeping the root account disabled by default.
Enabling the root account
The first thing to do is set a root password, which should be different to the current user’s password (in this case kali ). We can do this by doing the following:
[email protected]:~$ sudo passwd [sudo] password for kali: New password: Retype new password: passwd: password updated successfully [email protected]:~$ Please note that the password prompt will not display output as you are typing in the password, but it will still register the keystrokes.
The next thing we need to decide is if we are wanting to use root via SSH or through the login prompt on whichever desktop environment is installed.
Enabling root for SSH
If we look at /etc/ssh/sshd_config we will see a PermitRootLogin line. We will want to change this line to match our use case:
[email protected]:~$ grep PermitRootLogin /etc/ssh/sshd_config #PermitRootLogin prohibit-password # the setting of "PermitRootLogin without-password". [email protected]:~$ [email protected]:~$ man sshd_config | grep -C 1 prohibit-password PermitRootLogin Specifies whether root can log in using ssh(1). The argument must be yes, prohibit-password, forced-commands-only, or no. The default is prohibit-password. If this option is set to prohibit-password (or its deprecated alias, without-password), password and keyboard-interactive authentication are disabled for root. [email protected]:~$ [email protected]:~$ sudo systemctl restart ssh [email protected]:~$ If we have set up SSH key based login for the root account, then we can simply uncomment the appropriate line and continue on. Otherwise, we should change PermitRootLogin to be yes which will allow us to input a password.
Enabling root for GNOME and KDE login
We will first install kali-root-login to change multiple configuration files that will permit us to login to the root account through the GNOME GDM3 and the KDE login prompt. This step is not necessary when using other desktop environments:
[email protected]:~$ sudo apt -y install kali-root-login Reading package lists. Done Building dependency tree Reading state information. Done The following NEW packages will be installed: kali-root-login 0 upgraded, 1 newly installed, 0 to remove and 1516 not upgraded. Need to get 6,776 B of archives. After this operation, 33.8 kB of additional disk space will be used. Get:1 http://kali.download/kali kali-rolling/main amd64 kali-root-login all 2019.4.0 [6,776 B] Fetched 6,776 B in 1s (10.9 kB/s) Selecting previously unselected package kali-root-login. (Reading database . 333464 files and directories currently installed.) Preparing to unpack . /kali-root-login_2019.4.0_all.deb . Adding 'diversion of /etc/gdm3/daemon.conf to /etc/gdm3/daemon.conf.original by kali-root-login' Adding 'diversion of /etc/pam.d/gdm-password to /etc/pam.d/gdm-password.original by kali-root-login' Adding 'diversion of /etc/pam.d/gdm-autologin to /etc/pam.d/gdm-autologin.original by kali-root-login' Adding 'diversion of /etc/pam.d/lightdm-autologin to /etc/pam.d/lightdm-autologin.original by kali-root-login' Adding 'diversion of /etc/pam.d/sddm to /etc/pam.d/sddm.original by kali-root-login' Adding 'diversion of /etc/sddm.conf to /etc/sddm.conf.original by kali-root-login' Unpacking kali-root-login (2019.4.0) . Setting up kali-root-login (2019.4.0) . Installing /usr/share/kali-root-login/daemon.conf as /etc/gdm3/daemon.conf Installing /usr/share/kali-root-login/gdm-password as /etc/pam.d/gdm-password Installing /usr/share/kali-root-login/gdm-autologin as /etc/pam.d/gdm-autologin Installing /usr/share/kali-root-login/lightdm-autologin as /etc/pam.d/lightdm-autologin Installing /usr/share/kali-root-login/sddm as /etc/pam.d/sddm Installing /usr/share/kali-root-login/sddm.conf as /etc/sddm.conf [email protected]:~$ We can now log out of our non-root user account and login to root using the password that we set earlier.
Updated on: 2023-Mar-06
Author: gamb1t
Как получить root-доступ в Kali Linux

Статьи
В этой статье мы узнаем, как получить root-доступ и войти в систему как root в Kali Linux. В старой версии Kali по умолчанию пользователем является root. Но теперь при установке Kali Linux мы должны создать стандартного пользователя. После входа в систему мы должны использовать команду sudo для установки любого приложения или пакета в Kali.
Итак, как получить доступ root в Kali Linux, мы должны выполнить следующие шаги:
Как получить root-доступ
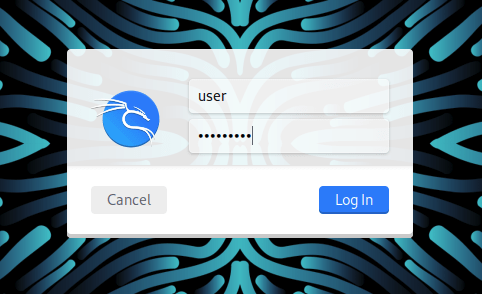
В первый раз мы должны войти в систему под учетной записью обычного пользователя, которая создается при установке Kali.
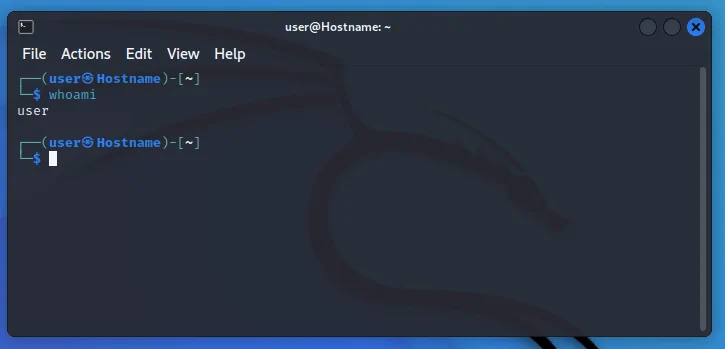
Проверка учетной записи пользователя для входа в систему
Теперь, прежде всего, нужно открыть терминал, и вы можете проверить текущего пользователя входа в систему с помощью этой команды.
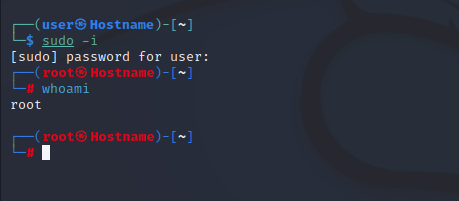
Вход в терминал под учетной записью root
Теперь мы переключим обычную учетную запись пользователя на учетную запись root, поэтому вам нужно ввести следующую команду в терминале.
Теперь вы можете проверить, что вы находитесь в root вы можете определить с помощью символа #, а также вы можете ввести ту же команду, которая является whoami.
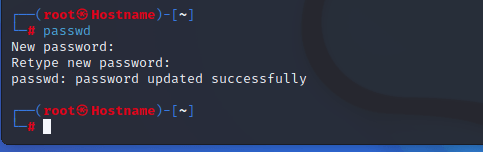
Установка пароля root в Kali Linux
Теперь вы проверили текущего пользователя в терминале, который является root, поэтому вам нужно ввести команду passwd и нажать enter, она запросит пароль, поэтому вам нужно ввести пароль, а затем проверить его, и все, вы установили пароль root с помощью терминала.
Вход в систему как root в Kali Linux
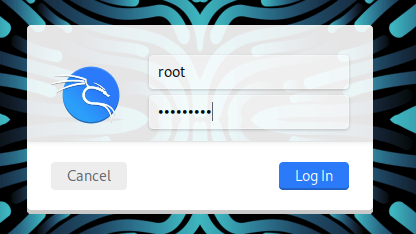
Теперь вы можете выйти из пользователя root, закрыть терминал, выйти из учетной записи обычного пользователя и войти в систему под пользователем root с помощью нового пароля.
Вот и все, это способ, как вы можете изменить пароль root и войти под пользователем root в Kali Linux.
Похожие записи:
How do I get root permission in Kali Linux?
![]()
The root user name or account has default permission to all available commands and files on a Linux or any other Unix-like operating system. It is also known as the superuser, the root account, and the root user. Username: “kali” are the standard credentials for logging into the new Kali system. This establishes a session as user “kali,” You must use this user password after “Sudo” to gain root access. Kali Linux was using the root account by default till recent times. Root login is restricted in the current versions of Kali, allowing you to utilize your regular user account to access the GUI. The reasons behind this modification should be clear, but if you are a Kali user, you are presumably already familiar with a Linux system; thus, there is a little risk in allowing you to log in with the root account. We will create a non-root user with administrative capabilities while we install Kali Linux. Other Linux distributions follow a similar procedure. The default user in older versions of Kali is root. But first, we must create a regular account before installing Kali Linux. To install any program or package under Kali, we must first log in and then use the Sudo command. So, to gain root access to Kali Linux, we must follow the appended methods:
Method 1:
If many users share the system, some of them may wish to serve as administrators and manage the system as a whole. So that no direct effect on the system’s operation and easy sharing across users, the suitable users can be granted administrator privileges and others with non-root privileges. It will be tough for an attacker to break into the system if there is a root user. The usage of sudo and the disablement of the root account might mislead intruders because they would not know which account had admin privileges. Sudo policies can be created and deployed in a corporate network as well as Kali Linux distributions. Having a root password improves monitoring capabilities because it allows you to see what others users have been doing in the system and whether or not any intrusions are occurring.
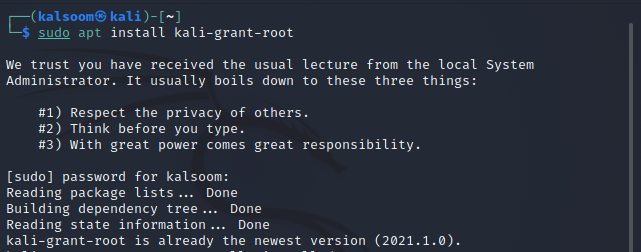
Step 1: To begin, download the kali-root-login package with the apt package manager.
Step 2: Next, use the following listed command to configure the program we have just downloaded.

Step 3: Upon the execution of the above command, the following displayed screen will pop up.

Step 4: Ensure that “enable password-less privilege escalation” is selected before clicking enter to proceed further.
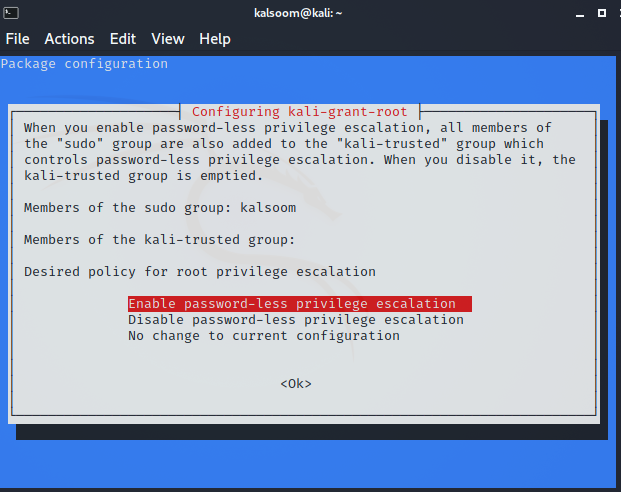
Step 5: Upon section, the user will be added to the “kali-trusted” group, as you can verify from the attached screenshot.

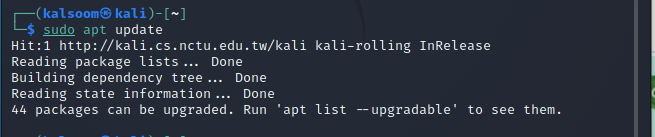
Step 6: It’s as simple as that. You can even use the Sudo command to perform all subsequent commands as root, but you will never require a password. Try logging out and then in, then perform a command that typically requires root access to see whether it works.
Method 2
We connect as non-root users by default on Kali Linux 2021, and we must set the root password ourselves. We do not even know the root password in the first session, so we can’t log indirectly. Instead, we have to log in as a non-user, which is established when we install Kali Linux.
Step 1: To begin, you must first open the terminal and then use this command to determine the current login user.

You can check that the user name is kalsoom in our system.
Step 2: To change the standard user account to the root account, execute the following cited command into the terminal.
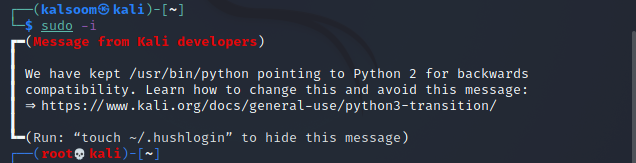
Step 3: You can now verify that you are in the root by using the appended command.

The output displays the user name as “root”.
Conclusion
In this tutorial, we learned how to grant root rights to a regular user in Kali Linux. You can use the instructions in this guide to prefix any command with sudo and never have to input a password again. When the Kali developers restricted root login in the latest releases, they must have anticipated that some users would be irritated; therefore, they provided numerous options for restoring capability. One word to the wise when using the root password: keep it safe in your control; otherwise, the system could be compromised. I hope the article will be instructive for you while working on Kali Linux. You can use either of these two methods to get access to root rights in your system.