Canon mp495 как подключить по wifi
МФУ довольно давно не подключался, а с того времени я переделал всю топологию сети и ее настройки. Появилась необходимость, но принтер не отображался в списке подключенных, хотя весело горел значок WiFi .
1. Сбрасываем настройки сети и отключаем WiFi на принтере
Нажимаем 14 раз на значок сервисного режима на принтере ( пассатижи с отверткой ) до появления буквы «t» и затем нажимаем на COLOR или BLACK. Принтер должен выполнить операцию, вернуть значение — 1 и отключить WiFi ( индикатор погаснет )
Нажимаем 13 раз на значок сервисного режима до появления буквы «G» ( но без горизонтальной черты ) и нажимаем на COLOR. Принтер выполнит операцию и индикатор засветится.
3. Подключаем к нашей сети.
Открываем нашу точку доступа ( снимаем любую авторизацию и пароли ) и меняем SSID на — «BJNPSETUP». Сохраняем. Теперь наш МФУ подключился и заходим через браузер по адресу, который он получил из пула и настраиваем подключение через пароль и статический IP ( МФУ умеет WEP/WPA/WPA2/IPv4/IPv6/DHCP/STATIC ). Сохраняем настройки и возвращаем конфигурацию нашему роутеру. IP МФУ должен запинговаться.
This entry was posted on Понедельник, июля 23, 2012 at 13:52 and is filed under Новости. You can follow any responses to this entry through the RSS 2.0 feed. You can leave a response, or trackback from your own site.
12 комментариев to “Сброс параметров TCP/IP для WiFi у pixma mp 495”
Николай, постучался к Вам в аську, но так и не получил ответа.
Эта запись как алмаз среди болота звиздежа в сети. Огромное спасибо за помощь.
Приятно, когда информация приносит пользу, мучался довольно долго с этим вопросом.
Сохраняем. Теперь наш МФУ подключился и заходим через браузер по адресу, который он получил из пула и настраиваем подключение через пароль и статический IP ( МФУ умеет WEP/WPA/WPA2/IPv4/IPv6/DHCP/STATIC ). Сохраняем настройки и возвращаем конфигурацию нашему роутеру. IP МФУ должен запинговаться.
можно здесь по подробнее? По какому адресу заходить? и где посмотреть статический айпи?
Выделенный для МФУ адрес можно увидеть в контрольной панели роутера, он будет в подключенных устройствах, далее этот адрес вводим в браузер и попадаем в контрольную панель нашего МФУ, там его делаем статическим и сохраняем настройки подключения к Wi-Fi сети
единственный сайт, где можно увидеть адекватную инструкцию по подключению canon pixma mp495 к точке доступа
Спасибо, сам долго искал подобную инструкцию к МФУ и много колдовал =)
Большое вам спасибо Николай! Я долго мучилась с принтером, не могла отключить WI-FI ( случайно включила не зная как ). Очень помогло мне. Еще раз спасибо.
Сам столкнулся с подобными проблемами и долго искал решение =)
Спасибо, друг. Способ нетривиальный, но по-другому не получилось.
велкам 🙂 сам колдовал долго.
Bolshoe spasibo za takuju podskazku kak otkliuchit Wifi ot canon Pixma MP495.
Na google .com tak i nemog naiti, prostogo objasnenia kak otkliuhit
Some access points (often called routers or hubs) feature an automatic connection button labelled “WPS” which stands for Wi-Fi Protected Setup and allows permitted devices to connect to your network without needing to enter a password. This is the easiest way of connecting your PIXMA printer, so if your access point has a WPS button please select ‘WPS Connection Method’ below for instructions on connecting using this method.
If your access point does not support WPS, please select ‘Standard Connection Method’ below.
WPS Connection Method
Before we start, there are some conditions that must be met in order to use the WPS push button method:
- The access point must have a physical WPS push button available. Please check with your device’s user guide for details. If the WPS push button is not available please use the instructions in the Standard Connection Method section.
- Your network must be using the WPA (Wi-Fi Protected Access) or WPA2 security protocol. Most WPS enabled access points use this protocol.
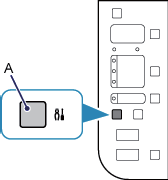
Make sure that the printer is turned on.
If the power is on, the LED (Light Emitting Diode) is lit as shown in the illustration below.

1. Press and hold the [Maintenance] button (A) on the printer for approximately 5 seconds.

2. Make sure that the LED flashes as shown in the illustration below.

1. Press the [Fit to Page] button (A).

2. Make sure that the LED flashes as shown in the illustration above, then press the [WPS] button on your access point within 2 minutes.
For exact details regarding pressing the WPS button, please refer to the access point manual.
The (blue) Wi-Fi lamp on the printer will flash while searching for, or connecting to the access point.
3. When wireless connection is complete, the LED lights up for about 3 seconds, then changes to «1» as shown in the illustration below. Make sure that the (blue) Wi-Fi lamp on the printer is also lit.

If any of the following error codes are displayed on the LED (alternately flashing between the letter “E” and then a “Number” followed by another “Number”), please press the [Black] or [Colour] button to dismiss the error, and then repeat steps 1 and 2.
Error E, 2, 1.

This error appears when wireless connection setup was not completed within 2 minutes after pressing the WPS button.
Is the access point turned on? If the access point is already turned on, turn it off, and then turn it back on.
Error E, 2, 3.

This error appears when multiple WPS access points are detected. Please wait for a while, then configure WPS settings again.
If you have more than one access point, press the [WPS] button on only one access point.
Network settings confirmation
To confirm that your printer is successfully connected to your wireless network, you can print out the network settings of your printer:
1. Make sure that your printer is turned on.
2. Load a sheet of A4 or Letter-sized plain paper.

3. Press the [Maintenance] button (A) repeatedly until the LED displays .

4. Press the [Colour] button or the [Black] button.
When referring to the printout, check that the “Link Status” indicates “Active” and that the SSID — Service Set Identifier (the name of your wireless network) indicates the correct name of your wireless network.
This concludes the WPS setup procedure.
Please now proceed by installing the software to make the most out of your PIXMA MP495.
If you do not have the installation CD that came with your product, please download the manuals and software to continue.
If the WPS wireless setup is still failing after following this guide, please contact us for further assistance.
Standard Connection Method
1. Insert the CD that came with your printer and run the setup.
Windows Users – If the “Setup CD-ROM” does not autorun, insert the CD-ROM into the computer again and click on [My Computer], select the CD-ROM and double-click [MSETUP4.EXE].
Windows 8 users — double-click [Canon_IJ]. When the selection window opens, double-click the [MSETUP4.EXE]).
Mac Users – Double-click the [Canon_IJ] icon mounted on your desktop. When the selection window opens, click the [SETUP] to start the software download link.
If you do not have the installation CD that came with your product, please download the manuals and software to continue.
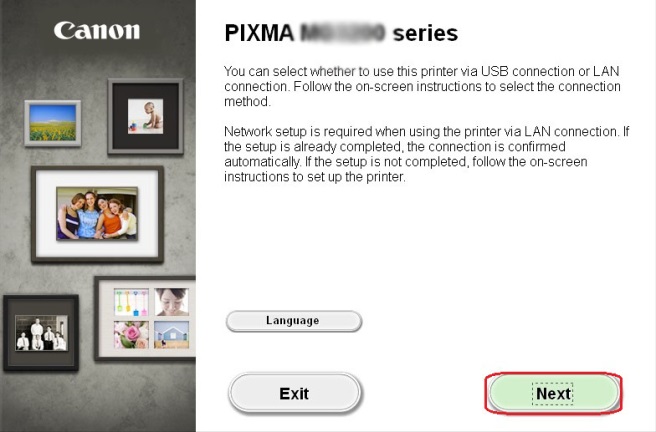
2. When the initial screen appears, click on [Next].
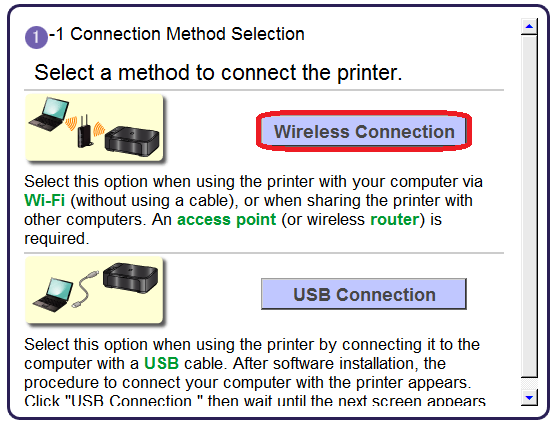
3. Select [Wireless Connection] as a connection method.
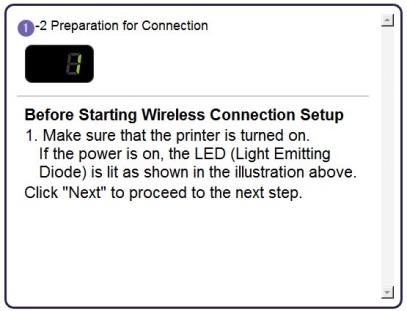
4. Ensure that your printer is turned on, and then click [Next].
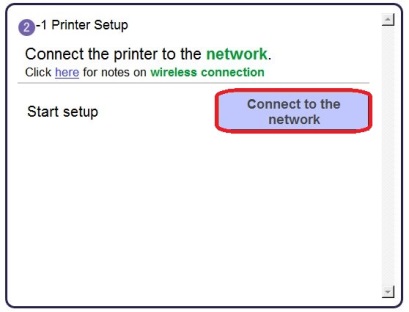
1. Click on [Connect to the network].
2. Press and hold the [Maintenance] button (A) on the printer for approximately 5 seconds.

Then, click on [Next].
3. Make sure that the LED flashes as shown in the illustration below.

Then, click on [Next].
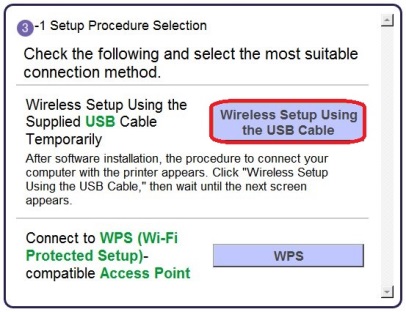
4. When the following screen appears, click on [Wireless Setup Using the USB Cable].
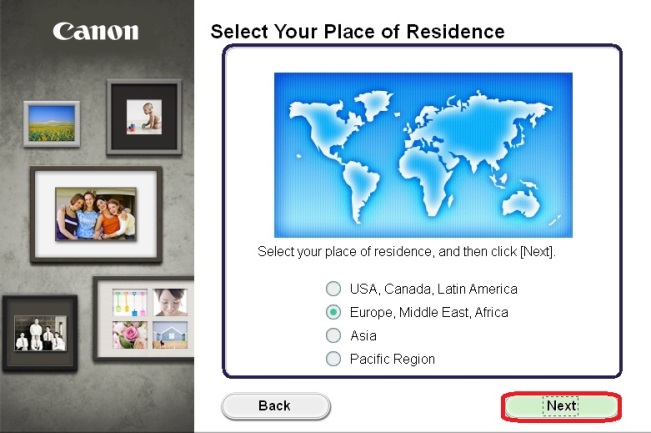
5. When the following screen appears select your region, and then click on [Next].
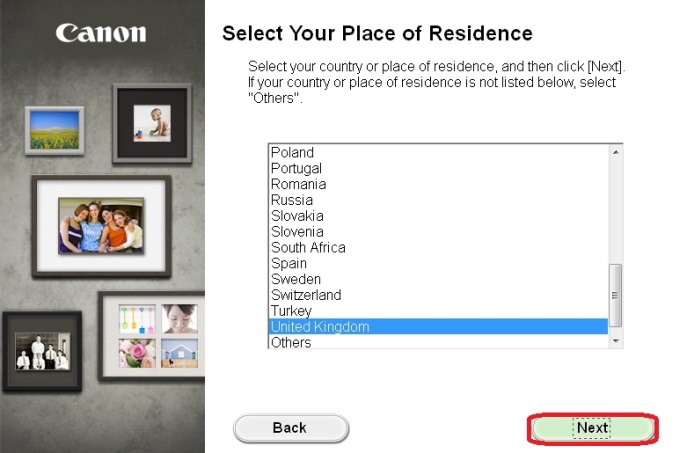
6. When the following screen appears select your language, and then click on [Next].
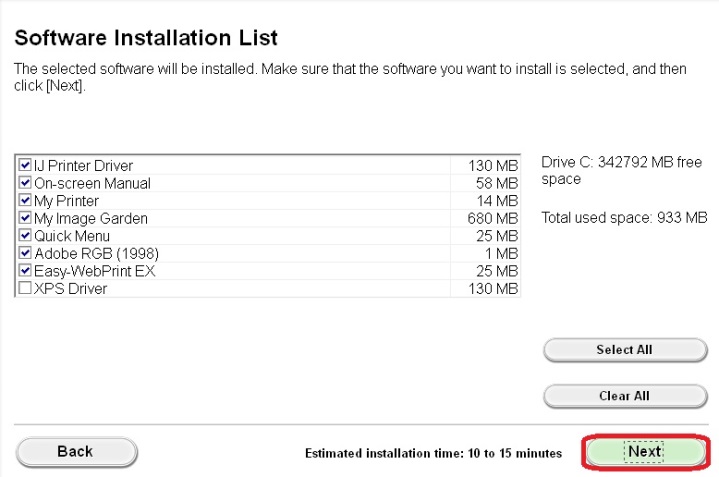
1. When the following screen appears, select the software you wish to install, and then click on [Next]. If you’re not sure which software you want to install at this stage, don’t worry, as you can always uninstall it at a later stage if you wish.
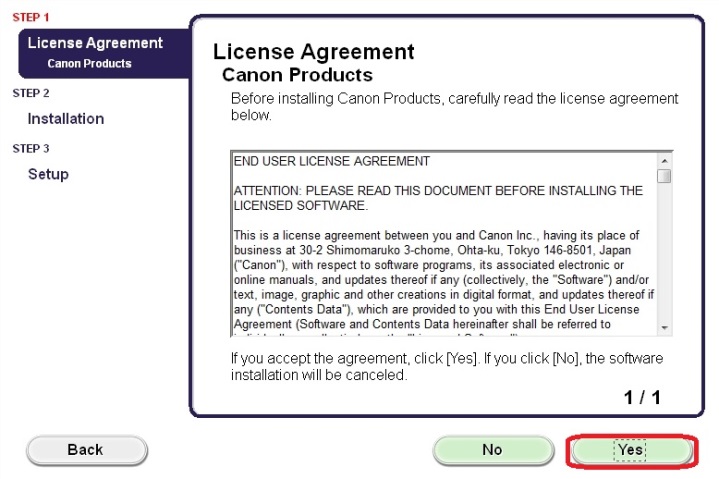
2. When the following screen appears, click on [Yes] to agree to the end user license agreement.
3. When the following screen appears, click on [Next].
Windows Users

4. When the following screen appears, connect your printer to your computer using the supplied USB cable. This is the cable with the symbol on the connector.
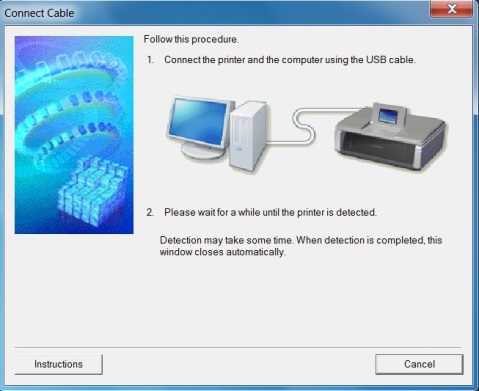
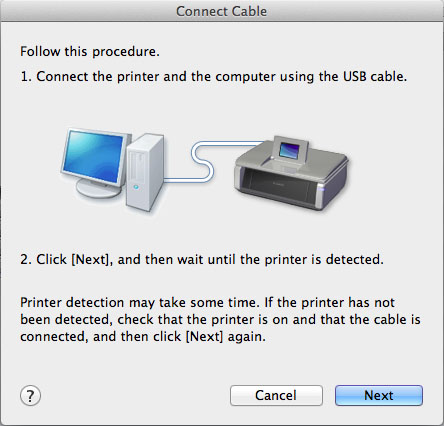
(For Mac users, click [Next]).
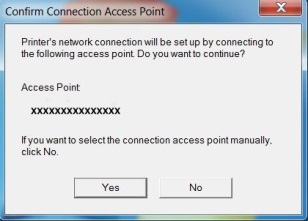
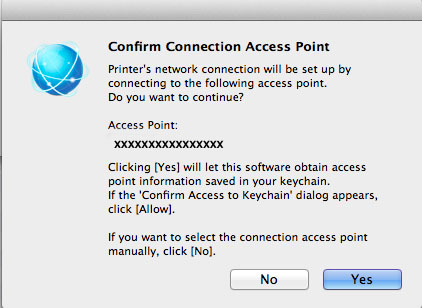
5. Once your printer has been detected, the following screen will appear. The name of the access point that your computer is connected to will be displayed (where “xxxxxxxxxxxxx” is shown). If this is the wireless network you want your printer to connect to, click on [Yes]. Otherwise click on [No].
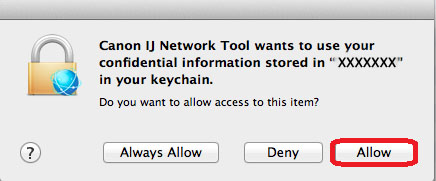
When the following screen appears, click [Allow].
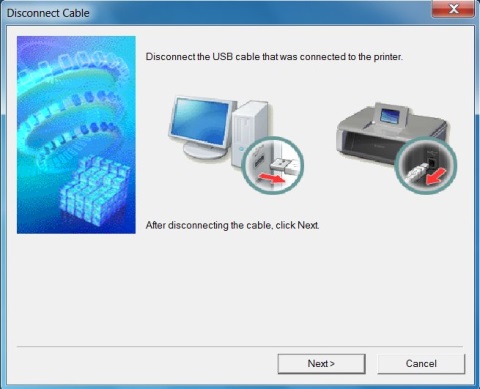
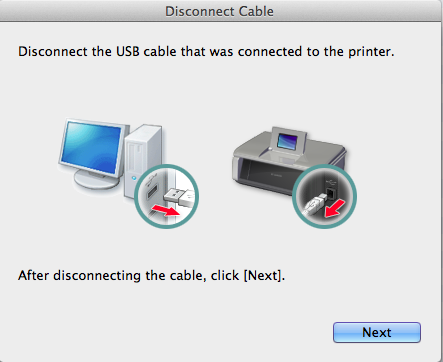
6. When the following screen appears, disconnect your printer from your computer and click [Next].
7. The following screen indicates the model of your printer and the name (or SSID) of your wireless network.
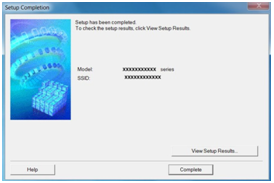

Click [Complete]. Click [OK].
This concludes the Windows setup
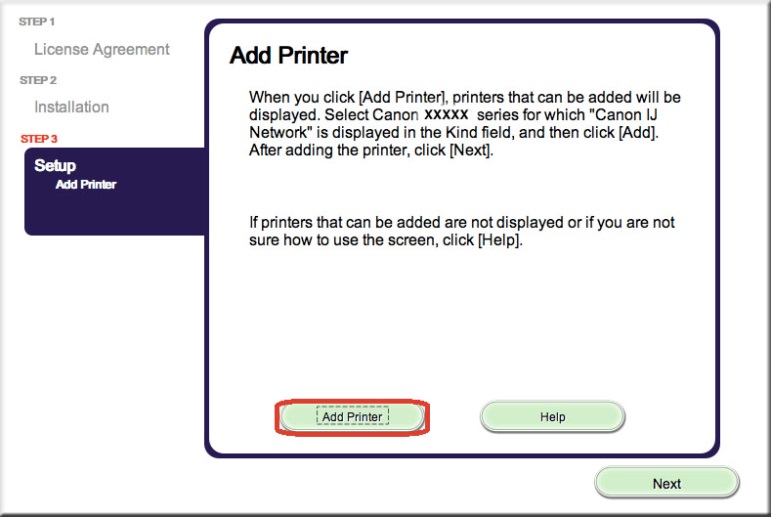
When the following screen appears, click [Add Printer].
In the following screen, select the [Canon IJ Network] driver version and click [Add].
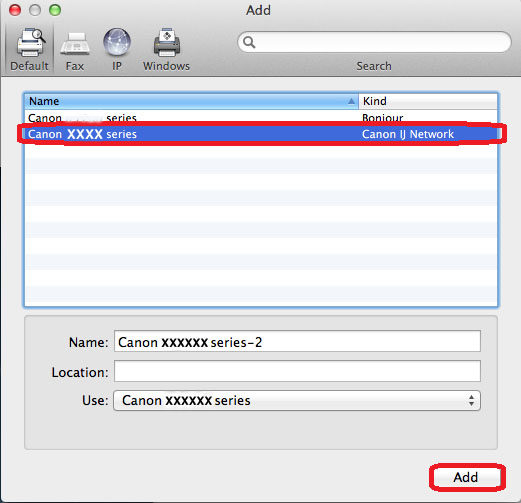
This concludes the Mac setup
If the wireless setup is still failing after following this guide, please contact us for further assistance.
Restoring Network Settings to Factory Default
If you need to reset your network settings back to factory default, for example if you change your access point, you can do so by following these instructions.
Please note that initialisation erases all network settings on the machine, so printing or scanning from a computer over the network will become impossible until the printer is re-configured with new network settings.

1. Press the [Maintenance] button (A) repeatedly until the LED displays .
2. Press the [Colour] button or the [Black] button.
The network settings are now initialised.
The network settings have been reset back to factory default settings.
If this process is still failing after following this guide, please contact us for further assistance.
Windows 10 / 7 / 8 / 8.1 / XP / Vista
Установка драйвера в Windows 10
Получить установочный файл для установки драйвера можно на сайте компании Canon или на нашем портале. Скачайте инсталлятор, потом откройте папку «Загрузки», выберите скачанный файл и запустите его.

Нужно дождаться, пока программа – архиватор распакует файлы, необходимые для работы. Это занимает некоторое время.

Дальше вы попадаете на экран «Приветствие». Здесь нужно подтвердить, что вы действительно хотите поставить этот драйвер на свой компьютер. Нажмите «Далее».

На следующей стадии надо подтвердить согласие с положениями «Лицензионного соглашения». Выберите кнопку «Да» чтобы продолжить установку.

Подождите, пока инсталляционная программа распакует все необходимые файлы. Следить за ходом установки можно по движению прогресс-бара.

Дальше идет выбор подходящего способа подключения. Установите метку напротив варианта «Подключение принтера через USB-порт» и нажмите на кнопку «Далее».

Теперь нужно подсоединить принтер к USB-входу компьютера и дождаться, пока принтер будет обнаружен. Обычно на это уходит несколько секунд, в зависимости от мощности компьютера.

На завершающем экране Вы увидите сообщение об успешной установке принтера. Теперь ваш принтер готов к работе.