- How to Use echo Command in Bash Scripts in Linux
- How to Work With echo Command in Linux
- Example 1: No Arguments to echo Command
- Example 2: Use echo With and Without Quotes
- Example 3: Printing Variables with Echo Command
- Example 4: Redirecting Output to File
- Example 5: Supported Arguments
- Example 6: Escaped Characters
- Print files from your Linux terminal
- Print using the lpr command
- Setting a default printer
- Setting a default destination with environment variables
- Get a list of attached printers
- Printing to an arbitrary printer
- How printers are defined
- Printing from the terminal
- Print from anywhere with CUPS on Linux
- How to set up your printer on Linux
How to Use echo Command in Bash Scripts in Linux
echo is a shell built-in command that is used to print the information/message to your terminal. It is the most popular command that is available in most Linux distributions and is typically used in bash scripts and batch files to print status text/string to the screen or a file.
In this article, I will show you how to use the echo command in Linux shell scripts.
How to Work With echo Command in Linux
When learning shell scripting this is the first command you will learn about to print something in your terminal. echo will print the output to stdout or you can also redirect the output to files. There are two versions of echo. One is bash builtin and the second one is an external command.
NOTE: Always builtin version takes precedence over external command.
Use the type command to get the path information about the echo command.
$ type -a echo echo is a shell builtin echo is /usr/bin/echo echo is /bin/echo
To get the list of options supported for the echo command, use the help option.
Example 1: No Arguments to echo Command
When you call the echo command without passing any arguments it prints an empty line.
Example 2: Use echo With and Without Quotes
You can pass arguments to echo command with or without quotes. Take a look at the below example. I am printing the same statement with single and double quotes and without quotes and getting the same result.
$ echo Love Linux And OpenSource $ echo "Love Linux And OpenSource" $ echo 'Love Linux And OpenSource'
There is a significant difference in when to use single and double quotes. When you use single quotes and any word contains a single quote then it will be treated as the end of quotes. Take a look at the below example where isn’t contains single quotes and is treated as the end of quotes.
$ echo 'Windows isn't opensource' > ^C
In this case, using double quotes will make more sense.
$ echo "Windows isn't opensource" Windows isn't opensource
Example 3: Printing Variables with Echo Command
Values stored in variables can be printed to the terminal using the echo command. When you use single quotes variable $ will be interpreted as text and will not be expanded to its assigned value (welcome).
$ VAR="Welcome" $ echo $ to shell tips $ echo "$ to shell tips" $ echo '$ to shell tips'
Example 4: Redirecting Output to File
You can redirect output to a file instead of printing it in a terminal using the redirection operator ( > and >> ).
$ echo " Writing to file redirect.txt " > redirect.txt $ echo " Appending to file redirect.txt " >> redirect.txt
- Using > operator will create a new file if not exists and write the data and if the file exists it will overwrite the data.
- Using >> operator will create a new file if not exists and append the data if the file exists.
Example 5: Supported Arguments
echo command supports three arguments.
By default when you run the echo command new line character is automatically appended at the end. If you want to suppress this behavior use -n flag.
$ echo -n "Love Linux And OpenSource"
By using the -E flag, the echo statement will treat all backslash-escaped characters as plain text. It is not mandatory to use -E flag because echo by default will not treat these as special characters.
$ echo "\nLove Linux And OpenSource" $ echo -E "\nLove Linux And OpenSource"
To use backslash-escaped characters you have to use -e flag.
Example 6: Escaped Characters
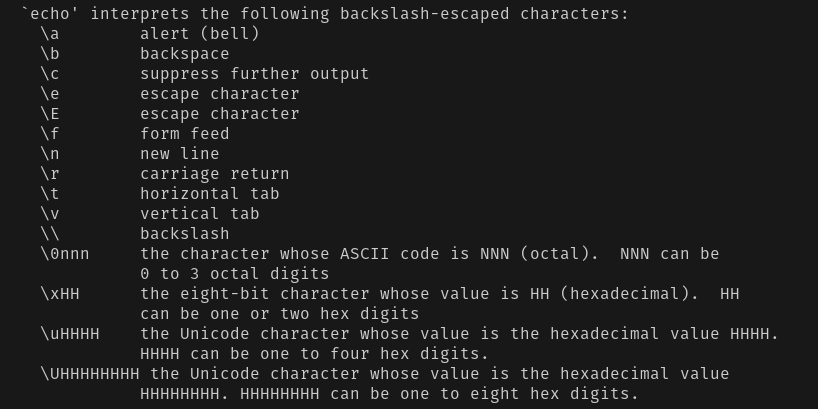
echo command supports escape characters like newline, tab, vertical tab, and a few more. You can get the list of supported characters from the help command.
Let’s see frequently used escape characters in action. Note you have to use -e argument for any escape characters to be effective.
Newline character(\n) – This will be one of the commonly used escape characters. When you use \n it will add new lines.
$ echo -e "\nWelcome to \nLinuxShellTips" Welcome to LinuxShellTips
Horizontal tab(\t) – To create horizontal tabs use \t which adds a single tab in your statement.
$ echo -e "\tWelcome to \tLinuxShellTips" Welcome to LinuxShellTips
Vertical tab(\v) – To create vertical tabs use \v .
$ echo -e "\vWelcome \vto \vLinuxShellTips" Welcome to LinuxShellTips
Carriage Return(\r) – Removes everything that comes before \r and prints only what is after \r .
$ echo -e "Welcome to \r LinuxShellTips" LinuxShellTips
Suppress Further Output(\c) – Carriage return removes everything that comes before it and \c will remove everything that comes after it.
$ echo -e "Welcome to \c LinuxShellTips" Welcome to
If you want to treat any escape characters as normal characters you can use \\ . Let’s say you want \c to be treated as a normal value then use \\ followed by escape character \c .
echo -e "Welcome to \\\c LinuxShellTips" Welcome to \c LinuxShellTips
That’s it for this article. The echo is a simple command to use and very easy to learn. We will catch you up with more shell script-related articles soon.
Print files from your Linux terminal
Printing on Linux is easy, but sometimes it feels like a lot of work to launch an application, open a file, find the Print selection in the menu, click a confirmation button, and so on. When you’re a Linux terminal user, you often want to perform complex actions with simple triggers. Printing is complex, and there’s little as simple as the lpr command.
Print using the lpr command
To print a file from your terminal, use the lpr command:
Should that fail, you need to set a default printer or specify a printer manually.
Setting a default printer
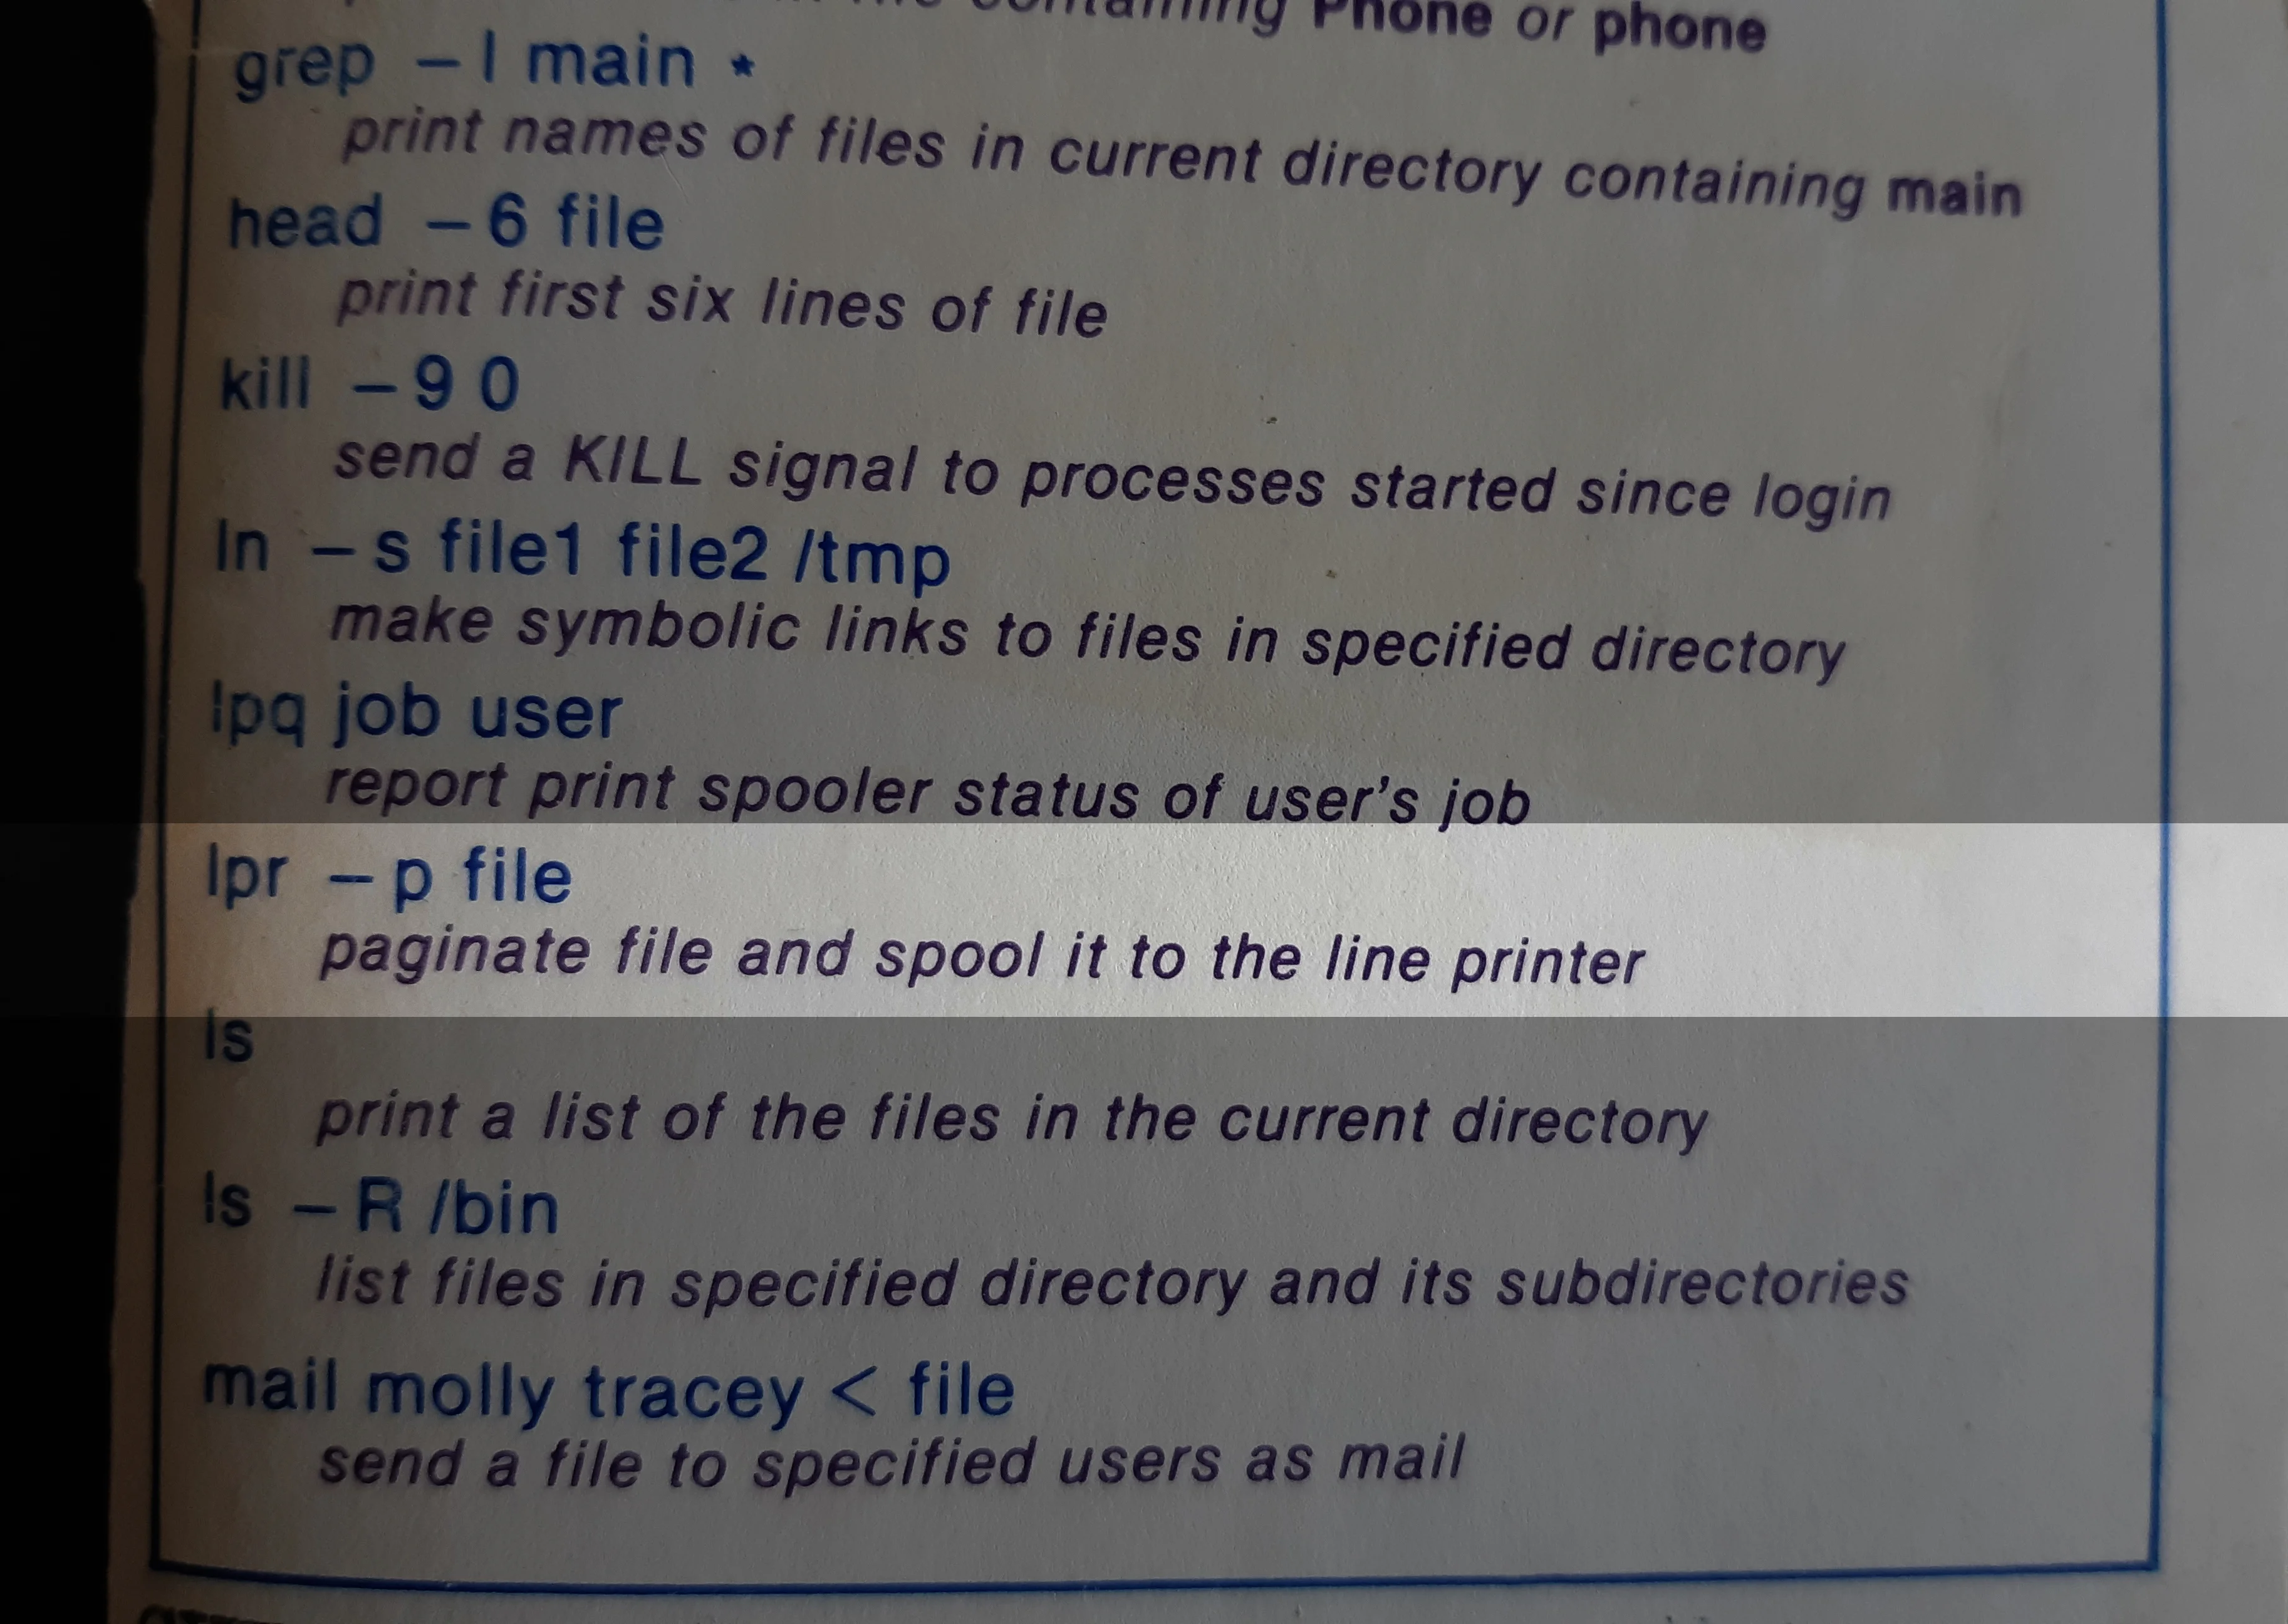
According to my well-worn copy of a Berkeley 4.2 manual printed in 1984, the lpr command paginated and sent a file to a printer spool, which streamed data to something called a line printer.
These days, the actual lpr command is insufficient because modern computers are likely to have access to several printers, and certainly to printers a lot more complex than a dot-matrix line printer. Now there’s a subsystem, called the Common Unix Printing System (CUPS), to keep track of all the printers that you want your computer to access, which driver your computer should use to communicate with each printer, which printer to use by default, and so on. The lpr.cups or lpr-cups commands, bundled with CUPS and usually symlinked to lpr , allow you to print from a terminal by referencing your Common Unix Printing System (CUPS) configuration first.
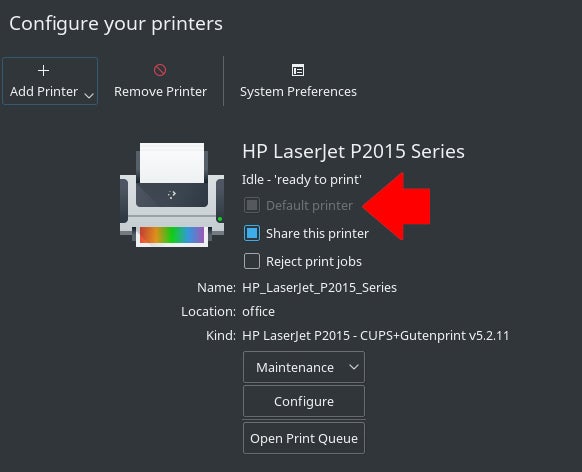
To print a file with lpr , you should first set a default printer. You can set a default printer in your system’s printer settings:
Figure 2: Set a default printer.
Alternately, you can mark a printer as the default with the lpadmin command:
$ sudo lpadmin -d HP_LaserJet_P2015_Series $ lpstat -v device for HP_LaserJet_P2015_Series: ipp://10.0.1.222:631/printers/HP_LaserJet_P2015_SeriesSetting a default destination with environment variables
You aren’t permitted to set your own default printer on systems you don’t have an admin account on because changing print destinations is considered a privileged task. Before lpr references CUPS for a destination, it queries your system for the PRINTER environment variable.
In this example, HP_LaserJet_P2015_Series is the human-readable name given to the printer. Set PRINTER to that value:
$ PRINTER=HP_LaserJet_P2015_Series $ export PRINTEROnce the PRINTER variable has been set, you can print:
Get a list of attached printers
You can see all the printers that are accepting print jobs and that are attached to your system with the lpstat command:
$ lpstat -a HP_LaserJet_P2015_Series accepting requests since Sun 1 Aug 2021 10:11:02 PM NZST r1060 accepting requests since Wed 18 Aug 2021 04:43:57 PM NZSTPrinting to an arbitrary printer
Once you have added printers to your system, and now that you know how to identify them, you can print to any one of them, whether you have a default destination set or not:
$ lpr -P HP_LaserJet_P2015_Series myfile.txtHow printers are defined
CUPS has a user-friendly front-end accessible through a web browser such as Firefox. Even though it uses a web browser as its user interface, it’s actually a service running locally on your computer (a location called localhost) on port 631. CUPS manages printers attached to your computer, and it stores its configuration in /etc/cups/printers.conf .
The printers.conf file consists of definitions detailing the printing devices your computer can access. You’re not meant to edit it directly, but if you do, then you must stop the cupsd daemon first.
A typical entry looks something like this:
Info Ricoh 1060 Location Downstairs MakeModel Ricoh Aficio 1060 - CUPS+Gutenprint v5.2.6 DeviceURI lpd://192.168.4.8 State Idle StateTime 1316011347 Type 12308 Filter application/vnd.cups-raw 0 - Filter application/vnd.cups-raster 100 rastertogutenprint.5.2 Accepting Yes Shared No JobSheets none none QuotaPeriod 0 PageLimit 0 KLimit 0 OpPolicy default ErrorPolicy stop-printer In this example, the printer’s name is r1060 , a human-readable identifier for a Ricoh Aficio 1060.
The MakeModel attribute is pulled from the lpinfo command, which lists all available printer drivers on your system. Assuming you know that you have a Ricoh Aficio 1060 that you want to print to, then you would issue this command:
$ lpinfo -m | grep 1060 gutenprint.5.2://brother-hl-1060/expert Brother HL-1060 - CUPS+Gutenprint v5.2.11 gutenprint.5.2://ricoh-afc_1060/expert Ricoh Aficio 1060 - CUPS+Gutenprint v5.2.11This command lists the relevant drivers you have installed.
The MakeModel is the last half of the result. In this example, that’s Ricoh Aficio 1060 — CUPS+Gutenprint v5.2.11 .
The DeviceURI attribute identifies where the printer is found on the network (or physical location, such as the USB port). In this example, the DeviceURI is lpd://192.168.4.8 because I’m using the lpd (line printer daemon) protocol to send data to a networked printer. On a different system, I have an HP LaserJet attached by a USB cable, so the DeviceURI is DeviceURI hp:/usb/HP_LaserJet_P2015_Series?serial=00CNCJM26429 .
Printing from the terminal
Sending a job to a printer is an easy process, as long as you understand the devices attached to your system and how to identify them. Printing from the terminal is fast, efficient, and easily scripted or done as a batch job. Try it out!
Print from anywhere with CUPS on Linux
Share your printer with the Common Unix Printing System (CUPS).
How to set up your printer on Linux
In the event that your printer isn’t auto-detected, this article teaches you how to add a printer on Linux manually.


