Archer C80 V2 User Guide
The router’s NAT (Network Address Translation) feature makes devices on the LAN use the same public IP address to communicate with devices on the internet, which protects the local network by hiding IP addresses of the devices. However, it also brings about the problem that an external host cannot initiatively communicate with a specified device on the local network.
With the forwarding feature the router can penetrate the isolation of NAT and allows devices on the internet to initiatively communicate with devices on the local network, thus realizing some special functions.
The TP-Link router supports four forwarding rules. If two or more rules are set, the priority of implementation from high to low is Port Forwarding, Port Triggering, UPNP and DMZ.
It contains the following sections:
1. Share Local Resources on the Internet by Port Forwarding
When you build up a server on the local network and want to share it on the internet, Port Forwarding can realize the service and provide it to internet users. At the same time Port Forwarding can keep the local network safe as other services are still invisible from the internet.
Port Forwarding can be used for setting up public services on your local network, such as HTTP, FTP, DNS, POP3/SMTP and Telnet. Different services use different service ports. Port 80 is used in HTTP service, port 21 in FTP service, port 25 in SMTP service and port 110 in POP3 service. Please verify the service port number before the configuration .
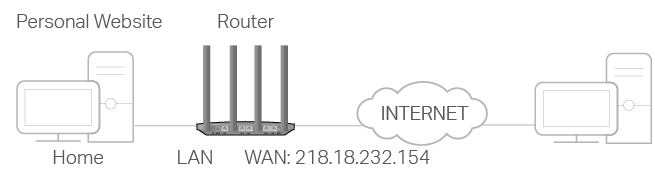
Share my personal website I’ve built in local network with my friends through the internet.
For example, the personal website has been built on my home PC (192.168.0.100). I hope that my friends on the internet can visit my website in some way. The PC is connected to the router with the WAN IP address 218.18.232.154.
1. Assign a static IP address to your PC, for example 192.168.0.100.
2. Visit http://tplinkwifi.net , and log in with your TP-Link ID or the password you set for the router.
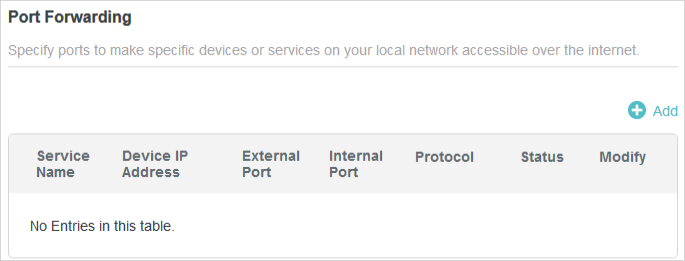
3. Go to Advanced > NAT Forwarding > Port Forwarding .
5. Click VIEW COMMON SERVICES and select HTTP . The External Port , Internal Port and Protocol will be automatically filled in.
6. Click VIEW CONNECTED DEVICES and select your home PC. The Device IP Address will be automatically filled in. Or enter the PC’s IP address manually in the Device IP Address field.
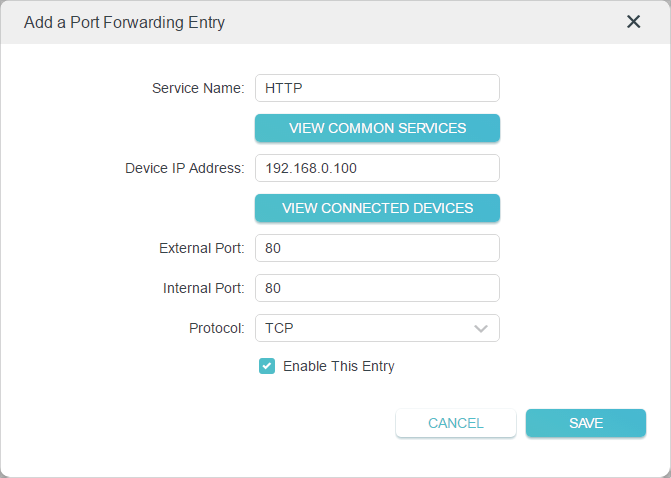
• It is recommended to keep the default settings of Internal Port and Protocol if you are not clear about which port and protocol to use.
• If the service you want to use is not in the common services list , you can enter the corresponding parameters manually. You should verify the port number that the service needs.
• You can add multiple port forwarding rules if you want to provide several services in a router. Please note that the External Port should not be overlapped.
Users on the internet can enter http:// WAN IP (in this example: http:// 218.18.232.154) to visit your personal website.
• The WAN IP should be a public IP address. For the WAN IP is assigned dynamically by the ISP, it is recommended to apply and register a domain name for the WAN referring to Make Applications Free from Port Restriction by DMZ . Then users on the internet can use http:// domain name to visit the website.
• If you have changed the default External Port , you should use http:// WAN IP: External Port or http:// domain name: External Port to visit the website.
2. Open Ports Dynamically by Port Triggering
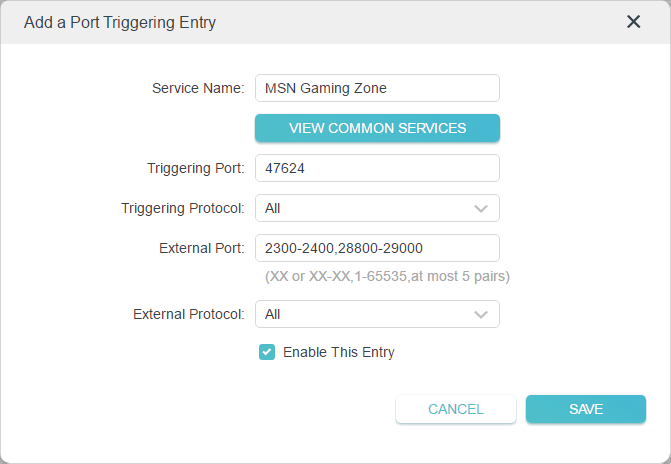
Port Triggering can specify a triggering port and its corresponding external ports. When a host on the local network initiates a connection to the triggering port, all the external ports will be opened for subsequent connections. The router can record the IP address of the host. When the data from the internet return to the external ports, the router can forward them to the corresponding host. Port Triggering is mainly applied to online games, VoIPs, video players and common applications including MSN Gaming Zone, Dialpad and Quick Time 4 players, etc.
Follow the steps below to configure the Port Triggering rules:
1. Visit http://tplinkwifi.net , and log in with your TP-Link ID or the password you set for the router.
2. Go to Advanced > NAT Forwarding > Port Triggering and click .
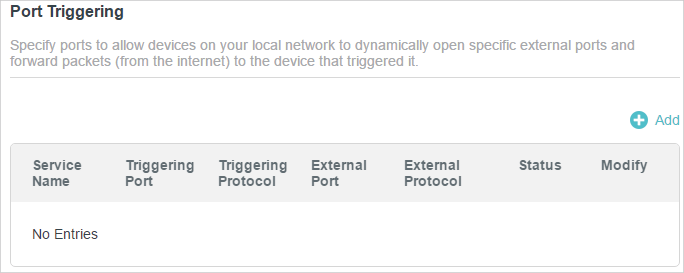
3. Click VIEW COMMON SERVICES , and select the desired application. The Triggering Port , Triggering Protocol and External Port will be automatically filled in. The following picture takes application MSN Gaming Zone as an example.
• You can add multiple port triggering rules according to your network need.
• The triggering ports can not be overlapped.
• If the application you need is not listed in the Existing Applications list, please enter the parameters manually. You should verify the external ports the application uses first and enter them into External Port field according to the format the page displays.
3. Make Xbox Online Games Run Smoothly by UPnP
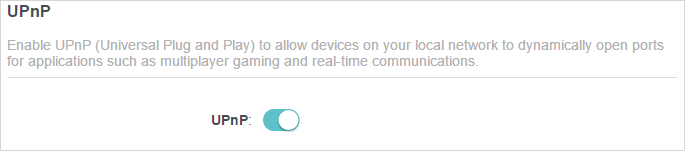
The UPnP (Universal Plug and Play) protocol allows applications or host devices to automatically find the front-end NAT device and send request to it to open the corresponding ports. With UPnP enabled, the applications or host devices on the local network and the internet can freely communicate with each other thus realizing the seamless connection of the network. You may need to enable the UPnP if you want to use applications for multiplayer gaming, peer-to-peer connections, real-time communication (such as VoIP or telephone conference) or remote assistance, etc.
• UPnP is enabled by default in this router.
• Only the application supporting UPnP protocol can use this feature.
• UPnP feature needs the support of operating system (e.g. Windows Vista/ Windows 7/ Windows 8, etc. Some of operating system need to install the UPnP components).
For example, when you connect your Xbox to the router which has connected to the internet to play online games, UPnP will send request to the router to open the corresponding ports allowing the following data penetrating the NAT to transmit. Therefore, you can play Xbox online games without a hitch.

If necessary, you can follow the steps to change the status of UPnP.
1. Visit http://tplinkwifi.net , and log in with your TP-Link ID or the password you set for the router.
2. Go to Advanced > NAT Forwarding > UPnP and toggle on or off according to your needs.
4. Make Applications Free from Port Restriction by DMZ
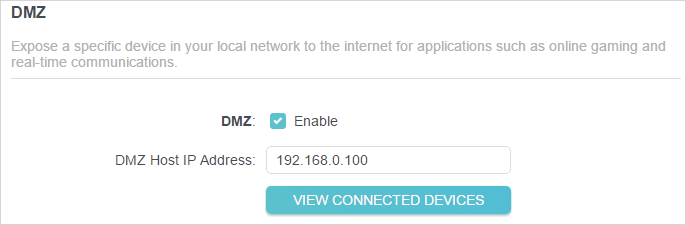
When a PC is set to be a DMZ (Demilitarized Zone) host on the local network, it is totally exposed to the internet, which can realize the unlimited bidirectional communication between internal hosts and external hosts. The DMZ host becomes a virtual server with all ports opened. When you are not clear about which ports to open in some special applications, such as IP camera and database software, you can set the PC to be a DMZ host.
When DMZ is enabled, the DMZ host is totally exposed to the internet, which may bring some potential safety hazards. If DMZ is not in use, please disable it in time.
Make the home PC join the internet online game without port restriction.
For example, due to some port restriction, when playing the online games, you can log in normally but cannot join a team with other players. To solve this problem, set your PC as a DMZ host with all ports open.
1. Assign a static IP address to your PC, for example 192.168.0.100.
2. Visit http://tplinkwifi.net , and log in with your TP-Link ID or the password you set for the router.
3. Go to Advanced > NAT Forwarding > DMZ and tick to enable DMZ.
4. Click VIEW CONNECTED DEVICES and select your PC. The Device IP
Address will be automatically filled in. Or enter the PC’s IP address 192.168.0.100 manually in the DMZ Host IP Address field.
The configuration is completed. You’ve set your PC to a DMZ host and now you can make a team to game with other players.
Как открыть порты на роутере TP-Link Archer
Проброс портов на роутере TP-Link Archer приходится делать для разных онлайн-игр или чтобы получить доступ к устройствам в локальной сети — камере наблюдения, видеорегистратору и т.п. По умолчанию все входящие подключения к роутеру запрещены и если не открыть порт на ТП-Линке, то доступа к нужным сервисам не будет! Как это сделать Вы узнаете в нашей инструкции.

На сегодня есть два варианта веб-интерфейса — классический интерфейс TP-Link, который используется как на старых роутерах типа TL-WR740N, TL-WR840N, TL-WR841N и т.п. А так же современный мультиязыковой веб-интерфейс для роутеров Archer C5, C6, C60 и т.п. Я покажу как открыть порт на роутере TP-Link в обоих случаях.
Как зайти в роутер TP-Link
Прежде чем показывать как сделать проброс портов на ТП-Линке, мы покажем Вам как правильно зайти в настройки роутера TP-Link Archer, так как многие даже не в курсе как это делается.
Начинаем с того, что берём в руки свой Wi-Fi маршрутизатор, переворачиваем и смотрим что написано на наклейке, а именно в поле «Данные для входа по умолчанию»:
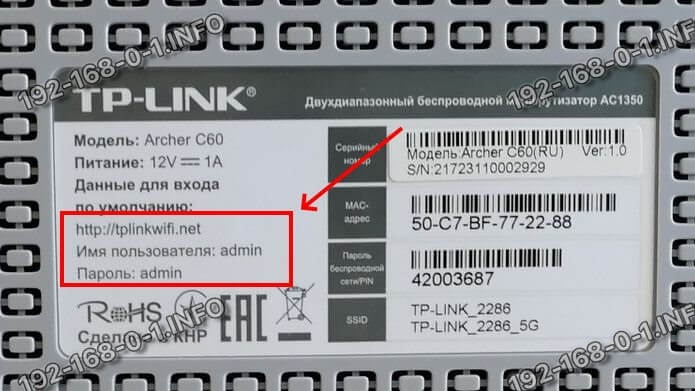
Первое, что понадобится — это адрес устройства в локальной сети. У роутеров TP-Link обычно используется адрес tplinkwifi.net , как на картинке выше, либо IP-адрес 192.168.0.1. У ADSL-модемов иногда встречается адрес tplinkmodem.net . Вы должны ввести этот адрес в адресной строке веб-браузера на подключенном к роутеру компьютере, ноутбуке или смартфоне:
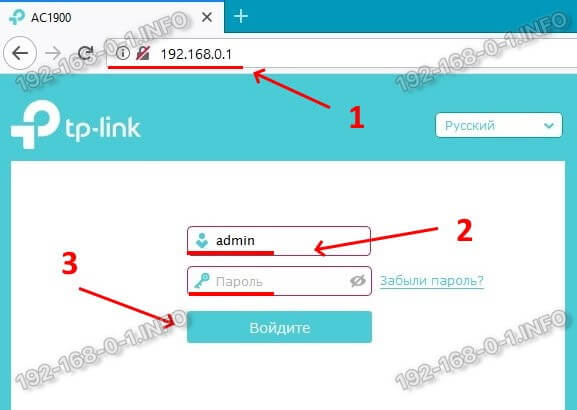
После этого должна открыться страничка для ввода логина и пароля на вход. В эти поля впишите логин и пароль с наклейки. Если заводской пароль не подошёл, значит ранее его уже изменили. Что делать в этом случае написано в инструкции не подходит пароль к роутеру. После удачной авторизации можно выполнять указанные ниже действия.
Проброс портов на Archer
В современном веб-интерфейсе роутеров TP-Link настройка поделена на три варианта. Быстрая, Базовая и Дополнительная. Чтобы открыть порт на Archer C5, C6, C60 нужно открыть «Дополнительные настройки» и в меню слева выбрать раздел «NAT Переадресация» >>> «Виртуальные серверы».
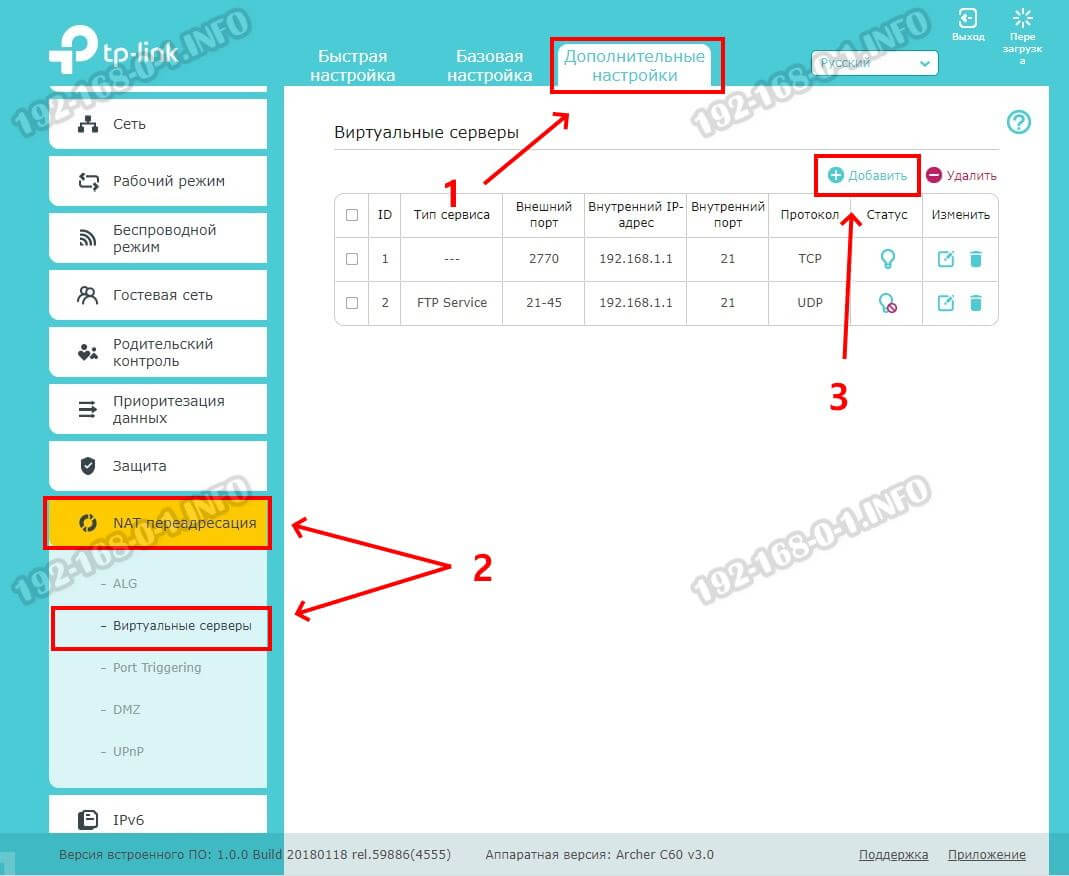
Чтобы открыть порты на ТП-Линк Арчер, в появившемся меню «Виртуальные серверы» нажмите кнопку «Добавить».
Появится вот такое меню:
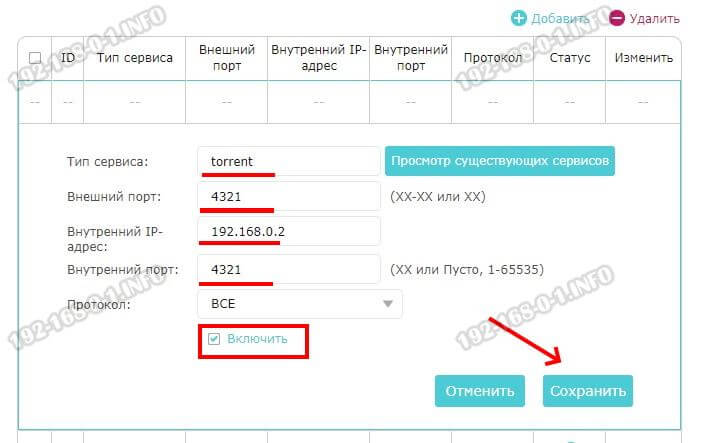
- В поле «Тип сервиса» пишем название программы, игры или сервера, для которого делаем проброс портов. Ниже указываем номер порта внешнего и внутреннего. Если нужно указать диапазон портов — прописываем номер начального и через дефис — номер конечного порта.
- Так же надо указать локальный IP-адрес того компьютера или устройства, для которого делается проброс и выбрать используемый протокол. Ну или поставить там значение «Все», чтобы порт был открыть для всех протоколов сразу. Не забудьте поставить галочку «Включить», чтобы правило было активным.
- Нажимаем на кнопку «Сохранить», чтобы применить настройки.
В таблице виртуальных серверов появится новая строчка! Можно проверять доступность!
Как открыть порт на TP-Link
Теперь рассмотрим проброс портов на роутерах TP-Link со старым веб-интерфейсом. Такой интерфейс использовался ещё 10 лет назад и имел более ярко-зелёную окраску. На более новых маршрутизаторах он немного изменил цвет и теперь выполнено в более сине-голубых тонах. Что интересно — элементы меню практически не изменились за это время.
Для того, чтобы открыть порты, вам нужно в меню роутера TP-Link открыть раздел «Переадресация» >>> «Виртуальный сервер».

На появившейся страничке нажимаем кнопку «Добавить», чтобы создать правило проброса порта. Откроется вот такое меню:
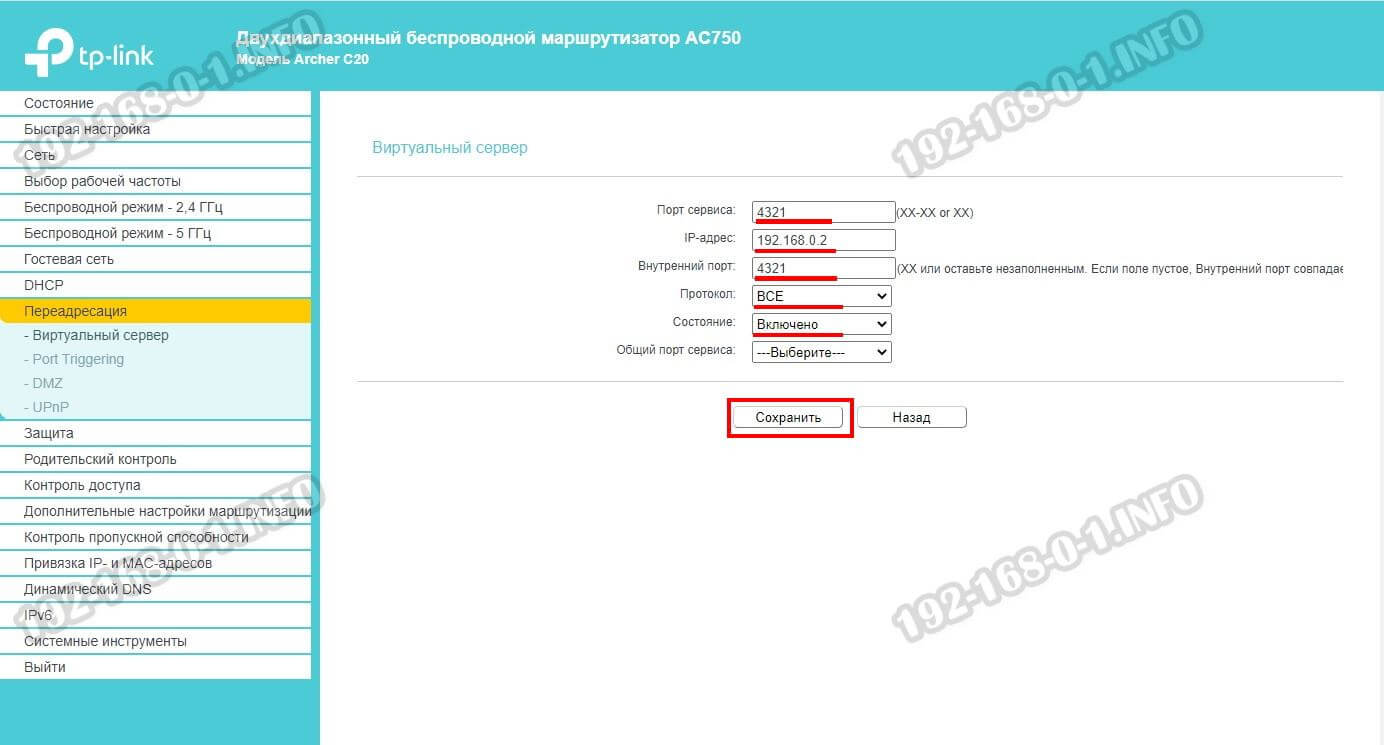
- Тут указываем порт сервера или диапазон портов, а так же IP-адрес компьютера или устройства в локальной сети, для которого делаем проброс.
- Повторяем номер порта в поле «Внутренний порт».
- В поле «Протокол» выбираем значение ВСЕ.
- Состояние выбираем «Включено».
- Нажимаем кнопку «Сохранить», чтобы проброс порта на ТП-Линке сохранился.
В таблице виртуальных серверов появится новая строчка. Можно приступать к проверке.
P.S.: Если в результате проверки Вы обнаружили, что открытый порт закрыт и соединения из внешней сети на него не проходят, то Вы должны учитывать следующее:
- Порт, для которого Вы делали проброс, должен быть открыт на компьютере или ином устройстве, IP-адрес которого Вы указывали. То есть в правилах его брандмауэра так же должны быть разрешены входящие соединения на этот порт.
- В момент проверки Вы должны запустить сервер или игру, для которой открывался порт. Иначе, даже если всё правильно прописано, то тест покажет, что порт закрыт.