- Grafana support for Prometheus
- Installing
- Using
- Creating a Prometheus data source
- Creating a Prometheus graph
- Importing pre-built dashboards from Grafana.com
- Visualizing metrics.
- Installing and Setting up Grafana.
- Adding Prometheus as a Data Source in Grafana.
- Creating our first dashboard.
- Get started with Grafana and Prometheus
- Download Prometheus and node_exporter
- Install Prometheus node_exporter
- Install and configure Prometheus
- Configure Prometheus for Grafana
- Check Prometheus metrics in Grafana Explore view
- Start building dashboards
Grafana support for Prometheus
Grafana supports querying Prometheus. The Grafana data source for Prometheus is included since Grafana 2.5.0 (2015-10-28).
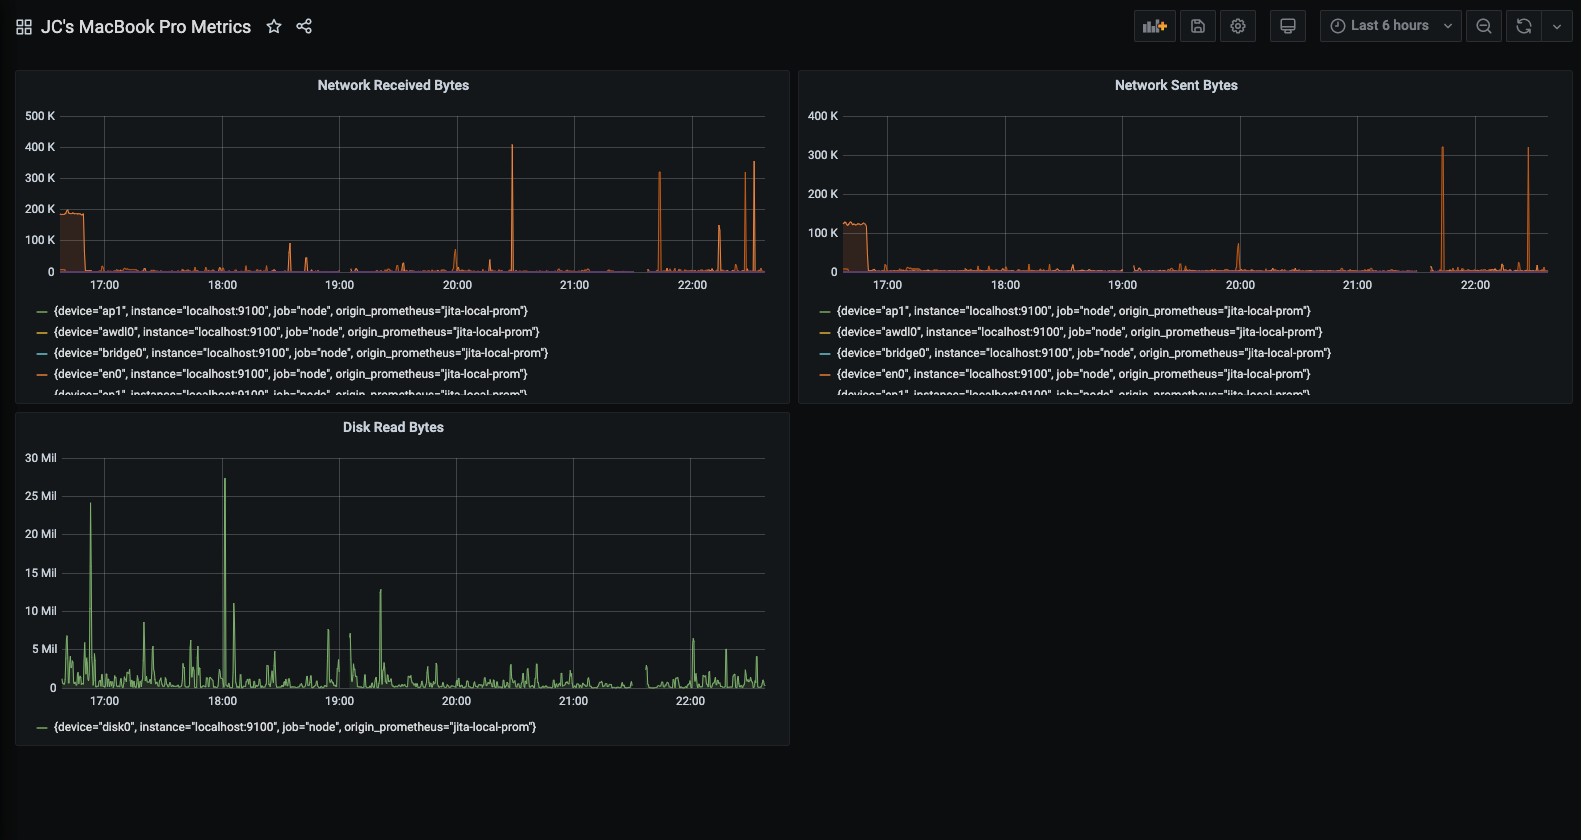
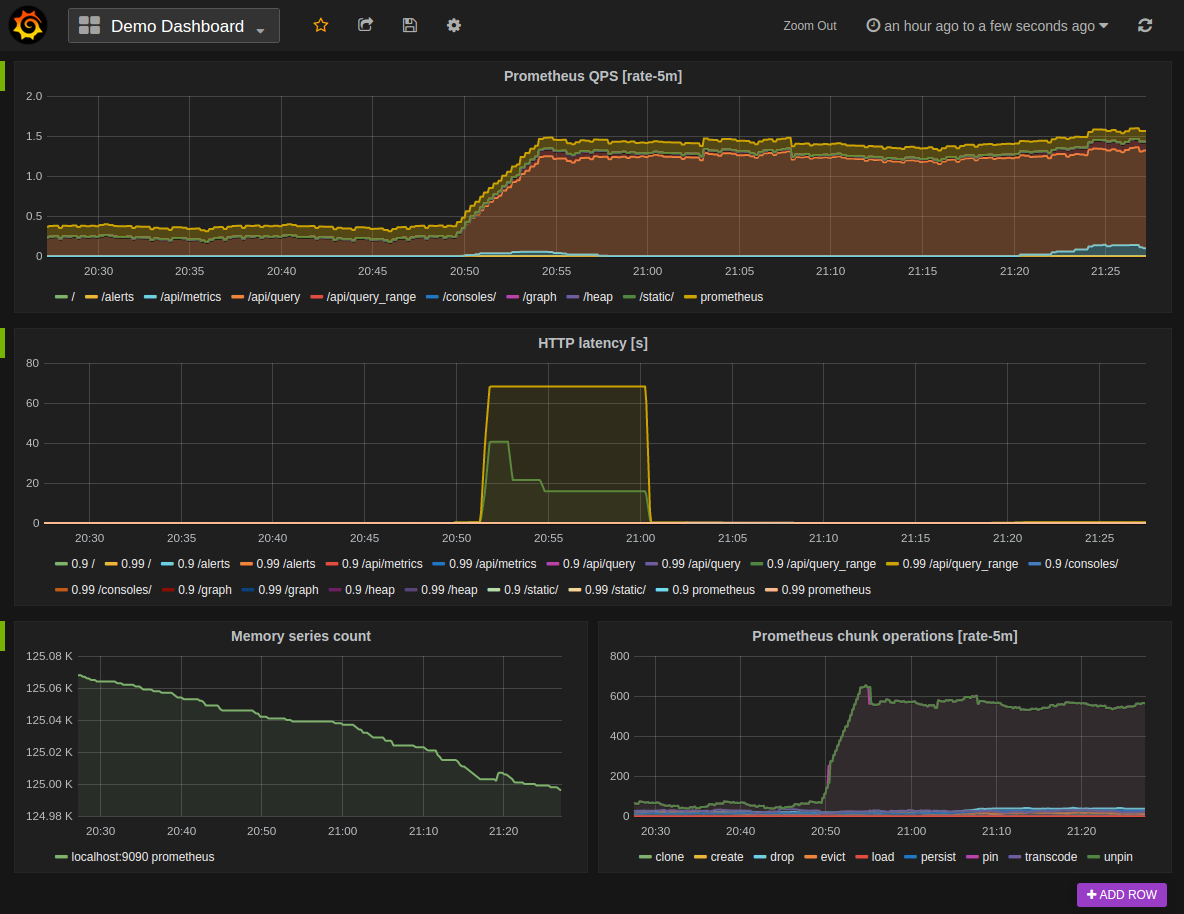
The following shows an example Grafana dashboard which queries Prometheus for data:
Installing
Using
By default, Grafana will be listening on http://localhost:3000. The default login is «admin» / «admin».
Creating a Prometheus data source
To create a Prometheus data source in Grafana:
- Click on the «cogwheel» in the sidebar to open the Configuration menu.
- Click on «Data Sources».
- Click on «Add data source».
- Select «Prometheus» as the type.
- Set the appropriate Prometheus server URL (for example, http://localhost:9090/ )
- Adjust other data source settings as desired (for example, choosing the right Access method).
- Click «Save & Test» to save the new data source.
The following shows an example data source configuration:

Creating a Prometheus graph
Follow the standard way of adding a new Grafana graph. Then:
- Click the graph title, then click «Edit».
- Under the «Metrics» tab, select your Prometheus data source (bottom right).
- Enter any Prometheus expression into the «Query» field, while using the «Metric» field to lookup metrics via autocompletion.
- To format the legend names of time series, use the «Legend format» input. For example, to show only the method and status labels of a returned query result, separated by a dash, you could use the legend format string > — > .
- Tune other graph settings until you have a working graph.
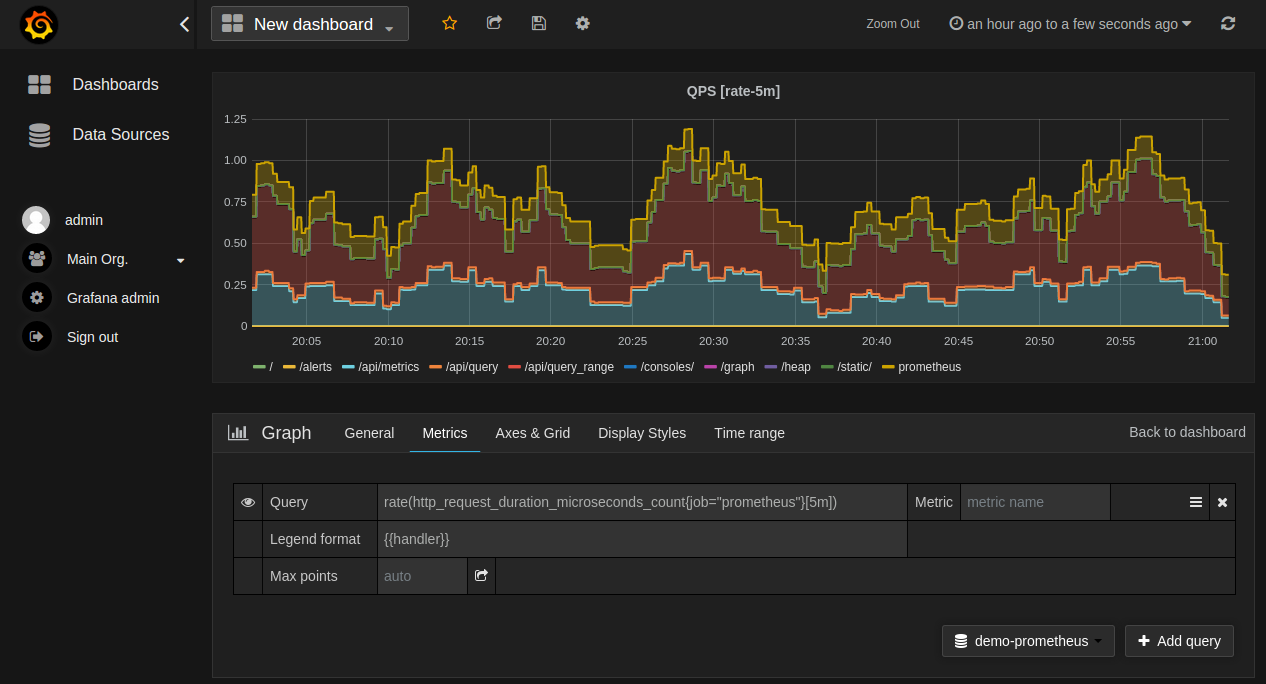
The following shows an example Prometheus graph configuration:
In Grafana 7.2 and later, the $__rate_interval variable is recommended for use in the rate and increase functions.
Importing pre-built dashboards from Grafana.com
Grafana.com maintains a collection of shared dashboards which can be downloaded and used with standalone instances of Grafana. Use the Grafana.com «Filter» option to browse dashboards for the «Prometheus» data source only.
You must currently manually edit the downloaded JSON files and correct the datasource: entries to reflect the Grafana data source name which you chose for your Prometheus server. Use the «Dashboards» → «Home» → «Import» option to import the edited dashboard file into your Grafana install.
Visualizing metrics.
In this tutorial we will create a simple dashboard using Grafana to visualize the ping_request_count metric that we instrumented in the previous tutorial.
If you are wondering why one should use a tool like Grafana when one can query and see the graphs using Prometheus, the answer is that the graph that we see when we run queries on Prometheus is to run ad-hoc queries. Grafana and Console Templates are two recommended ways of creating graphs.
Installing and Setting up Grafana.
Install and Run Grafana by following the steps from here for your operating system.
Once Grafana is installed and run, navigate to http://localhost:3000 in your browser. Use the default credentials, username as admin and password as admin to log in and setup new credentials.
Adding Prometheus as a Data Source in Grafana.
Let’s add a datasource to Grafana by clicking on the gear icon in the side bar and select Data Sources
In the Data Sources screen you can see that Grafana supports multiple data sources like Graphite, PostgreSQL etc. Select Prometheus to set it up.
Enter the URL as http://localhost:9090 under the HTTP section and click on Save and Test .

Creating our first dashboard.
Now we have succesfully added Prometheus as a data source, Next we will create our first dashboard for the ping_request_count metric that we instrumented in the previous tutorial.
- Click on the + icon in the side bar and select Dashboard .
- In the next screen, Click on the Add new panel button.
- In the Query tab type the PromQL query, in this case just type ping_request_count .
- Access the ping endpoint few times and refresh the Graph to verify if it is working as expected.
- In the right hand section under Panel Options set the Title as Ping Request Count .
- Click on the Save Icon in the right corner to Save the dashboard.
Get started with Grafana and Prometheus
Prometheus is an open source monitoring system for which Grafana provides out-of-the-box support. This topic walks you through the steps to create a series of dashboards in Grafana to display system metrics for a server monitored by Prometheus.
- Download Prometheus and node_exporter
- Install Prometheus node_exporter
- Install and configure Prometheus
- Configure Prometheus for Grafana
- Check Prometheus metrics in Grafana Explore view
- Start building dashboards
Download Prometheus and node_exporter
Download the following components:
Like Grafana, you can install Prometheus on many different operating systems. Refer to the Prometheus download page to see a list of stable versions of Prometheus components.
Install Prometheus node_exporter
Install node_exporter on all hosts you want to monitor. This guide shows you how to install it locally.
Prometheus node_exporter is a widely used tool that exposes system metrics. For instructions on installing node_exporter, refer to the Installing and running the node_exporter section in the Prometheus documentation.
When you run node_exporter locally, navigate to http://localhost:9100/metrics to check that it is exporting metrics.
Note: The instructions in the referenced topic are intended for Linux users. You may have to alter the instructions slightly depending on your operating system. For example, if you are on Windows, use the windows_exporter instead.
Install and configure Prometheus
tar xvfz prometheus-*.tar.gz cd prometheus-* By default, Prometheus looks for the file prometheus.yml in the current working directory. This behavior can be changed via the —config.file command line flag. For example, some Prometheus installers use it to set the configuration file to /etc/prometheus/prometheus.yml .
The following example shows you the code you should add. Notice that static configs targets are set to [‘localhost:9100’] to target node-explorer when running it locally.
# A scrape configuration containing exactly one endpoint to scrape from node_exporter running on a host: scrape_configs: # The job name is added as a label `job=` to any timeseries scraped from this config. - job_name: 'node' # metrics_path defaults to '/metrics' # scheme defaults to 'http'. static_configs: - targets: ['localhost:9100'] ./prometheus --config.file=./prometheus.yml You can see that the node_exporter metrics have been delivered to Prometheus. Next, the metrics will be sent to Grafana.
Configure Prometheus for Grafana
When running Prometheus locally, there are two ways to configure Prometheus for Grafana. You can use a hosted Grafana instance at Grafana Cloud or run Grafana locally.
This guide describes configuring Prometheus in a hosted Grafana instance on Grafana Cloud.
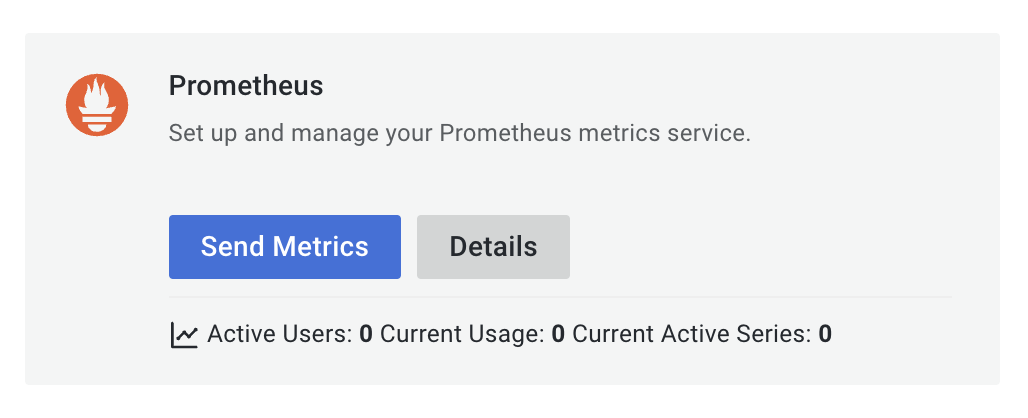
- Because you are running your own Prometheus instance locally, you must remote_write your metrics to the Grafana.com Prometheus instance. Grafana provides code to add to your prometheus.yml config file. This includes a remote write endpoint, your user name and password.
Add the following code to your prometheus.yml file to begin sending metrics to your hosted Grafana instance.
remote_write: - url: basic_auth: username: password:
Note: To configure your Prometheus instance to work with Grafana locally instead of Grafana Cloud, install Grafana here and follow the configuration steps listed here.
Check Prometheus metrics in Grafana Explore view
In your Grafana instance, go to the Explore view and build queries to experiment with the metrics you want to monitor. Here you can also debug issues related to collecting metrics from Prometheus.
Start building dashboards
Now that you have a curated list of queries, create dashboards to render system metrics monitored by Prometheus. When you install Prometheus and node_exporter or windows_exporter, you will find recommended dashboards for use.
The following image shows a dashboard with three panels showing some system metrics.