- How to set up Proton VPN on DD-WRT routers
- 1. Basic router settings
- 2. Disabling IPV6
- 3. Open the desired *.ovpn config file with a text editor, such as Notepad.
- 4. Configuring the OpenVPN service
- 5. In Additional Config box either enter or copy/paste these commands:
- 6. Copy the CA Cert into the respective field.
- 7. Copy the TLS Auth Key field into the respective field.
- 8. After entering all this data, Save and Apply Settings
- 9. To Verify the VPN is Working, Navigate to Status > OpenVPN
- 10. To create a kill-switch,
- Secure your internet
- How to setup Proton VPN on MikroTik routers
- A step-by-step guide to setting up Proton VPN on your MikroTik router
How to set up Proton VPN on DD-WRT routers
This is a step-by-step guide to setting up Proton VPN on your DD-WRT router.
If you set up your VPN account to work on your router, you can protect the online activity of each device connected to your WiFi. Below we explain how to get Proton VPN to work on your DD-WRT router.
But, you can skip this setup process by purchasing a pre-configured router from FlashRouters. FlashRouters makes it easy for anyone to have VPN security for all of the Internet-connected devices in their home, including smart phones, SmartTVs, and gaming consoles. No matter what Proton VPN plan you use, you can configure your router to work with your Proton VPN account. If you buy a Proton VPN pre-configured router, you will only need to enter your Proton VPN OpenVPN credentials.
Regardless of whether you are setting your router up yourself or using a pre-configured router, you will need your OpenVPN config files from the Proton VPN Dashboard.
1. Basic router settings
Log in to your DD-WRT Administrative Interface, usually accomplished using your browser and opening the IP of your router (per default 192.168.1.1 or similar).
Navigate to Setup > Basic Setup .
Under Network Address Server Settings (DHCP) , set the DNS values to the following Proton VPN DNS addresses:
(The DNS values depend on which transport protocol you want to use, either UDP or TCP. Learn more about UDP vs. TCP.)
If you are using UDP:
Static DNS 1 = 10.8.8.1 Static DNS 2 = 0.0.0.0 Static DNS 3 = 0.0.0.0 (default) Use DNSMasq for DHCP = Checked Use DNSMasq for DNS = Checked DHCP-Authoritative = Checked
NOTE: If you are a FREE user and using FREE servers to configure your router, you will have to use 10.8.0.1 for Static DNS 1
If you are using TCP:
Static DNS 1 = 10.7.7.1 Static DNS 2 = 0.0.0.0 Static DNS 3 = 0.0.0.0 (default) Use DNSMasq for DHCP = Checked Use DNSMasq for DNS = Checked DHCP-Authoritative = Checked
NOTE: If you are a FREE user and using FREE servers to configure your router, you will have to use 10.7.0.1 for Static DNS 1
Then, Save and Apply settings.

2. Disabling IPV6
Navigate to Setup > IPV6 and set IPv6 to Disable , then Save & Apply Settings. (this is a recommended step to make sure you get no IP leaks)

3. Open the desired *.ovpn config file with a text editor, such as Notepad.
In our example, we chose de-03.protonvpn.com.udp1194.ovpn as an example.

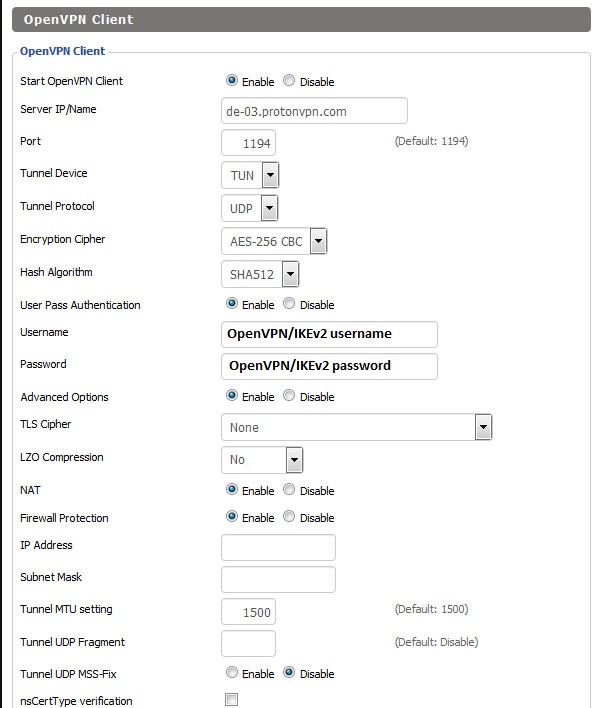
4. Configuring the OpenVPN service
Navigate to Service > VPN .
Under OpenVPN Client , set Start OpenVPN Client = Enable
Then set the necessary fields as follows:
Server IP/Name = copy the value in the line starting with 'remoteʼ, excluding the port number at the end, e.g., 123.123.123.123 or de.protonvpn.com Port = copy the value following the server IP address. For example, 1194 or 443 Tunnel Device = TUN Tunnel Protocol = copy the value from the proto line, e.g., UDP or TCP Note: If you are using 10.8.8.1 or 10.8.0.1 as "Static DNS 1" in Step 1, then select UDP for Tunnel Protocol. If you are using 10.7.7.1 or 10.7.0.1 as "Static DNS 1" in Step 1, then select TCP for Tunnel Protocol. Encryption Cipher = AES-256-CBC Hash Algorithm = SHA-512 User Pass Authentication = Enable Username, Password = Your OpenVPN credentials If the Username and Password fields are missing, fill in the remaining fields and continue with step 5.1 Advanced Options = Enable (this will enable additional options) TLS Cipher = None LZO Compression = No NAT = Enable
Note 1: To find your OpenVPN username and password, go to your Proton Account. These are not the same as your regular Proton Account username and password.
Note 2: to use our NetShield DNS filtering feature, append the suffix +f1 to your Username to block malware, or +f2 to block malware, ads, and trackers (for example 123456789+f2).
Options not mentioned above should be kept with default values.
4.1. (Optional, depending on step 5.)
If the Username and Password fields are missing, go to Administration > Commands , and enter this code:
echo "YOURUSERNAME YOURPASSWORD" > /tmp/openvpncl/user.conf /usr/bin/killall openvpn /usr/sbin/openvpn --config /tmp/openvpncl/openvpn.conf --route-up /tmp/openvpncl/route-up.sh --down-pre /tmp/openvpncl/route-down.sh --daemon
Replace YOURUSERNAME and YOURPASSWORD with your respective OpenVPN login and OpenVPN password. If you do not know your OpenVPN credentials see this article .
Click Save Startup , and return to the previous VPN tab.
5. In Additional Config box either enter or copy/paste these commands:
tls-client remote-cert-tls server remote-random nobind tun-mtu 1500 tun-mtu-extra 32 mssfix 1450 persist-key persist-tun ping-timer-rem reneg-sec 0
# Delete ‘#’ in the line below if your router does not have credentials fields and you followed step 4.1:
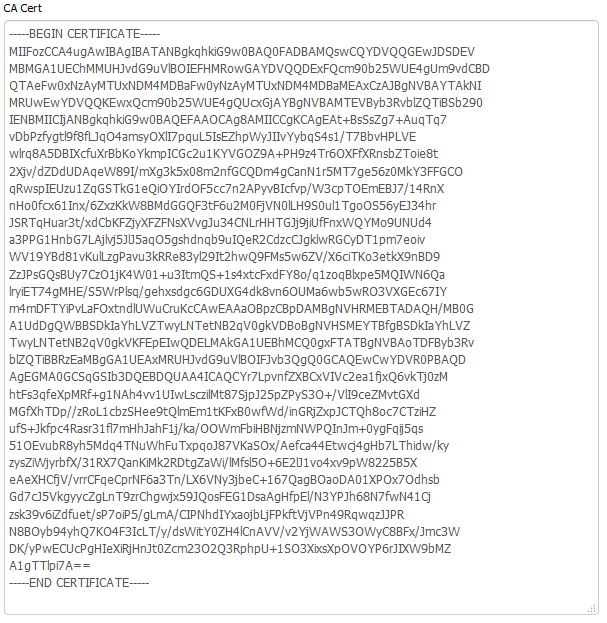
6. Copy the CA Cert into the respective field.
Be sure the entire text gets pasted in, including
—–BEGIN CERTIFICATE—– and —–END CERTIFICATE—– lines.
7. Copy the TLS Auth Key field into the respective field.
Be sure the entire text gets pasted in, including
—–BEGIN OpenVPN Static key V1—– and —–END OpenVPN Static key V1—– lines.

8. After entering all this data, Save and Apply Settings

9. To Verify the VPN is Working, Navigate to Status > OpenVPN
Under State, you should see the message: Client: CONNECTED SUCCESS.

10. To create a kill-switch,
Go into Administration > Commands , and enter this script:
WAN_IF=`nvram get wan_iface` iptables -I FORWARD -i br0 -o $WAN_IF -j REJECT --reject-with icmp-host-prohibited iptables -I FORWARD -i br0 -p tcp -o $WAN_IF -j REJECT --reject-with tcp-reset iptables -I FORWARD -i br0 -p udp -o $WAN_IF -j REJECT --reject-with udp-reset
Then select Save Firewall, Go into Administration > Management > Reboot router .
Secure
your internet
- Strict no logs policy
- All apps are open source and audited
- High-speed connections (up to 10 Gbit)
- Based in Switzerland
- 30-day money-back guarantee
How to setup Proton VPN on MikroTik routers
A step-by-step guide to setting up Proton VPN on your MikroTik router
Proton VPN can be set up on your MikroTik router so that it will automatically connect to a Proton VPN server (available on your subscription) whenever an internet connection is established.
Below is a step-by-step guide to connecting a MikroTik router to a Proton VPN server using the IKEv2 VPN protocol. You can make these changes using the web configuration panel of your router.
1. To open the MikroTik configuration panel, open your terminal and enter:
3. Get your service credentials from here, and use them for this setup.
4. Import Proton VPN CA to your router:
/tool fetch url="https://protonvpn.com/download/ProtonVPN_ike_root.der"
/certificate import file-name=ProtonVPN_ike_root.der name="Proton VPN CA" passphrase=""
5. Mark ALL traffic that you want to route through VPN server:
/ip firewall address-list add address=192.168.88.0/24 list=under_protonvpn /ip firewall mangle add action=mark-connection chain=prerouting src-address-list=under_protonvpn new-connection-mark=under_protonvpn passthrough=yes
6. IPsec/IKEv2 configuration
/ip ipsec mode-config add connection-mark=under_protonvpn name="Proton VPN mode config" responder=no /ip ipsec policy group add name=ProtonVPN /ip ipsec profile add dh-group=modp4096,modp2048,modp1024 dpd-interval=disable-dpd enc-algorithm=aes-256 hash-algorithm=sha256 name="Proton VPN profile" /ip ipsec peer add address= exchange-mode=ike2 name="Proton VPN server" profile="Proton VPN profile" /ip ipsec proposal add auth-algorithms=sha256 enc-algorithms=aes-256-cbc lifetime=0s name="Proton VPN proposal" pfs-group=none /ip ipsec identity add auth-method=eap certificate="Proton VPN CA" eap-methods=eap-mschapv2 generate-policy=port-strict mode-config="Proton VPN mode config" password= peer="Proton VPN server" policy-template-group=ProtonVPN username= /ip ipsec policy add dst-address=0.0.0.0/0 group=ProtonVPN proposal="Proton VPN proposal" src-address=0.0.0.0/0 template=yes
In “/ip ipsec policy” you should be able to see a new dynamic rule added next to your Proton VPN policy. It MUST exist, otherwise configuration is not working.
Note: To use our NetShield DNS filtering feature, you need to add suffixes to your OpenVPN/IKEv2 username. Add the suffix +f1 to block malware only or +f2 to block malware, ads, and trackers (for example: openvpn_ikev2_username+f2). NetShield is only available with our Plus, Unlimited, Family, or Visionary plans.
7. (OPTIONAL) Implement our kill switch
/interface/bridge/add name=protonvpn_blackhole protocol-mode=none /routing/table/add name=protonvpn_blackhole fib /ip/firewall/mangle/add chain=prerouting src-address-list=under_protonvpn action=mark-routing new-routing-mark=protonvpn_blackhole passthrough=yes /ip/route/add routing-table=protonvpn_blackhole gateway=protonvpn_blackhole
8. (IMPORTANT) Exclude such VPN traffic from fasttrack
To list all firewall rules:
To remove the two fasttrack rules (the default rule and the dummy rule), add the appropriate numbers you found from the command above to the following command:
/ip firewall filter remove
/ip firewall mangle add action=change-mss chain=forward new-mss=1360 passthrough=yes protocol=tcp connection-mark=under_protonvpn tcp-flags=syn tcp-mss=!0-1375
10. Don’t forget to disable the fasttrack rule in FIREWALL RULES and reboot your router!