- How to use the official Linux CLI
- How to install the official Linux CLI
- Debian-based distros
- Fedora 35+
- Archlinux and Manjaro 19+
- How to use the official Linux CLI
- How to use the kill Switch
- How to use Netshield Ad-blocker
- How to connect using the command-line
- How to uninstall the official Linux CLI
- Notes
- 6. Try out the early release version of this app
- Secure your internet
How to use the official Linux CLI
Proton VPN offers both an official Linux app with graphical user interface and an official Linux CLI. In this article, we explain how to install and use the Linux CLI.
The official Proton VPN Linux CLI is available for many Linux Debian-based distros, Fedora 34+, and Archlinux / Manjaro. If you are using the old community Proton VPN client for Linux, we recommend that you upgrade one of the new official clients. Please note that, at the present time, the new Proton VPN CLI doesn’t support Split Tunneling and doesn’t run on headless servers.
How to install the official Linux CLI
Debian-based distros
Our command-line tool officially supports the following Debian and Ubuntu-based distributions:
- Debian 10
- Ubuntu 18.04 (LTS) +
- Mint 19.3+
- MX Linux 19
- Kali Linux
- Elementary OS 5 (Juno) +
It also works with many distros based on these Linux versions (not Ubuntu Server or Raspbian), but we cannot provide support for these at this time.
If you are using an older version of our Linux client, we recommend that you uninstall it before installing the new CLI. Please see Note 1 at the end of this article for instructions.
1. Get the Proton VPN repository setup DEB package
This package contains the repository configuration and keys that are required to install the Proton VPN app.
2. Install the Proton VPN repository
Open a terminal and run the following:
sudo apt-get install protonvpn-stable-release_1.0.3_all.deb Replace with the path to where you download the file. For example:
sudo apt-get install ~/Downloads/protonvpn-stable-release_1.0.3_all.deb
Please don’t try to check the GPG signature of this release package (dpkg-sig –verify). Our internal release process is split into several part and the release package is signed with a GPG key, and the repo is signed with another GPG key. So the keys don’t match.
If you want to check the repo package integrity, you can check its checksum with the following command:
echo "c409c819eed60985273e94e575fd5dfd8dd34baef3764fc7356b0f23e25a372c protonvpn-stable-release_1.0.3_all.deb" | sha256sum --check -
3. Update the apt-get package list
The following command updates the list of available packages and their versions. Doing this allows you to install the Proton VPN App. Enter:
4. Install the Proton VPN Linux CLI
Last step! Type this command:
sudo apt-get install protonvpn-cli Fedora 35+
Please note that our CLI does not work on earlier versions of Fedora (it may work on Fedora 31- 34, but these versions are no longer officially supported). To upgrade your system, run:
1. Get the Proton VPN repository setup RPM package
This RPM package contains the repository configuration and keys that are required to install the Proton VPN app.
2. Install the Proton VPN repository
Open the terminal and run the following:
sudo dnf install protonvpn-stable-release-1.0.1-1.noarch.rpm
3. Update the dnf package list
The following command updates the list of available packages and their versions. Doing this allows you to install the Proton VPN App. Enter:
4. Install the Proton VPN Linux CLI
sudo dnf install protonvpn-cli
5. Install required dependencies for the alternative routing feature
sudo dnf install python3-pip pip3 install --user 'dnspython>=1.16.0'
Archlinux and Manjaro 19+
1. Update your local repository
Open the terminal and enter the following command:
pamac update --force-refresh
2. Verify that Proton VPN is now in your local repository
Enter the following command to list all the Proton VPN packages in your repository:
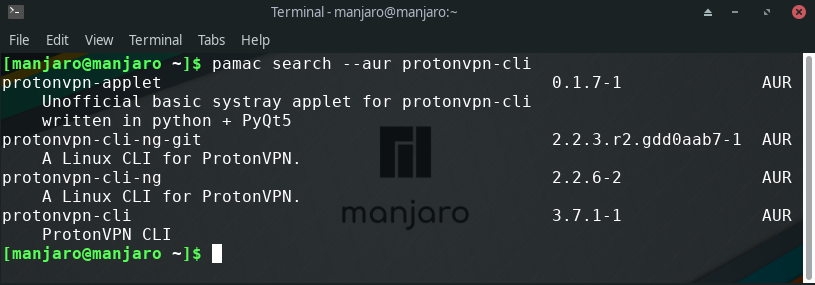
pamac search --aur protonvpn-cli
If no Proton VPN packages are returned, check your internet connection and repeat Step 1 and Step 2 to ensure the packages appear.
3. Build and install Proton VPN
4. Import the PGP key
You will be prompted to Trust Proton AG and import PGP key. Ensure the PGP key fingerprint exactly matches
6A55 7192 8D22 22D8 3BC7 456E 4EDE 055B 645F 044F
If it does, then go ahead and click y to import it. If your package manager fails to fetch or import the key, please see Note 5 below.
How to use the official Linux CLI
1. Log in using your regular Proton/Proton VPN account details using the following command (please note that these are not the OpenVPN/IKEv2 login credentials used by the older community Linux client).
protonvpn-cli login [Proton VPN username]
You will be prompted to enter your password. If you don’t have a Proton VPN account you can sign up for a Free plan for Linux.
The CLI will remember your login details between sessions. 2. Open a list of Proton VPN servers with:
protonvpn-cli connect (or protonvpn-cli c)
3. Select a server location and click OK. Select a server at that server location and click OK. 4. Select udp or tcp (we recommend udp unless you have a reason to choose tcp).
A connection to the VPN server will now be established. To check your connection status, enter:
protonvpn-cli status (or protonvpn-cli s)
protonvpn-cli disconnect (or protonvpn-cli d)
Alternatively, you can disconnect using NetworkManager.
How to use the kill Switch
The Proton VPN official Linux CLI includes a kill switch. The basic kill switch will block all your internet connections when the VPN is running and the connection to one of our servers fails. To enable it, enter:
The CLI also features a permanent kill switch. This prevents all internet connections unless the VPN is running and connected to one of our servers. To enable it, enter:
protonvpn-cli ks --permanent
You can disable the Kill Switch by entering:
How to use Netshield Ad-blocker
NetShield Ad-blocker is a DNS filtering feature. You can choose between three levels of NetShield protection:
- Off
- Block malware only (default)
- Block malware, ads, & trackers (only available if you have a paid Proton VPN plan)
To turn NetShield off, use the command
protonvpn-cli netshield --off
To block malware only:
protonvpn-cli netshield --malware
To block malware, ads, and trackers, use the command
protonvpn-cli netshield --ads-malware
protonvpn-cli ns --ads-malware
How to connect using the command-line
To see the full list of connection options, enter:

To connect to the fastest Proton VPN server for your location, for example, enter:
Or to connect to the fastest Tor server (Plus and Visionary users only), enter:
Additional connection options, including specifying a custom DNS server, can be found by entering:
Entering protonvpn-cli h (or protonvpn-cli –help) will always show the latest commands supported by the command line tool.
How to uninstall the official Linux CLI
If you wish to uninstall the Proton VPN official Linux CLI, open Terminal and disable the kill switch (if it is running). To do this, enter:
Debian distros
sudo apt-get autoremove protonvpn
3. Remove any leftover files:
1. Uninstall the CLI app with:
sudo dnf remove protonvpn -y; sudo dnf autoremove -y; sudo dnf clean packages
2. Check if all Proton VPN packages are uninstalled:
dnf/yum list installed | grep proton
3. Check if any Proton VPN folders remain on your system:
ls -ld /usr/lib/python3.*/site-packages/proton*
If any folders are found then remove them using:
sudo rm -rf /usr/lib/python3.*/site-packages/proton*
4. Check again that all folders are removed (see Step 3 above).
Archlinux and Manjaro
pamac remove protonvpn-cli
Notes
1. Uninstall the older community Proton VPN app
To uninstall the older community Proton VPN app, run:
Select option 7) Purge Configuration. Then uninstall through the package manager you used for installation. For Debian, if the package is installed system-wide then use the command:
sudo pip3 uninstall protonvpn-cli
pip3 uninstall protonvpn-cli
2. Disable the kill switch if you have uninstalled the app
The kill switch can be easily disabled from within the official Linux CLI app, but this will not be possible if you have uninstalled the CLI app first without disabling the kill switch. This may result in your system being unable to access the internet. To remove the kill switch after the CLI app has been uninstalled:
a) Identify Proton VPN connection names by running the command:
nmcli connection show --active
This will display a list of all your system’s active connections.
b) Look for any connections with the pvpn- prefix. This usually includes pvpn-killswitch and pvpn-ipv6leak-protection, and may include pvpn-routed-killswitch. Delete all these connections using the following command:
nmcli connection delete [connection name]
nmcli connection delete pvpn-killswitch
c) Re-run the following command to verify that Proton VPN connections have been deleted:
nmcli connection show --active
If any Proton VPN connections remain, delete them as described above.
3. Required dependencies
Our Linux CLI needs one of the following dependencies installed in order to work. Installing both of these dependencies is not recommended as it may cause problems:
Note that most distros come pre-installed with one of these dependencies, so usually no additional configuration is required. Also required is:
4. Supported distros
The Proton VPN Linux CLI is currently officially supported on the following distros:
- Debian 10
- Ubuntu 18.04 +
- Mint 19.3+
- MX Linux 19+
- Kali Linux
- Elementary 5+
- Fedora 31+
- Archlinux and Manjaro
We are working on adding official support for more distros, but we cannot offer support for unsupported distros and versions. The Debian client should work on many Debian-based distros, and we invite users to test-run our software on their systems. But we cannot provide support if things don’t work on these unsupported systems.
5. Manually install the PGP key in ArchLinux / Manjaro
If your package manager fails to fetch or import the key, you can import it manually using the steps below. Please note that we use Pacman for this (not Pamac, as used in the main setup guide above).
a. Download our public PGP key
b. Add the key to Pacman
pacman-key --add /path/to/downloaded/public_key.asc
(Replace /path/to/ with the path to wherever you downloaded key)
c. Ensure that the key has been added to pacman keyring
pacman-key --finger 6A5571928D2222D83BC7456E4EDE055B645F044F
d. Sign the key
pacman-key --lsign-key 6A5571928D2222D83BC7456E4EDE055B645F044F
6. Try out the early release version of this app
The early access version of our Linux CLI gives you access to new features before they are released publicly, but it is still in development. By using the early access version and sharing your feedback, you can help us find and address bugs. If you would like to install the early access version instead of the stable release of this app, please see here.
Secure
your internet
- Strict no logs policy
- All apps are open source and audited
- High-speed connections (up to 10 Gbit)
- Based in Switzerland
- 30-day money-back guarantee