- Мониторинг температуры Linux
- Что мы будем использовать?
- Установка компонентов
- Настройка мониторинга температуры Linux
- 1. Настройка lm_sensors
- Настройка hddtemp
- Измерение и мониторинг температуры
- Выводы
- How to Check CPU Temperature on Linux
- Check CPU Temperature Using Lm-Sensors
- Check CPU Temperature Using Psensor
- Install Psensor
- Using Psensor
- Check Temperature Without Third-Party Utilities
Мониторинг температуры Linux
В большинстве случаев нам не нужно беспокоиться о температуре компьютера. Все устроено так что температура не будет превышать максимальную если у вашего оборудования нет никаких производственных дефектов. Но перегрев могут вызвать не только аппаратные ошибки, это также может произойти из-за багов в драйвере графической карты или неправильно настроенной программы управления вентилятором. Частой причиной перегрева также может быть пыль, грязь, мусор попавшие в систему охлаждения (вентилятор, радиатор). Такое часто происходит со старым оборудованием.
Перегрев может вызвать очень серьезные повреждения вашего компьютера, так что следите за температурой вашей системы. Еще лучше если есть служба контроля температуры, которая предупредит вас если температура начнет сильно расти. В этой инструкции я расскажу как настроить мониторинг температуры Linux. В операционной системе Linux есть специальный набор утилит, которые предназначены для того, чтобы выполнять контроль температуры linux.
Что мы будем использовать?
Давайте рассмотрим утилиты, которые мы сегодня будем использовать:
- lm-sensors — программный инструмент, извлекающий данные из аппаратных датчиков на материнской плате для мониторинга температуры, напряжения, влажности и т д;
- hddtemp — инструмент для измерения температуры жестких дисков;
- psensor — графическая утилита для мониторинга температуры, которая позволяет посмотреть температуру Linux, для процессора, видеокарты, жестких дисков и других компонентов, которые поддерживают эту функцию.
Установка компонентов
Программа psensor отображает температуру на основе информации, полученной от lm-sensors и hddtemp. Поэтому сначала необходимо установить эти инструменты. Для установки в Debian или Ubuntu выполните:
sudo apt install lm-sensors hddtemp psensor
Если вы хотите установить самую новую версию этих компонентов, нужно добавить сначала PPA от разработчиков в систему:
sudo add-apt-repository ppa:jfi/ppa
sudo apt update
sudo apt install lm-sensors hddtemp psensor
Установка psensor в Fedora и других дистрибутивах, основанных на Red Hat будет выглядеть аналогично:
sudo yum install lm_sensors hddtemp psensor
Настройка мониторинга температуры Linux
Сначала нужно настроить низкоуровневые инструменты для считывания данных о температуре компонентов lm_sensors и hddtemp. Начнем с lm_sensors. После этого вы уже сможете посмотреть температуру linux.
1. Настройка lm_sensors
Для запуска мастера настройки ls_sensors выполните команду:
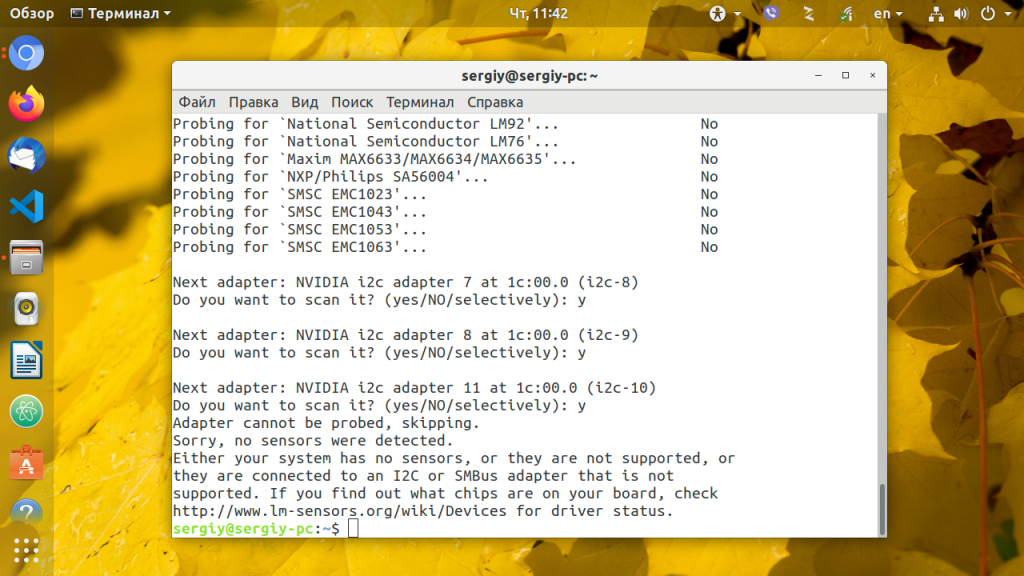
Отвечайте Y на все вопросы. Утилита попытается обнаружить все доступные в системе встроенные аппаратные датчики (для процессора, видеокарты, памяти и других микросхем), а также автоматически определить подходящие драйвера для них.
Когда сканирование датчиков завершится вам будет предложено добавить обнаруженные модули ядра в автозагрузку:
В Ubuntu или Debian модули будут добавлены в /etc/modeuls. А в Fedora будет создан файл /etc/sysconfig/lm_sensors. Для автоматической загрузки нужных модулей достаточно добавить lm_sensors в автозагрузку:
sudo systemctl enable lm-sensors
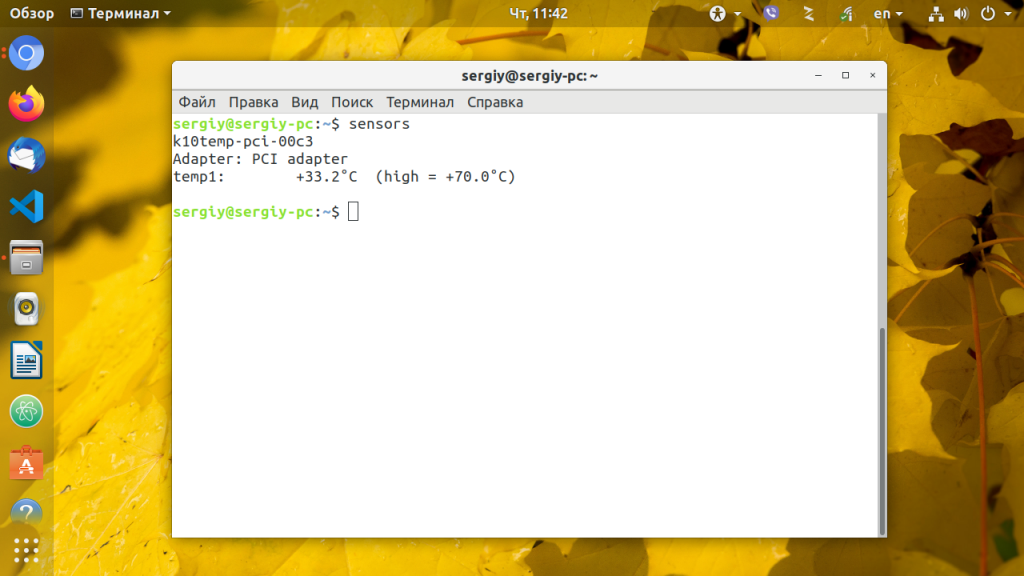
Теперь вы можете посмотреть температуру процессора Linux и других аппаратных компонентов с помощью команды sensors:
Настройка hddtemp
Еще вам нужно запустить hddtemp для контроля температуры жестких дисков. Выполните эту команду для запуска hddtemp в качестве демона, /dev/sda замените на адрес своего диска.
Это нужно сделать для каждого диска. Также необходимо добавить эту программу в автозагрузку.
Измерение и мониторинг температуры
Теперь можно начать мониторинг температуры linux с помощью psensor. Для этого просто запустите программу. Вы можете сделать это с помощью главного меню или же выполнив команду:

Вызовите контекстное меню в главном окне программы и выберите Параметры. Здесь вы увидите список доступных датчиков. Вы можете выбрать за какими датчиками нужно наблюдать.
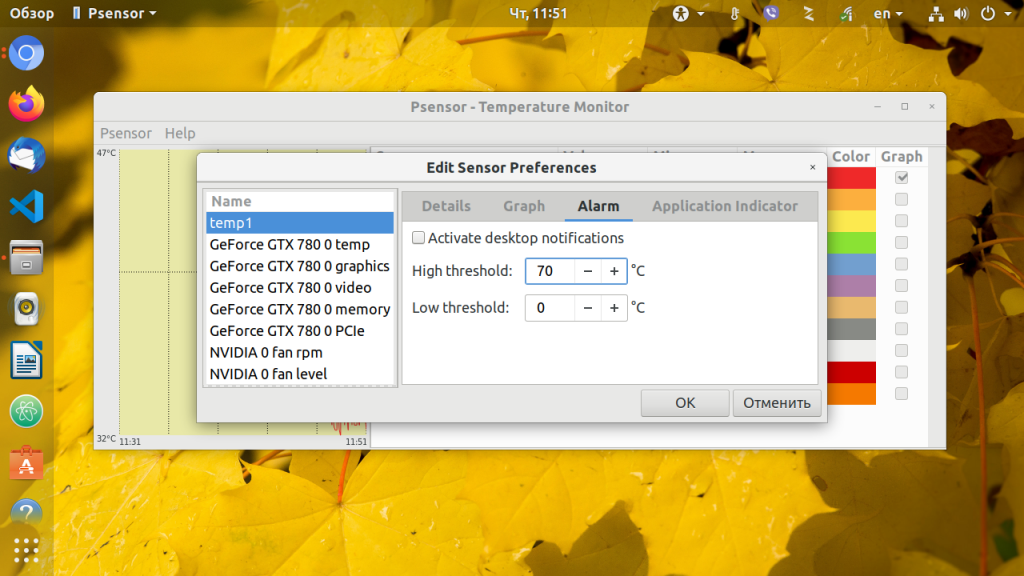
Еще можно установить уровень тревоги для каждого датчика на вкладке Alarm. Когда температура Linux превысит заданную вы получите уведомление.
По умолчанию температура в psensor измеряется в градусах Цельсия. В последних версиях также есть поддержка конвертации в градусы по Фаренгейту.
Выводы
Дальше, чтобы программа работала постоянно осталось добавить ее в автозагрузку. Теперь температура процессора linux всегда будет под контролем и ваш компьютер точно не перегреется. Если у вас остались вопросы, спрашивайте в комментариях!
Обнаружили ошибку в тексте? Сообщите мне об этом. Выделите текст с ошибкой и нажмите Ctrl+Enter.
How to Check CPU Temperature on Linux
Like any electrical component, CPUs generate heat when being used. Some resource-demanding programs cause the CPU to increase the clock speed, which results in higher temperatures. Dust buildup also causes the CPU to overheat.
High temperatures shorten the lifespan of sensitive components, so keeping track of CPU temperatures is crucial. This way, you prevent performance throttling or component damage.
In this tutorial, you will learn how to use different tools and in-built utilities to check CPU temperature on Linux machines.

Check CPU Temperature Using Lm-Sensors
Lm-sensors is a command-line utility for hardware monitoring. Use the tool to check the temperature of the CPU and other components. Follow these steps to install and configure Lm-sensors:
1. Open the terminal and install these packages using a package manager for your distribution. In Ubuntu, use the following command:
sudo apt install hddtemp lm-sensorsWait for the lm-sensors and hddtemp to finish downloading and installing.
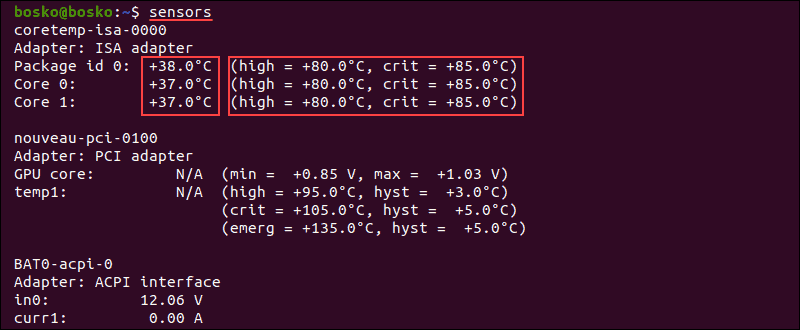
2. Execute the sensors command to see the CPU temperature. The output shows the current temperature readings of all sensors in the machine. The results include the temperature of each core and maximum thresholds.
3. To check SSD and hard drive temperatures, execute the following command:

The output shows the temperature of the selected disk.
4. To see which system components you can monitor, run sudo sensors-detect .
Answer YES to multiple scanning requests until the system scan is complete.
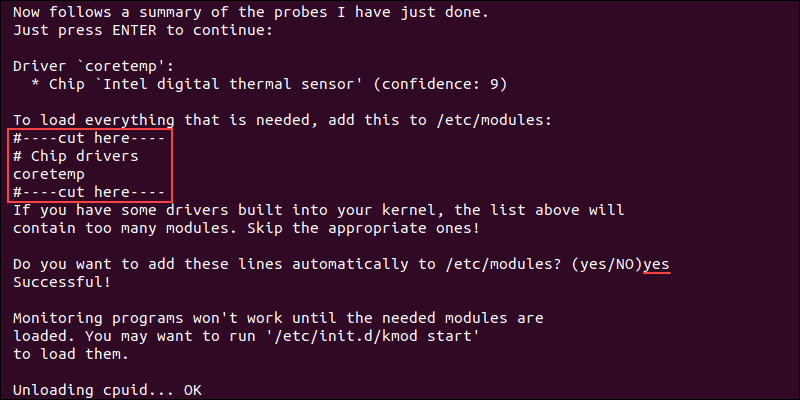
When the scan completes, the output shows the summary.
5. To ensure that system monitoring works, load the needed modules using the following command:

6. To run the sensors command repeatedly and get real-time data in the terminal, execute the following command:
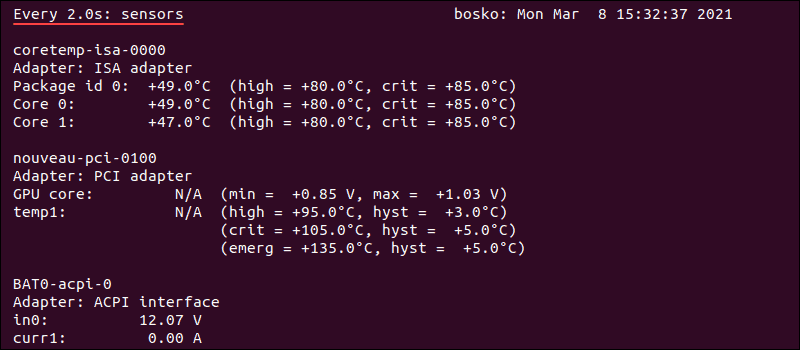
The output refreshes every two seconds and displays the current CPU temperature reading.
Note: To check CPU usage on Linux, read our tutorial on How to check CPU usage.
Check CPU Temperature Using Psensor
Psensor is a GUI app that allows you to monitor the temperature of various system components. This utility also allows you to monitor CPU usage and fan speed.
Psensor includes an applet indicator for Ubuntu, allowing you to display the temperature in the top panel to notify you when the temperatures get too high.
Install Psensor
Before installing Psensor, you need to install and configure Lm-sensors.
1. Run this command to install the necessary packages:
sudo apt install lm-sensors hddtemp2. Next, scan for sensors in your machine:
Answer YES to any scan requests until the scan is completed.
3. To make sure the packages are installed, execute the sensors command.
4. Update the package repository with sudo apt update .
5. Install Psensor using the following command:
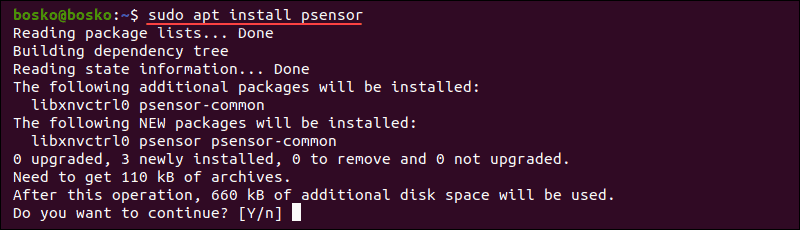
Answer YES and wait for the installation to finish.
Using Psensor
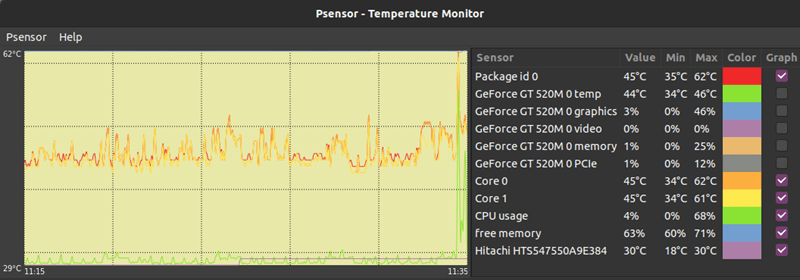
Search for Psensor in the app menu and open the utility. The app displays a graph of the selected values and shows the CPU temperature, CPU and memory usage, free RAM, GPU temperature, and HDD temperature.
To configure Psensor and set which stats you want to see, follow these steps:
1. Click Psensor in the menu bar, followed by Preferences.
2. Check off the boxes for the options you want – whether Psensor launches on system startup, the update interval, graph colors, etc.

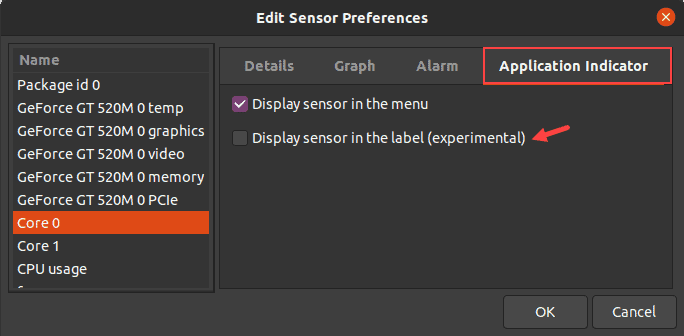
3. To show CPU or HDD temperatures in the top panel, go to Sensor Preferences under the Application Indicator. Enable the Display sensor in the label option.
Note: Learn more about monitoring CPU performance by referring to our article on Linux perf, a lightweight command-line utility.
Check Temperature Without Third-Party Utilities
There is a way to use the in-built utilities to check the CPU temperature if you don’t want to use third-party apps.
1. To check the CPU temperature without installing a third-party app, use the following command:
cat /sys/class/thermal/thermal_zone*/temp
The output shows the CPU temperature in the five-digit format. Here, 49000 means 49C.
2. If you get several thermal zones and different temperatures, execute the following command to see what a single thermal zone represents:
For example, run cat /sys/class/thermal/thermal_zone2/type to see the type of thermal zone 2.
The CPU temperature is in the zone labeled x86_pkg_temp.
3. To see what all the thermal zones are referring to, use:

The output shows the last stored temperature for that thermal zone in degrees Celsius. In this example, there is only one thermal zone, labeled x86_pkg_temp, which represents the CPU temperature.
You now know how to check CPU temperature on Linux using various utilities. The guide also showed how to configure the tools to display other information, such as GPU and HDD temperature.