- Использование HTTP proxy и SOCKS в Linux
- curl: передача данных через proxy
- wget: закачка файлов через proxy
- ssh: доступ к серверам
- Соксификатор dante
- DNS запросы через proxy
- Linux Proxy 101: How to Setup a Proxy Server on Linux
- How to Set up Proxies Temporarily on Linux
- Setting Proxies That Does Not Require Username/Password Authentication
- Setting Proxies with Username and Password Authentication
- Setting Proxies With Domain
- Handling @ Character in Password
- How to Set Up Permanent Proxies on Linux
- How To Verify Your Proxy Settings
Использование HTTP proxy и SOCKS в Linux
В Linux существует много полезных консольных команд, которые при необходимости хотелось бы запустить через proxy. Некоторые приложения имеют встроенную поддержку proxy, а некоторые нет. Далее описано как пользоваться востребованными утилитами через proxy, даже теми, которые этой поддержки не имеют.
curl: передача данных через proxy
curl имеет полноценную поддержку как HTTP proxy так и SOCKS.
Для тестирования возможно использовать proxy сервера из бесплатных списков (socks — sockslist.net, и HTTP proxy — proxyhttp.net). Проверка IP адреса будет производиться с помощью ресурса check-host.net
# Проверить HTTP proxy curl --proxy 11.22.33.44:5555 check-host.net/ip # Тоже самое, но если для HTTP proxy требуется авторизация curl --proxy 11.22.33.44:5555 -U username:password check-host.net/ip # Проверить socks4 curl --socks4 11.22.33.44:5555 check-host.net/ip # Проверить socks5 curl --socks5 11.22.33.44:5555 check-host.net/ip # Тоже самое, только преобразование имен идет также через SOCKS # (подробнее о преобразовании имен можно прочитать ниже в подразделе "DNS запросы через proxy") curl --socks5-hostname 11.22.33.44:5555 check-host.net/ip Часть параметров curl можно записать в файл ~/.curlrc:
socks5 = 11.22.33.44:5555 proxy-user = username:password user-agent = "Mozilla/5.0 (X11; Linux i686; rv:7.0.1) Gecko/20100101 Firefox/7.0.1" С помощью time и curl также можно замерить время отклика сервера:
# Без proxy: time curl check-host.net/ip # С proxy: time curl --socks5 11.22.33.44:5555 check-host.net/ip # Или любого сайта: time curl habrahabr.ru Результат будет выглядеть так:
real 0m0.307s user 0m0.000s sys 0m0.004s wget: закачка файлов через proxy
wget имеет встроенную поддержку proxy. Недостаток лишь в том, что только поддержку HTTP proxy. Для использования совместно с SOCKS рекомендуется использовать соксификатор dante.
# Скачать файл через proxy: http_proxy="http://33.22.44.44:8080" wget http://www.google.com/favicon.ico Тоже самое, но для HTTPS https_proxy="http://33.22.44.44:8080" wget https://www.google.com/favicon.ico # Использовать proxy с авторизацией http_proxy="http://33.22.44.44:8080" wget --proxy-user=user --proxy-password=password http://www.google.com/favicon.ico Чтобы все время не указывать —proxy-user и —proxy-password можно их прописать в файл ~/.wgetrc:
proxy-user = username proxy-password = password user-agent = Mozilla/5.0 (X11; Linux i686; rv:7.0.1) Gecko/20100101 Firefox/7.0.1 ssh: доступ к серверам
Для доступа к серверам через ssh и proxy также лучше использовать соксификатор dante.
Соксификатор dante
apt-get install dante-client # пример для Debian-based систем # Если требуется зайти по ssh на сервер SOCKS_PASSWORD="" SOCKS_SERVER="11.22.33.44:1080" socksify ssh myserver # Тоже самое, только если для подключения к соксу требуется авторизация SOCKS_USERNAME="user" SOCKS_PASSWORD="password" SOCKS_SERVER="11.22.33.44:1080" socksify ssh myserver # Пример с использованием IRC клиента - irssi SOCKS_PASSWORD="" SOCKS_SERVER="11.22.33.44:1080" socksify irssi # Тоже самое, только с использованием HTTP proxy с поддержкой метода CONNECT HTTP_CONNECT_PROXY="http://11.22.33.44:8080" socksify irssi С помощью socksify можно направить через proxy почти любое приложение, не только консольное.
Чтобы все время не вводить данные о proxy можно создать файл /etc/socks.conf
Пример для SOCKS:
Пример для HTTP proxy с авторизацией:
А также экспортировать переменные SOCKS_USERNAME и SOCKS_PASSWORD, если для SOCKS или HTTP proxy требуется авторизация:
export SOCKS_USERNAME="username" export SOCKS_PASSWORD="password" DNS запросы через proxy
Часто требуется чтобы и преобразование имен происходило через proxy. Если использовать dante, то запрос на преобразование имен идет и через proxy, и через именной сервер указанный в /etc/resolv.conf . Понять почему же идет два одинаковых запроса вместо одного не удалось. Поэтому можно предложить два варианта:
1) Закомментировать именные сервера в файле /etc/resolv.conf, чтобы преобразование имен шло только через proxy. Это отразится на всей системе.
2) Изменить /etc/resolv.conf и выставить именные сервера необходимой страны, или просто отличные от серверов провайдера. Например установить сервера Google:
nameserver 8.8.8.8 nameserver 8.8.4.4 Чтобы данные не были перезаписаны именными серверами провайдера (при переподключении), можно запретить обновление списка именных серверов сетевому менеджеру (NetworkManager/wicd) или DHCP-клиенту (спасибо ergil за корректировку).
Или воспользоваться «грубым» методом — запрещением изменения файла /etc/resolv.conf:
sudo chattr +i /etc/resolv.conf Если есть какие-то дополнения, пожалуйста, напишите, это будет полезно узнать и применить.
Linux Proxy 101: How to Setup a Proxy Server on Linux
Are you trying to make use of proxies on your Linux-based computer? Then you have to configure it. This article will show you how to set up proxies on Linux to access the Internet.

The use of proxies cannot be overemphasized. With a proxy server, you can circumvent geolocationrestrictions, access localized web content, unblock websites, and make use of automation software. All the popular Operating Systems in the market have support for proxies, and Linux is not an exception.
An overwhelming number of Internet marketers and privacy concerns individuals on the Internet are using Linux-based operating systems. Surprisingly, a good number of them do not know how to configure proxies on their machine. If you’re one of them, you’re on the right page as you are going to be learning about Linux proxy settings here.
When it comes to setting proxies on Linux, you need to know that each distribution of Linux has its own specific configuration method. Not only that, but you also need to be aware that some applications can outrightly disregard your proxy setting and bypass it. Some of the applications would require proxies to set their own way.
Whatever the case may be, make sure you test the proxies and make sure they work before using them for the use case you set them up for. There are many ways of setting proxies on Linux. Some of these methods will be discussed below.
How to Set up Proxies Temporarily on Linux

Not everyone wants to make use of proxies all the time. For some users, the use of proxies has to be ones in a while when the need arises. And after using them for the required use case, they drop them and continue accessing the Internet with their real IP address. To set up proxies temporarily for the current session, you need to do that using the http_proxy & https_proxy environment variable. Launch the terminal and choose one of the options available to you below.
Setting Proxies That Does Not Require Username/Password Authentication
Setting proxies that require no username and password authentication are the easiest in Linux. This is because you only need to specify the server IP and Port. There are two classes of proxies that do not need username and password for authentication.
These are free/public proxies that are considered low quality and proxy servers that provide IP authentication as an alternative. Some providers even have IP authentication as the only means of authentication. For proxies like this, whitelist your device IP from the dashboard the proxy provider provided. After whitelisting the IP address, use the below command for setting the proxies temporarily.
# export http_proxy=http://SERVER:PORT/
Setting Proxies with Username and Password Authentication

When a proxy server requires you to authenticate using a username and password, then you need to modify the command above slightly to accommodate the username and password. Below is the modified code.
If the username and password are correct and you have a valid subscription, then you have set up proxies.
Setting Proxies With Domain
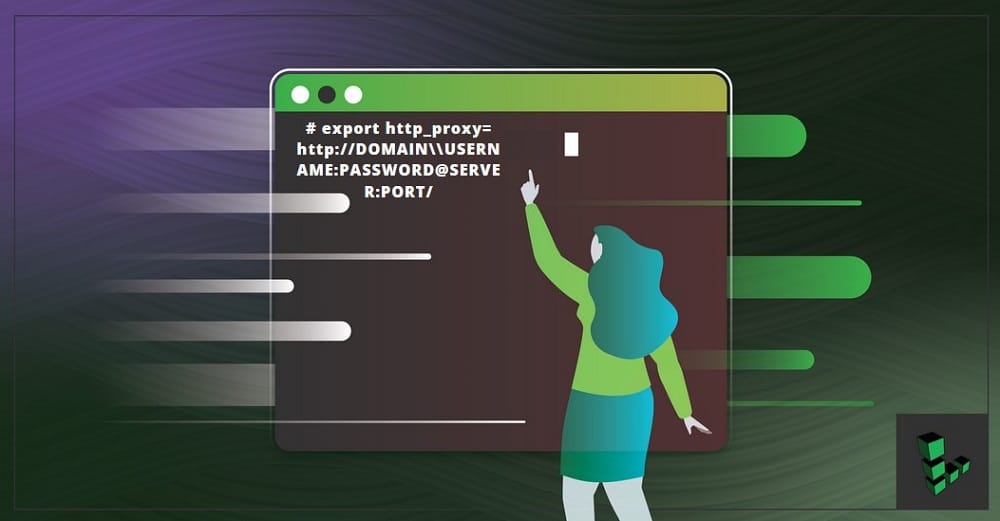
For proxies that require domain details to be setup, run the following modified code.
Handling @ Character in Password
Obviously, you wouldn’t have the @ as a character in your username. However, it commonly used in passwords. Use the below command when your username or password has the @ character.
Look at the code above; you will see a backslash (\) before the @.
How to Set Up Permanent Proxies on Linux

If you wouldn’t want to be setting proxies every now and then, then you need to set up proxies using the environment variable. This is done by modifying the file /etc/environment using the code below.
# echo “http_proxy=http://proxy.example.com:3128/” >> /etc/environment
How To Verify Your Proxy Settings

Linux provides an easy way to check whether you have set up proxies on your machine or not. You will need to use the terminal to check this. Use the commands below. If their values are empty, then your proxies have not been set.
Some times, the above might return values, but your browser isn’t making use of them. Some browsers can decide to overlook your default proxy settings. To check if you’re accessing the Internet using the proxy IP address, visit the WhatIsMyIPAddress website – by click this link. The IP address which you use in accessing the Internet will be displayed. Also, for every software you intend to use, read about the software as some of them tend to disregard the global proxy settings – if that’s the case, you then have to set up proxies in the interface provided by that software.

If you are just concerned about privacy, then a VPN might be a better option. This is because unlike proxies that do not force all applications that access the Internet through them, VPN makes sure all Internet connections go through it. With a VPN set up, you will not have to worry about a particular software disregarding your proxies.
Setting proxies on Linux is actually very easy, especially if you know how to use the terminal – and if you don’t, I advise you to do. With just a few commands, you can get your Linux machine to work with a proxy server. However, do not just configure a proxy and think all your web requests will go through it. You need to confirm if the configuration was successful, and your applications aren’t ignoring it.