- How to Install and Use Putty on Ubuntu Linux
- Prerequisites
- Installing Putty from Command Line
- Launch Putty SSH Client
- Use Putty to access Cloud VM
- 23 thoughts on “How to Install and Use Putty on Ubuntu Linux”
- How To Configure SSH Keys Authentication With PuTTY And Linux Server
- Generate a private and public key pair
- Configure your Linux server (create user, save public key)
- Add Private key to PuTTY SSH authentication agent
- Use PuTTY to connect to your server
- How to Install PuTTY on Linux
- How to Install PuTTY on Linux
- Install PuTTy on Ubuntu and Linux Mint
- Install PuTTy on Debian
- Install PuTTy on Arch Linux
- Install PuTTy on CentOS, RHEL, Fedora, Rocky & AlmaLinux
- Install PuTTy from Source Code in Linux
How to Install and Use Putty on Ubuntu Linux
In this post, we will cover how to install and use putty on Ubuntu Linux.
System Admins who had worked on Windows Operating system , surely they have used putty software to ssh UNIX like systems. When they migrated to Ubuntu Desktop , they might require putty to manage their UNIX and Linux systems.
PuTTY is the most popular SSH client. It supports flexible terminal setup, mid-session reconfiguration using Ctrl-rightclick , multiple X11 authentication protocols, and various other interesting things not provided by ssh in an xterm. Putty also supports various protocols like Telnet, SCP, rlogin, SFTP and Serial.
Prerequisites
- Pre-Installed Ubuntu System
- Sudo User with admin rights
- Internet Connectivity
Note: We have tested below procedure of installing putty on Ubuntu 22.04 / 20.04 system.
Putty can be installed either from command line or synaptic package manager.
Installing Putty from Command Line
Putty package and its dependencies are available in the default package repositories of Ubuntu 22.04/20.04. So, its installation is quite easy.
Open the terminal on your ubuntu system and run below apt commands to install putty.
$ sudo apt update$ sudo apt install putty -y

Alternate way to install putty is via Synaptic Package Manager GUI, In case synaptic is not installed the first install it via below command,
$ sudo apt install synaptic -y
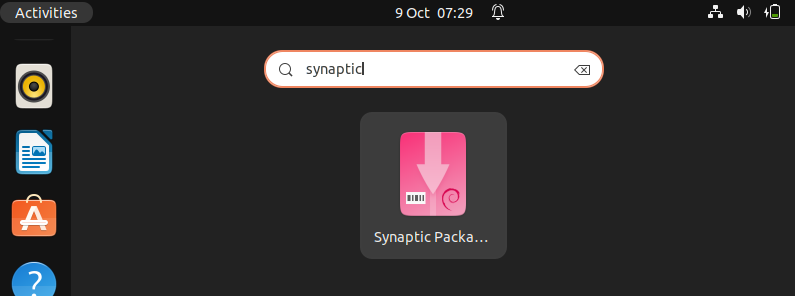
Once the synaptic is installed, access the Synaptic Package Manager, search synaptic from Activity as shown,
click on “ Synaptic Package Manager ” icon. It will prompt you to enter your user’s password.

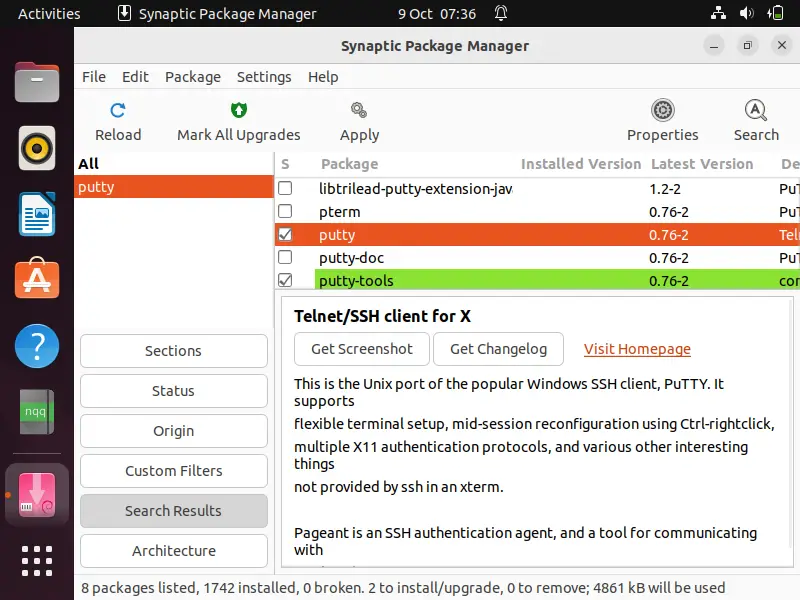
choose putty and Select ‘ Mark for Installation ‘ option & then click on apply.
Launch Putty SSH Client
Search putty from Activity as shown below,
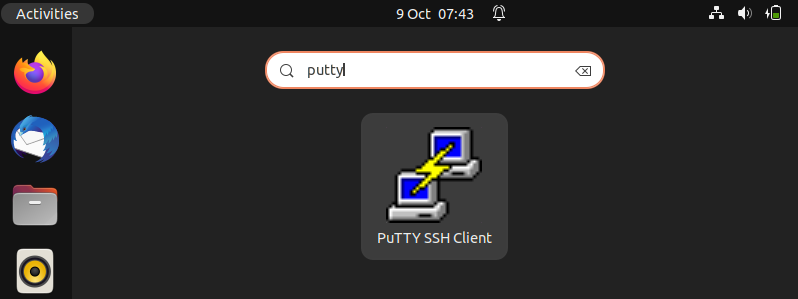
Click on PuTTY SSH Client
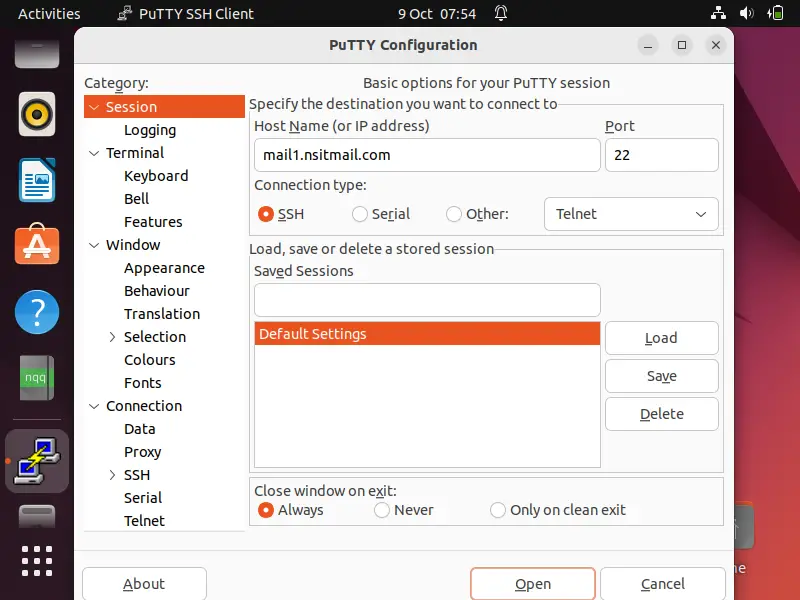
Enter Remote Server’s IP Address or Hostname.
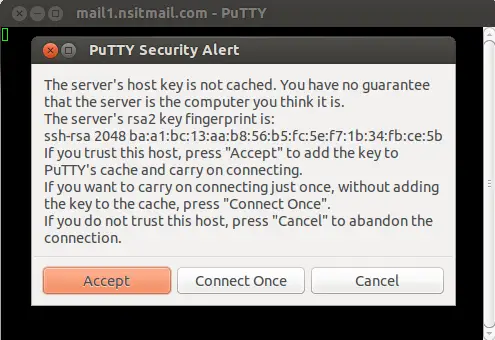
Click On Accept , then it will ask for User Name & Password as shown below :
Use Putty to access Cloud VM
Let’s suppose we want to access our public cloud VM (virtual machine) via putty using their private SSH keys, so for that refer the below steps:
2) Enter User Name and External IP address of your Cloud VM in ‘Host Name’ field
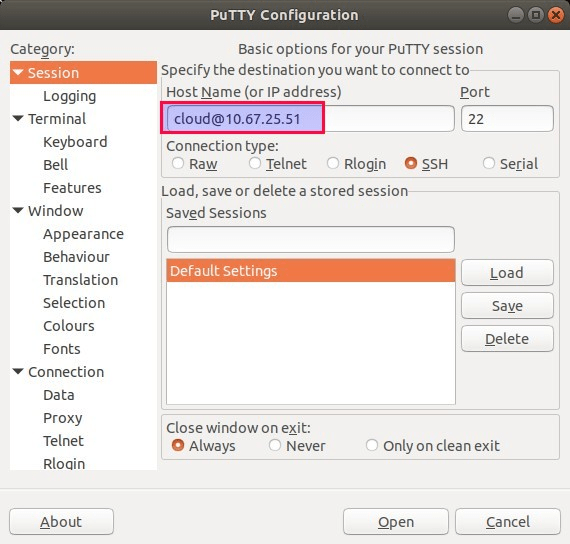
Here User name is the same user for which SSH keys are generated. By default SSH keys are generated in .pem format and putty don’t accept .pem ssh private keys, so it is recommended covert .pem ssh keys into .ppk format. One of the easiest way to convert keys into .ppk is via PuTTYgen utility, example is shown below. Puttygen utility will be installed automatically when we install putty.
$ puttygen my-ssh-key.pem -o my-ssh-key.ppk
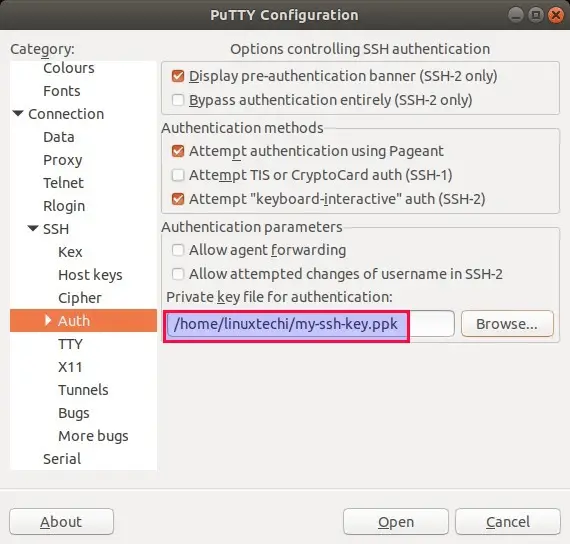
3) From SSH Tab, choose ‘Auth’ and then browse .ppk format ssh key,
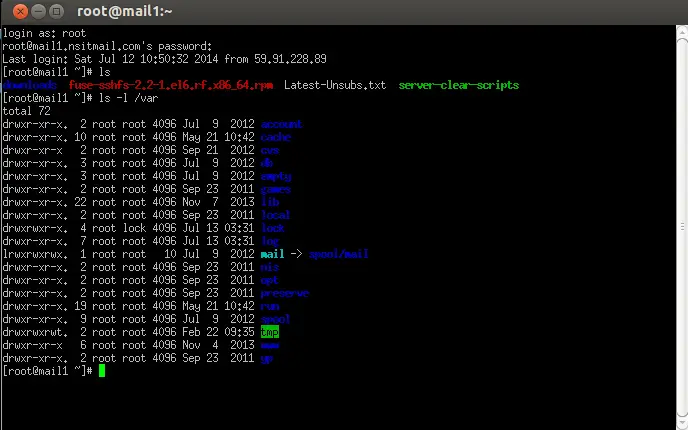
Now click on Open to start the SSH session with cloud VM, After the successful Connection to the Cloud VM, run the commands and other tasks that you want to do and to come out of VM or disconnect from VM type exit command.
That’s all from this guide, please do post your queries and feedback in below comments section.
23 thoughts on “How to Install and Use Putty on Ubuntu Linux”
Nice post. But why would you need to install putty, it’s just a frontend for ssh. It’s much easier to use ssh from the command line. Reply
Hi. Putty is more than just ssh. A good use is to use the serial option to “console in” to cisco devices. It also has a great Rlogin option. Reply
wondering if anyone can help. I am completely new at Ubuntu. Currently running Zorin Core and I’m trying to connect my cisco lab to my PC using puTTy using a Serial connection. Now when I select “Serial” , the “serial line” tab is automatically filled out: /dev/ttyS0.
I hit open and get an error saying : Unable to open connection to :
Unable to open serial port.
What is it I need to do to make make that serial connection communicate with my client on the PC? Appreciate any help I can get. Reply
I think you don’t have permissions to open it. From a terminal: chown $USER /dev/ttySo (or the path that appears there). You could also do it with the file manager. Reply
How does one do a paste from the clipboard in Putty?
Ctrl-V and Ctrl-Shift-V do not work.
The Windows version of Putty has no problems with this. Reply
plus 3 – me too! Have not found a WAY TO replicate the much loved Putty cut and paste in my Lubuntu. Reply
How To Configure SSH Keys Authentication With PuTTY And Linux Server
This tutorial explains how you can replace password-based SSH authentication with key-based authentication which is more secure because only the people that own the key can log in. In this example, we’re using PuTTY as our SSH client on a Windows system.
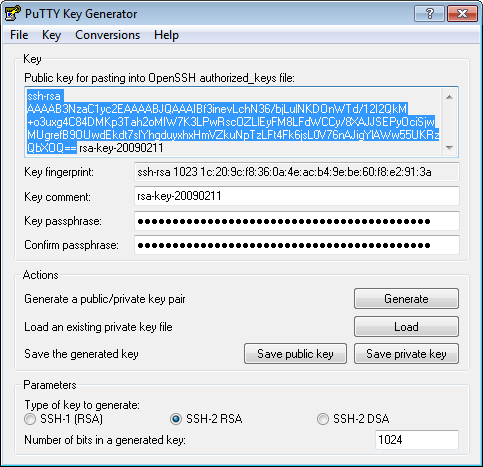
Generate a private and public key pair
Open PuTTYgen.exe, press Generate button, move mouse. Once the keys are generated, type your key passphrase (choose a «hard to guess» one). Save Public key. Save Private key.
Configure your Linux server (create user, save public key)
For this guide let’s assume you regular login name is us3r (replace it with one that you use regularly).
As root, on the shell, type:
adduser us3r --disabled-password
You will be asked to fill in some details such as the user’s real name (empty string is fine).
su us3r cd /home/us3r mkdir .ssh chmod 700 .ssh cd .ssh
Then in that folder, create and edit a file called authorized_keys2 .
In there, cut/paste your public ssh key, on ONE LINE (That is very important. )
- Do not add the email@example.com at the end of the line.
- Do not add the BEGIN PUBLIC KEY or END PUBLIC KEY.
- Do not add the rsa-key-20090211 at the end.
- Make sure, there is ssh-rsa at the beginning.
It should be something like:
ssh-rsa AAAAB3NzaC1yc2EAAAABJQAAAIBf3inevLchN36/bjLulNKDOnWTd/12I2QkM+o3uxg4C…
chmod 600 authorized_keys2
Add Private key to PuTTY SSH authentication agent
Start the PuTTY SSH authentication agent PAGEANT.EXE. When started, right-click its systray icon and select «add key». Select your private key file, and type in your passphrase when you add the key. The Pageant works as a passphrase keeper.
Use PuTTY to connect to your server
Open PuTTY and connect as us3r@putty.org.ru :
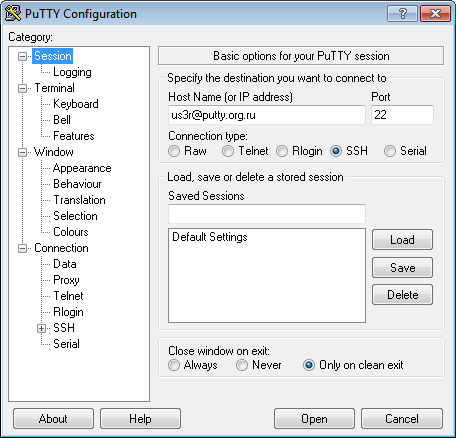
See that you log in without a password …
How to Install PuTTY on Linux
PuTTY is a free and open-source cross-platform SSH and telnet client that even after being around for over 20 years remains one of the most popular SSH clients being used especially on the Windows platform.
Linux distros ship with SSH capabilities built into their terminal but in real-world environments, I have seen PuTTY being used instead of the default Linux systems more times than I cared to count.
The quickest reasons that come to mind for such scenarios include:
- Familiarity: users are more comfortable using an SSH client they got familiar with while using Windows.
- Debug mode: Connection to serial pots and raw sockets is more user-friendly with PuTTY.
- Convenience: PuTTY has a GUI that undeniably makes it easier to use especially by SSH and/or terminal newbies.
It is possible for your own reasons for wanting to use PuTTY on GNU/Linux are different. It doesn’t really matter. Here are the steps to take in order to install PuTTY on the Linux distro of your choice.
How to Install PuTTY on Linux
PuTTY is available to install from the default official repositories in most Linux distributions. For instance, you can install PuTTY on Ubuntu and its derivative distros via the universe repository.
Install PuTTy on Ubuntu and Linux Mint
First, you’ll have to enable the universe repository so that you can access its packages, update your system to recognize its new access rights, and then run the install command.
$ sudo add-apt-repository universe $ sudo apt update $ sudo apt install putty
Launch PuTTY to see that its UI mirrors that of the windows version. Happy you 🙂

Install PuTTy on Debian
Just like for Ubuntu, PuTTY is available for Debian and all its distros via aptitude (i.e. using apt-get) as shown.
$ sudo apt-get install putty
Install PuTTy on Arch Linux
Arch Linux and its derivatives can also install PuTTY from the default repositories.
Install PuTTy on CentOS, RHEL, Fedora, Rocky & AlmaLinux
PuTTY is available to install via the distro’s default package manager.
$ sudo yum install putty OR $ sudo dnf install putty
Install PuTTy from Source Code in Linux
It’s possible that you want to get your hands ‘dirty‘ and build the SSH client from scratch yourself. You’re in luck because it is open-source and the source code is available to download putty from the official putty website using the following wget command.
$ wget https://the.earth.li/~sgtatham/putty/latest/putty-0.78.tar.gz $ tar -xvf putty-0.78.tar.gz $ cd putty-0.78/ $ ./configure $ sudo make && sudo make install
That’s all folks! You’re now equipped with the knowledge to install PuTTY on any Linux distro, in any environment. Now learn how to use putty with these useful putty tips and tricks.
Do you use a different SSH or telnet client? Tell us about it in the comments section below.