- How to Install PuTTY on Linux
- How to Install PuTTY on Linux
- Install PuTTy on Ubuntu and Linux Mint
- Install PuTTy on Debian
- Install PuTTy on Arch Linux
- Install PuTTy on CentOS, RHEL, Fedora, Rocky & AlmaLinux
- Install PuTTy from Source Code in Linux
- How to install PuTTY on Ubuntu
- How PuTTY works as SSH Client
- How to install PuTTY on Ubuntu using terminal
- How to install PuTTY using Ubuntu Software center
- Conclusion
- How to Install PuTTY on Ubuntu and Other Linux Distributions
- Installing Putty on Ubuntu Linux
- Installing Putty on other Linux distributions
- Learn the extra bits
How to Install PuTTY on Linux
PuTTY is a free and open-source cross-platform SSH and telnet client that even after being around for over 20 years remains one of the most popular SSH clients being used especially on the Windows platform.
Linux distros ship with SSH capabilities built into their terminal but in real-world environments, I have seen PuTTY being used instead of the default Linux systems more times than I cared to count.
The quickest reasons that come to mind for such scenarios include:
- Familiarity: users are more comfortable using an SSH client they got familiar with while using Windows.
- Debug mode: Connection to serial pots and raw sockets is more user-friendly with PuTTY.
- Convenience: PuTTY has a GUI that undeniably makes it easier to use especially by SSH and/or terminal newbies.
It is possible for your own reasons for wanting to use PuTTY on GNU/Linux are different. It doesn’t really matter. Here are the steps to take in order to install PuTTY on the Linux distro of your choice.
How to Install PuTTY on Linux
PuTTY is available to install from the default official repositories in most Linux distributions. For instance, you can install PuTTY on Ubuntu and its derivative distros via the universe repository.
Install PuTTy on Ubuntu and Linux Mint
First, you’ll have to enable the universe repository so that you can access its packages, update your system to recognize its new access rights, and then run the install command.
$ sudo add-apt-repository universe $ sudo apt update $ sudo apt install putty
Launch PuTTY to see that its UI mirrors that of the windows version. Happy you 🙂

Install PuTTy on Debian
Just like for Ubuntu, PuTTY is available for Debian and all its distros via aptitude (i.e. using apt-get) as shown.
$ sudo apt-get install putty
Install PuTTy on Arch Linux
Arch Linux and its derivatives can also install PuTTY from the default repositories.
Install PuTTy on CentOS, RHEL, Fedora, Rocky & AlmaLinux
PuTTY is available to install via the distro’s default package manager.
$ sudo yum install putty OR $ sudo dnf install putty
Install PuTTy from Source Code in Linux
It’s possible that you want to get your hands ‘dirty‘ and build the SSH client from scratch yourself. You’re in luck because it is open-source and the source code is available to download putty from the official putty website using the following wget command.
$ wget https://the.earth.li/~sgtatham/putty/latest/putty-0.78.tar.gz $ tar -xvf putty-0.78.tar.gz $ cd putty-0.78/ $ ./configure $ sudo make && sudo make install
That’s all folks! You’re now equipped with the knowledge to install PuTTY on any Linux distro, in any environment. Now learn how to use putty with these useful putty tips and tricks.
Do you use a different SSH or telnet client? Tell us about it in the comments section below.
How to install PuTTY on Ubuntu
![]()
PuTTY is a widely used SSH client for windows; however, it supports various network protocols such as Telnet, rlogin. The system administrators use PuTTY as SSH and Telnet client as well. Telnet is a protocol used to establish communication between two or more devices in a network, but it was declared as an insecure protocol, so the ground for another protocol was clear. A new protocol named SSH (Secure Shell) was introduced that allows multiple devices to communicate over a network in a secure manner. PuTTY SSH client provides extensive support for well-known operating systems. In this article, we will guide you to install PuTTY as an SSH client on your Ubuntu, and before this basic working flow of the PuTTY is also described here:
How PuTTY works as SSH Client
It acts as an SSH client as well as Telnet Client, and it is helpful to access your system remotely, for instance, you are using Ubuntu (it will act as a client), and you have another Ubuntu or Windows operating system (for server) that is connected to your Ubuntu system via a network. The server PC (either Ubuntu or Windows) must have an SSH server installed in it, and you can install PuTTY client in your Ubuntu system and can connect with the SSH server over a network.
In this guide, we will show you the possible ways and step-by-step procedures to install PuTTY on Ubuntu.
There are two ways to install PuTTY on Ubuntu:
How to install PuTTY on Ubuntu using terminal
The command-line interface of Ubuntu allows you to perform all the tasks that you can perform using the graphical interface; it seems difficult in the beginning but is very useful and user-friendly for Linux-loving users.
Firstly, open the terminal using “Ctrl+Alt+T” and use the command given below to update the repository:
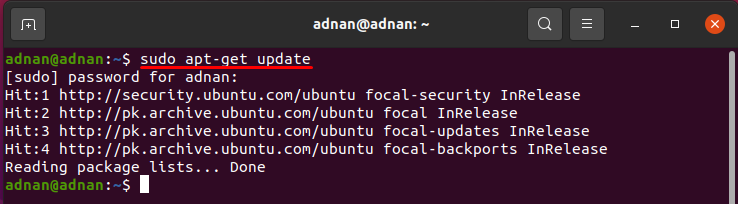
It is always recommended to update the repository by getting the latest list of programs supported by Ubuntu. It is observed that you can also install the program without executing the above command, but it may result in getting the older version.
After that, use the following command to get the PuTTY on your Ubuntu:
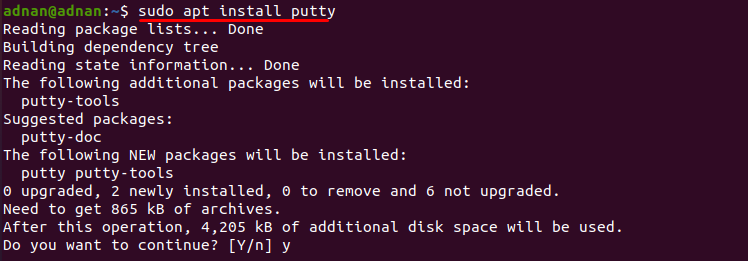
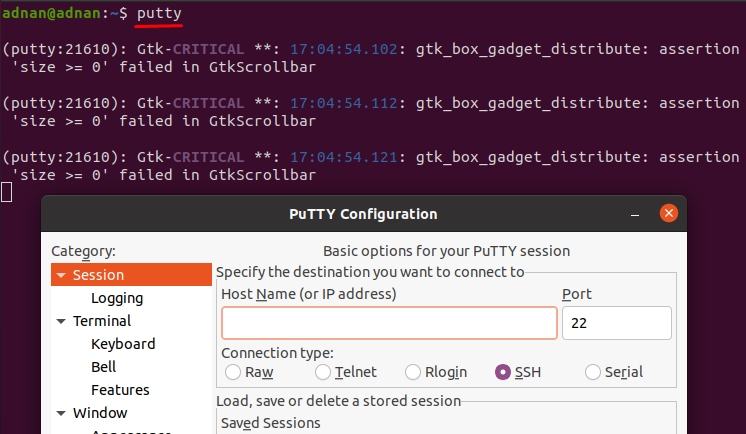
The above command will install the PuTTY, and you can run it from the terminal with the help of the command mentioned below:
How to install PuTTY using Ubuntu Software center
You can use the GUI of Ubuntu to install the PuTTY; follow the simple steps described below:
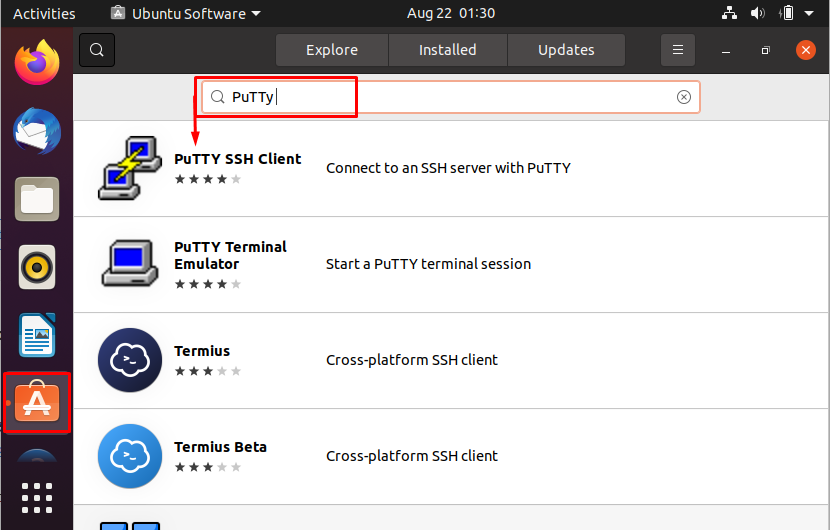
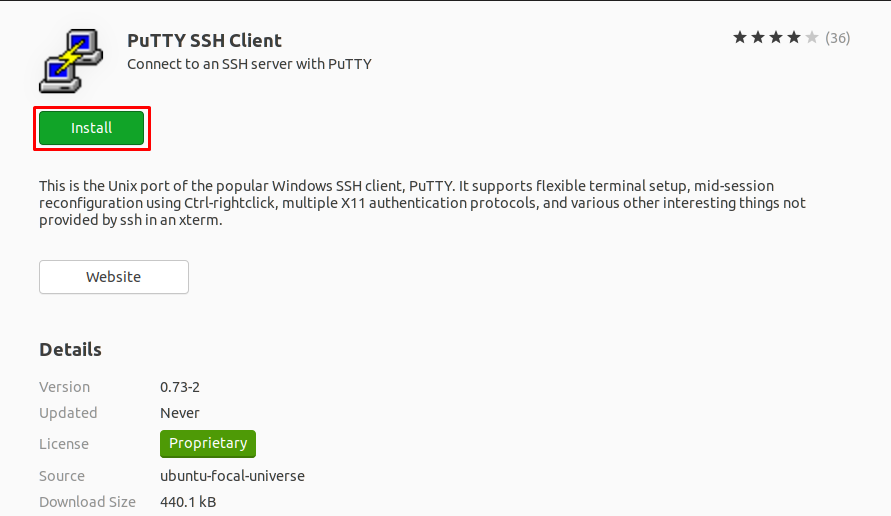
Step 1: Open your “Ubuntu Software Center” from the taskbar available on the desktop and search for “PuTTY” here. The search query will show multiple results; you must click on “PuTTY SSH Client” to continue:
Step 2: After clicking, you will notice a green “Install” button; click on this button to start the installation:
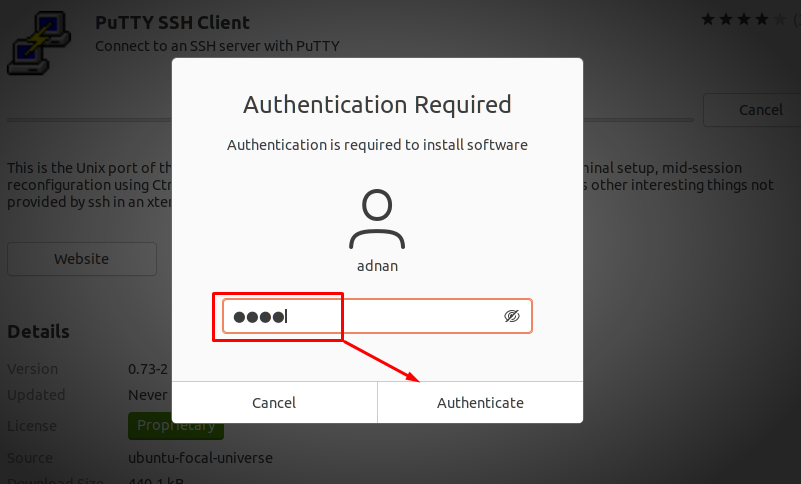
Step 3: The time you want to start the installation, the system will ask you to enter the user password, type your password and click on “Authenticate” to continue:
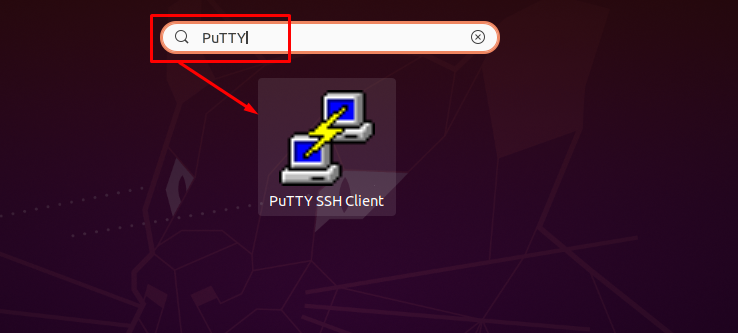
Once it is installed, you can find it from the applications menu that is available on the taskbar of the Ubuntu desktop. Click on the application tab and search or PuTTY in the search bar:

The search result will show the required program as shown in the image below:
How to remove PuTTY from your Ubuntu
If you want to remove the PuTTY from your Ubuntu, you can adopt any of the two ways mentioned below:
- Remove PuTTY using Ubuntu command line terminal
- Or use the graphical interface of Ubuntu
Using Ubuntu terminal: To remove the PuTTY from your Ubuntu, you can use the terminal of Ubuntu and execute the following command to remove the program from the system:
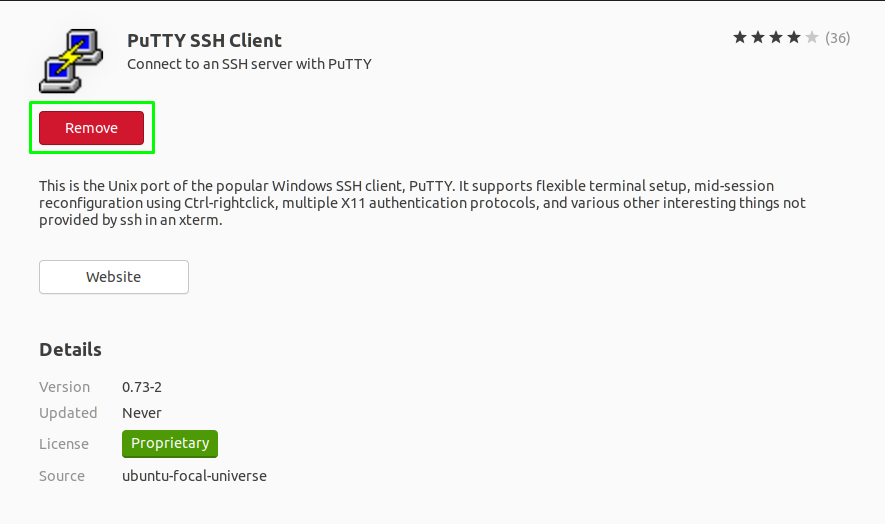
Using Ubuntu Software: Open “Ubuntu Software” and search for “PuTTY”; if the software is installed, a red “Remove” button will be displayed. Click on the “Remove” button to remove the tool:
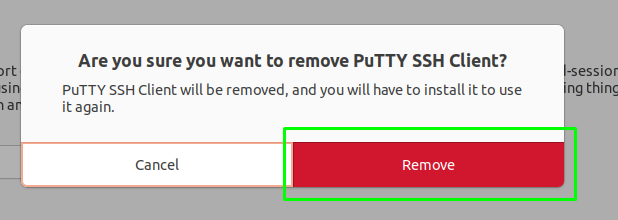
Once you click on the button, it will ask you for confirmation, and again click on remove to continue:
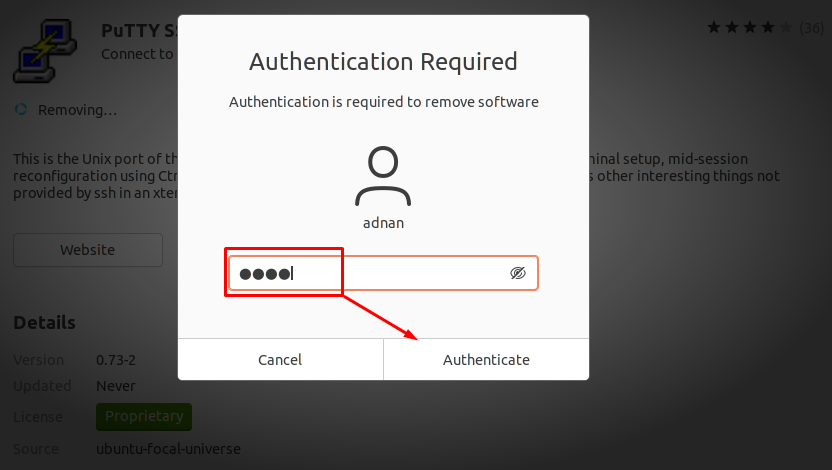
After that, the system will ask to input the user password; type the password and click on “Authenticate” to start removing the package:
Conclusion
PuTTY is a free and open-source terminal emulator that supports various network protocols; among those protocols, Telnet and SSH are the most used. In this article, we have briefly outlined its installation process. The users can adopt two ways to install and the same number of routes to remove the package from the system. The graphical method looks interesting to follow. However, the command line users can follow the other first method to go for installation.
How to Install PuTTY on Ubuntu and Other Linux Distributions
Free and Open Source SSH client Putty is also available for Linux users. Learn how to install Putty on Ubuntu and other distributions.
- You have used Putty for so long on Windows that you are more comfortable with it.
- You find it difficult to manually edit SSH config file to save the various SSH sessions. You prefer Putty’s graphical way of storing SSH connection.
- You want to debug by connecting to raw sockets and serial ports.
Whatever may be the reason, if you want to use Putty on Ubuntu or any other Linux, you can certainly do so. Let me show you how to do that.
Installing Putty on Ubuntu Linux

The good news for Ubuntu users is that Putty is available in the universe repository of Ubuntu.
To install Putty on Ubuntu, you should first make sure that the universe repository is enabled.
sudo add-apt-repository universeOnce you have the universe repository enabled, you should update Ubuntu with this command:
After this, you can install Putty with this command:
Once installed, you can start Putty by finding it in the menu.
As you can see in the screenshot below, the Linux version of Putty looks the same as the Windows version. That’s a relief because you won’t have to fiddle around trying to find your way through new and changed settings.
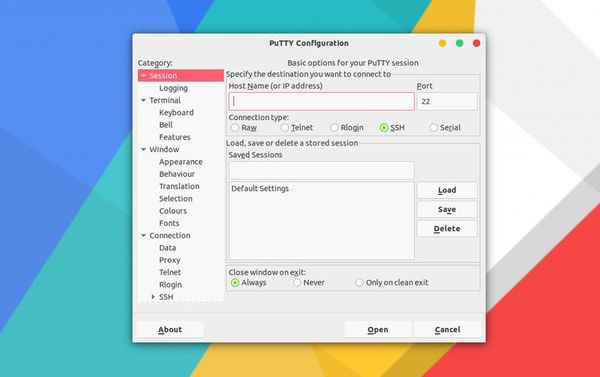
When you enter the remote system’s hostname or IP address and connect to it, Putty will utilize the already saved SSH keys in your home directory. It’s quite good at SSH key management.
Installing Putty on other Linux distributions
Putty is available for Debian so you just need to use apt-get or aptitude for installing it.
Putty is also available for Fedora/Red Hat and can be installed using the default package manager.
You can also easily install Putty in Arch Linux based distributions.
Remember that Putty is an open source software. You can also install it via source code if you really want to. You can download its source code from the link below.
Learn the extra bits
If you are new to the whole terminal thing, I highly recommend reading this guide. You’ll learn many useful things.
Knowing the essential Linux commands will also help you a great deal.
I would always prefer the native Linux terminal over an SSH client like Putty. I feel more at home with the GNOME terminal or Terminator. However, it’s up to an individual’s choice to use the default terminal or Putty in Linux.
What do you use for managing multiple SSH connections on Linux?