- SecureBoot-compatible UEFI netboot over IPv4 and IPv6
- TFTP server configuration
- Downloading the standard boot files
- Configuring the Ubuntu payload
- DHCP server configuration
- DHCPv4 (dnsmasq)
- DHCPv4 (isc-dhcp-server)
- DHCPv6 (isc-dhcp-server)
- Support for other architectures
- Add UEFI Support to PXE Boot Server on CentOS 7
- System Specification:
- Configure PXE Boot Server to support UEFI based systems:
SecureBoot-compatible UEFI netboot over IPv4 and IPv6
UEFI/PXE-netboot-install describes a method for preparing a self-contained netboot image for use with UEFI-based systems. However, with the introduction of UEFI Secure Boot, it is not possible to boot self-built netboot images on all UEFI systems without either disabling Secure Boot on the target system, or updating the Secure Boot key configuration in the firmware and signing your netboot images. This page therefore describes an alternate method for netbooting Ubuntu using a pre-prepared UEFI grub image.
- it allows booting to a grub menu providing a selection of boot options
- changes can be made to the boot configuration by dropping in stock Ubuntu netboot images and/or updating the grub.cfg, with no requirement to regenerate special grub images.
It is expected that future versions of MAAS will use the described method for hardware provisioning.
TFTP server configuration
Downloading the standard boot files
- shim.efi.signed from the shim-signed package, installed as bootx64.efi under the tftp root
- grubnetx64.efi.signed from the grub2 source package (and shipped in the grub-efi-amd64-signed binary package), installed as ‘grubx64.efi’ under the tftp root
- unicode.pf2 from the grub-common package, installed as grub/fonts/unicode.pf2 under the tftp root.
The last of these files is optional, but makes it possible to provide the same high-quality graphical output for the grub menu when netbooting that you get when booting locally.
The uefi-netboot.sh script enables you to download and install all of these files securely from Ubuntu. Ubuntu 13.10 or later is needed to run this script; if your tftp server is deployed on an earlier version of Ubuntu or on a different OS, you will want to create an Ubuntu 13.10 chroot, run the script, and copy the result over to your server. Note that it does *not* verify the grubnetx64.efi.signed file at download time, but instead relies on the fact that the bootx64.efi from the shim package will fail to pass control to grubx64.efi if it is not a properly signed EFI binary. (This does mean that an attacker could intercept your network traffic and replace the real grubx64.efi with any other binary signed by a trusted key, such as a different OS. If this is a concern, you should download the grub-efi-amd64-signed binary package with apt-get and extract the grubnetx64.efi.signed binary instead of using the attached script.)
Configuring the Ubuntu payload
In addition to the stock bootloader files, you will need to copy your kernel and initramfs to the tftp root, and install a grub2 config file at grub/grub.cfg under the tftp root. The kernel and initramfs can be downloaded from archive.ubuntu.com; e.g.:
wget http://archive.ubuntu.com/ubuntu/dists/precise/main/installer-amd64/current/images/netboot/ubuntu-installer/amd64/linux -O precise/linux wget http://archive.ubuntu.com/ubuntu/dists/precise/main/installer-amd64/current/images/netboot/ubuntu-installer/amd64/initrd.gz -O precise/initrd.gz
Here is a sample grub.cfg that offers a single boot entry, assuming that the netboot files have been installed in the precise subdirectory of the tftp root. You can specify as many menuentry sections as you wish.
set default="0" set timeout=-1 if loadfont unicode ; then set gfxmode=auto set locale_dir=$prefix/locale set lang=en_US fi terminal_output gfxterm set menu_color_normal=white/black set menu_color_highlight=black/light-gray if background_color 44,0,30; then clear fi function gfxmode set gfxpayload="$" if [ "$" = "keep" ]; then set vt_handoff=vt.handoff=7 else set vt_handoff= fi > set linux_gfx_mode=keep export linux_gfx_mode menuentry 'Ubuntu 12.04' gfxmode $linux_gfx_mode linux /precise/linux $vt_handoff quiet splash initrd /precise/initrd.gz >
DHCP server configuration
Once the tftp server has been configured, you will also need to configure your DHCP server to point at it. While it’s easy to set up your tftp server to point all machines at a single tftp resource for PXE booting, chances are you will want to configure your network so that it can boot both BIOS and UEFI systems. The below sample configurations can be used to direct machines of each type to the right tftp payload for booting.
Each of these samples assumes that you already have your dhcp server configured. If you need assistance in setting up your dhcp server, please consult the documentation for the respective packages.
DHCPv4 (dnsmasq)
DNSmasq functions as an all-in-one DHCP, DNS, and TFTP server. Setting up dnsmasq to serve BIOS and UEFI PXE clients is as simple as adding the following three lines to your /etc/dnsmasq.conf:
dhcp-boot=pxelinux.0 dhcp-match=set:efi-x86_64,option:client-arch,7 dhcp-boot=tag:efi-x86_64,bootx64.efi
DHCPv4 (isc-dhcp-server)
The configuration for isc-dhcp-server is slightly more involved than for dnsmasq. Assuming that your tftp server is on ip address 192.168.19.1, you can add the following lines to /etc/dhcp/dhcpd.conf:
option arch code 93 = unsigned integer 16; if option arch = 00:07 filename "bootx64.efi"; > else filename "pxelinux.0"; > next-server 192.168.19.1;
Note that unlike dnsmasq, isc-dhcp-server does not include a built-in tftp server, so you will need to run one separately. It’s recommended that you use tftpd-hpa for this.
DHCPv6 (isc-dhcp-server)
If you wish to support netboot over IPv6, you will need to use isc-dhcp-server; at present, dnsmasq does not support the DHCPv6 extensions for tftp booting.
Configuring isc-dhcp-server for DHCPv6 requires running a separate server, even if you already have isc-dhcp-server running for DHCPv4. The DHCPv4 and DHCPv6 servers can run on the same machine, and the Ubuntu isc-dhcp-server supports this with separate isc-dhcp-server and isc-dhcp-server6 upstart jobs.
Note that whereas normally DHCPv6 is only used for supplemental information such as DNS servers, with addresses handled via autoconfiguration in response to router advertisements, when netbooting you must configure your DHCPv6 server to allocate addresses; UEFI firmware will generally not netboot without this.
To enable temporary address assignments and configure UEFI netbooting over IPv6, add lines like the following to /etc/dhcp/dhcpd6.conf. This example assumes a network of 2001:db8:f00f:cafe::/64 with your DHCP/DNS/tftp server using the address of 2001:db8:f00f:cafe::1; you should adjust to match your own IPv6 network configuration.
option dhcp6.bootfile-url code 59 = string; option dhcp6.client-arch-type code 61 = array of unsigned integer 16; option dhcp6.name-servers 2001:db8:f00f:cafe::1; if option dhcp6.client-arch-type = 00:07 option dhcp6.bootfile-url "tftp://[2001:db8:f00f:cafe::1]/bootx64.efi"; > else # Support a hypothetical BIOS system that can PXE boot over IPv6 option dhcp6.bootfile-url "tftp://[[2001:db8:f00f:cafe::1]/pxelinux.0"; > subnet6 2001:db8:f00f:cafe::/64 range6 2001:db8:f00f:cafe::42:10 2001:db8:f00f:cafe::42:99; range6 2001:db8:f00f:cafe:: temporary; >
Once configured, you can start the DHCPv6 server with sudo service isc-dhcp-server6 start.
Note that prior to Ubuntu 13.10, the tftpd-hpa package is configured to listen on 0.0.0.0:69 by default, which causes it to bind to IPv4-only. To support IPv6 netboot you will need to change this in /etc/default/tftpd-hpa to read TFTP_ADDRESS=[::]:69.
Support for other architectures
The IETF maintains a list of known client architectures for DHCP/DHCPv6. You can extend your DHCP configuration to permit netbooting of other client architectures by matching on the corresponding DHCP option value instead of 00:07 (== x86_64 UEFI). For instance, x86_32 UEFI can be supported by matching on an architecture value of 00:06 (‘6′ if using dnsmasq), and ARMv8 can be supported by matching 00:0b (’11’ using dnsmasq). For other architectures, you would not use shim for the payload, and instead boot to grub, or directly to a kernel that has an EFI boot stub.
UEFI/SecureBoot/PXE-IPv6 (последним исправлял пользователь vorlon 2020-02-25 20:19:08)
Add UEFI Support to PXE Boot Server on CentOS 7

BIOS (Basic Input/Output System) and UEFI (Unified Extensible Firmware Interface) are two firmware interfaces for computer systems which work as an interpreter between the operating system and the computer firmware. Both of these are installed at the time of manufacturing and is the first program that runs when a computer is turned on. BIOS uses the Master Boot Record (MBR) to save information about the hard drive data while UEFI uses the GUID partition table (GPT).
MBR uses 32-bit entries in its table which limits the total physical partitions to only 4 with maximum size of 2 TB each. Whereas, GPT uses 64-bit entries in its table which allows it use more than 4 physical partitions with larger sizes.
In our previous article Setup a PXE Boot Server in RHEL/CentOS 7, we have configured a PXE boot server and added the RHEL 7.5 installation option in it. The configuration worked fine with BIOS based computer systems, but didn’t support UEFI based clients.
In this article, we will add UEFI support to our PXE Boot Server on CentOS 7.
Note: In this article, we are performing everything from CLI, therefore, it is highly recommended that, you should have Linux Pocket Guide: Essential Commands for quick reference.

System Specification:
We use the same CentOS 7 server that we have configured as PXE Boot Server in our previous article. The specifications have been re-mentioned below for convenience of the readers.
Configure PXE Boot Server to support UEFI based systems:
Connect to pxe-server.itlab.com using ssh.
Adjust DHCP server configuration to support UEFI systems.
Search for following lines in the above file.
#PXE boot server next-server 192.168.116.41; filename "pxelinux.0"; Replace above lines with following configurations.
Restart dhcpd.service to apply changes.
# systemctl restart dhcpd.service If dhcpd.service gives error during startup, then look for any possible syntax errors therein and try to restart the service again.
For more details on comparisons in the above configurations, please refer to RFC 4578 — Dynamic Host Configuration Protocol (DHCP) Options for the Intel Preboot eXecution Environment (PXE).
Now, we need a bootloader (such as grubx64.efi) to support UEFI clients. This bootloader is available in CentOS 7.5 ISO.
Copy grubx64.efi to /var/lib/tftpboot directory.
# cp /var/ftp/pub/rhel7/EFI/BOOT/grubx64.efi /var/lib/tftpboot/ Our PXELINUX menu does not work for UEFI systems, therefore we have to create another menu for the UEFI clients.
The menu filename is grub.cfg and it is located at /var/lib/tftpboot. Therefore, we will define RHEL 7.5 installation option in this file as follows:
# cat >> /var/lib/tftpboot/grub.cfg set timeout=60 > > menuentry 'Install RHEL 7.5' < >linuxefi /networkboot/rhel7/vmlinuz inst.repo=ftp://192.168.116.41/pub/rhel7/ > initrdefi /networkboot/rhel7/initrd.img > > > EOF Restart tftp.service to apply changes.
# systemctl restart tftp.service UEFI configurations has been completed.
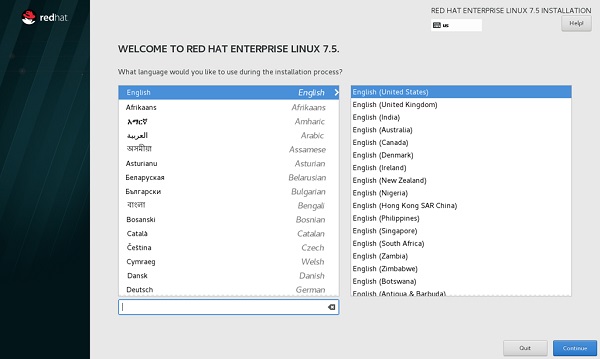
To test the configurations, connect a UEFI based system to network, and turn it on.

The UEFI client will fetch the above menu from PXE boot server.
Press to start installation.
Our PXE boot Server is now supports both BIOS and UEFI based clients.
We have successfully added UEFI support in our PXE boot Server on CentOS 7.

If you find this article useful? Consider supporting us by