- Как установить Python IDLE в Linux
- Что такое IDLE
- Функции IDLE
- Установка Python IDLE IDE в Linux
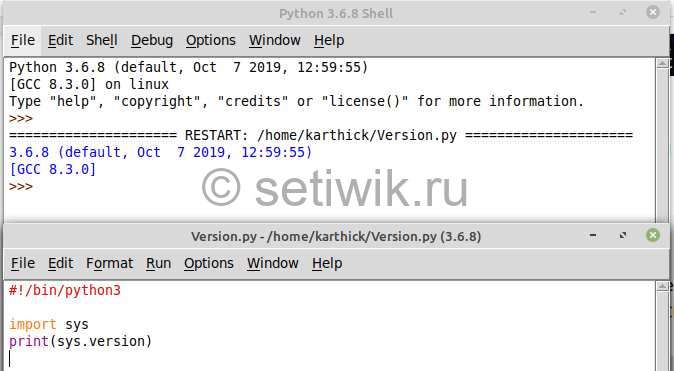
- Написание первой программы Python с использованием IDLE
- Python IDLE Отладчик
- Изменение визуальных настроек IDLE Python
- Заключение
- Install Python3 and IDLE on Ubuntu 18.04
- Installing Python 3
- Installing Python 3.6:
- Installing Python 3.7:
- Installing Python 3 IDLE for Developing Python Program
- For Python 3.6:
- For Python 3.7:
- Using IDLE to Develop a Python 3 Program
- Customizing Python 3 IDLE
- About the author
- Shahriar Shovon
- How to Install IDLE Python IDE on Ubuntu 20.04
- How to Install IDLE?
- Launch IDLE
- Your first Python program in IDLE
- Установка IDLE Python в Ubuntu 20.04
- Установка IDLE Python в Ubuntu 20.04
- Создание первой программы в IDLE
- Выводы
Как установить Python IDLE в Linux
Мы все знаем что в Linux Python установлен по умолчанию, но как я не старался я не смог найти IDLE. В этой инструкции я расскажу как установить Python IDLE в Linux. Но для начала давайте разберем что такое IDLE.
Что такое IDLE
IDLE — это интегрированная и обучающая среда, созданная с помощью Python. В которой используется GUI Tkinter toolkit. В основном этим пользуются новички, чтобы познакомиться с Python.
IDLE — это кроссплатформенное приложение, которое работает с Mac OS, Windows и Linux. Но в операционной системе Windows IDLE устанавливается в месте с Python. Для Mac OS и Linux мы должны установить IDLE отдельно.
Функции IDLE
- Удобный текстовый редактор.
- Раскраска кода.
- Советы и рекомендации.
- Автоматическое отступление.
- Отладчик.
- Просмотр локального и глобального пространства имен.
Если вы новичок в программировании на Python. Или и вообще новичок в программировании, то IDLE это лучшее приложение для начала. Но если вы опытный программист, переходящий с другого языка на Python. Тогда мы рекомендуем более продвинутые редакторы, такие как Pycharm, VScode, Sublime Text, VIM и т. д.
Установка Python IDLE IDE в Linux
В большинстве современных дистрибутивов Linux Python устанавливается по умолчанию и поставляется вместе с приложением IDLE. Но бывает такое что он не установлен, как в моем случае. Тогда вы можете установить его с помощью диспетчера пакетов, как показано ниже.
$ sudo apt install idle [на Debian/Ubuntu для Python2]
$ sudo apt-get install idle3 [на Debian/Ubuntu для Python3]
$ sudo yum install python3-tools [на CentOS/RHEL и Fedora]
После завершения установки введите в терминале «idle» . Так же можно перейти в меню Пуск → «idle» → Запустить приложение.
Когда вы открываете IDLE, вы увидите интерактивный терминал. Для выхода из термина можно использовать горячие клавиши ALT + SPACE.
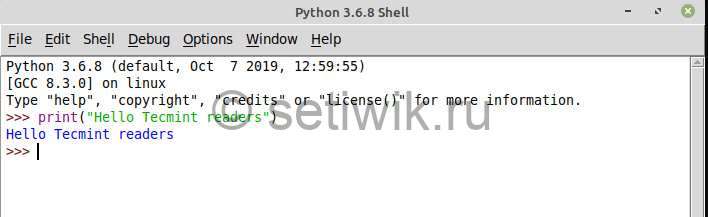
Написание первой программы Python с использованием IDLE
Ну как же можно обойтись без первой программы?
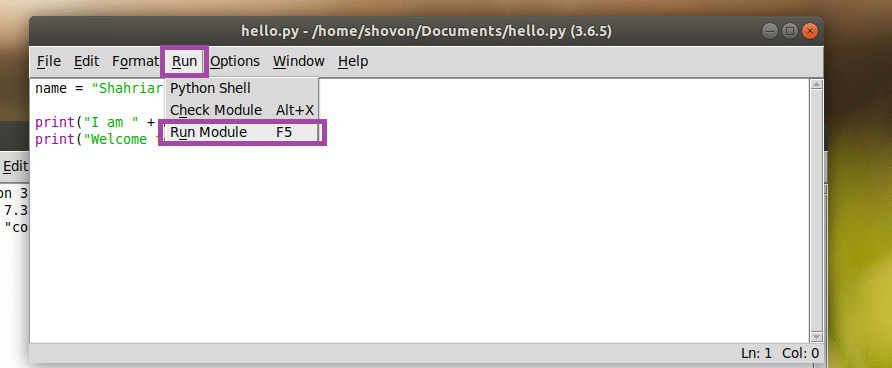
Перейдите в меню Файл → Новый файл → Для того чтоб открыть текстовый редактор. Как только редактор будет открыт, вы сможете писать программу. Чтобы запустить программу из текстового редактора и сохраните файл. Требуется нажать кнопку F5 или Выполнить → Run Module.
Python IDLE Отладчик
Чтобы получить доступ к отладчику, перейдите в Раздел отладка → Отладчик (Debug → Debugger). Режим отладки будет включен, вы можете отлаживать и шагать через код.

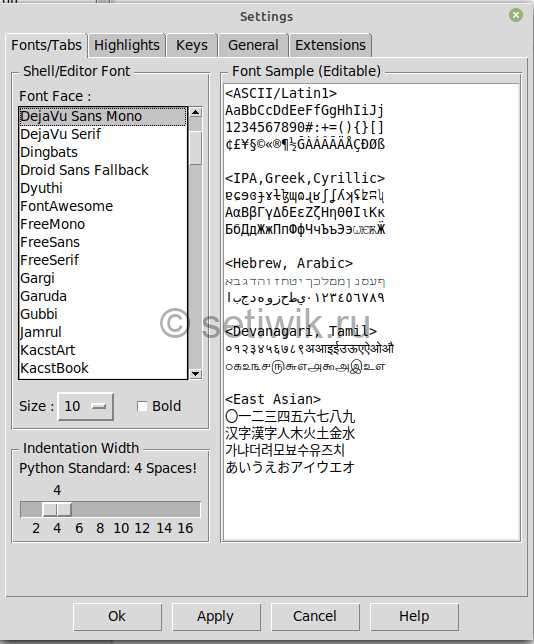
Изменение визуальных настроек IDLE Python
Чтоб поменять цвета, шрифты и другие настройки интерфейса. Перейдите в меню Параметры → Настройка IDLE. Это откроет окно настроек.
Заключение
На сегодня все. Надеюсь вы поняли что такое IDLE и как его установить в Linux. Как написать первую программу python через интерпретатор и текстовый редактор. А так же как получить доступ к отладчику и как изменить настройки IDLE.
Install Python3 and IDLE on Ubuntu 18.04
![]()
Python 3.6 should be installed on Ubuntu 18.04 LTS by default. Python 3.7 (still in beta) is also available in the official package repository of Ubuntu 18.04 LTS at the time of this writing. But it’s not installed by default.
In this article, I will show you how to install Python 3.6 and Python 3.7 in case you don’t have it installed. Let’s get started.
Installing Python 3
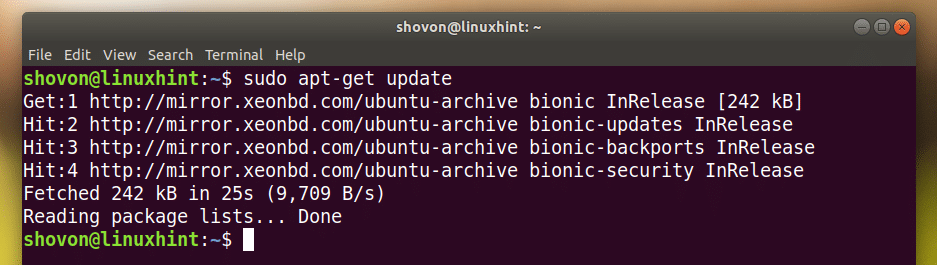
First update the package repository cache with the following command:
The package repository cache should be updated.
Installing Python 3.6:
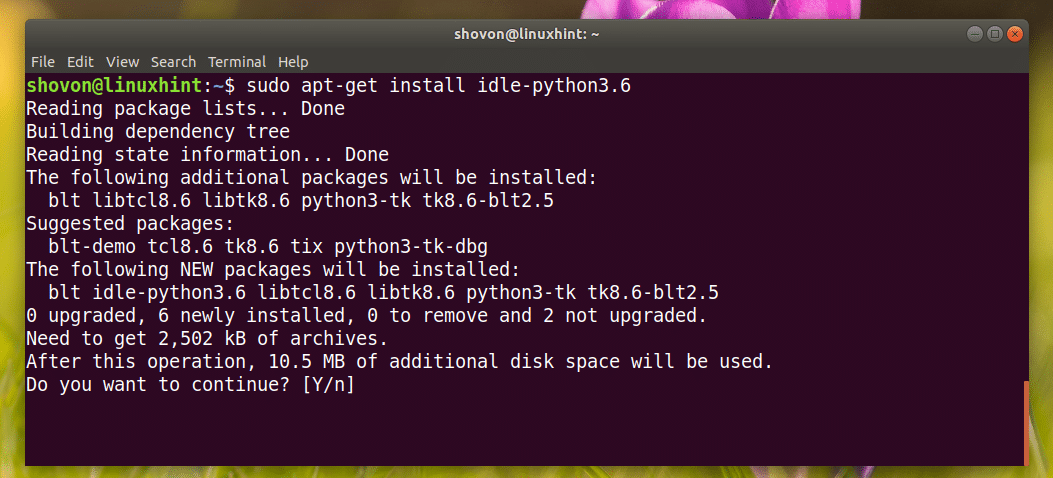
Now to install Python 3.6, run the following command:

As you can see from the screenshot below, Python 3.6 is already installed as I said.

Installing Python 3.7:
To install Python 3.7 (still in beta at the time of this writing), run the following command:
Press y and then press .

Python 3.7 should be installed.

You can run the following command to verify whether Python 3.7 is working:
As you can see, it’s working.

Installing Python 3 IDLE for Developing Python Program
Python 3 IDLE is a graphical program for writing python 3 programs and test them. It is beginner friendly. You can always start writing Python 3 code with Python 3 IDLE. It is lightweight and has nice syntax highlighting ability.
Python 3 IDLE is available in the official package repository of Ubuntu 18.04 LTS.
For Python 3.6:
To install Python 3 IDLE for Python 3.6, run the following command:

Press y and then press to continue.

For Python 3.7:
To install Python 3 IDLE for Python 3.7, run the following command:
Using IDLE to Develop a Python 3 Program
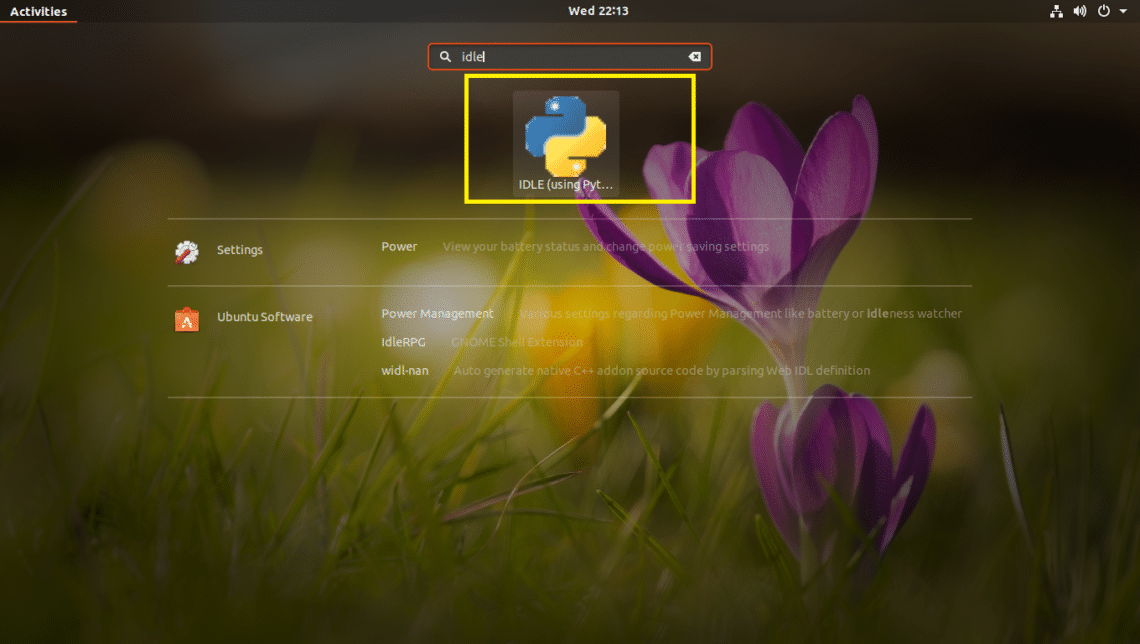
Now that you have Python 3 IDLE installed, you can go to the Application Menu and search for Python 3 IDLE.
You should see the following icon as marked in the screenshot below, click on it.
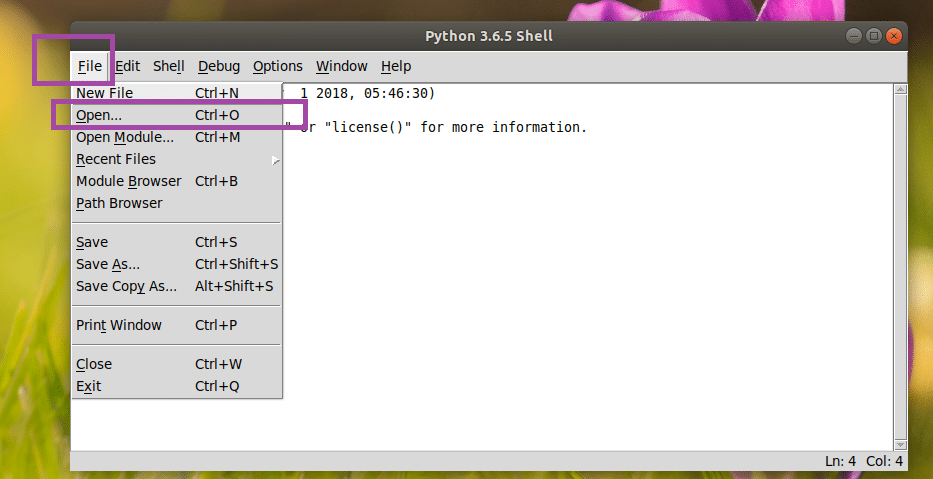
You should see the following window. This is a Python 3.6 shell where you can execute python codes, one line at a time. It is good for testing very simple codes or logics before putting it to your Python 3 source code file.

Now to go to the graphical editor, click on File and you should see the following menu. From here you can click on Open… to open an existing Python 3 source code file in the graphical editor.
NOTE: You can also press + o to open an existing Python 3 source file in the graphical editor.
Or you can click on New File… to create a new file and open it in the graphical editor.
NOTE: You can also press + n to create a new file and open it in the graphical editor.

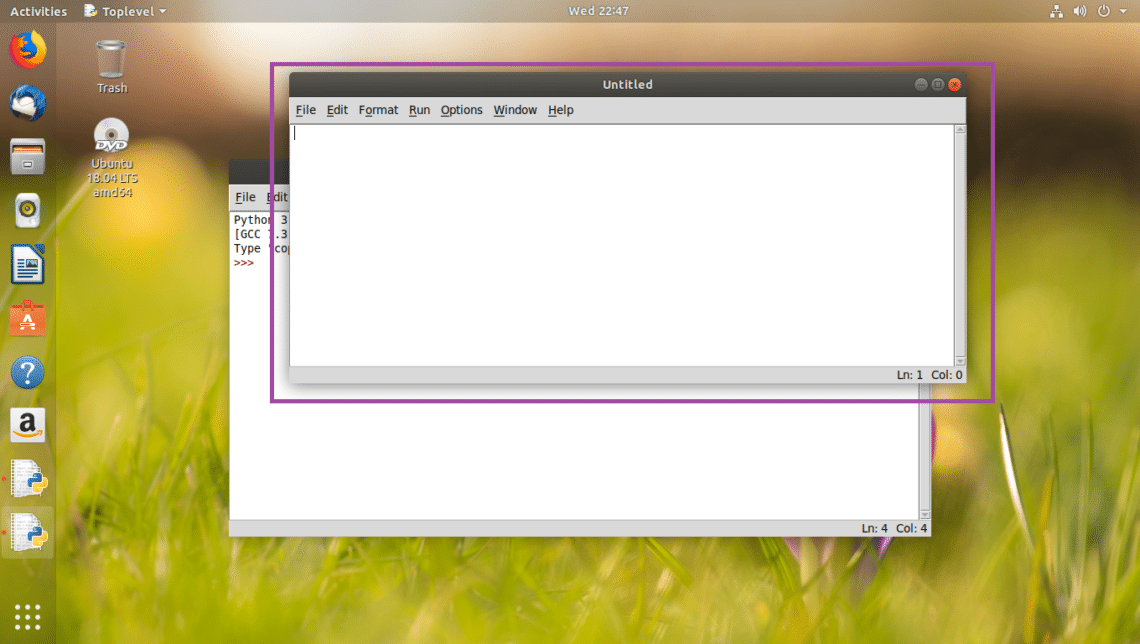
I created a new file, and when you do, it should look something like this. This is the graphical code editor.
Once you write some code in it, save it somewhere on your filesystem. To save the file, click on File and then click on Save as shown in the screenshot below.
NOTE: You can also save the file by pressing + s.

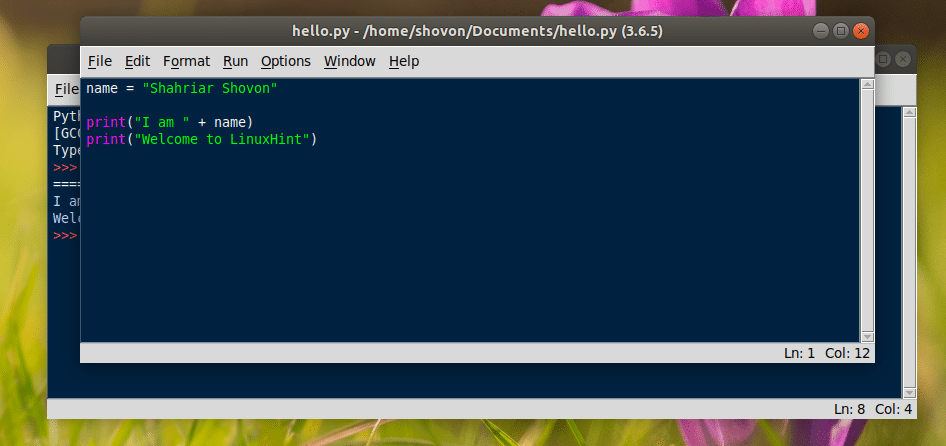
Now let’s write our very first Python 3 program and save it as hello.py somewhere on your filesystem.

To run the program, click on Run and then click on Run Module. You can also press F5 to run the program.
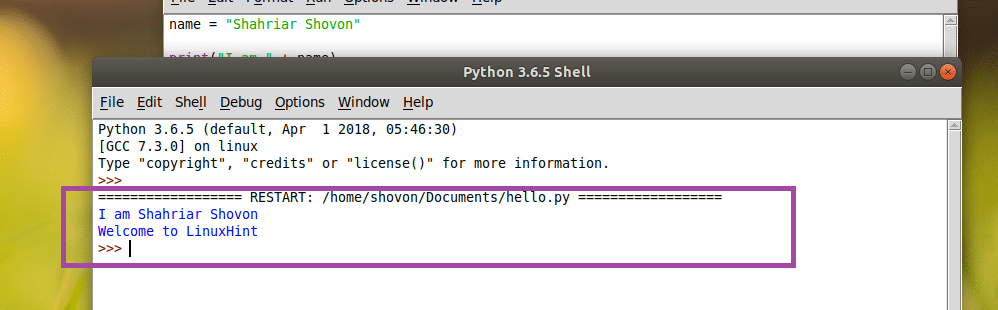
As you can see, the correct output is displayed on the console.
Customizing Python 3 IDLE
You can go to Options and then Configure IDLE to go to the configuration window of Python 3 IDLE.

Settings window should open as you can see in the screenshot below. From the Fonts/Tabs tab, you can change your IDLE font, font size, the default indentation width.

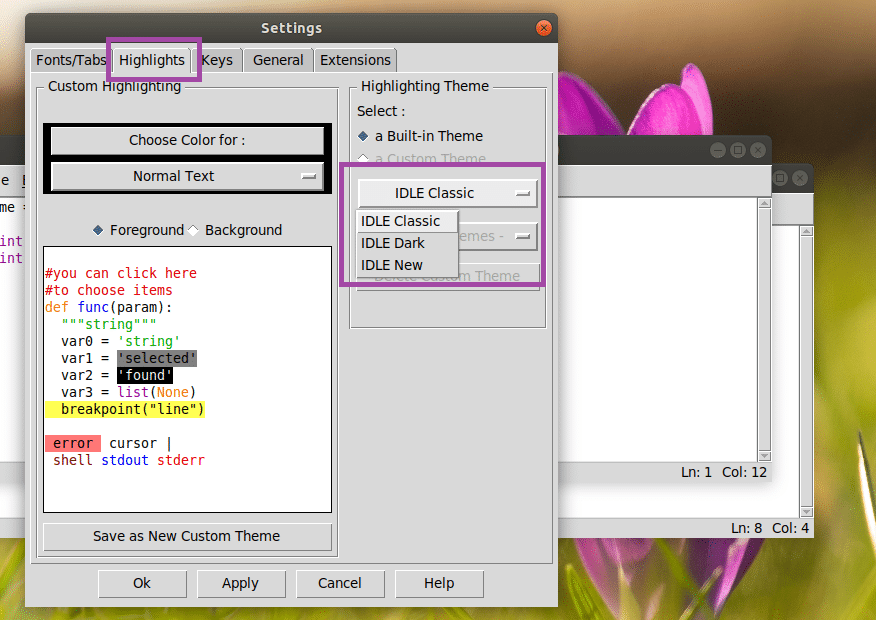
From the Highlights tab, you can change the Color Scheme or Theme of IDLE. By default, IDLE Classic is set. You can also choose IDLE Dark and IDLE New as you can see in the marked section of the screenshot below.
Once you’re done, click on OK. The changes should be applied.
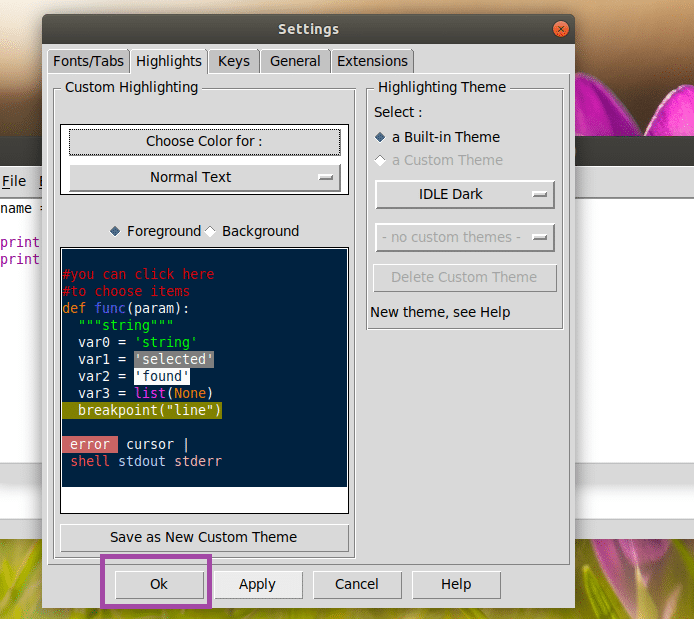
IDLE Dark theme:
That’s how you install Python 3 and start learning Python 3 on Ubuntu 18.04 LTS. Thanks for reading this article.
About the author
Shahriar Shovon
Freelancer & Linux System Administrator. Also loves Web API development with Node.js and JavaScript. I was born in Bangladesh. I am currently studying Electronics and Communication Engineering at Khulna University of Engineering & Technology (KUET), one of the demanding public engineering universities of Bangladesh.
How to Install IDLE Python IDE on Ubuntu 20.04

IDLE stands for Integrated DeveLopment Environment. It is an IDE for Python, written in Python language itself and based on Tkinter with bindings to the Tk widget set. IDLE is most suitable for beginners as it is easy to use and not feature overloaded. Hence, it is very popular in educational environments.
IDLE is a cross-platform IDE solution that comes with a basic feature set that includes:
- Multi-window text editor with syntax highlighting, auto-completion, smart indent, and other features to make coding easy.
- Python shell with syntax highlighting.
- Integrated debugger with stepping, persistent breakpoints, and call stack visibility.
For more information on IDLE, visit the following official documentation:
In this article, we will be installing IDLE through the Ubuntu command line. The article also explains how to launch IDLE and use it to write and run a simple Python script.
We have run the commands and procedures mentioned in this article on a Ubuntu 18.04 or Ubuntu 20.04 system.
How to Install IDLE?
Python is installed by default on all the latest Ubuntu releases and it also usually comes with the IDLE application. However, if you have a minimal installation of Ubuntu that lacks any IDLE UI application, you can install it by following this method:
Open the Ubuntu command line, The Terminal, either through the system Dash or the Ctrl+Alt+T shortcut.
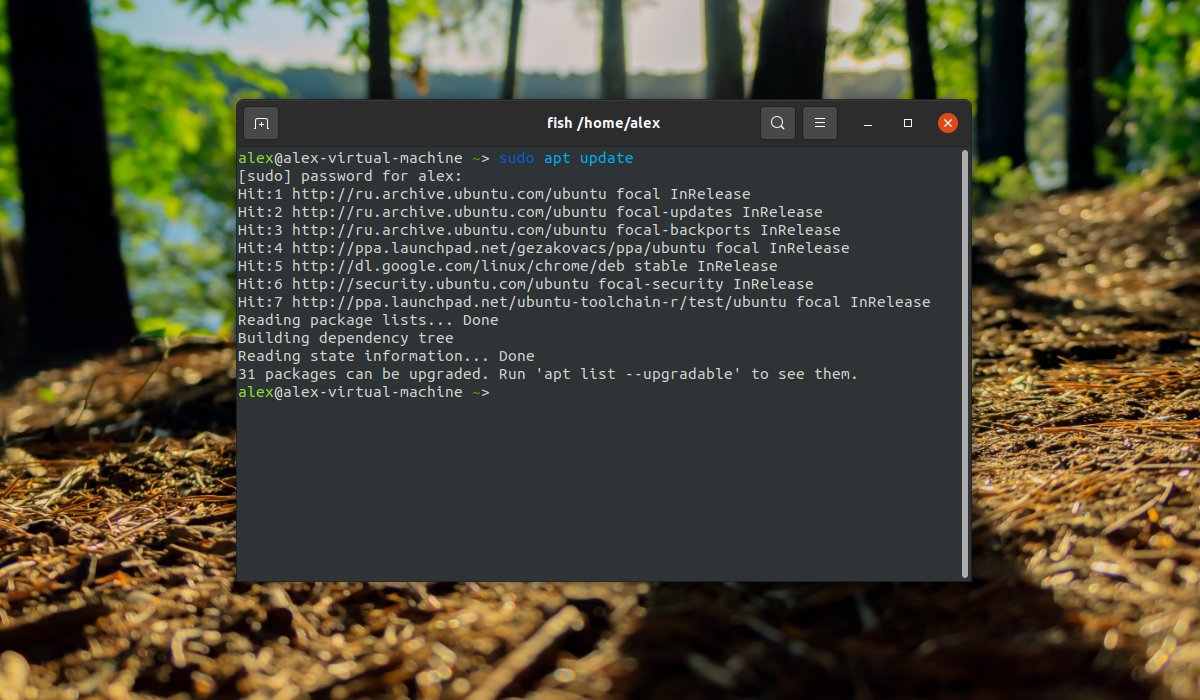
Then, you need to update your system’s repository index through the following command as sudo:
This way your system’s repository gets in-line with the Internet repositories and that helps you in installing the latest version of any available software.

You need to run this command as sudo because only an authorized user can add/remove, update, and configure software on Ubuntu. The system will ask you the password for sudo and then execute the rest of the command when you have provided a correct password.
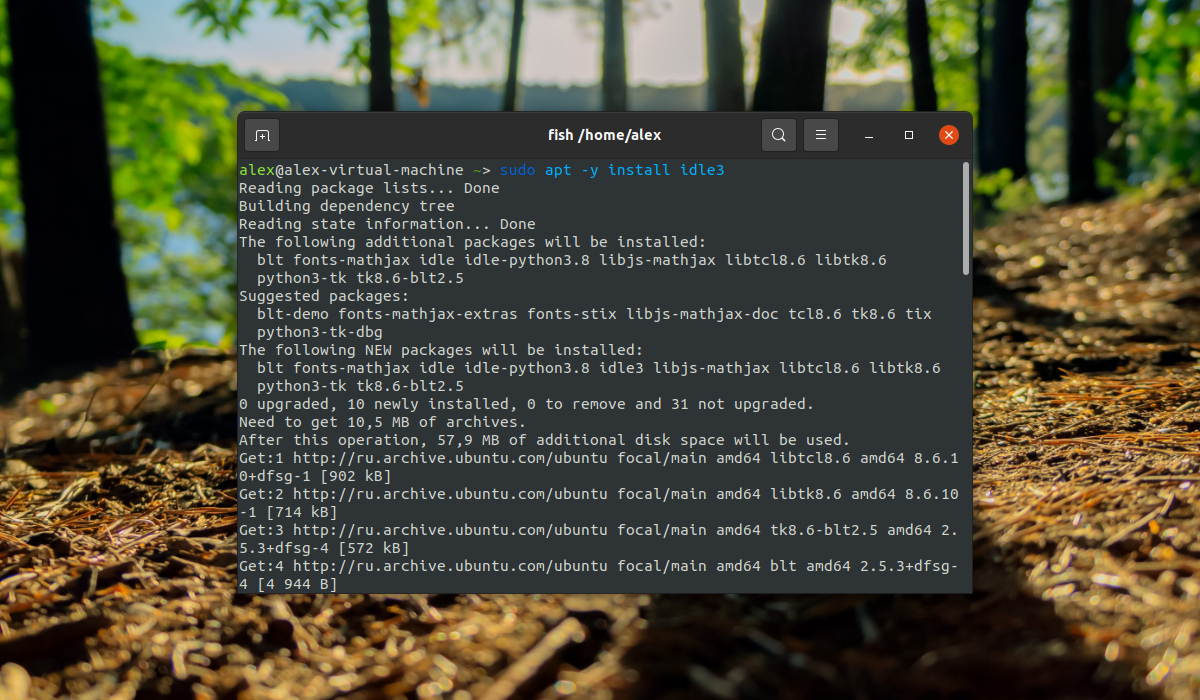
The next step is to run the following command in order to install IDLE3. This is the best-suited version when you have either Python 2 or Python 3 installed on your system.
$ sudo apt-get install idle3

The system might ask you for a Y/n input in order to make sure that you indeed want to install the software. Please enter Y and then hit Enter, after which IDLE3 will be installed on your system.
Launch IDLE
You can launch IDLE both through the command line or the Ubuntu UI.
Run the following command in the Terminal in order to launch IDLE.

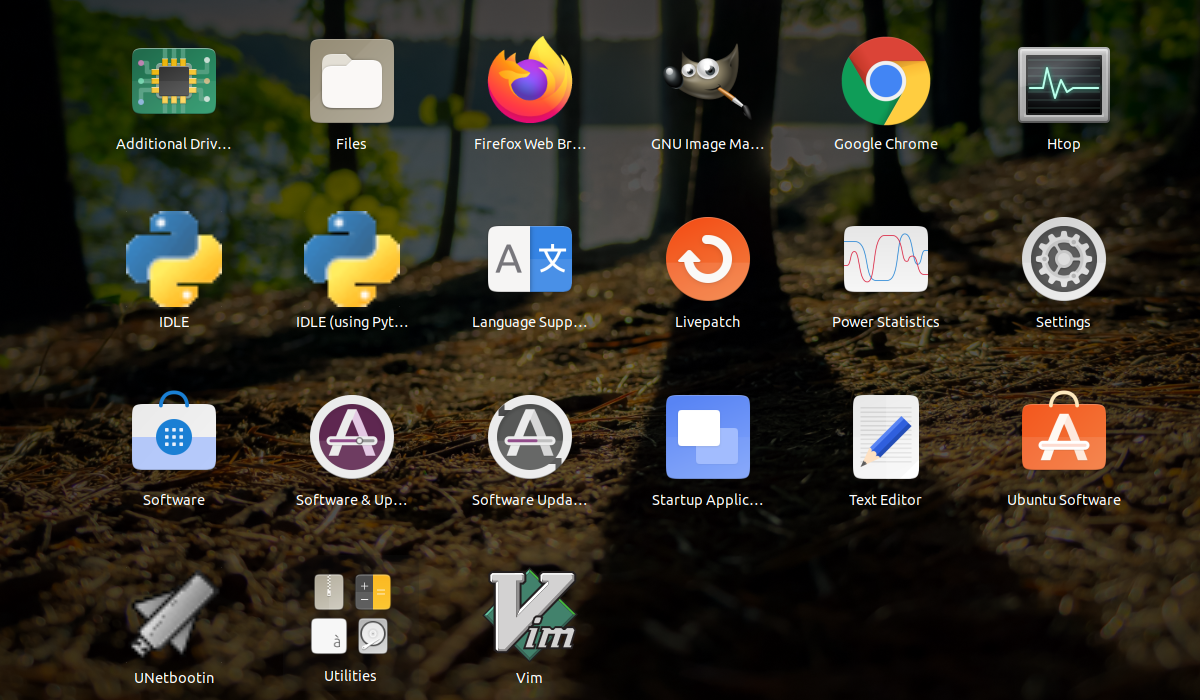
Or else, enter keywords relevant to IDLE in your Ubuntu Dash search as follows:

This will list all the IDLE applications installed on your system. Click on any one of them to Launch the Python integrated development environment.
Your first Python program in IDLE
Open the IDLE application, which by default looks like this:

Your first line of code starts from where you see the three “greater than” or “>” symbols.
Place the cursor at this point and write or copy & paste the following line of code:
print("This is my first Python program :) :)") This is a simple print statement that can be used to print anything inside the parentheses “( )”, on the screen.
When you hit Enter, the output is displayed as follows:

You can even choose to save the program (through the Save/Save As option from the File menu) and access it later (through the Open option from the File menu or directly by clicking it from where you have saved it).
After reading this article, you can integrate the IDLE Python development environment into your Ubuntu system and make the best use of its UI-based simple and easy to use feature set.
Установка IDLE Python в Ubuntu 20.04
IDLE (расшифровывается как Integrated Development and Learning Environment — Интегрированная среда для разработки и обучения) — интегрированная среда разработки на языке Python. Официально — искажение от слова IDE, но на самом деле названа в честь Эрика Айдла (Eric Idle) из комедийной комик группы Монти Пайтон.
Преимущества IDLE заключается в подсветке синтаксиса, поддержке автозаполнения и встроенным отладчиком. Поставляется вместе с Python и может использоваться на многих платформах, среди которых Windows, Mac OS, Unix-подобные ОС. В данной статье будет рассмотрена установка данной IDE в операционной системе Ubuntu 20.04 и запуск первой программы.
Установка IDLE Python в Ubuntu 20.04
Для установки сначала необходимо обновить индекс пакетов при помощи команды:
Так как интерпретатор языка программирования Python уже установлен в Ubuntu 20.04 по умолчанию, то можно сразу переходить к установке самой IDLE выполнив команду:
Для запуска IDLE можно воспользоваться 2 способами. Первый способ заключается в запуске из терминала для этого необходимо ввести команду:

Второй способ — запуск при помощи ярлыка из меню с приложениями:
Создание первой программы в IDLE
Запустите IDLE любым из вышеперечисленных способ и в открывшемся окне интерпретатора введите следующий код:
print («Первая программа созданная в IDLE!»)
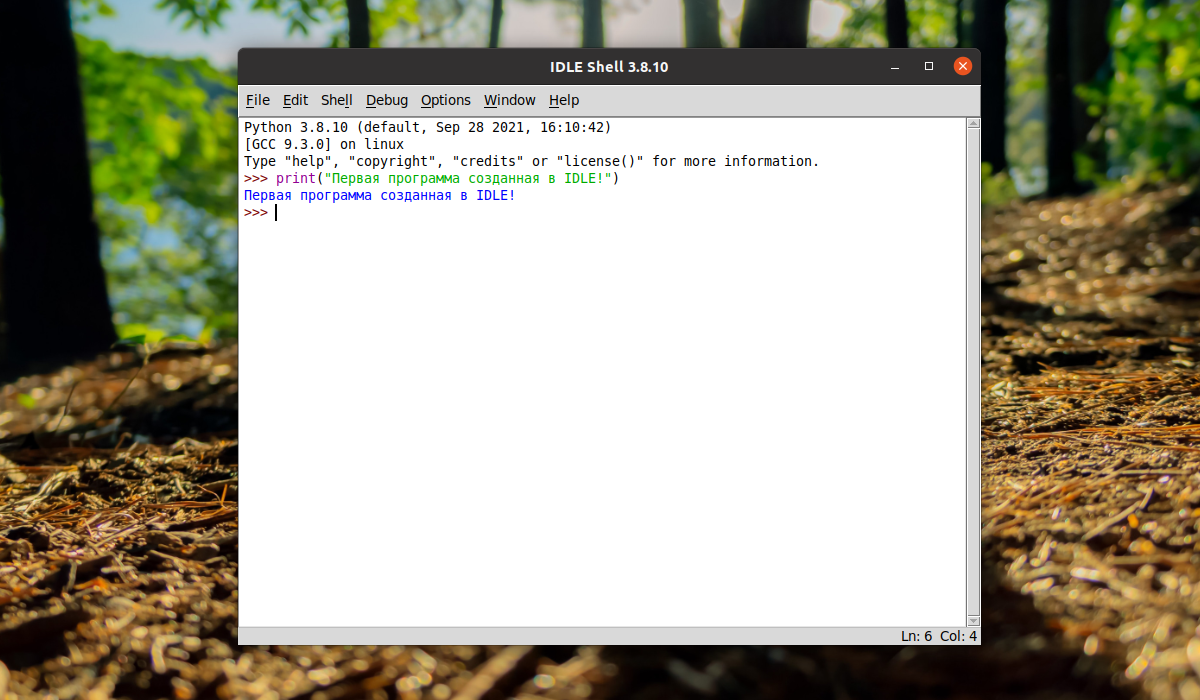
Нажмите на клавишу Enter и в терминале отобразится фраза — Первая программа созданная в IDLE!
Выводы
В этой небольшой статье была рассмотрена установка IDLE в Ubuntu 20.04, а также было показано написание первой программы, выводящее строку в терминал.
Обнаружили ошибку в тексте? Сообщите мне об этом. Выделите текст с ошибкой и нажмите Ctrl+Enter.