- Selenium Client Driver
- Supported Python Versions
- Installing
- Drivers
- Example 0:
- Example 1:
- Example 2:
- Selenium Server (optional)
- Use The Source Luke!
- Installing ChromeDriver and Python Selenium
- Introduction
- Installing Python
- Mac
- Linux
- Windows
- Installing and configuring Selenium
- Configuring a WebDriver browser
- Writing your first automated tests
- Alternative to WebDrivers: Reflect
- Next Steps
Selenium Client Driver
The selenium package is used to automate web browser interaction from Python.
| Home: | https://selenium.dev |
| GitHub: | https://github.com/SeleniumHQ/Selenium |
| PyPI: | https://pypi.org/project/selenium/ |
| IRC/Slack: | Selenium chat room |
Several browsers/drivers are supported (Firefox, Chrome, Internet Explorer), as well as the Remote protocol.
Supported Python Versions
Installing
If you have pip on your system, you can simply install or upgrade the Python bindings:
Alternately, you can download the source distribution from PyPI (e.g. selenium-4.10.0.tar.gz), unarchive it, and run:
Note: You may want to consider using virtualenv to create isolated Python environments.
Drivers
Selenium requires a driver to interface with the chosen browser. Firefox, for example, requires geckodriver, which needs to be installed before the below examples can be run. Make sure it’s in your PATH , e. g., place it in /usr/bin or /usr/local/bin .
Failure to observe this step will give you an error selenium.common.exceptions.WebDriverException: Message: ‘geckodriver’ executable needs to be in PATH.
Other supported browsers will have their own drivers available. Links to some of the more popular browser drivers follow.
| Chrome: | https://chromedriver.chromium.org/downloads |
| Edge: | https://developer.microsoft.com/en-us/microsoft-edge/tools/webdriver/ |
| Firefox: | https://github.com/mozilla/geckodriver/releases |
| Safari: | https://webkit.org/blog/6900/webdriver-support-in-safari-10/ |
Example 0:
from selenium import webdriver browser = webdriver.Firefox() browser.get('http://selenium.dev/')
Example 1:
- open a new Firefox browser
- load the Yahoo homepage
- search for “seleniumhq”
- close the browser
from selenium import webdriver from selenium.webdriver.common.by import By from selenium.webdriver.common.keys import Keys browser = webdriver.Firefox() browser.get('http://www.yahoo.com') assert 'Yahoo' in browser.title elem = browser.find_element(By.NAME, 'p') # Find the search box elem.send_keys('seleniumhq' + Keys.RETURN) browser.quit()
Example 2:
Selenium WebDriver is often used as a basis for testing web applications. Here is a simple example using Python’s standard unittest library:
import unittest from selenium import webdriver class GoogleTestCase(unittest.TestCase): def setUp(self): self.browser = webdriver.Firefox() self.addCleanup(self.browser.quit) def test_page_title(self): self.browser.get('http://www.google.com') self.assertIn('Google', self.browser.title) if __name__ == '__main__': unittest.main(verbosity=2)
Selenium Server (optional)
For normal WebDriver scripts (non-Remote), the Java server is not needed.
However, to use Selenium Webdriver Remote , you need to also run the Selenium server. The server requires a Java Runtime Environment (JRE).
Run the server from the command line:
java -jar selenium-server-4.10.0.jar
Then run your Python client scripts.
Use The Source Luke!
Installing ChromeDriver and Python Selenium
A step-by-step guide for installing and running Selenium tests in Python that use the Chrome WebDriver.


Photo by Wesson Wang on Unsplash
Table of contents

Introduction
Automated testing is an essential part of web development that massively increases productivity in a team. By outsourcing the repetitive task of testing our web applications to computers, we free up more time to work on shipping features while ensuring a bug-free experience for our users.
With this in mind, we’ll be exploring how to use one of the most capable automated testing tools, Selenium, to run a sample automated test using the WebDriver API on a live page.
By the end of this tutorial, we will:
- Install and configure a Chrome Selenium instance in WebDriver using Python
- Write two small automated tests for a search feature
Installing Python
To follow along, you’ll need basic programming knowledge and Python installed on your computer.
If you don’t already have Python installed on your machine, go ahead and run the following commands in your terminal.
Mac
/bin/bash -c "$(curl -fsSL https://raw.githubusercontent.com/Homebrew/install/master/install.sh)"` export PATH="/usr/local/opt/python/libexec/bin:$PATH" brew install python Linux
sudo apt install python3 sudo apt install python3-pip Windows
Install Chocolatey and then run the following commands below
choco install python python -m pip install -U pip Installing and configuring Selenium
Now that we have Python set up, we can go ahead and set up Selenium and WebDriver. This should be relatively straightforward as there are only two steps required to accomplish this. There are multiple methods available for installing Selenium depending on your programming language. You could download the executable directly but for this tutorial, we’ll be using pip to do so.
- Open up your terminal and using pip , we can install Selenium’s Python library with the following command:
pip install selenium # or pip3 install selenium python -c "import selenium; print(selenium.**version**)" If this command throws an error, try using pip3 to install Selenium again.
Configuring a WebDriver browser
Next, we need to configure a browser driver for Selenium to run our tests in. A browser driver allows us to spin up an instance of any major browser like Chrome, Chromium, Firefox, etc.
There are multiple methods of setting up a browser driver, but to keep things simple we’ll use a third-party Python library called Webdriver Manager to get the correct driver and configure it.
Download the webdriver-manager library using pip :
pip install webdriver-manager # or pip3 install webdriver-manager Create a test.py script and open it in your code editor of choice.
touch test.py code test.py # or open the file directly Import the library and set up a browser driver:
# test.py from webdriver_manager.chrome import ChromeDriverManager from selenium import webdriver from selenium.webdriver.chrome.service import Service as ChromeService browser = webdriver.Chrome(service=ChromeService(ChromeDriverManager().install())) browser.implicitly_wait(5) # Add tests here Writing your first automated tests
We now have all we need to start writing automated tests using the WebDriver API in Python.
To demonstrate the concept, we’ll write two small tests against Wikipedia to verify that a user can search for a term from the homepage.
Sample Test — A user can type and get suggestions
- As a user, I can type a search term into an input.
- When I type into the input field, I get a list of suggestions
- Open up the test.py file and add the following import
from selenium.webdriver.common.by import By Visit the Wikipedia homepage using the browser we instantiated in the previous section
browser.get("https://wikipedia.org/") Note: To know which attribute and element to query, you need to have access to the website’s source code. Only run automated scripts on sites in the public domain or that you own.
Query the input field and type a sample search query
search_input = browser.find_element(By.ID, "searchInput") search_input.send_keys("Python") Assert that we get a list of suggestions for the search query
suggestions = browser.find_elements(By.CLASS_NAME, 'suggestion-link') assert len(suggestions) > 0 Note: suggestion-link is the class name of the element that contains the title of a suggestion.
We can also assert that each suggestion actually contains the search query we’re searching for. This is done by looping over each suggestion and asserting that the title text of the suggestion contains our search query
for suggestion in suggestions: title_element = suggestion.find_element( By.CLASS_NAME, 'suggestion-highlight') assert re.search(query, title_element.text) Add a print statement at the end to confirm that the test passed and then kill the browser instance using the .quit method.
print("tests passed") browser.quit() At this stage, we now have a simple automated test that types into an input field and verifies that we get suggestions as we type.
Run the test by opening up your terminal and running:
If you see a test passed output on your terminal, congratulations, you just wrote a real automated test.
Let’s extend this test to explore more features of WebDriver.
Sample Test — Clicking on a suggestion takes me to the appropriate page
Note: You should continue from the previous step and add the following code before the print and browser.quit() commands
Click on the first suggestion
Assert that the browser navigates to the appropriate page by checking if the current page url contains our search query.
assert re.search(query, browser.current_url) Assert that the current page heading contains our search query
page_heading = browser.find_element(By.ID, "firstHeading") assert re.search(query, page_heading.text) At this stage, your test file should look like this:
from webdriver_manager.chrome import ChromeDriverManager from selenium import webdriver from selenium.webdriver.chrome.service import Service as ChromeService from selenium.webdriver.common.by import By import re browser = webdriver.Chrome( service=ChromeService(ChromeDriverManager().install())) browser.implicitly_wait(5) query = "Python" browser.get("https://wikipedia.org/") search_input = browser.find_element(By.ID, "searchInput") search_input.send_keys(query) suggestions = browser.find_elements(By.CLASS_NAME, 'suggestion-link') assert len(suggestions) > 0 for suggestion in suggestions: title_element = suggestion.find_element( By.CLASS_NAME, 'suggestion-highlight') assert re.search(query, title_element.text) suggestions[0].click() assert re.search(query, browser.current_url) page_heading = browser.find_element(By.ID, "firstHeading") assert re.search(query, page_heading.text) print("tests passed") browser.quit() Run the test again running python <path_to_test_file> in your terminal and confirm that the text tests passed is displayed.
Alternative to WebDrivers: Reflect
As learned above, getting started with Selenium in Python is not straightforward. In particular, you’ve to download and configure the right web driver based on your target browser. Even though Webdriver manager makes everything easier, that remains a cumbersome and tedious task. It would be great if you could create automated tests for all browsers without writing any code, wouldn’t it? Well, this is exactly what Reflect is all about!
Reflect is a no-code testing platform that allows to you create and run tests across all popular browsers in the cloud.
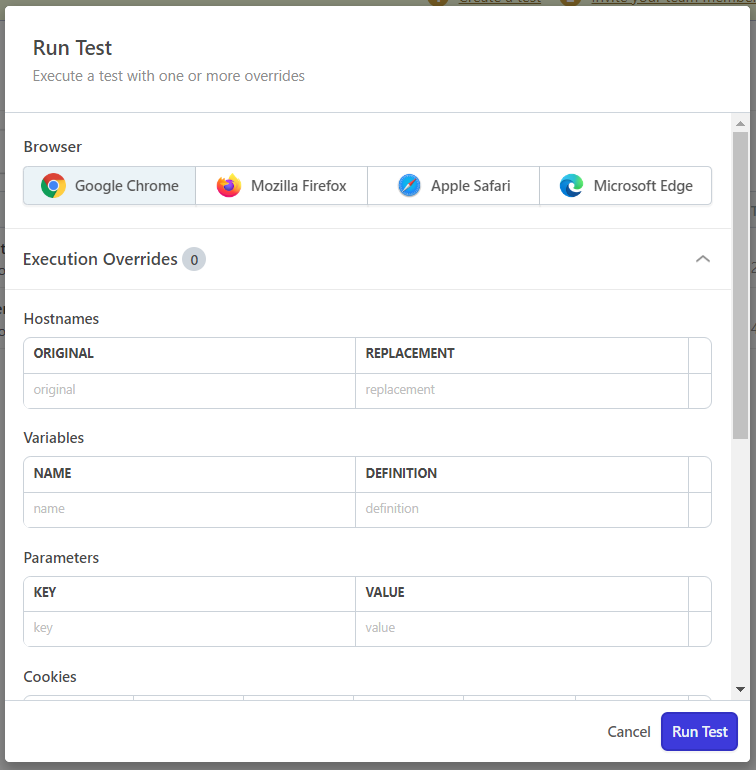
With Reflect, you can define automated tests for your web applications without having to configure any web drivers. Actually, you don’t need any coding experience. Thanks to its point-and-click UI, you can quickly create tests directly in the browser and then run them on desktop or mobile platforms in the cloud.
Using a cloud platform for automated cross-browser testing like Reflect means you don’t have to build and maintain your own testing infrastructure. That’s a hassle-free way to get the benefits of automated testing without the headache of managing a testing grid. Avoid writing complex code and wasting time in web driver configurations, try Reflect for free today!
Next Steps
We’ve only briefly explored the features of WebDriver and the variety of ways it allows us to interact with our web pages and test critical user flows.
To recap, we installed the following packages:
We’ve also used various Python and WebDriver APIs to write two small automated tests. Also, we saw how a powerful, no-code, cloud solution testing tool like Reflect can save you from any configuration issue. Hopefully you found this article useful!