- Install and Use Qemu on Ubuntu
- Add user to appropriate groups
- Installing another Linux virtually with Qemu
- Enabling shared folders in Qemu (optional)
- Enabling shared clipboard in Qemu (optional)
- Enabling auto-resize in Qemu (optional)
- Want to use a plug-and-play version of Qemu?
- How to Install QEMU/KVM on Ubuntu to Create Virtual Machines
- Step 1: Check Virtualization Enabled in Ubuntu
- Step 2: Install QEMU/KVM on Ubuntu 20.04/22.04
- Step 3: Launch Virtual Machine Manager in Ubuntu
- Step 4: Create Virtual Machine with QEMU/KVM in Ubuntu
Install and Use Qemu on Ubuntu
Before jumping to the installation, let’s check whether your machine supports the virtualization or not.
To do so, use the following command:
LC_ALL=C lscpu | grep VirtualizationIf you have an intel processor, it should bring the following output:

And if you have an AMD processor, it should get you the following output:
Also, make sure your system has multiple cores so that you can allocate some to your VM and still have enough to power the host machine.
And if you’re not sure, use the following command and the output should be more than zero:
egrep -c '(vmx|svm)' /proc/cpuinfo
Once you are all set, you can install Qemu and KVM on Ubuntu using the following command:
sudo apt install qemu qemu-kvm virt-manager bridge-utilsReboot your system once the installation is over.
Add user to appropriate groups
To make Qemu work, you’d have to add your user to two groups: libvirt-kvm and libvirt .
To do so, use the following commands one by one:
sudo useradd -g $USER libvirtsudo useradd -g $USER libvirt-kvmNext, enable and start the libvirt service:
sudo systemctl enable libvirtd.service && sudo systemctl start libvirtd.serviceThat’s it! The installation of Qemu is done.
Installing another Linux virtually with Qemu
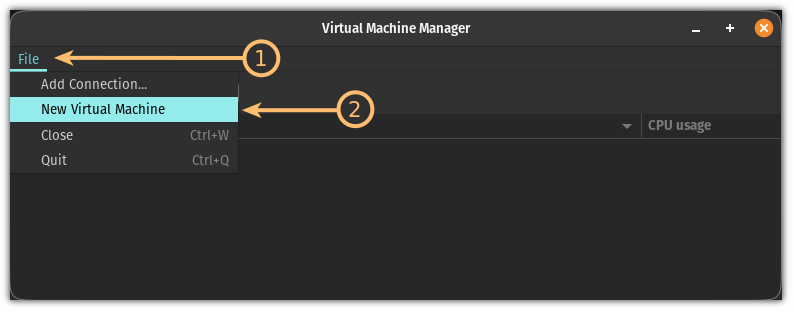
First, open the Virtual Machine Manager from the system menu:

Next, click on the File menu and choose the New Virtual Machine option:
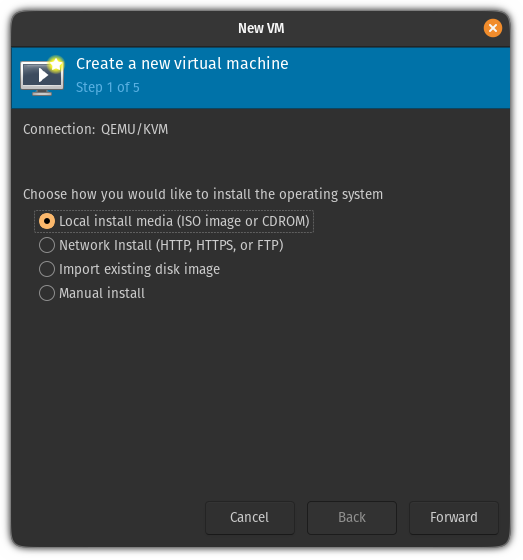
From here, choose the first option Local install media which will allow you to choose the ISO from your file manager:
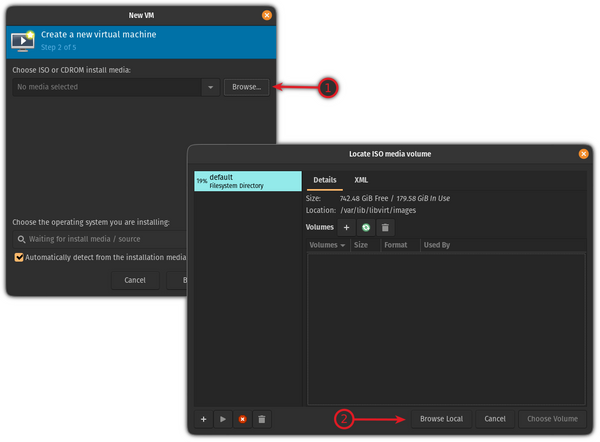
Next, you will be asked to add the ISO file. Here, click on the Browse button; it will open a new prompt, and there, click on the browse local.
It will open the file manager and from there, select the ISO file:
In most cases, the ISO file will be detected but if you find a situation where it does not detect it automatically, follow the given steps:
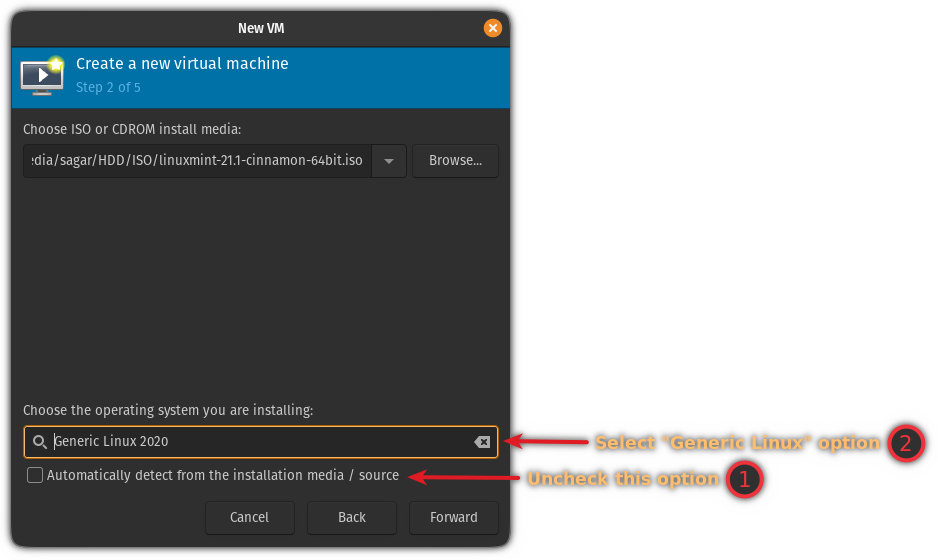
- Uncheck the Automatically detect from the source option
- Choose the Generic Linux option
Next, you will be asked to allocate memory and storage as per your needs. I would recommend going with a minimum of 2 cores, 4 GB of RAM, and 25 GB of storage for the desktop version:
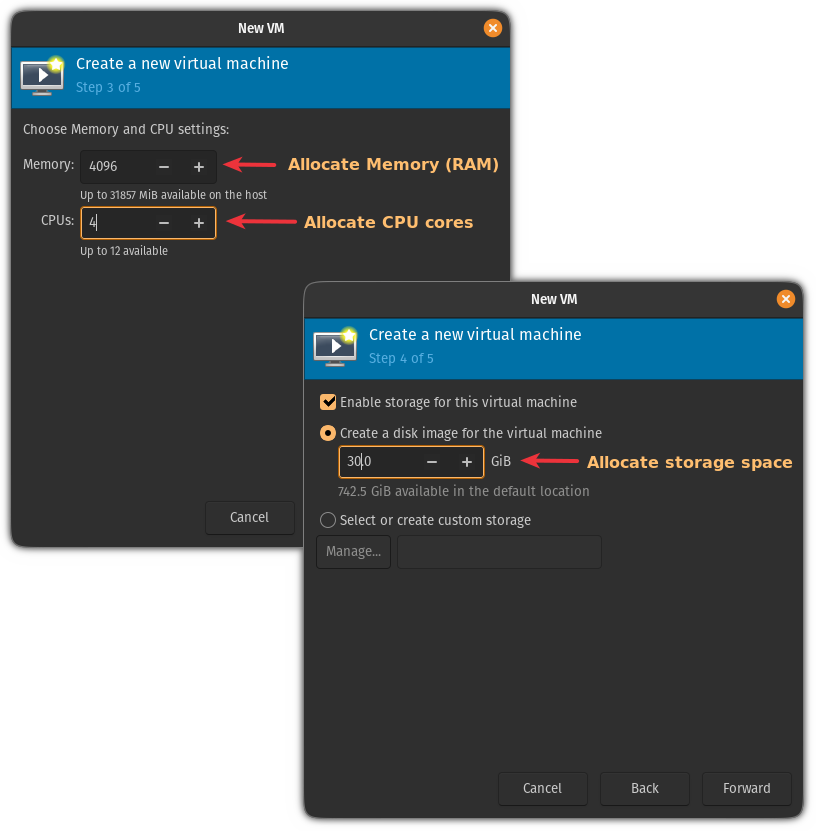
Except for the disk space, system resources like CPU and RAM are only used when running the OS in VM.
And finally, give the appropriate name to your VM; once done, click on the finish button:
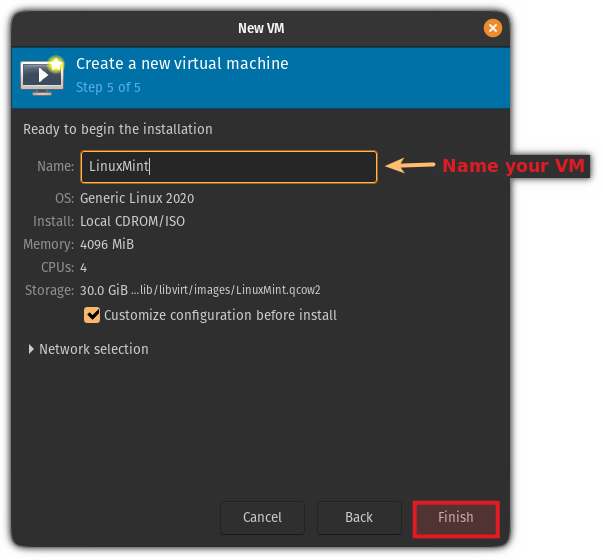
It will load the ISO, so you can start the installation from here.
That’s done. You may enjoy your VM but you’ll even enjoy it better if you enable shared folder, clipboard sharing, etc. The following few sections show how to do that.
Enabling shared folders in Qemu (optional)
In this section, I will show you how you can share the existing directory of the host machine with the VM.
To do so, you’d have to perform the following:
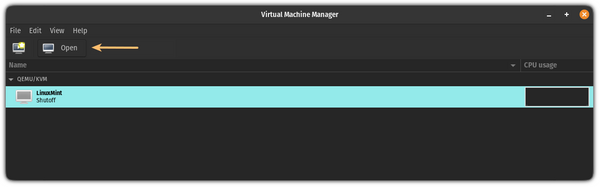
So first, open the Virtual Machine Manager from the system menu, select the VM, and click the Open button to manage the console:
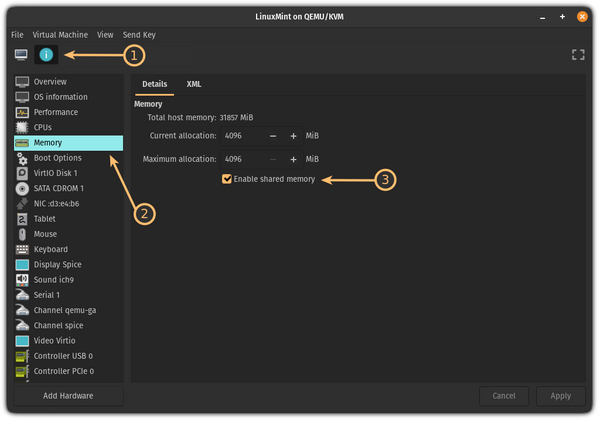
Now, click on the info button, select the Memory and enable the shared memory:
Next, click on the Add Hardware button, select the Filesystem option.
Here, you’d have to do the following:
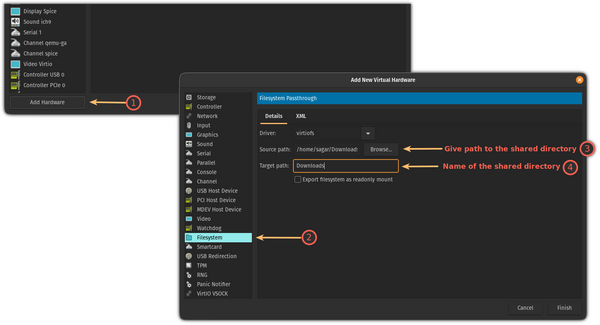
- Add a path to the directory you want to share in the Source path section
- Add the name of the directory in the Target path section
Once done, click on the Finish button and start the VM. Create a directory in the same location with the same name and location in the VM
In VM, open the terminal and use the following syntax to mount the shared directory:
sudo mount -t virtiofs sharename path/to/shared/directoryIn my case, it was the Downloads directory, so I will be using the following:
sudo mount -t virtiofs Downloads /home/sagar/Downloads
But that’s a temporary solution.
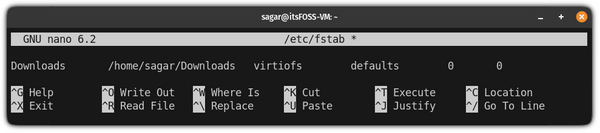
To make it permanent, you’d have to make create an entry in /etc/fstab In the VM.
To do so, first, open the /etc/fstab config file using the following:
Go to the end of the file in the nano text editor using Alt + / and use the following syntax to create an entry:
sharename path/to/shared/directory virtiofs defaults 0 0Here’s what my config looks like:
Here I’ve shown how I created a new file in my host machine in the Downloads directory and the changes were reflected in my VM:
So now you can use this shared folder to transfer files between the host and VM without any issues!
Enabling shared clipboard in Qemu (optional)
To enable the shared clipboard, all you have to do is install the spice-vdagent utility in the VM.
So if your VM is Ubuntu/Debian based, you can use the following:
sudo apt install spice-vdagentsudo pacman -S spice-vdagentsudo yum install spice-vdagentOnce you are done with the installation, reboot your VM, and the clipboard should work as intended!
Enabling auto-resize in Qemu (optional)
The auto-resize feature is nothing but when you resize the VM window, the VM display will adapt to the change in size immediately:
To enable the auto-resize in Qemu, you will have to follow 2 simple steps:
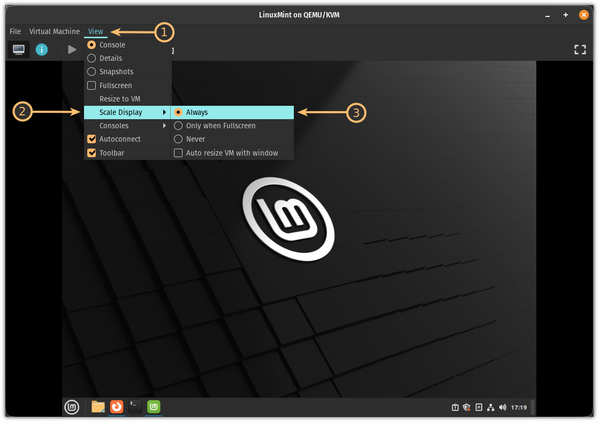
- Click on the View (from top menubar)
- Select the Scale Display option and choose the Always option
Want to use a plug-and-play version of Qemu?
In this tutorial, I went through how you can manually install a VM in Qemu but what if I tell you that you can automate the whole process, like allocating storage, RAM, etc?
Yes, it gives the same efficiency but comes in handy when you want to create a new VM ASAP! The tool is called Quickgui and we have a dedicated tutorial for the installation:
I hope you will find this guide helpful. And if you have any queries, feel free to ask in the comments.
How to Install QEMU/KVM on Ubuntu to Create Virtual Machines
Virtualization is one of the most widely used technologies both in enterprise and home environments. Whether you are a seasoned IT expert, a programmer, or an IT novice, virtualization can be one of your greatest friends.
Virtualization is the abstraction of a computer’s hardware resources using a software application known as a hypervisor. The hypervisor creates an abstraction layer over computer hardware and virtualizes various components of the system including but not limited to memory, processor, storage, USB devices, etc.
In doing so, it allows you to create virtual computers also known as virtual machines off of the virtualized elements, and each virtual machine, also known as a guest, runs independently from the host system.
KVM, short for Kernel-based Virtual Machine is an open-source type 1 hypervisor (bare metal hypervisor) that is integrated into the Linux kernel. It allows you to create and manage virtual machines running Windows, Linux, or UNIX variants such as FreeBSD, and OpenBSD.
As mentioned earlier, each virtual machine has its own virtual resources such as storage, memory, CPU, network interfaces, USB interfaces, and video graphics to mention a few.
QEMU (Quick Emulator) is a software module that emulates various components of computer hardware. It supports full virtualizations and works alongside KVM to provide a holistic virtualization experience.
In this guide, we will demonstrate how to install QEMU/KVM on Ubuntu 20.04 / 22.04 distributions.
Step 1: Check Virtualization Enabled in Ubuntu
To start off check if your CPU supports virtualization technology. Your system needs to have an Intel VT-x (vmx) processor or AMD-V (svm) processor.
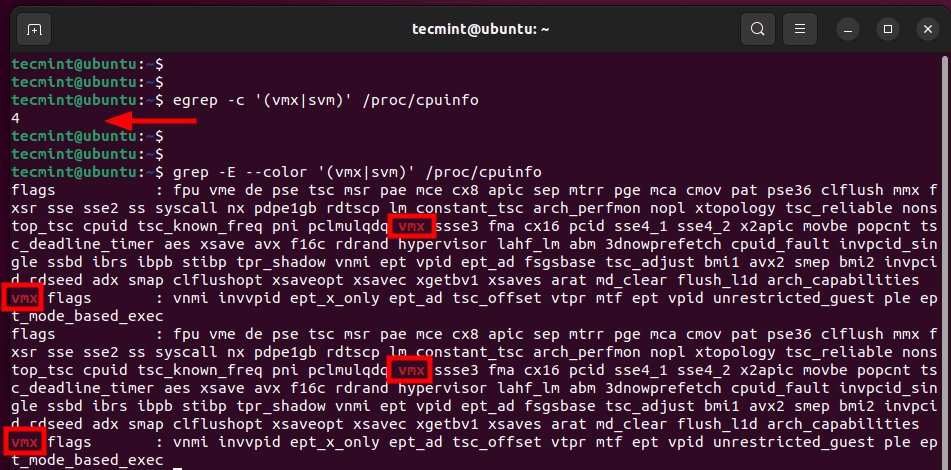
To verify this, run the following egrep command.
$ egrep -c '(vmx|svm)' /proc/cpuinfo
If Virtualization is supported, the output should be greater than 0, for example, 2,4,6, etc.
Alternatively, you can run the following grep command to display the type of processor your system supports. In our case, we are running Intel VT-x denoted by the vmx parameter.
$ grep -E --color '(vmx|svm)' /proc/cpuinfo
Equally important, check if KVM virtualization is supported by running the following command:

If the kvm-ok utility is missing, install the cpu-checker package as follows.
$ sudo apt install cpu-checker -y
Now that we have verified that our system supports KVM virtualization, let us proceed and install QEMU.
Step 2: Install QEMU/KVM on Ubuntu 20.04/22.04
Next up, update the package lists and repositories as follows.
Thereafter, install QEMU/KVM alongside other virtualization packages as follows:
$ sudo apt install qemu-kvm virt-manager virtinst libvirt-clients bridge-utils libvirt-daemon-system -y
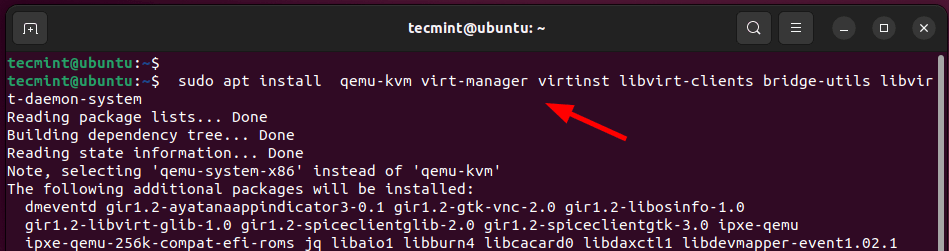
Let us examine what role each of these packages plays.
- qemu-kvm – This is an open-source emulator that emulates the hardware resources of a computer.
- virt-manager – A Qt-based GUI interface for creating and managing virtual machines using the libvirt daemon.
- virtinst – A collection of command-line utilities for creating and making changes to virtual machines.
- libvirt-clients – APIs and client-side libraries for managing virtual machines from the command line.
- bridge-utils – A set of command-line tools for managing bridge devices.
- libvirt-daemon-system – Provides configuration files needed to run the virtualization service.
At this point, we have installed QEMU and all the essential virtualization packages. The next step is to start and enable the libvirtd virtualization daemon.
So, run the following commands:
$ sudo systemctl enable --now libvirtd $ sudo systemctl start libvirtd
Next, verify if the virtualization service is running as shown.
$ sudo systemctl status libvirtd
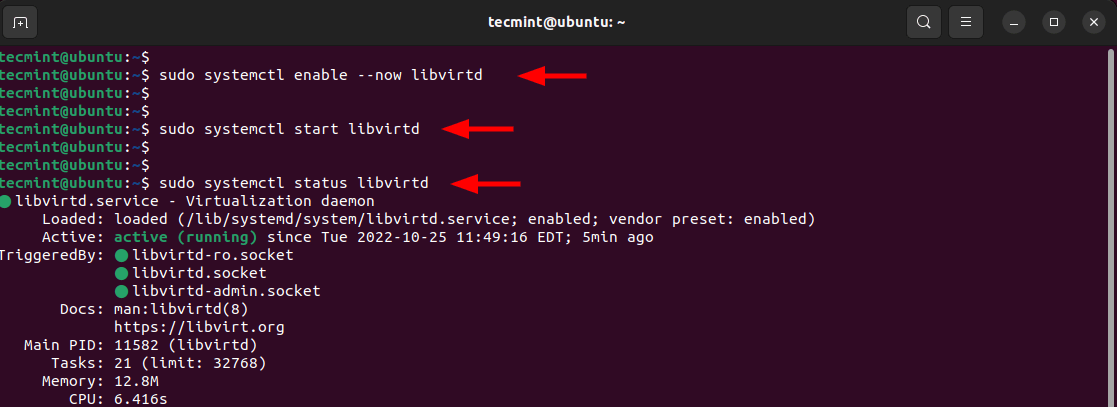
From the output above, the libvirtd daemon is up and running as expected. Additionally, add the currently logged-in user to the kvm and libvirt groups as shown.
$ sudo usermod -aG kvm $USER $ sudo usermod -aG libvirt $USER
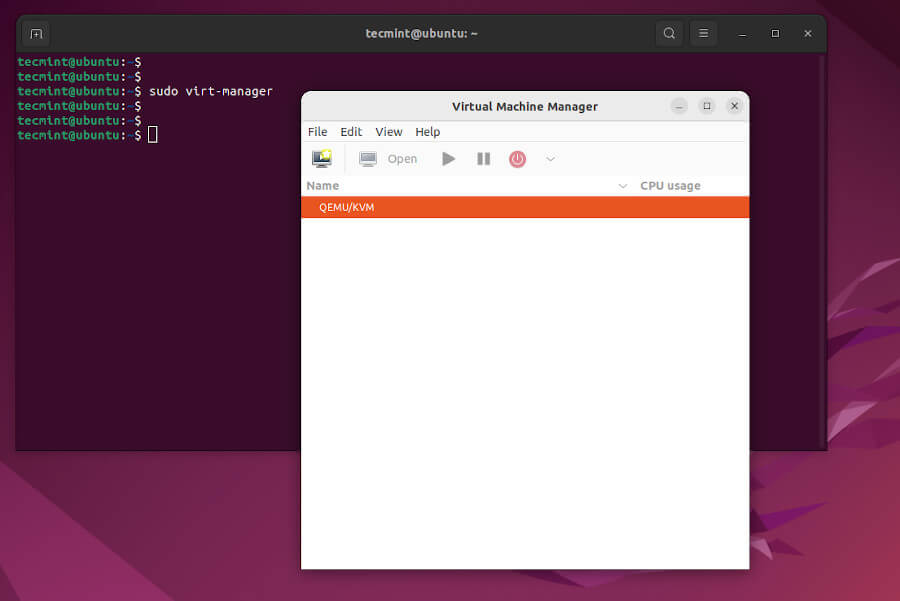
Step 3: Launch Virtual Machine Manager in Ubuntu
The next step is to launch the QEMU/KVM GUI tool which is the Virtual Machine Manager.
The Virtual Machine Manager will pop up as shown. From here, you can start creating and managing virtual machines as we shall demonstrate shortly.
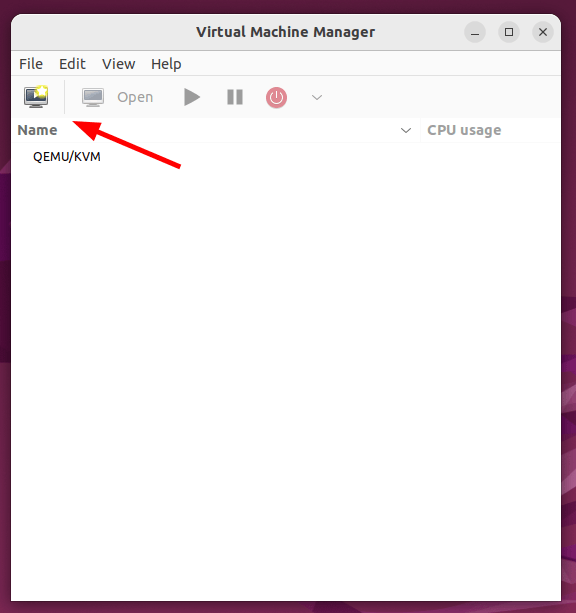
Step 4: Create Virtual Machine with QEMU/KVM in Ubuntu
In this section, we will demonstrate how you can create a virtual machine using an ISO image. For demonstration purposes, we will use a Fedora Live ISO image. You can use an ISO image of your preferred OS and follow along.
To begin, click on the icon at the top left corner as shown below.
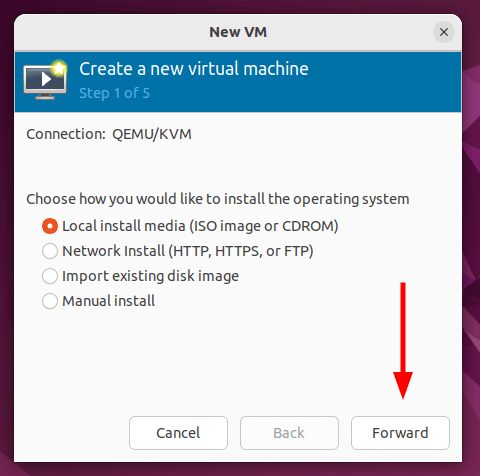
Since we are creating a virtual machine from an ISO file, select the first option – ‘Local install media (ISO image or CDROM)‘. Then click ‘Forward‘.
Next, click ‘Browse’ to navigate to the location of the ISO file.
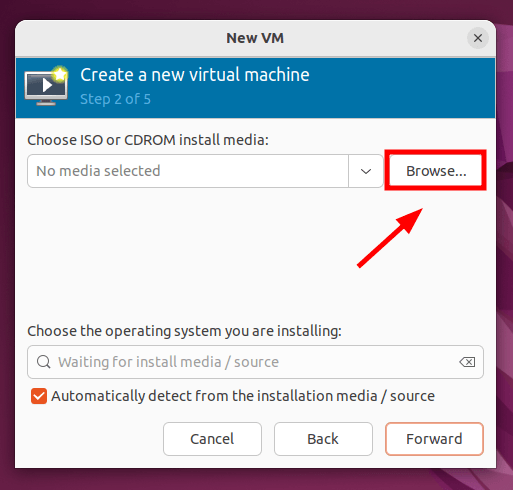
Since the ISO file is saved locally on your system, we will click ‘Browse Local’.

Be sure to navigate to the location of your ISO file. Click it and then click ‘Open’.
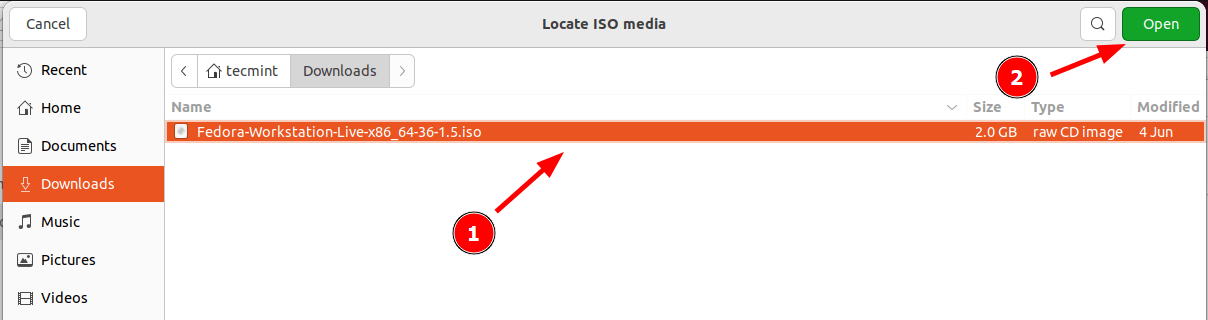
Before proceeding, ensure that you have selected the operating system from the drop-down menu. Then click ‘Forward’.

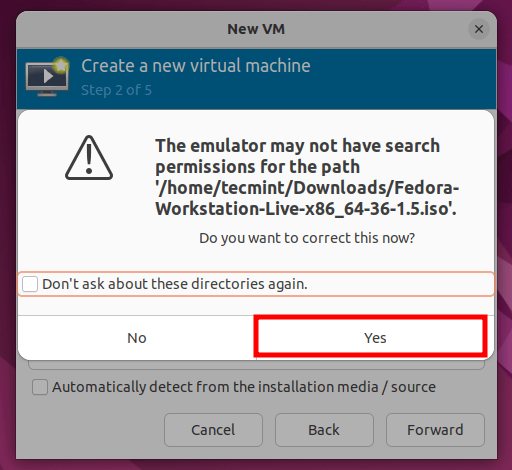
Click ‘Yes’ on the pop-up to grant the emulator search permissions to the ISO file.
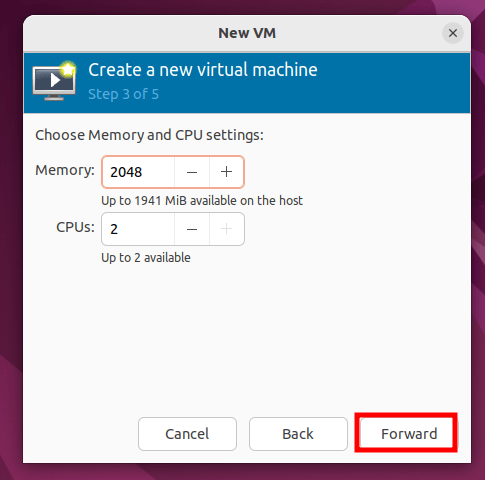
Next, select the Memory size and the number of CPU cores and click ‘Forward’.
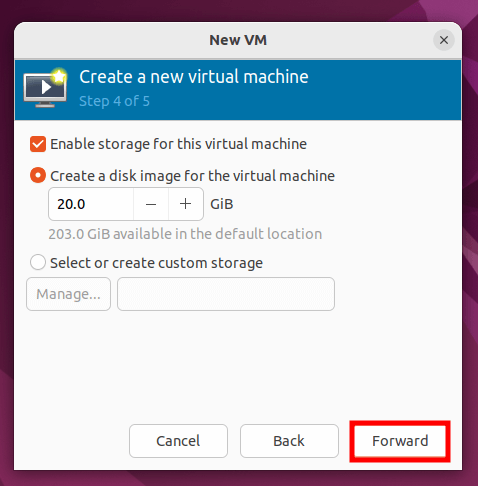
In the next step, enable storage for the virtual machine and specify the virtual disk size. Then click ‘Forward’.
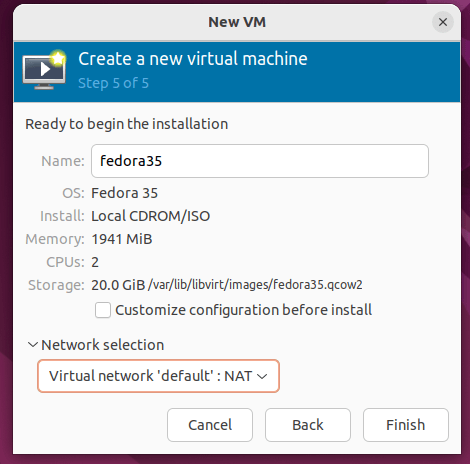
Finally, review all the settings that you have defined, and if all looks good, click ‘Finish’ to create the virtual machine. Else, click ‘back’ and make the necessary changes.
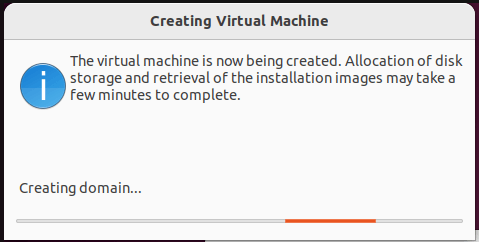
Once you click ‘Finish’ the virtual machine manager will start creating the virtual machine based on the set configurations.
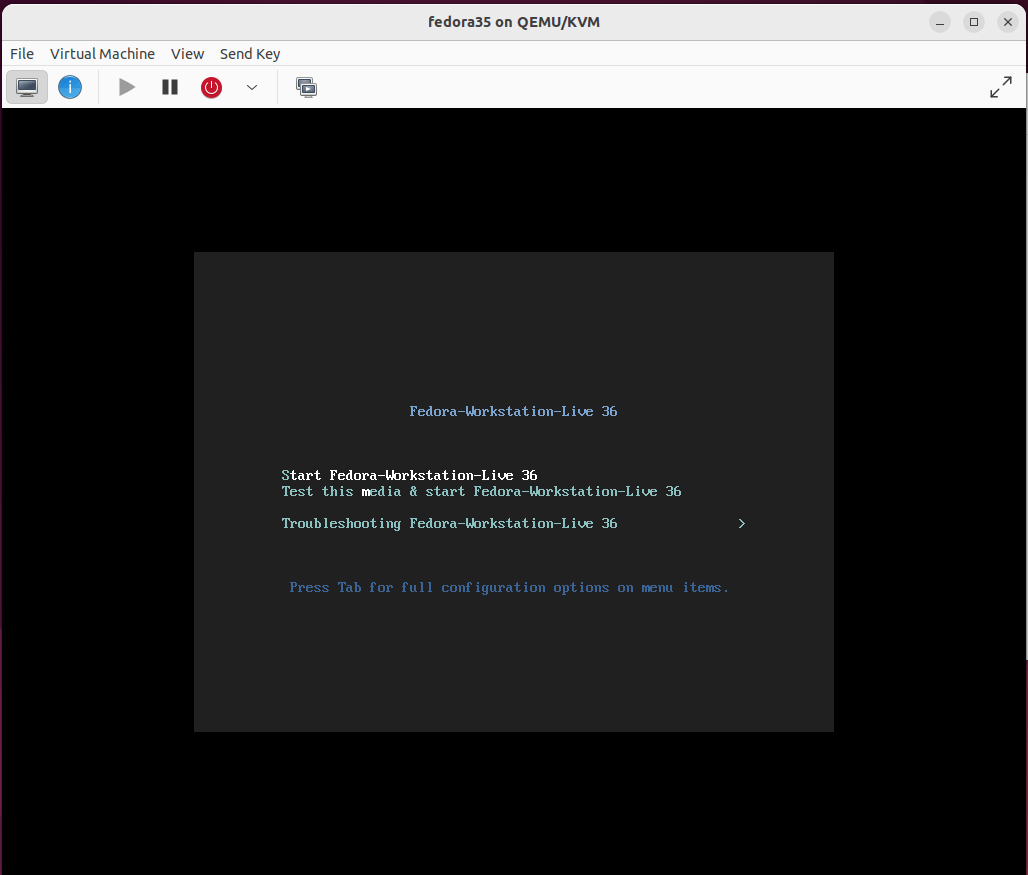
And in a matter of seconds, the virtual machine installation wizard will pop up. You can proceed with the installation as you would on a physical system.
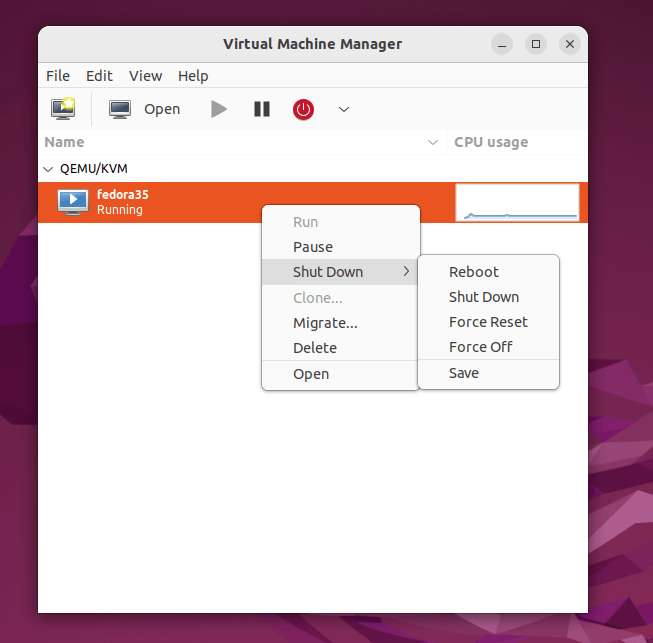
In addition, your virtual machine will be listed on the Virtual machine manager as shown. By right-clicking on your VM, you can perform a variety of tasks including pausing, rebooting, resetting, and deleting the virtual machine among many others.
In this guide, we have demonstrated how to install QEMU/KVM on Ubuntu 20.04 / 22.04. In addition, we went a step further and created a virtual machine using an ISO image file.
To manage KVM virtual machines, read our following articles: