- Radxa zero kali linux
- Kali on Radxa Zero (sdcard) — Build-Script Instructions
- Kali on Radxa Zero (sdcard) — User Instructions
- Radxa zero kali linux
- Kali on Radxa Zero (eMMC) — Build-Script Instructions
- Kali on Radxa Zero (eMMC) — User Instructions
- Zero/dev/kernel
- Hardware Required
- Set up build environment
- Get kernel source code
- Build kernel
- Pack Kernel
- Install Kernel on Radxa Zero
- Zero/install/eMMC
- Requirement
- Install using Windows
- Install using Linux or macOS
Radxa zero kali linux
The Radxa Zero has a quad core 1.8GHz, with 512MB, 1GB, 2GB, or 4GB of LPDDR4 RAM. Kali Linux fits on an external microSD card.
By default, the Kali Linux Radxa Zero image contains the kali-linux-default metapackage similar to most other platforms. If you wish to install extra tools please refer to our metapackages page.
The Radxa Zero (sdcard) image has only been tested on the 2GB and 4GB variants.
Kali on Radxa Zero (sdcard) — Build-Script Instructions
Kali does not provide pre-built images for download, but you can still generate one by cloning the Kali-ARM Build-Scripts repository on GitLab, and follow the README.md file’s instructions. The script to use is radxa-zero-sdcard.sh .
Once the build script finishes running, you will have an img.xz file in the images directory where you ran the script from. At that point, the instructions are the same as if you had downloaded a pre-built image.
The easiest way to generate these images is from within a pre-existing Kali Linux environment.
Kali on Radxa Zero (sdcard) — User Instructions
To install Kali on your Radxa Zero (sdcard), follow these instructions:
- Get a fast microSD card or USB drive with at least 16GB capacity. Class 10 cards are highly recommended.
- Use the dd utility to image this file to your microSD card (same process as making a Kali USB.
In our example, we assume the storage device is located at /dev/sdb . Do not simply copy these value, change this to the correct device path.
This process will wipe out your microSD card. If you choose the wrong storage device, you may wipe out your computers hard disk.
This process can take a while, depending on your PC, your microSD card, and the size of the Kali Linux image.
Once the dd operation is complete, boot up the Radxa Zero with the microSD card plugged in.
Updated on: 2023-May-30
Author: steev
Radxa zero kali linux
The Radxa Zero has a quad core 1.8GHz, with 512MB, 1GB, 2GB, or 4GB of LPDDR4 RAM. There are multiple eMMC versions available, we recommend at least 32GB.
By default, the Kali Linux Radxa Zero image contains the kali-linux-default metapackage similar to most other platforms. If you wish to install extra tools please refer to our metapackages page.
The Radxa Zero eMMC image only works on the 2GB and 4GB variants, as the 512MB and 1GB do not have eMMC.
Kali on Radxa Zero (eMMC) — Build-Script Instructions
Kali does not provide pre-built images for download, but you can still generate one by cloning the Kali-ARM Build-Scripts repository on GitLab, and follow the README.md file’s instructions. The script to use is radxa-zero-sdcard.sh .
Once the build script finishes running, you will have an img.xz file in the images directory where you ran the script from. At that point, the instructions are the same as if you had downloaded a pre-built image.
The easiest way to generate these images is from within a pre-existing Kali Linux environment.
Kali on Radxa Zero (eMMC) — User Instructions
The Radxa Zero requires entering maskrom mode in order to write the Kali Linux image to the eMMC.
To install Kali on your Radxa Zero (eMMC), follow these instructions:
This process will wipe out whatever is on your eMMC.
We will need to download a few files from Radxa’s website as well as install the Amlogic boot tool in order to write to the eMMC with the Radxa Zero in maskrom mode.
- radxa-zero-erase-emmc.bin — automatically erases the eMMC, then presents the eMMC as a USB storage device.
- rz-udisk-loader.bin — expose the eMMC device as a USB Mass Storage device.
- sudo apt update
- sudo apt install python3-pip
- sudo pip3 install pyamlboot
- connect the Radxa Zero to the computer in maskrom mode
- Locate the USB boot button on the bottom of the Radxa Zero
- Press the button and while holding it down, plug the Radxa Zero in to the computer
- You can release the button when the power LED turns on
- Verify that the computer sees the Radxa Zero in maskrom mode via lsusb
- lsusb
[email protected]:~$ lsusb | grep Amlogic Bus 001 Device 048: ID 1b8e:c003 Amlogic, Inc. GX-CHIP - sudo boot-g12.py radxa-zero-erase-emmc.bin
- Use the dd utility to image this file to the newly presented USB device (same process as making a Kali USB.
In our example, we assume the storage device is located at /dev/sdb . Do not simply copy these value, change this to the correct device path.
This process will wipe out your whatever is on your eMMC. If you choose the wrong storage device, you may wipe out your computers hard disk.
This process can take a while, depending on your PC, your Radxa Zero’s storage, and the size of the Kali Linux image.
Once the dd operation is complete, unplug the Radxa Zero from the computer, and boot up the Radxa Zero.
Linux (sdcard boot, write to eMMC):
You cannot use the Radxa Zero sdcard image on the eMMC, and vice versa. The bootloader is written to different locations depending on eMMC and sdcard and they are not interchangeable.
With this mode, we first boot the Radxa Zero from a microSD card, and simply use the dd utility to write an image to the eMMC.
- Follow the Radxa Zero (sdcard) instructions
- Connect the Radxa Zero to a wireless network
- Copy the image file you want to use to the microSD card. Keep in mind that you will need enough free space on the microSD card
- Use the dd utility to image this file to the eMMC device (same process as making a Kali USB.
In our example, we assume the storage device is located at /dev/mmcblk0 . Do not simply copy these value, change this to the correct device path.
This process will wipe out your whatever is on your eMMC. If you choose the wrong storage device, you may wipe out your computers hard disk.
This process can take a while, depending on your microSD card, your Radxa Zero’s storage, and the size of the Kali Linux image.
Once the dd operation is complete, power off the Radxa Zero, unplug the microSD card, and then boot up the Radxa Zero.
Updated on: 2023-May-30
Author: steev
Zero/dev/kernel
Below we will show you how to build, pack, and install Radxa Zero kernel with a Ubuntu 20.04 HOST PC.
Hardware Required
Set up build environment
$ sudo apt update $ sudo apt install gcc-aarch64-linux-gnu device-tree-compiler libncurses5 libncurses5-dev bc python dosfstools flex build-essential libssl-dev mtools bison flex bison git wget $ wget https://developer.arm.com/-/media/Files/downloads/gnu-a/10.3-2021.07/binrel/gcc-arm-10.3-2021.07-x86_64-aarch64-none-elf.tar.xz $ sudo tar xvf gcc-arm-10.3-2021.07-x86_64-aarch64-none-elf.tar.xz -C /opt
Get kernel source code
Build kernel
$ cd kernel $ export ARCH=arm64 $ export CROSS_COMPILE=/opt/gcc-arm-10.3-2021.07-x86_64-aarch64-none-elf/bin/aarch64-none-elf- $ make radxa_zero_defconfig $ make -j8 $ ls arch/arm64/boot/Image arch/arm64/boot/Image # this is the kernel image $ ls arch/arm64/boot/dts/amlogic/meson-g12a-radxa-zero.dtb arch/arm64/boot/dts/amlogic/meson-g12a-radxa-zero.dtb # this is the device tree blob
Pack Kernel
$ export ARCH=arm64 $ export CROSS_COMPILE=/opt/gcc-arm-10.3-2021.07-x86_64-aarch64-none-elf/bin/aarch64-none-elf- $ make radxa_zero_defconfig $ export build_id="999" # make sure it's big enough so that our kernel is newer than package from apt repository $ export lv="-$build_id-amlogic" $ export kv=$(make kernelversion) $ export debv="$kv$lv" $ make bindeb-pkg -j8 LOCALVERSION=$lv KDEB_PKGVERSION=$debv # for packing on non Debian system you may need `DPKG_FLAGS=-d` to skip dependency check
The generated packages are (the kernel revision name might be different, in our case it is 5.10.69):
$ ls ../*.deb ../linux-headers-5.10.69-999-amlogic_5.10.69-999-amlogic_arm64.deb ../linux-libc-dev_5.10.69-999-amlogic_arm64.deb ../linux-image-5.10.69-999-amlogic_5.10.69-999-amlogic_arm64.deb
Install Kernel on Radxa Zero
Copy linux-headers-5.10.69-999-amlogic_5.10.69-999-amlogic_arm64.deb and linux-image-5.10.69-999-amlogic_5.10.69-999-amlogic_arm64.deb to your Radxa Zero. Then install with following commands:
rock@zero:~$ sudo dpkg -i linux-headers-5.10.69-999-amlogic_5.10.69-999-amlogic_arm64.deb rock@zero:~$ sudo dpkg -i linux-image-5.10.69-999-amlogic_5.10.69-999-amlogic_arm64.deb
Reboot into your new kernel.
Zero/install/eMMC
This guide describes how to install the raw images to Radxa Zero series eMMC. Raw image is the standard method to install Linux distro on single board computers, since they don’t have standardized way to boot and initialize their hardware.
Requirement
- Radxa Zero or Radxa Zero 2
- A PC/laptop running Windows, Linux, or macOS
- USB A to C cable or C to C cable, depending on your host
- A supported Linux image
Install using Windows
If you have existing data that you want to keep, this is your last chance to do so. Please follow maskrom guide to load rz-udisk-loader.bin and make backup accordingly.
Now follow eMMC erase guide to wipe out the existing system. Your computer should detect a new storage device after the file is loaded.
You can now flash your Linux image using balenaEtcher similar to flash microSD card. Choose the newly detected device in your target drive and proceed as normal.
Once you are done flashing, unplug and replug Radxa Zero to quit maskrom mode and boot normally.
Install using Linux or macOS
If you have existing data that you want to keep, this is your last chance to do so. Please follow maskrom guide to load rz-udisk-loader.bin and make backup accordingly.
Now follow eMMC erase guide to wipe out the existing system. Your computer should detect a new storage device after the file is loaded.
Now lsusb should show the following device:
Bus 001 Device 049: ID 1b8e:2200 Amlogic, Inc. USB download gadget
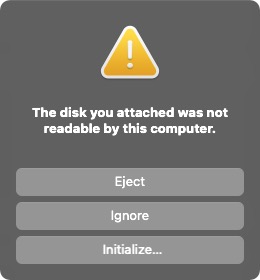
The Zero is in USB disk mode now, your computer should popup a new USB drive. On macOS you will get a disk not readable popup. Just click Ignore:
On Linux you will get following output from sudo dmesg :
[74292.229573] usb 1-10.2.3: new high-speed USB device number 84 using xhci_hcd [74292.330483] usb 1-10.2.3: New USB device found, idVendor=1b8e, idProduct=c003, bcdDevice= 0.20 [74292.330487] usb 1-10.2.3: New USB device strings: Mfr=1, Product=2, SerialNumber=0 [74292.330488] usb 1-10.2.3: Product: GX-CHIP [74292.330489] usb 1-10.2.3: Manufacturer: Amlogic [74303.432510] usb 1-10.2.3: USB disconnect, device number 84 [74303.665204] usb 1-10.2.3: new high-speed USB device number 85 using xhci_hcd [74303.769674] usb 1-10.2.3: New USB device found, idVendor=1b8e, idProduct=2200, bcdDevice=99.99 [74303.769678] usb 1-10.2.3: New USB device strings: Mfr=1, Product=2, SerialNumber=3 [74303.769679] usb 1-10.2.3: Product: USB download gadget [74303.769680] usb 1-10.2.3: Manufacturer: Radxa [74303.769681] usb 1-10.2.3: SerialNumber: AMLG12A-RADXA-ZERO [74303.771008] usb-storage 1-10.2.3:1.0: USB Mass Storage device detected [74303.771133] scsi host4: usb-storage 1-10.2.3:1.0 [74304.785353] scsi 4:0:0:0: Direct-Access Linux Radxa Zero UDisk 0ff PQ: 0 ANSI: 2 [74304.785506] sd 4:0:0:0: Attached scsi generic sg2 type 0 [74304.785679] sd 4:0:0:0: [sdc] 60749504 512-byte logical blocks: (31.1 GB/29.0 GiB) [74304.785796] sd 4:0:0:0: [sdc] Write Protect is off [74304.785798] sd 4:0:0:0: [sdc] Mode Sense: 0f 00 00 00 [74304.785916] sd 4:0:0:0: [sdc] Write cache: enabled, read cache: enabled, doesn't support DPO or FUA [74304.833523] sdc: sdc1 [74304.861751] sd 4:0:0:0: [sdc] Attached SCSI removable disk [74305.424709] EXT4-fs (sdc1): recovery complete [74305.425517] EXT4-fs (sdc1): mounted filesystem with writeback data mode. Opts: (null). Quota mode: none.
You can now use dd to write the raw image to the eMMC on Zero now.
sudo dd if=/path/to/image of=/dev/new_dev bs=1M sync
Once you are done flashing, unplug and replug Radxa Zero to quit maskrom mode and boot normally.