- dpapathanasiou / RaspberryPi_A_Plus_Wifi.md
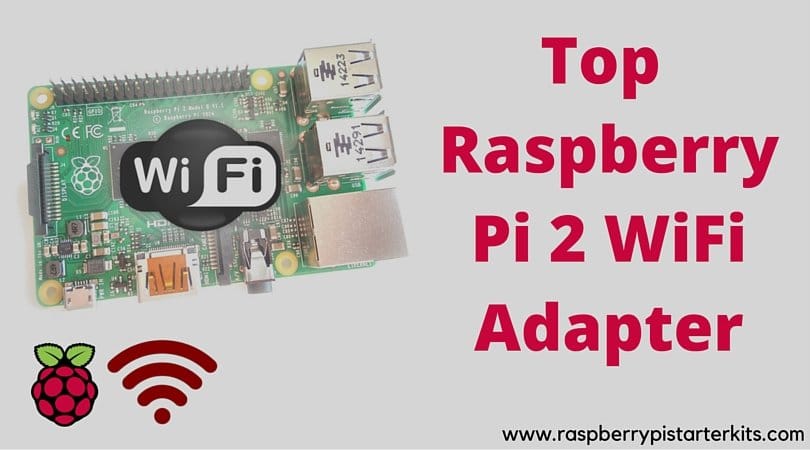
- Top Raspberry Pi 2 WiFi Adapters
- Best Raspberry Pi WiFi dongles
- 1) Edimax EW-7811Un 150Mbps WiFi Dongle for Raspberry Pi 2
- 2) Official Raspberry Pi WiFi dongle
- 3) TP-LINK TL-WN725N Raspberry Pi WiFi Dongle (Adapter)
- 4) Panda Ultra 150Mbps Wireless N USB Adapter For Raspberry Pi/ Pi2
- 5) TP-LINK Archer T1U Wireless AC450 Nano USB Adapter For Raspberry Pi
- How to Connect Raspberry Pi to WiFi?
dpapathanasiou / RaspberryPi_A_Plus_Wifi.md
The Raspberry Pi Model A+ has just a single usb port, so getting the wifi configured has to done by editing /etc/network/interfaces from a command line prompt.
These instructions assume the Raspbian OS on the SD card, and a usb wifi adapter that supports the RTL8192cu chipset, since the current Raspbian has built-in support for it.
- Put a keyboard in the usb slot
- Connect the HDMI slot to a monitor
- Power up
- Login as user pi
- Do any desired initial setup at the raspi-config screen, which appears automatically
- Don’t reboot just yet
cd /etc/network sudo cp -ip interfaces interfaces.org - Use the wpa_passphrase command to generate the wpa-psk value for the interfaces file (unless you already know it, of course)
Since the wpa-psk value is a long, random string, and there’s no easy way to copy-and-paste in the raw terminal, use these commands to capture the passphrase output and append it to the interface file:
sudo chown pi:pi interfaces wpa_passphrase ssidName passphraseString >> interfaces The wpa_passphrase output looks like this:
which is a little different than what should be inside the interfaces file:
wpa-ssid "ssidName" wpa-psk "a0b1c2 . a0b1c2"
so use vi or nano to make those edits and save the file (note that in the Pi default keyboard layout, the double-quotes character is at [SHIFT] 2, where the at-sign normally is).
Here’s a diff of what the edited file should look like:
diff interfaces interfaces.org < iface wlan0 inet dhcp < wpa-ssid "ssidName" < wpa-psk "a0b1c2 . a0b1c2" --- >iface wlan0 inet manual Finally, reset the file permissions, and issue the shutdown command, and unplug the Pi from the power source.
sudo chown root:root interfaces sudo shutdown -h now
This time, without the keyboard and monitor connections, power up the Pi like this:
- Unplug the keyboard from the usb slot
- Plug the wifi adaptor into the usb slot
- Plug in the power source
The Pi should be accessible on the local network, at the ssid specified.
Top Raspberry Pi 2 WiFi Adapters
![]()
When you start using your Raspberry Pi, you may use the Ethernet connection to setup everything and ensure that the working is all good. However, can you just keep using Ethernet? Not really. At some point, you will have to switch to WiFi because it will help you enhance the performance of your Raspberry Pi device and also increase its speed.
Now, since there are so many Raspberry Pi WiFi adapters out there, chances are that you will be confused. That’s why it is ideal that you go through a few of the best WiFi dongles for Raspberry Pi out there and choose one based on your needs. We have listed a few out here for you.
Best Raspberry Pi WiFi dongles
1) Edimax EW-7811Un 150Mbps WiFi Dongle for Raspberry Pi 2
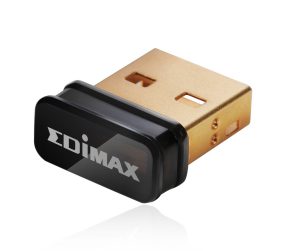
If you go by the reviews from users, you will know that this is the most popular adapter for Raspberry Pi as well as Raspberry Pi 2 devices. It is extremely small, thanks to which you can just plug it in and forget about it.
We’ve mentioned some of its features below:
- It supports the latest 802.11n wireless standard.
- The speed is approximately 3x when compared to 802.11b.
- Supports smart transmit power control.
- The device comes with a multi-language EZMax setup wizard to help you through the process.
- You’ll have a much better experience with real-time streaming of videos, music, and Skype calls.
- It provides up to 150 MBPS wireless data speed.
- You can also use it on operating systems such as Mac OS, Windows, and Linux.

2) Official Raspberry Pi WiFi dongle
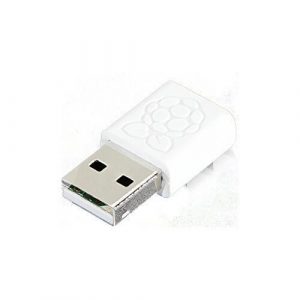
The best thing about the Official Raspberry Pi WiFi dongle, according to many users, is the performance and reception. Many have reported that it is much better than the other options that they previously tried. What’s more, it comes with a universal USB adapter that lets you use it with any device!
Here are a few interesting features:
- The maximum throughput expected is 150Mbps, which is very good!
- It comes with the Official Raspberry Pi Operating System, known as Raspbian.
- The New Out of Box Software (NOOB) is inbuilt with this device.
- Setup and usage are a breeze.
- It supports not just 802.11b but also 802.11g and 802.11n wireless networks. Thus, you can get rid of wires and enjoy the Wi-Fi world with fantastic Internet connectivity.
- The product comes with a BCM43143 chipset.
3) TP-LINK TL-WN725N Raspberry Pi WiFi Dongle (Adapter)
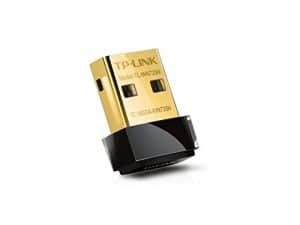
The TP-Link Raspberry Pi dongle is among the most popular options among users and almost all of them have given it positive reviews. The setup is easy; you can just plug it in and start using! All you need to do in between is to install one driver from the official TP-Link website.
Let’s read on to find out a few special features of this adapter:
- It supports 802.11 n/g/g wireless standards.
- It can give you a speed of up to 150 Mbps.
- It supports WEP, WPA-PSK/WPA2-PSK, and WPA/WPA2 encryptions, ensuring complete safety.
- You also get a superb SoftAP feature through which you can create a Wi-Fi hotspot! Connecting to your mobile devices, thus, is easier with this dongle.
- The frequency range is 2.400GHz to 2.4835GHz.
- It supports USB 2.0.
- You won’t suffer any lag in real-time streaming with this device.
- The brand promises 2-year warranty and technical support that you can always rely on.
4) Panda Ultra 150Mbps Wireless N USB Adapter For Raspberry Pi/ Pi2

With this dongle, you get the latest 802.11n wireless standard. However, you can also work with 802.11g wireless network thanks to its backward compatibility. In this case, though, you will get 2.4GHz frequency. Regarding price and popularity, this one gives stiff competition to the others in its league.
Here are a few of its features:
- It provides up to 150 Mbps speed.
- It works well enough to reach super coverage and network range.
- You can use it with many other operating systems including Windows, Mac OS, Ubuntu, Fedora, Kali Linux, and Mint OS.
- With 64/128 bit encryptions, it helps you stay safe from security threats.
- You can use it with routers that use 2.4 GHz frequency.
- The package comes with an installation CD and a user manual to help you with the installation and setup process.
- The brand offers a one-year manufacturer’s warranty for this device.
5) TP-LINK Archer T1U Wireless AC450 Nano USB Adapter For Raspberry Pi

Easy installation, SoftAP for Wi-Fi hotspot setup, advanced wireless encryption, and easy installation are just a few of the many features of TP-Link, making it one of the best WiFi dongles for Raspberry Pi. Users have reported that it works seamlessly.
Let’s take a look at a few more of its features:
- The brand promises speed of up to 433 Mbps, which is much higher than what you would typically expect.
- Just plug it in and forget about it. It is small and designed to make your work seamless without blocking other USB ports.
- It uses 802.11ac but you can also use it with 802.11a/n, thanks to backward compatibility.
- Remember that it only transmits 5GHz. While the brand says this is to ensure that there’s no signal interference, you may want to be careful while selecting a router.
- It is compatible with Mac OS, Windows, and Linux Kernal as well.
- It comes with 2-year warranty and unlimited technical support.
- You can easily play games and stream HD movies without lag.
- Even though it is slightly on the higher end in terms of price, the product does total justice to it with its amazing features.
It would be very unwise to buy a Raspberry Pi WiFi adapter without proper research. As you can see, there are multiple options and not all will suit your needs and preferences. Do your research and make sure you only pick the best.
Many intelligent users do not worry about buying a WiFi dongle for the Raspberry Pi and just rely on trial and error basis, so they do not get the peak performance of their Pi device. To get the best results, put your hands on buying a good, reliable, and sturdy Raspberry Pi WiFi Dongle / Adapter. Just don’t forget to complete the configurations at the time of the booting of your Raspberry Pi device by setting up the Raspberry Pi WiFi dongle for the automatic initialization.
How to Connect Raspberry Pi to WiFi?
- A Raspberry Pi model (Pi 3 is the latest and fastest of them)
- A compatible WiFi adapter
- Raspberry Pi display
- A USB keyboard & mouse
- A reliable internet connection
So now, I will explain how you can connect your Raspberry Pi wirelessly to access the web with the help of a USB WiFi adapter.
Don’t attach the WiFi adapter for now. You can connect all the other components to the Raspberry Pi.
Method-1: Using the GUI
If you are a beginner and setting up the wireless network on your Pi for the first time, then I recommend you to use the monitor or touchscreen display to complete this process efficiently.
Step-1: Login to your Raspberry Pi with credentials. Default username and password are pi & raspberry respectively.
Step-2: Attach the wireless adapter to your Pi system
Step-3: On your Raspberry Pi desktop, click on the icon of ‘WiFi.’
Step-4: In the wireless network’s window, click on the ‘Scan’ button
Step-5: When you see the network’s name you want to connect, click on it
Step-6: Enter the password if you set it for security reason
Step-7: Click on ‘Connect’ button
Step-8: After you ‘Add’ the network to your device, you will be redirected to the previous window. Close it as you are now connected wirelessly to the web with the help of the WiFi dongle.
Method-2: Without GUI (Using Command Prompt)
Though this method contains some coding techniques, that doesn’t mean it can be done only by experts in the field. I tried to make the process as short and simple as possible so that even the first time users can get the knowledge and work it on their Raspberry Pi devices.
I hope you have installed the Raspbian OS on your Pi. Attach the WiFi dongle with your Pi.
Step-1: Boot up your Raspberry Pi and log in with the username and password
Step-2: Open the LXTerminal
Step-3: Scan for the available WiFi network by entering the command below
Step-4: Find your network name on that list. It will look like ESSID:“Your Desired Network Name.”
If you see your network name in that list, it’s time to edit the configuration file named as wpa_supplicant.conf so that the Raspberry Pi automatically detect the WiFi network next time you boot up your Pi.
Step-5: Enter the command: sudo nano /etc/wpa_supplicant/wpa_supplicant.conf
Step-6: At the end of the file enter the following coding lines;
ssid=“Your Desired Network Name”
Step-7: Save the file by pressing CTRL + X and then selecting ‘Y’
Now, your Pi would be connected to the internet. To crosscheck the connection, enter the command as below:
If you can see the “inet addr” in the results, that means you are connected wirelessly to the web.
But, if you found that the Raspberry Pi is still not connected to the web after this process, then reboot it and check again. Sometimes, a restart is required after doing some changes to the configuration files and adding some command lines.
To reboot your Raspberry Pi, enter the command:
It would be very unwise to buy a Raspberry Pi WiFi adapter without proper research. As you can see, there are multiple options and not all will suit your needs and preferences. Do your research and make sure you only pick the best.