- Build Embedded Linux for Raspberry Pi using Yocto
- Создание образа Linux для Raspberry Pi 3 в Yocto
- Saved searches
- Use saved searches to filter your results more quickly
- License
- demiban/raspberry-pi-3_embedded-linux
- Name already in use
- Sign In Required
- Launching GitHub Desktop
- Launching GitHub Desktop
- Launching Xcode
- Launching Visual Studio Code
- Latest commit
- Git stats
- Files
- README.md
- About
Build Embedded Linux for Raspberry Pi using Yocto
Building complete Linux operating system for embedded devices was a complicated task requiring investment with both time and money for many years. Thanks to Yocto, this task of compiling individual component, software’s and building complete embedded Linux operating system, has been made much simpler by it.
In this post, we will demonstrate, how you can follow just simple steps and build embedded Linux for Raspberry Pi.
For proceeding to this post: Setting up ubuntu development machine for Yocto is a prerequisite and make sure you have all those packages installed in Ubuntu.
Note: This compilation is done for Yocto 2.6 i.e codenamed “thud” which is last known stable version available for RaspberryPi. Although currently Yocto 2.7 (codename – warrior) is available with Poky but meta-raspberrypi with “warrior” branch is not available.
Now, lets clone the poky and raspberry Pi metadata as,
$ git clone git://git.yoctoproject.org/poky $ git checkout -b thud origin/thud $ git clone git://git.yoctoproject.org/meta-raspberrypi $ git checkout -b thud origin/thudNow, we will have to initialize the environment variables to start compilation for kernel and filesystem as,
Above command will initialize environment variables and create build directory and will go inside this build directory. The tree structure of the newly created “build” directory is like,
$ tree build/ build/ └── conf ├── bblayers.conf ├── local.conf └── templateconf.cfg 1 directory, 3 filesNow, we need to change bblayers.conf to add the path of meta-raspberrypi layer, hence open this file and append the path of meta-raspberrypi layer like below,
BBLAYERS ?= " \ /home/myuser/workspace/poky/meta \ /home/myuser/workspace/poky \ /home/myuser/workspace/poky/meta-yocto-bsp \ /home/myuser/workspace/meta-raspberrypi \ "Next, we need to edit “conf/local.conf” to add Raspberry Pi as machine,
and append following string,
Now, lets start the compilation which will create the complete binary images required to boot Raspberry Pi,
Создание образа Linux для Raspberry Pi 3 в Yocto
В одной из своих старых публикаций я описал процесс сборки ядра Linux для Raspberry Pi 3. Собранное ядро запускалось в заранее установленном дистрибутиве Raspbian. Сейчас мы попробуем создать свой дистрибутив Linux и запустить его на плате Raspberry Pi 3 вместо установленного там Raspbian Linux.
Первый вопрос, который напрашивается : «а зачем создавать свой дистрибутив Linux?» .
Для платы Raspberry Pi 3 такая необходимость может возникнуть, если необходимо создать специализированное устройство. Например маршрутизатор или сервер домашней автоматизации. В свой новый образ можно включить только необходимое для работы устройства программное обеспечение и больше ничего лишнего.
Основная цель проделываемой нами работы — это научиться создавать свои дистрибутивы Linux с помощью Yocto Project на примере платы Raspberry Pi 3.
Как разработчиков встраиваемых систем нас в первую очередь интересует возможность создания устройств на базе высокопроизводительного CPU для запуска на нем Embedded Linux .
Образ операционной системы Linux для разрабатываемого устройства будет содержать свой уникальный набор программного обеспечения, а также поддержку драйверов периферии для используемой SoC.
Сборка дистрибутива производиться путем кросс-компиляции на более производительной Linux машине.
Для пользователей Windows можно установить Oracle Virtual Box и запустить Linux в виртуальной среде. Установка образа Fedora Linux в Virtual Box описана в моей публикации Эксперименты с WiFi модулями на основе SoC ESP8266.
На моем двухъядерном Intel Celeron G1840 с тактовой частотой 2,8 ГГц образ Fedora Linux в виртуальной машине работал очень медленно, поэтому я установил более легковесный Linux Lite.
При создании виртуального диска необходимо обеспечить для нужд Yocto не менее 50 Гб дискового пространства (при возможности 100 — 200 Гб ).
После установки дистрибутива Linux Lite на жесткий диск открываем окно терминала (Ctrl+Alt+T) и устанавливаем все необходимые дополнительные пакеты :
$ sudo apt-get update
$ sudo apt-get install gawk wget git diffstat unzip texinfo gcc-multilib \
build-essential chrpath socat cpio python python3 python3-pip python3-pexpect \
xz-utils debianutils iputils-ping python3-git python3-jinja2 libegl1-mesa libsdl1.2-dev \
xterm vim -y
Дальше нужно создать в своем домашнем каталоге подкаталог yocto (или назовите его как хотите) :
$ mkdir yocto
$ cd yocto
Загружаем с git репозиториев необходимые для сборки компоненты :
$ git clone git://git.yoctoproject.org/poky
Poky – это эталонный дистрибутив Linux, содержащий систему сборки Open Embedded и набор метаданных.
$ git clone git://git.openembedded.org/meta-openembedded
Скачиваем слой BSP (Board Support Package) для плат серии Raspberry Pi :
$ git clone git://git.yoctoproject.org/meta-raspberrypi
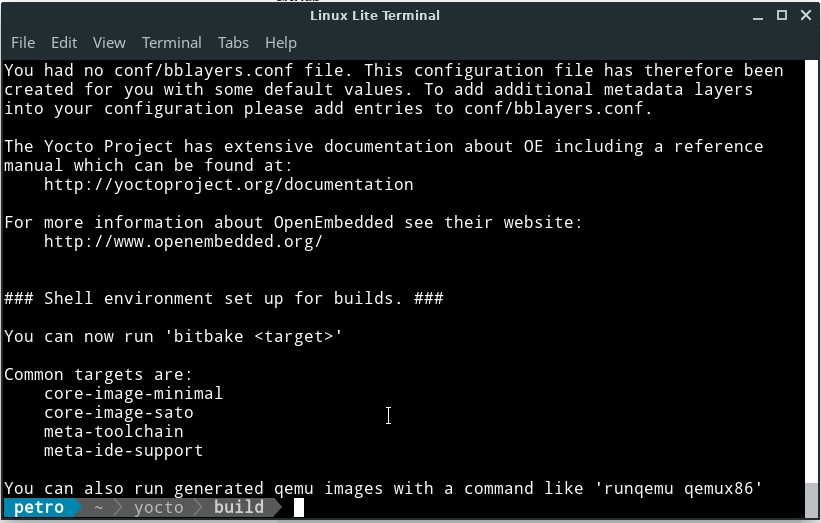
Запускаем скрипт оболочки oe-init-build-env , который подготовит нам каталог по-умолчанию build для сборки образа и создаст конфигурационные файлы:
$ source poky/oe-init-build-env
Если вас не устраивает название каталога build, то его можно задать явно :
$ . poky/oe-init-build-env rpi3-build
Теперь нужно добавить необходимые слои программного обеспечения. Например поддержка плат Raspberry Pi (BSP пакет) находиться в слое meta-raspberrypi. Точно так же поддержка компьютерной сети , графического интерфейса пользователя, поддержка средств мультимедиа находятся в разных слоях. Свои программы для нового образа вам также необходимо создавать в отдельном слое.
$ bitbake-layers add-layer ../meta-raspberrypi
$ bitbake-layers add-layer ../meta-openembedded/meta-oe
$ bitbake-layers add-layer ../meta-openembedded/meta-python
$ bitbake-layers add-layer ../meta-openembedded/meta-perl
$ bitbake-layers add-layer ../meta-openembedded/meta-multimedia
$ bitbake-layers add-layer ../meta-openembedded/meta-networking
$ bitbake-layers add-layer ../meta-openembedded/meta-gnome
$ bitbake-layers add-layer ../meta-openembedded/meta-xfce
Вместо использования команды bitbake-layers add-layer можно дописать задействованные слои в файл conf/bblayers.conf вручную.
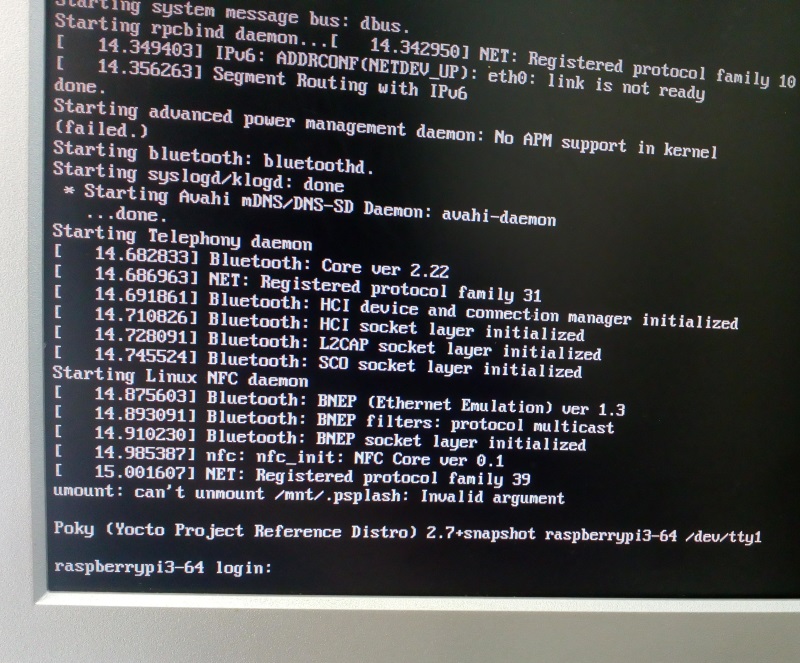
После этого нужно добавить название нашей целевой платы в скрипт conf/local.conf :
MACHINE ?= «raspberrypi3-64»
Процесс сборки происходит очень долго, поэтому при наличии многоядерного процессора сборку можно распараллелить добавлением следующих опций в файл conf/local.conf :
BB_NUMBER_THREADS ?= «2»
PARALLEL_MAKE ?= «-j 2»
Для своего двухъядерного процессора я указал количество потоков и заданий для make равными двум.
Чтобы защититься от ошибок при сборке из-за недоступности какого-то репозитория можно добавить в conf/local.conf зеркала :
Собрать базовый образ Linux с интерфейсом командной строки можно с помощью команды :
$ bitbake core-image-base
Запустить сборку образа с поддержкой графического интерфейса GNOME можно при помощи следующей команды :
$ bitbake core-image-sato
Минималистичный образ с поддержкой легковесного графического интерфейса XFCE собирают запуском цели :
$ bitbake core-image-minimal-xfce
Я пробовал собирать все три варианта :


Моя конфигурация сборки выглядит следующим образом :
Saved searches
Use saved searches to filter your results more quickly
You signed in with another tab or window. Reload to refresh your session. You signed out in another tab or window. Reload to refresh your session. You switched accounts on another tab or window. Reload to refresh your session.
Scripts and config to generate an Embedded Linux Image for a Raspberry PI 3.
License
demiban/raspberry-pi-3_embedded-linux
This commit does not belong to any branch on this repository, and may belong to a fork outside of the repository.
Name already in use
A tag already exists with the provided branch name. Many Git commands accept both tag and branch names, so creating this branch may cause unexpected behavior. Are you sure you want to create this branch?
Sign In Required
Please sign in to use Codespaces.
Launching GitHub Desktop
If nothing happens, download GitHub Desktop and try again.
Launching GitHub Desktop
If nothing happens, download GitHub Desktop and try again.
Launching Xcode
If nothing happens, download Xcode and try again.
Launching Visual Studio Code
Your codespace will open once ready.
There was a problem preparing your codespace, please try again.
Latest commit
Git stats
Files
Failed to load latest commit information.
README.md
This project provides Buildroot configuration and scripts to generate a custom Embedded Linux Image for a Raspberry PI 3.
Open a terminal in the raspberry-pi-3_embedded-linux directory and follow these steps to build a basic image for the Raspberry PI 3.
- Change the following scripts to executables: $ chmod +x setup-env.sh build.sh run-emu.sh
- Get all the sources needed to build the image and configure buildroot by typing: $ ./setup-env.sh
If any error occurred on the build, open the build.log in the buildroot directory.
- Build the fbcp binary to enable the /dev/fb1 to display the content in the LCD screen: «$ build.sh fbcp»
- Copy the fbcp and additionals files to the sdcard.img created by buildroot to enable the 3.5″ SPI LCD screen. $ ./build.sh cp2sd
- Insert the sdcard and flash the rpi3 image: $ ./build.sh flash /dev/mmcblk0
The flash command will format the sdcard to FAT32 before flashing, so you don’t have to manually format the sdcard. Important: Do not use /dev/mmcblk0p1, it won’t work.
The following message should appear:
"Welcome to Embedded linux on Raspberry Pi 3!" - Wifi firmware fix: http://lists.busybox.net/pipermail/buildroot/2016-April/159688.html
- TFT screen and fbcp setup: https://github.com/recalbox/recalbox-os/wiki/TFT-Screen-SPI-Bus-%28EN%29
- Connect to a wifi network: http://linuxcommando.blogspot.com/2013/10/how-to-connect-to-wpawpa2-wifi-network.htmlhttp://recalbox-wiki-rtfd.readthedocs.io/en/4.0/EN/Utility—Use-of-fbcp-for-small-TFT-screen-(EN)/https://delog.wordpress.com/2014/10/10/wireless-on-raspberry-pi-with-buildroot/
- Hotspot: https://frillip.com/using-your-raspberry-pi-3-as-a-wifi-access-point-with-hostapd/https://www.raspberrypi.org/forums/viewtopic.php?f=63&t=141807
About
Scripts and config to generate an Embedded Linux Image for a Raspberry PI 3.