- Saved searches
- Use saved searches to filter your results more quickly
- samvidita/Connect-RaspberryPi-to-laptop-wirelessly
- Name already in use
- Sign In Required
- Launching GitHub Desktop
- Launching GitHub Desktop
- Launching Xcode
- Launching Visual Studio Code
- Latest commit
- Git stats
- Files
- readme.md
- About
- Setting up a Raspberry Pi Zero W/WH, the headless way, with Wifi and VNC enabled
- Latest
Saved searches
Use saved searches to filter your results more quickly
You signed in with another tab or window. Reload to refresh your session. You signed out in another tab or window. Reload to refresh your session. You switched accounts on another tab or window. Reload to refresh your session.
Learn how to connect raspberry pi to laptop wirelessly. Share your raspberry pi screen on laptop and control it with laptop mouse and keyboard.
samvidita/Connect-RaspberryPi-to-laptop-wirelessly
This commit does not belong to any branch on this repository, and may belong to a fork outside of the repository.
Name already in use
A tag already exists with the provided branch name. Many Git commands accept both tag and branch names, so creating this branch may cause unexpected behavior. Are you sure you want to create this branch?
Sign In Required
Please sign in to use Codespaces.
Launching GitHub Desktop
If nothing happens, download GitHub Desktop and try again.
Launching GitHub Desktop
If nothing happens, download GitHub Desktop and try again.
Launching Xcode
If nothing happens, download Xcode and try again.
Launching Visual Studio Code
Your codespace will open once ready.
There was a problem preparing your codespace, please try again.
Latest commit
Git stats
Files
Failed to load latest commit information.
readme.md
Connect Raspberry Pi to Laptop Wirelessly
This tutorial covers how to connect Raspberry Pi to Laptop wirelessly. Share your Raspberry Pi screen on laptop screen and control it with laptop mouse and keyboard.
You can find the YouTube Tutorial posted here.
Step1 : Install Raspberry Pi Imager and download OS
Raspberry Pi Imager is the quick and easy way to install Raspberry Pi OS and other operating systems to a microSD card. Download and install Raspberry Pi Imager for your operating system.
Many operating systems are available for Raspberry Pi, including Raspberry Pi OS. Raspberry PI OS Lite is a minimal operating system. This image contains only the core operating system and boots to a command line instead of a GUI or desktop environment. Raspberry Pi OS with desktop comes with desktop GUI. Download the Raspberry Pi OS of your choice.
Note : Debian with Raspberry Pi Desktop is the operating system for PC and Mac. Download the Raspberry Pi OS instead.
Step2 : Flash OS to microSD card
Open Raspberry Pi Imager and insert microSd card to laptop with card reader. At first we need to format the microSD card.
Note : Class 10 microSd card with minimum 8GB of space is recommended.

Select operating system as ERASE, then select the storage space and click on write. This will format the microSD card.
After formatting microSD card next step is to flash OS to microSD card. We can select any OS in Raspberry Pi Imager. This will download the OS and then flash it to microSD card. Since we have already downloaded the OS we need to select custom and then select OS image from local downloaded folder. Usually OS image will be downloaded in .img .zip .iso .gz .xz format.

Then select storage device and click on write. This will flash OS to microSD card. It will take some time.

Step3 : Enable SSH and configure WiFi
Using SSH we can access the command line of a Raspberry Pi remotely from another computer or device on the same network. To enable SSH in Raspberry Pi we need to add a blank file named ssh in boot partition without any extension. This will enable SSH during boot time and delete the ssh file created. To create ssh file in a simple way we just need to open command prompt and type the following command. It will create ssh file
echo>boot_partition_name:\ssh Note : Repalce boot_partition_name with your partition name e.g. echo>I:\ssh

After enabling SSH, Cofigure Wifi. We need to add the details of the wireless network to which we want to connect our Raspberry Pi. Basically we need to create wpa_supplicant.conf file and palce it in a boot partion. During boot Raspberry Pi will connect to the wireless network of which details are given. Open any text editor and add following lines
ctrl_interface=DIR=/var/run/wpa_supplicant GROUP=netdev update_config=1 country= network=< ssid="" psk="" scan_ssid=1 > Note : The Raspberry Pi and the laptop to which you want connect your Pi need to be connected to same wireless network
Add the details like SSID, Password (In case of open network leave password field balnk with double quotes) and Country your code. You can find country codes here. If your WiFi network is not hidden then remove scan_ssid=1
Step4 : Enable VNC and Configure Raspberry Pi
VNC is a graphical desktop sharing system that allows you to remotely control the desktop interface of one computer (running VNC Server) from another computer. VNC Viewer transmits the keyboard and either mouse or touch events to VNC Server, and receives updates to the screen in return. You will see the desktop of the Raspberry Pi inside a window on your computer or mobile device. You’ll be able to control it as though you were working on the Raspberry Pi itself.
To enable VNC we need to download an SSH client. The most commonly used client is called PuTTY and can be downloaded from here. Install and open PuTTY, set the connection type as SSH, port as 22 and type the following host name.

Click on open. If WiFi configuarion is not correct, you eventually see a message saying Network error: Connection timed out . When the connection works you will see the security warning. You can safely ignore it, and click the ‘Yes’ button. You will now see the usual login prompt. The default username for Raspberry Pi OS is Pi and password is raspberry . You should now have the Raspberry Pi prompt.

Now we need to configure Raspberry Pi. Type the following command in Raspberry Pi command prompt and press enter.
This command will open Raspberry Pi configuration window as shown below.

Go to Interface Options and select VNC , and press enter to enable it.

Next in the Raspberry Pi configuration main menu go to System options from there select Boot / AUto login and finally select Desktop Autologin . This will automatically login as ‘Pi’ user desktop GUI.

Here we are done with Raspberry Pi configuration and enabled VNC. Click on finish and reboot your Pi.
Step5 : Share Raspberry Pi screen with VNC viewer
VNC viewer a graphical desktop sharing system that allows a user to remotely control the desktop of a remote computer (running VNC Server) from your device, and it transmits the keyboard and mouse or touch events to VNC Server, so that once you are connected, you have control over the computer you’ve accessed. You can download VNC viewer from here.
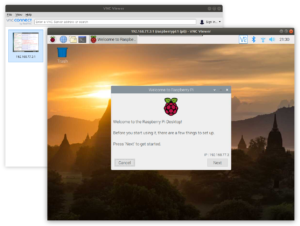
Open VNC viewer and type raspberrypi.local as server adreess. If Raspberry Pi and laptop are connected to same network, then authentication window will pop up. Enter the Pi credentials. Default username Pi and password is raspberry .

After successful login you can see Raspberry Pi desktop interface on your laptop screen. You can control the Raspberry Pi with laptop mouse and keyboard.

VNC Viewer ‘Cannot currently show the desktop’ error

Some time we will face this issue while connecting with VNC Viewer. This is because of the resolution we set in the Raspberry Pi configuration. To solve this issue follow the below steps.
Open SSH client (PuTTY in our case), connect to Raspberry Pi and login with the credentials. Then Go to Raspberry Pi configuration window by typing sudo raspi-config in command line. (These steps are mentioned above). In the configuration menu select dispaly settings

Then select resolution and change the resolution from default to any other resolution.

Now if we connect again with VNC viewer screen will be visible. Here we are done with connecting our Raspberry Pi with Laptop.
About
Learn how to connect raspberry pi to laptop wirelessly. Share your raspberry pi screen on laptop and control it with laptop mouse and keyboard.
Setting up a Raspberry Pi Zero W/WH, the headless way, with Wifi and VNC enabled
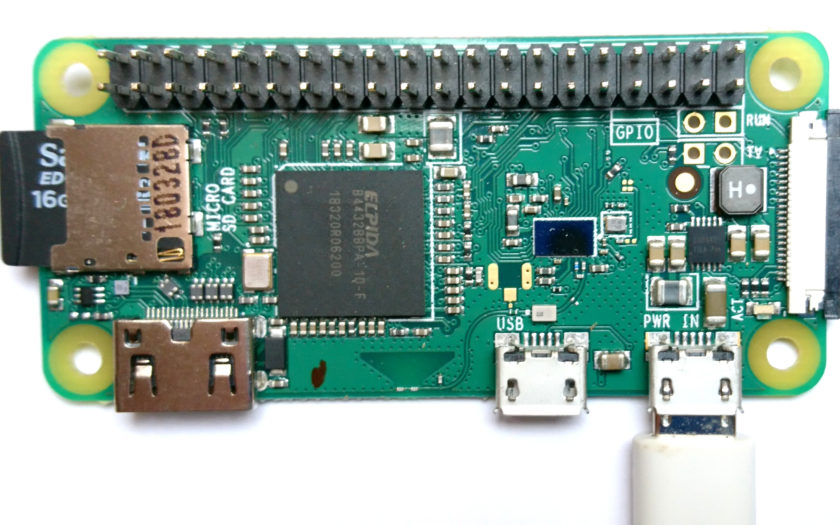
Many have covered this (at least partially), but here’s my ultimate, minimal, quick guide to all the necessary parts, using a Linux box.
Use the given commands in a Linux bash terminal.
Download the latest Raspbian image. (Choose the “with desktop and recommended software” version, when e.g. you need the IDLE Python IDE. VNC is included in all versions)
In the terminal (with optional, manual hash comparison):
# get the latest full image wget --output-document=raspbian_full_latest.zip https://downloads.raspberrypi.org/raspbian_full_latest # optionally check the sha256 hash sha256sum raspbian_full_latest.zip
Burn the image from the ZIP to the SD Card. Use the lsblk command to find out the device name.
In the terminal (assuming dev/sdb is the device name)
# get the device name lsblk # unzip and write, use proper device name for output unzip -p raspbian_full_latest.zip | sudo dd of=/dev/sdb status=progress conv=fsync # flush the write cache sync
Reference: For Linux specifically, here’s the full guide for writing the image to the SD card.
Enable ssh by placing an empty file named ssh (without extension or dot) in the boot folder of the boot partition.
# change to the boot partition cd /media/$USER/boot # ssh marker file touch ssh
Pre-configure your Wifi by placing a file named wpa_supplicant.conf in the root folder of the root partition, with the following content (Replace country and placeholders as needed)
country=CH ctrl_interface=DIR=/var/run/wpa_supplicant GROUP=netdev update_config=1 network=
# wifi config file (Adapt country and placeholders) touch wpa_supplicant.conf echo 'country=CH ctrl_interface=DIR=/var/run/wpa_supplicant GROUP=netdev update_config=1 network=< ssid="NETWORK-NAME" psk="NETWORK-PASSWORD" >' > wpa_supplicant.conf # flush the write cache sync
Now insert the SD card into you Raspberry Pi and connect power.
# see if it's there. (use your name or ip) ping raspberrypi-zero-wh # ssh into the raspberry ssh pi@raspberrypi-zero-wh
On the Raspberry Pi, do a proper setup:
# change the password passwd # type your old and new password # do housekeeping sudo apt-get update sudo apt-get dist-upgrade sudo apt-get clean
Enabling the remote VNC server
If you chose to burn the “with desktop and recommended software” version of the image, everything on the Raspberry Pi should already be in place to run the VNC server. Otherwise, follow the VNC Guide in the official documentation to enable the VNC server.
To run the VNC server, in an ssh session to the Raspberry Pi:
This should print a message like
New desktop is raspberrypi:1 (192.168.77.3:1)
On your client device, download the VNC viewer, then connect using the IP address and Desktop id.
Go to File/New Connection, then use e.g. 192.168.77.3:1

My name is Marcel and this is where I write about stuff that piqued my curiosity.
E-mail me directly at marcel@qrys.ch.