- Saved searches
- Use saved searches to filter your results more quickly
- License
- asparatu/raspberrypi-wpa-supplicant.conf
- Name already in use
- Sign In Required
- Launching GitHub Desktop
- Launching GitHub Desktop
- Launching Xcode
- Launching Visual Studio Code
- Latest commit
- Git stats
- Files
- README.md
- About
- Raspberry Pi Connect to Wifi Using wpa_supplicant
- Connecting to Wi-Fi on Raspberry Pi Headless (Without Monitor):
- Re-configuring Wi-Fi Configuration on Raspberry Pi:
- Adding Backup Wi-Fi Network:
- About the author
- Shahriar Shovon
- Беспроводная настройка Raspberry PI 3 B+
Saved searches
Use saved searches to filter your results more quickly
You signed in with another tab or window. Reload to refresh your session. You signed out in another tab or window. Reload to refresh your session. You switched accounts on another tab or window. Reload to refresh your session.
Raspberry Pi WiFi Configuration File
License
asparatu/raspberrypi-wpa-supplicant.conf
This commit does not belong to any branch on this repository, and may belong to a fork outside of the repository.
Name already in use
A tag already exists with the provided branch name. Many Git commands accept both tag and branch names, so creating this branch may cause unexpected behavior. Are you sure you want to create this branch?
Sign In Required
Please sign in to use Codespaces.
Launching GitHub Desktop
If nothing happens, download GitHub Desktop and try again.
Launching GitHub Desktop
If nothing happens, download GitHub Desktop and try again.
Launching Xcode
If nothing happens, download Xcode and try again.
Launching Visual Studio Code
Your codespace will open once ready.
There was a problem preparing your codespace, please try again.
Latest commit
Git stats
Files
Failed to load latest commit information.
README.md
Raspberry Pi Wifi Configuration File
Help you to setup a wpa supplicant configuration file for Raspbian Stretch or later on new headless Rasbian installation.
These will be step-by-step instruction on how to create the configuration file on any OS and Rasbian installation.
Git or Git for Windows needs to be install on the pc. You can download a copy from Git Official Website.
git clone https://github.com/asparatu/raspberrypi-wpa-supplicant.conf.git cd raspberrypi-wpa-supplicant.conf Linux: nano wpa_supplicant.conf Windows: notepad wpa_supplicant.conf - Edit country to your two letter ISO Code. If you do not know yours, check countrycode.org or keep the default of US
- Edit the Wifi SSID and PSK to your Wifi Information.
ssid="YOUR-SSID" psk="wpa_passphrase" Note: If using clear text password make sure you keep the quotes. If you use a hash of the password, you do not need to have quotes.
- Save the file and copy the file to the Boot directory on the microSD card.
- Optional: To enable SSH Server on boot, you need to copy the ssh file to the root of the microSD card.
How to connect to Raspberry Pi
You can connect to the Raspberry Pi by typing ssh pi@raspberrypi.local or ssh pi@(ip address) at the command prompt or terminal window and default password is raspberry
Shane Saunders — Initial work — asparatu
This project is licensed under the MIT License — see the LICENSE.md file for details
About
Raspberry Pi WiFi Configuration File
Raspberry Pi Connect to Wifi Using wpa_supplicant
![]()
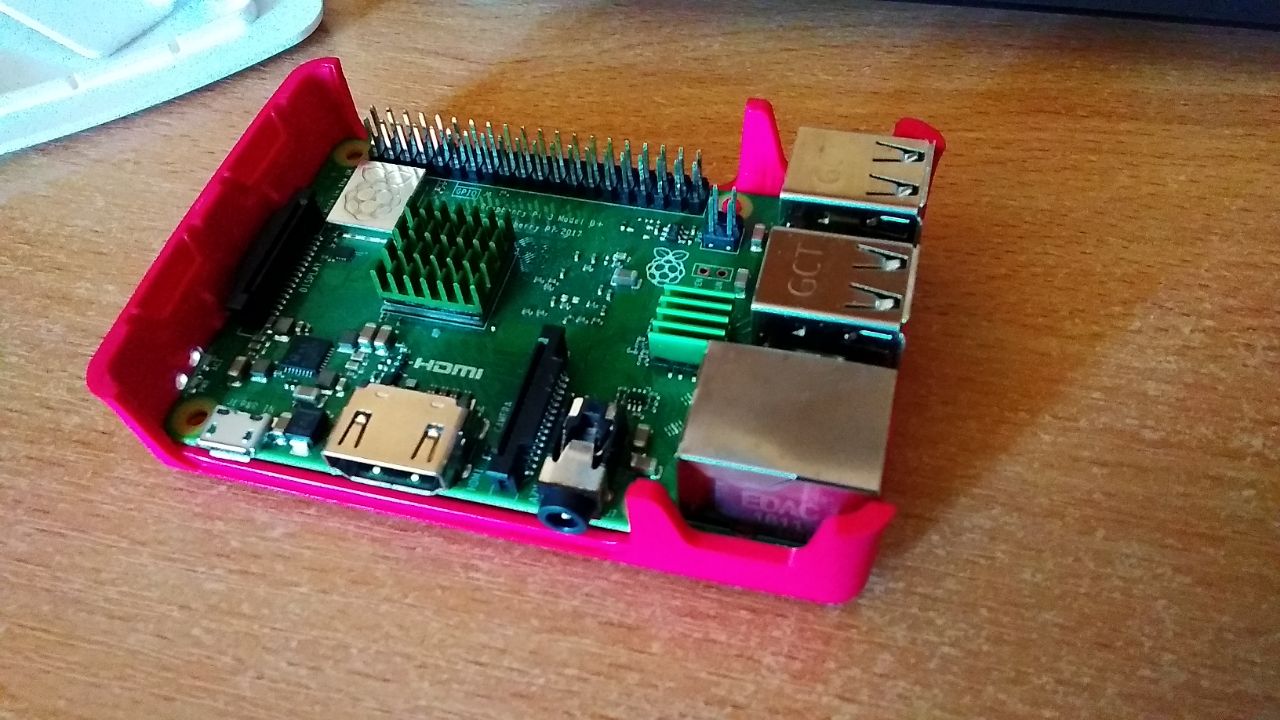
The officially recommended operating system of Raspberry Pi is Raspbian. On Raspbian, you can configure Wi-Fi networks using wpa_supplicant very easily. In this article, I will show you how to configure Wi-Fi on your Raspberry Pi single board computer with Raspbian installed. I will be using Raspberry Pi 3 Model B for the demonstration. But this article should work on any other version of Raspberry Pi with Raspbian installed. So, let’s get started.
Connecting to Wi-Fi on Raspberry Pi Headless (Without Monitor):
If you don’t have a monitor and also don’t have an Ethernet cable that can assign IP addresses to your Raspberry Pi via DHCP automatically, then you may think you don’t have a way to connect Raspberry Pi to your Wi-Fi network. But don’t lose hope. There are people configuring Raspberry Pi headless (without monitor). You can too. First, insert your microSD card on your computer. Then, flash the microSD card with Raspbian OS using Etcher.
NOTE: I have written a dedicated article on installing Raspbian on Raspberry Pi. You should take a look at it here on LinuxHint.com if you’re having problems with installing Raspbian on Raspberry Pi.
Then, eject your microSD and insert it on your computer again. You will find a boot partition as shown in the screenshot below. Double click on it.
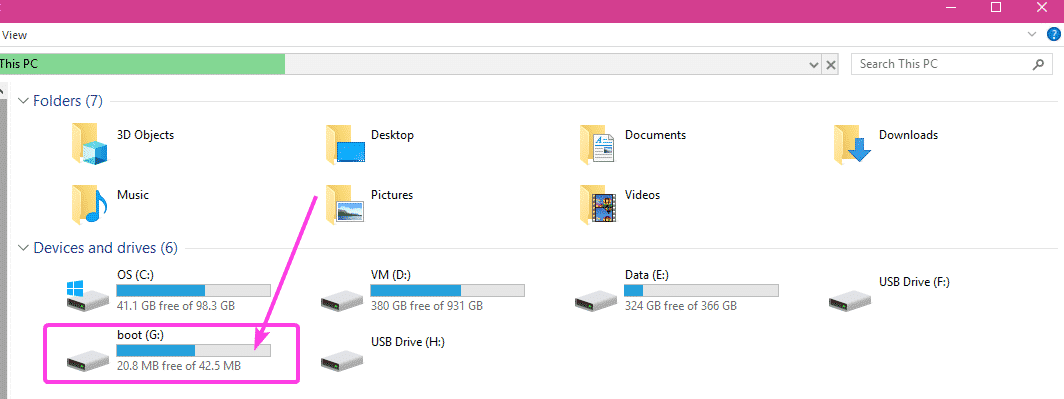
You will see many files inside this directory. You will have to create 2 more files in this directory.
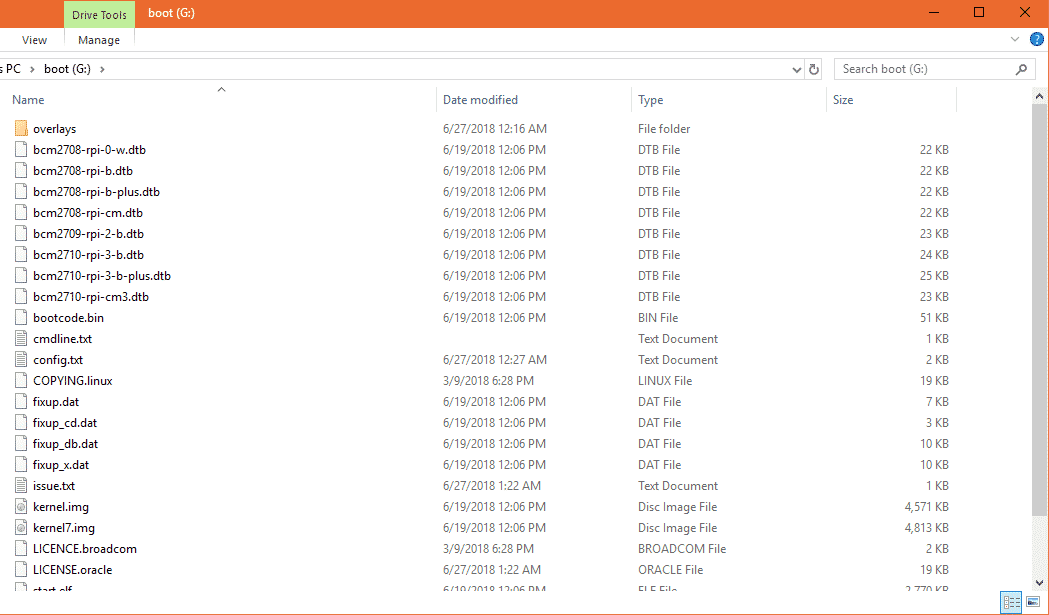
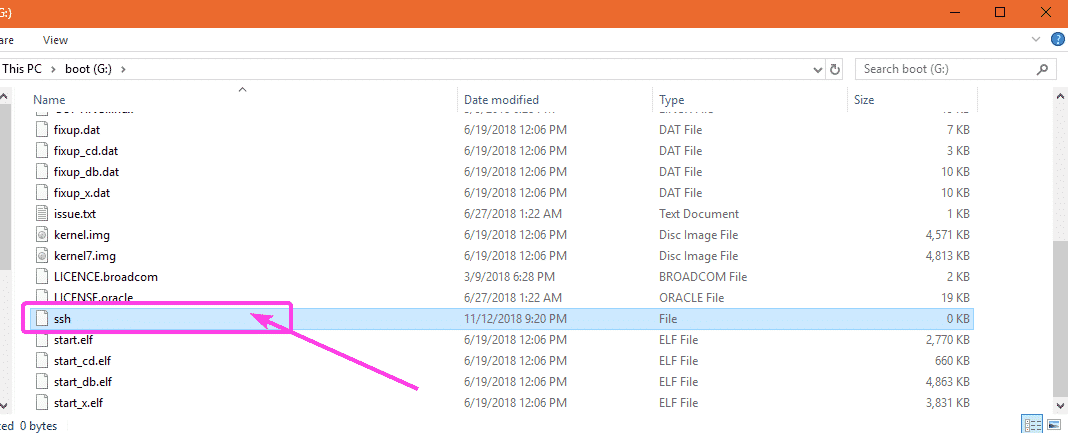
The first file is ssh (no extension). You don’t have to add anything in this file. The ssh file will enable SSH service. Without SSH enabled, you won’t be able to connect to your Raspberry Pi remotely. It will be useless.
The second file is wpa_supplicant.conf
In this file, you will have to type in the required configuration to connect to the Wi-Fi network. Just create a new file wpa_supplicant.conf and add the following lines to it. Be sure to make changes where necessary depending on your configuration. Finally, save the file.
country =US
ctrl_interface = DIR = / var / run / wpa_supplicant GROUP =netdev
update_config = 1
network = {
ssid = «WIFI_SSID»
scan_ssid = 1
psk = «WIFI_PASSWORD»
key_mgmt =WPA-PSK
}
NOTE: Don’t forget change WIFI_SSID to your Wi-Fi SSID, change WIFI_PASSWORD to your Wi-Fi password.
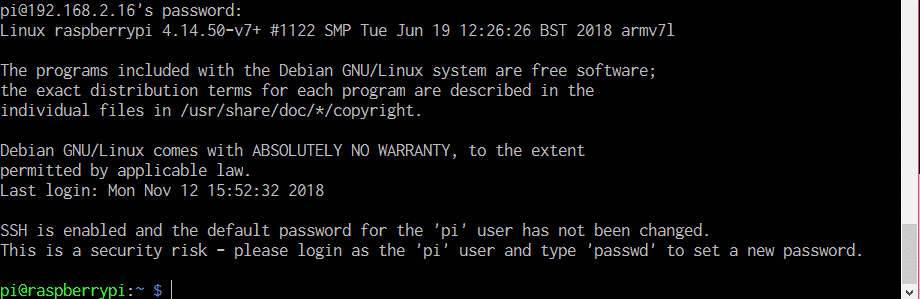
Now, eject the microSD card from your computer and insert it on your Raspberry Pi. Then, power on your Raspberry Pi. Your Raspberry Pi should be connected to the Wi-Fi network. You can find the IP address that is assigned to your Raspberry Pi via your Wi-Fi router from the control panel of your Router very easily. Mine is happen to be 192.168.2.16.
Now, your Raspberry Pi should be accessible remotely via SSH. The default username is pi and password is raspberry. To connect to your Raspberry Pi using SSH for the first time, run the following command:
Now, type in yes and press .

Now, type in the password raspberry and press .
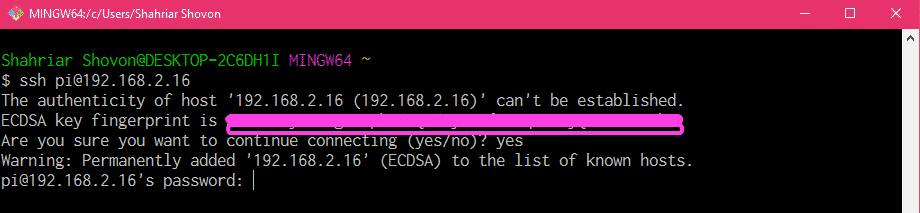
You should be connected to your Raspberry Pi remotely.
Re-configuring Wi-Fi Configuration on Raspberry Pi:
If you have network connectivity already and can connect to the Raspberry Pi remotely via SSH or VNC, and want to change the Wi-Fi configuration, then all you have to do is edit the wpa_supplicant configuration file /etc/wpa_supplicant/wpa_supplicant.conf
First, connect to your Raspberry Pi remotely via SSH or VNC.
Then, edit the /etc/wpa_supplicant/wpa_supplicant.conf configuration file with the following command:

The wpa_supplicant.conf configuration file should be opened as you can see in the screenshot below.
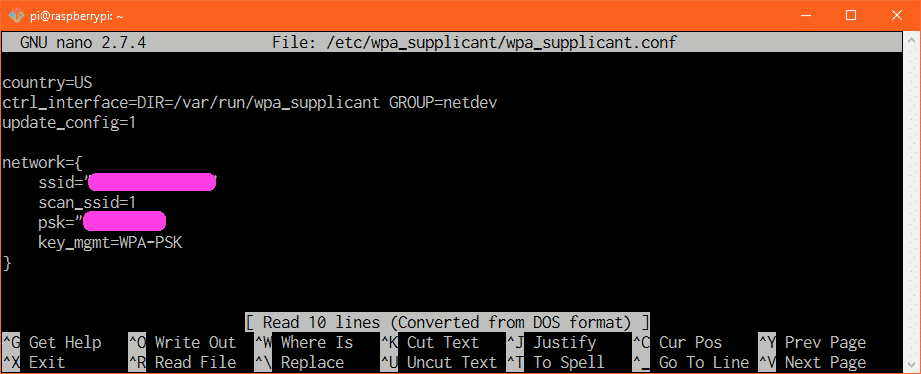
Now, modify your Wi-Fi connection details as required and save the file again by pressing + x and then press y followed by . Now, reboot your Raspberry Pi, the changes should be applied.
Adding Backup Wi-Fi Network:
You can add details of multiple Wi-Fi network on your Raspberry Pi. That way, if any Wi-Fi SSID is not available, Raspberry Pi will try to connect to the next Wi-Fi SSID. If it fails, it will try to connect to the next one and so on. I think this is an awesome feature of wpa_supplicant.
To add a backup Wi-Fi network on your Raspberry Pi, just edit the configuration file /etc/wpa_supplicant/wpa_supplicant.conf with the following command:
Now, type in the lines as marked in the screenshot below in the order in which you want the Raspberry Pi to try to connect to the Wi-Fi network.
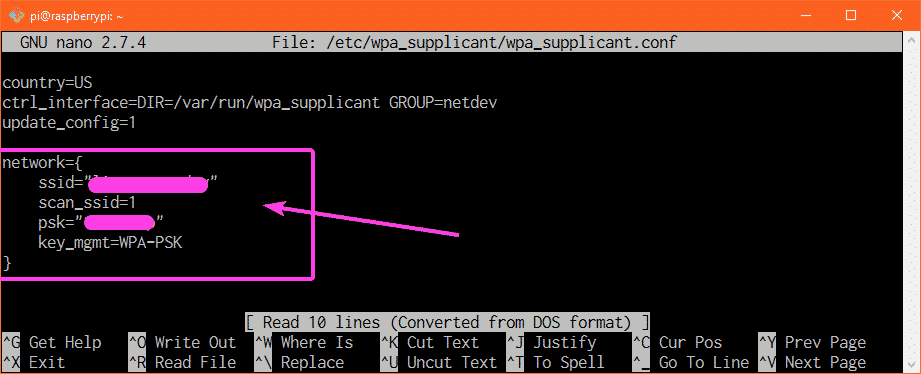
For example, let’s say you have Wi-Fi networks with the SSID CSE_LAB1 and HOME1 respectively. You want to connect to the Wi-Fi SSID HOME1 when you’re home. But when you’re at the university, you want to connect to the Wi-Fi SSID CSE_LAB1. So, here, HOME1 is your primary Wi-Fi SSID and CSE_LAB1 is your secondary Wi-Fi SSID. The wpa_supplicant.conf configuration file should look as follows in this case.
country =US
ctrl_interface = DIR = / var / run / wpa_supplicant GROUP =netdev
update_config = 1
network = {
ssid = «HOME1»
scan_ssid = 1
psk = «HOME1_PASS»
key_mgmt =WPA-PSK
}
network = {
ssid = «CSE_LAB1»
scan_ssid = 1
psk = «CSE_LAB1_PASSWORD»
key_mgmt =WPA-PSK
}
Make sure you reboot your Raspberry Pi for the changes to take effect. So, that’s how you configure Wi-Fi on your Raspberry Pi single board computer using wpa_supplicant. Thanks for reading this article.
About the author
Shahriar Shovon
Freelancer & Linux System Administrator. Also loves Web API development with Node.js and JavaScript. I was born in Bangladesh. I am currently studying Electronics and Communication Engineering at Khulna University of Engineering & Technology (KUET), one of the demanding public engineering universities of Bangladesh.
Беспроводная настройка Raspberry PI 3 B+
несколько месяцев назад, приобрел себе малинку, с целью попрактиковатся в embedded-типа разработке. Я уверен, много людей знакомых из Raspberry полагают, что для первоначального запуска микрокомпьютера нужен как минимум RJ45 или монитор, клавиатура и мышь (что лучше). Сегодня будем развенчивать этот миф поисковым запросом raspberry pi headless setup. Для этого будем использовать Wi-Fi сеть и SSH протокол.
Если у Вас уже есть плата и sd-карта, но нет дополнительного монитора и тем более шнура для ethernet, то нужно проделать дополнительные движения, для успешной установки ОС на вашу плату и возможности её использования.
- Выбираем желанную ОС (список доступных есть на сайте), скачиваем архив из сайта (я использовал Raspbian)
- Устанавливаем ОС на флешку. Распаковав архив, нужно записать образ диска с расширением img на отформатированную sd-карту (карта должна иметь достаточный объем памяти, в моём случае я использовал на 16gb). Можно использовать для этого Etcher (работает на всех платформах), Win32DiskImager (для Windows) или любую другую утилиту.
- Создаем файл wpa_supplicant.conf . Далее нужно создать файл конфигурации для wpa_supplicant , где мы укажем параметры нашей wi-fi сети.
ctrl_interface=DIR=/var/run/wpa_supplicant GROUP=netdev update_config=1 country=UA network=< ssid="Your network name/SSID" psk="Your WPA/WPA2 security key" key_mgmt=WPA-PSK >Вот и всё у нас есть полный доступ к ОС Raspberry. Если вдруг Вам нужен графический интерфейс, нужно поискать про VNC и RDP.