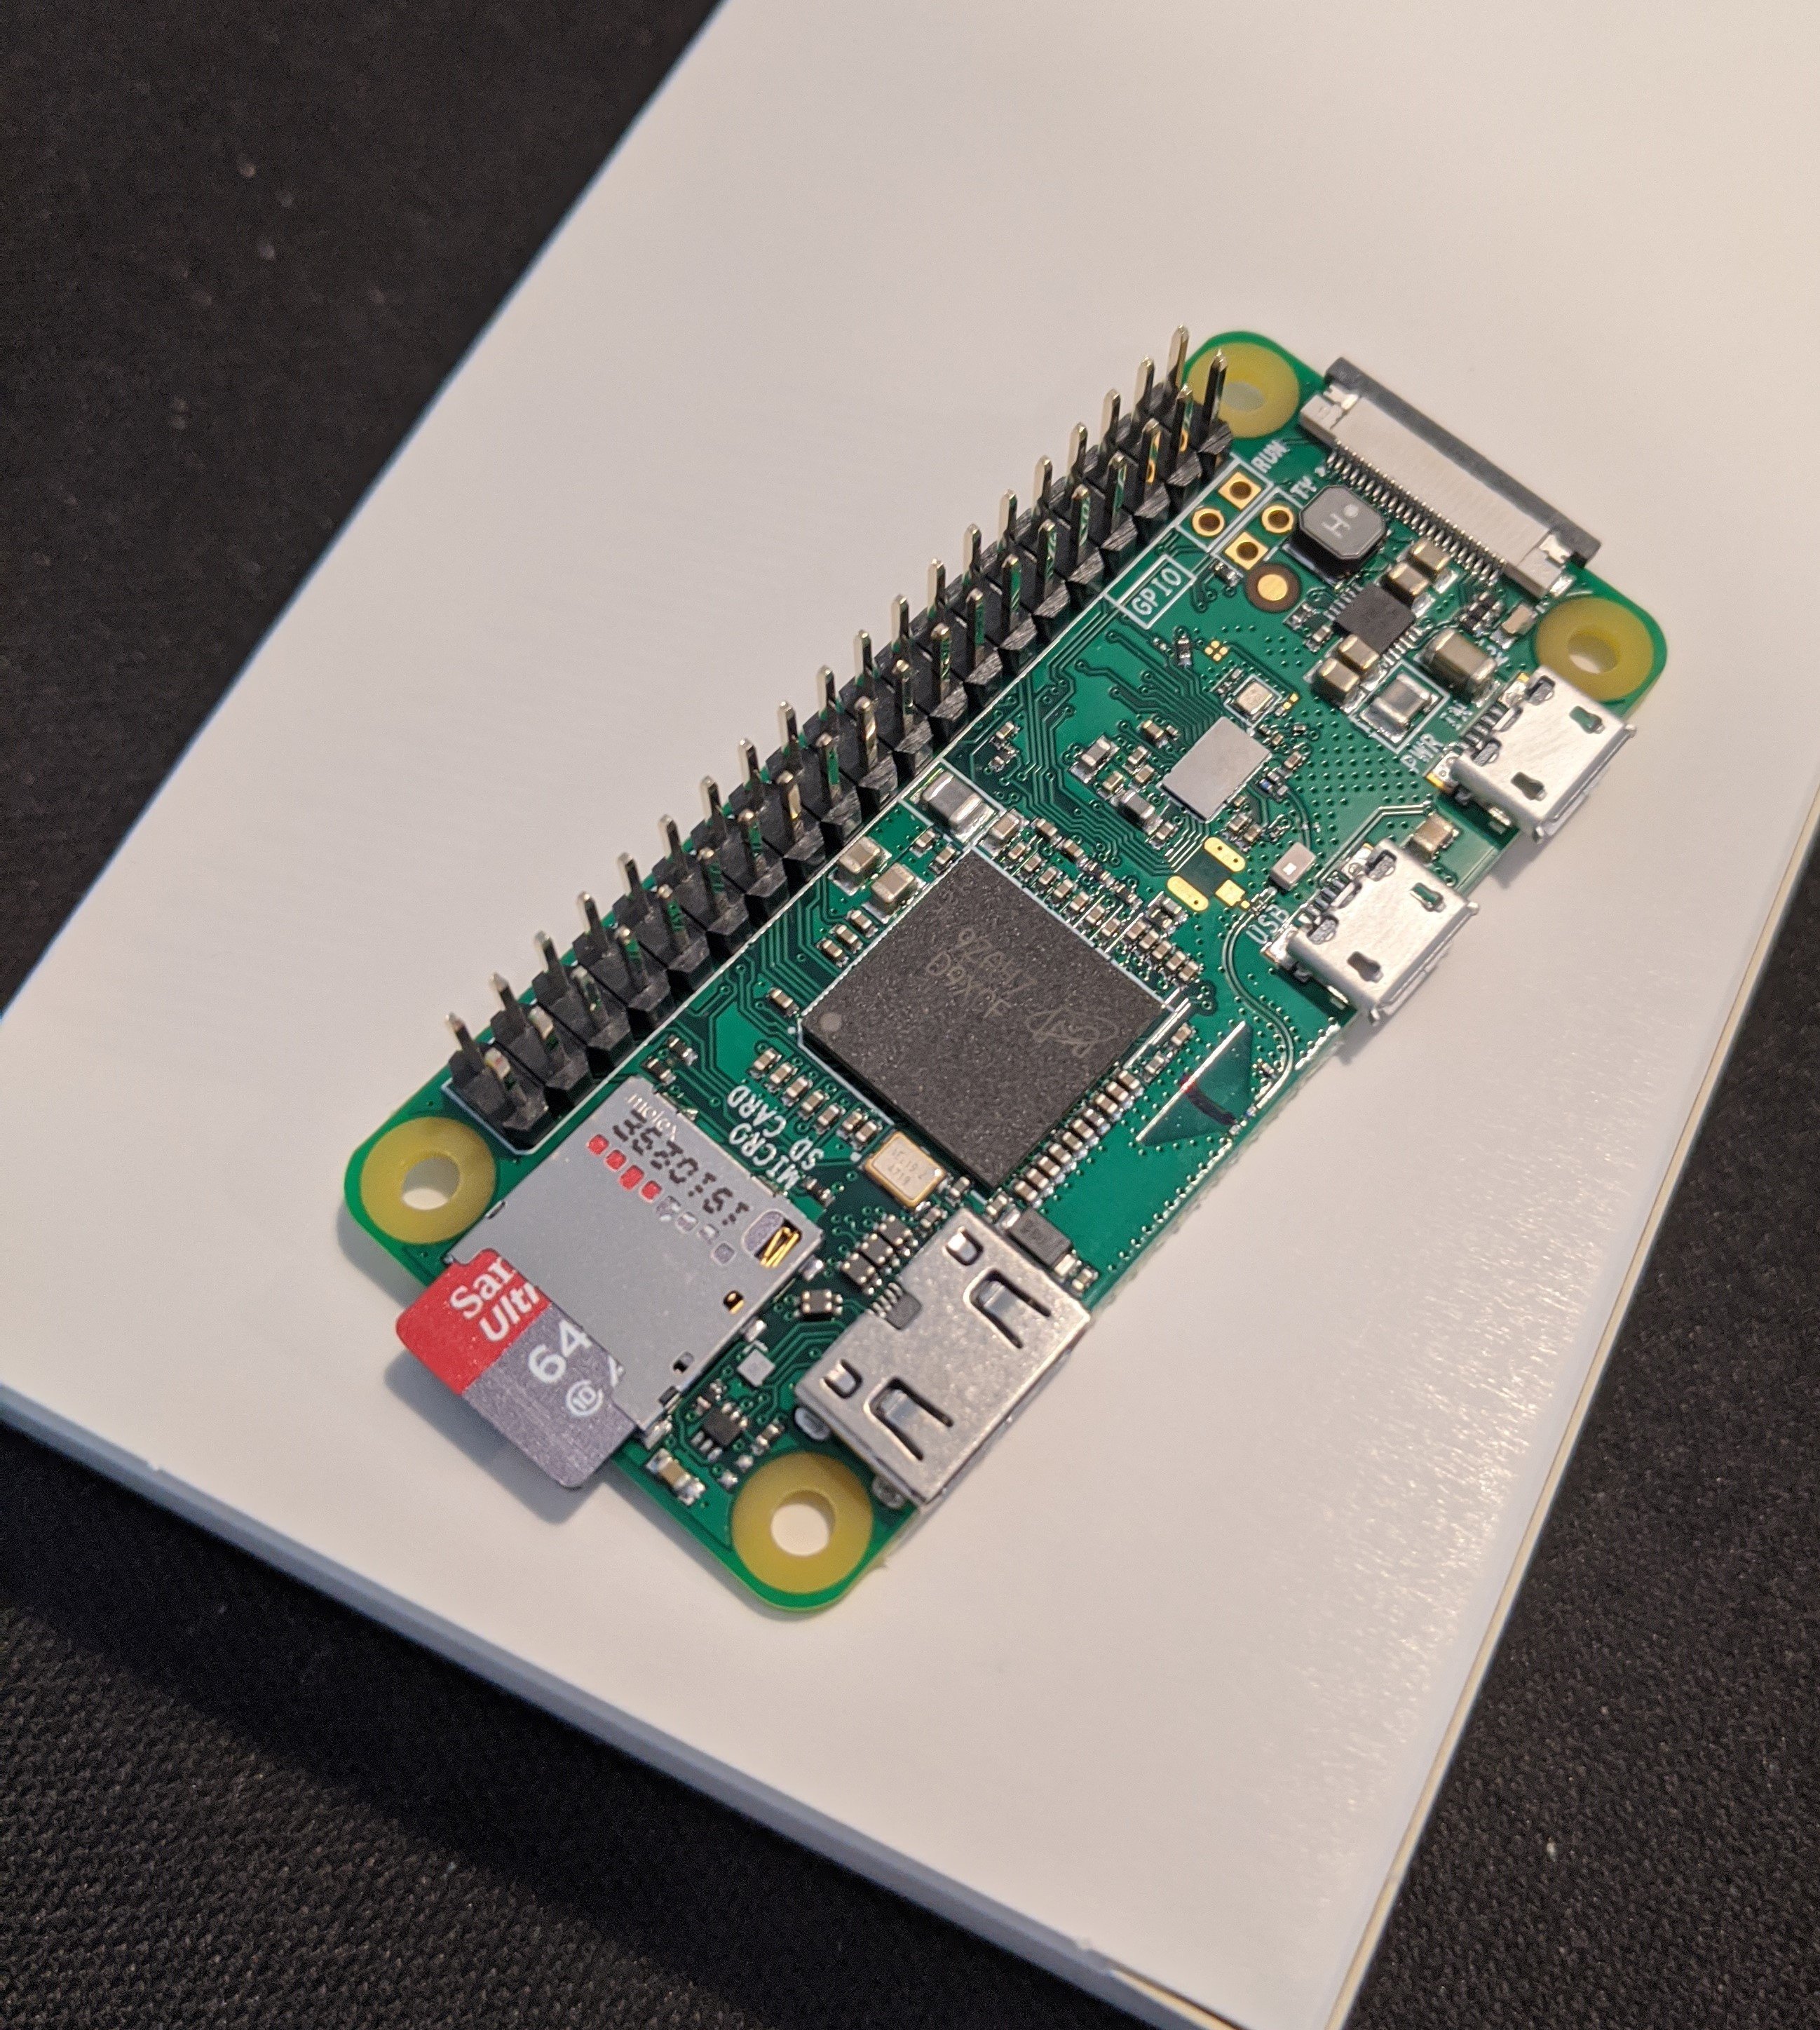
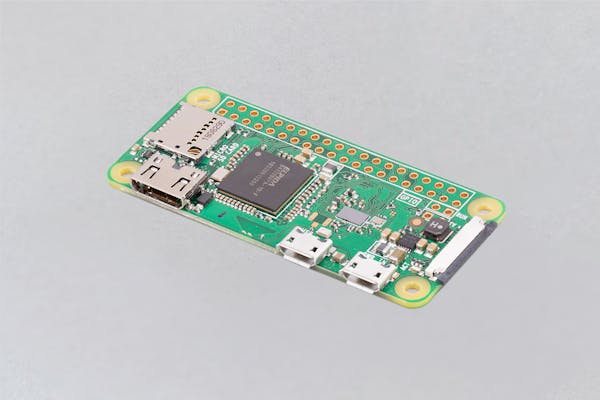
- Raspberry pi zero with wifi
- Комплект
- Установка Raspbian
- Windows
- Mac OS
- Linux
- Первый запуск
- Настройка Wi-Fi
- Preparing a Raspberry Pi Zero with WiFi and SSH
- Prepare the SD Card
- Download OS image
- Flash the SD Card
- Configure the OS
- Enable SSH
- Enable WiFi
- Run the Raspberry Pi Zero W
- Change password
- Change hostname
- Increase swap space
- Raspberry Pi Zero W
- Getting started
- Specification
- Compliance
- Obsolescence Statement
Raspberry pi zero with wifi
Недавно вышла новая версия Raspberry Pi Zero W. Это то же самое что просто Zero, только с Wi-fi и Bluetooth на борту. В общем решил заказать, поиграться.
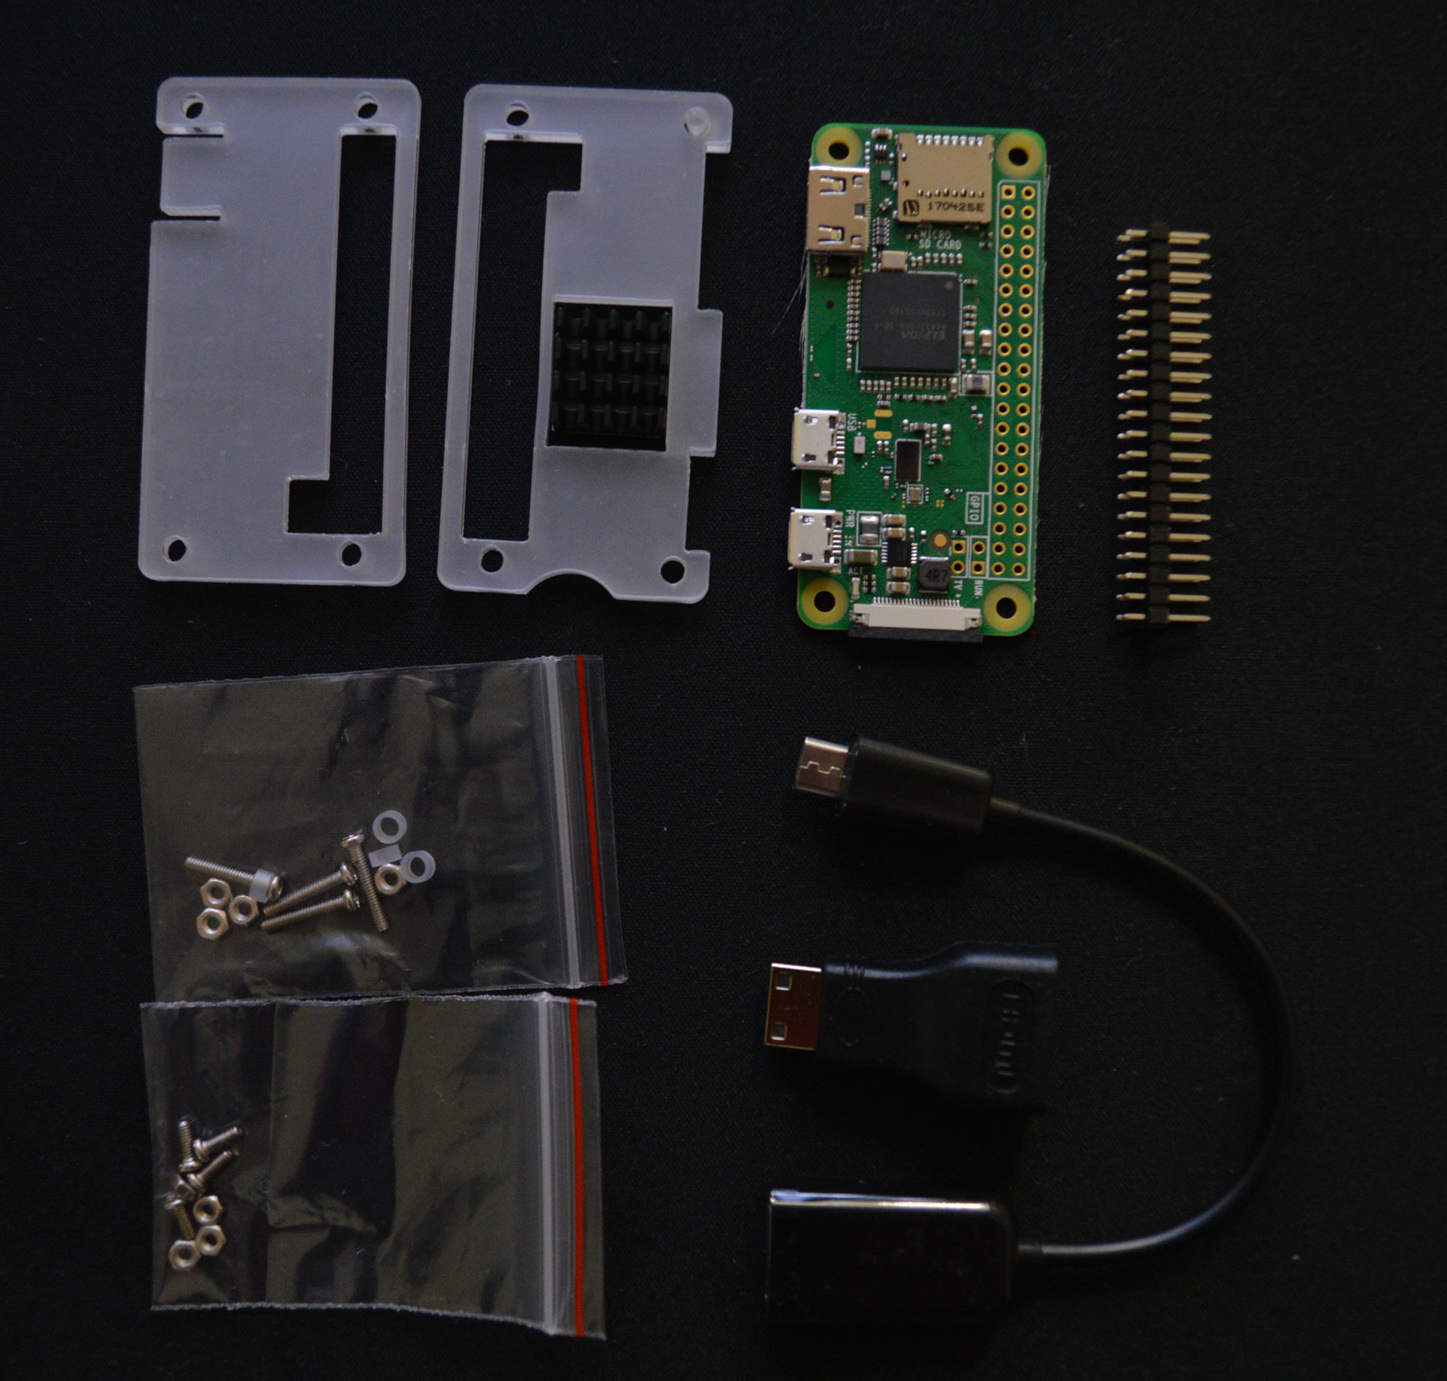
Комплект
Заказывал с AliExpress-а: вот здесь сама платка и к ней еще доп.набор из переходников, камеры, корпуса и GPIO пинов. Вот так выглядит весь комплект:
Характеристики Raspberry Pi Zero W:
- 1GHz, single-core CPU
- 512MB RAM
- Mini-HDMI port
- Micro-USB On-The-Go port
- Micro-USB power
- HAT-compatible 40-pin header
- Composite video and reset headers
- CSI camera connector
- 802.11n wireless LAN Wi-Fi
- Bluetooth 4.0
- 65mm x 30mm x 5mm
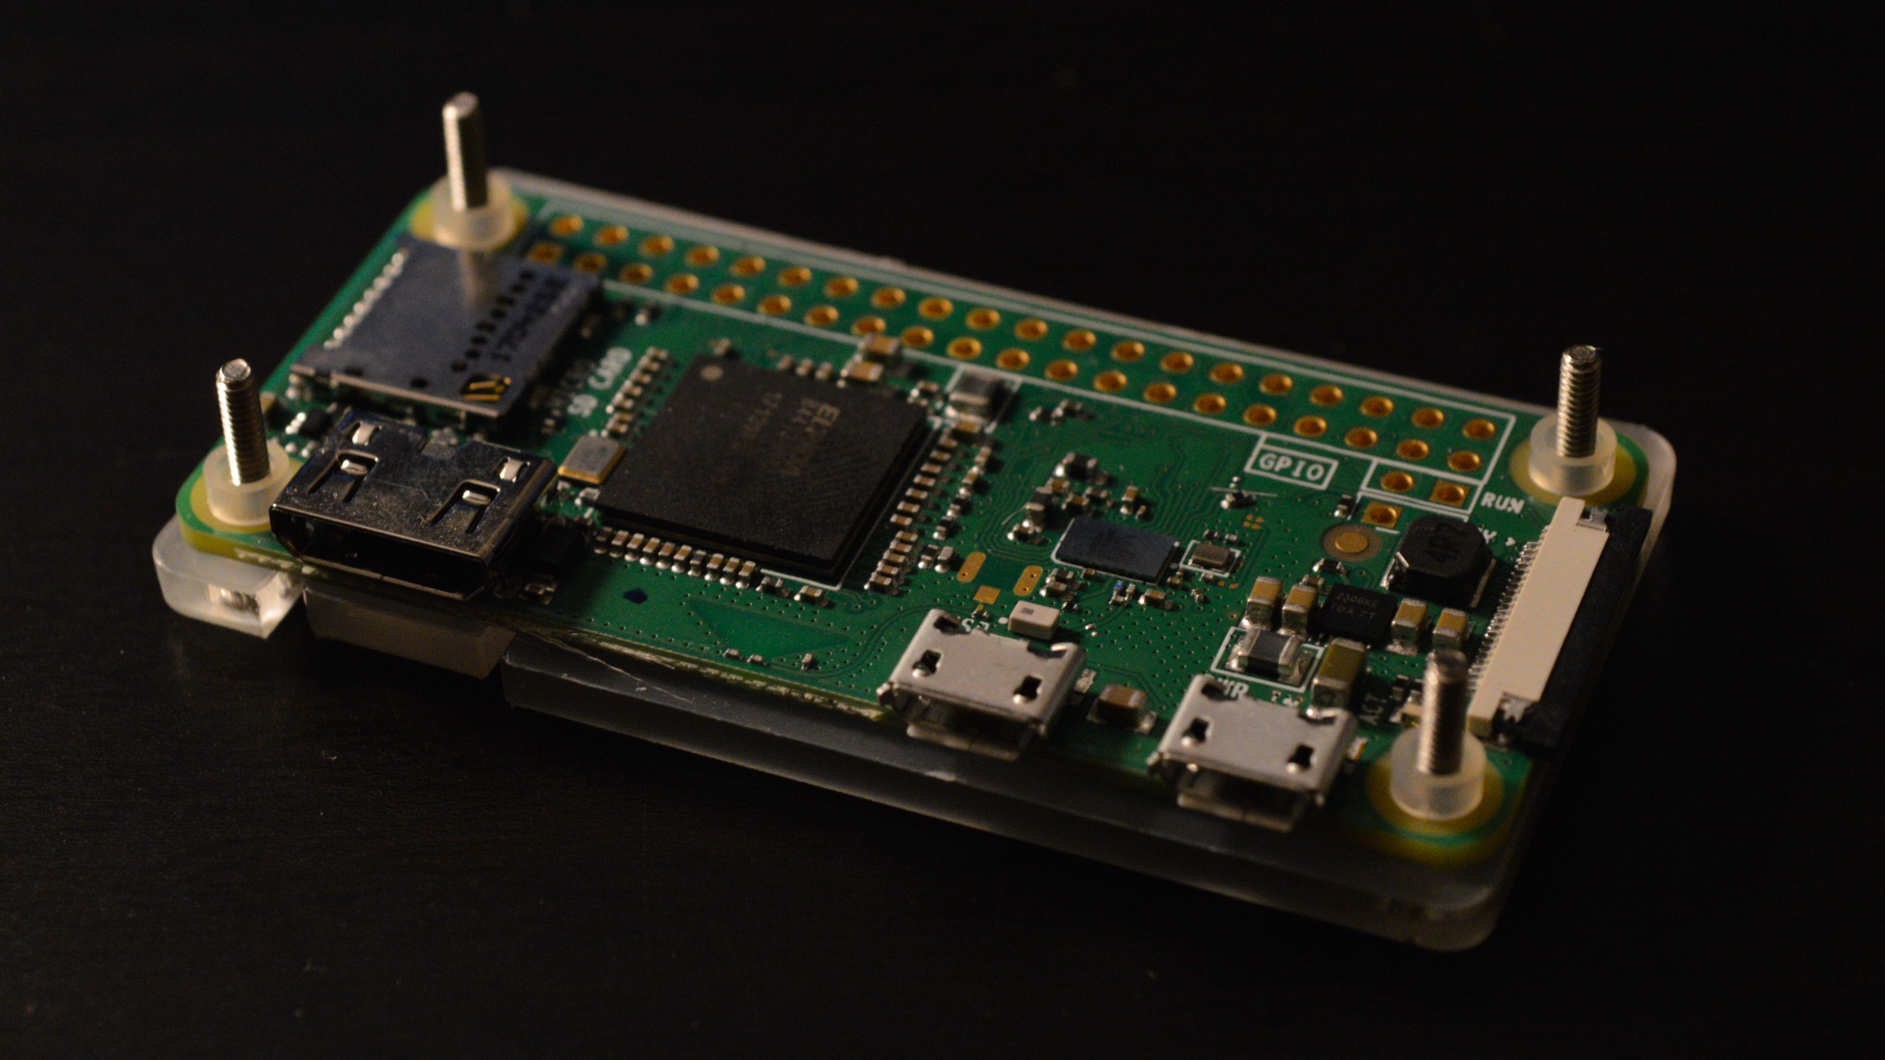
GPIO пины здесь нужно напаять вручную, вот так:
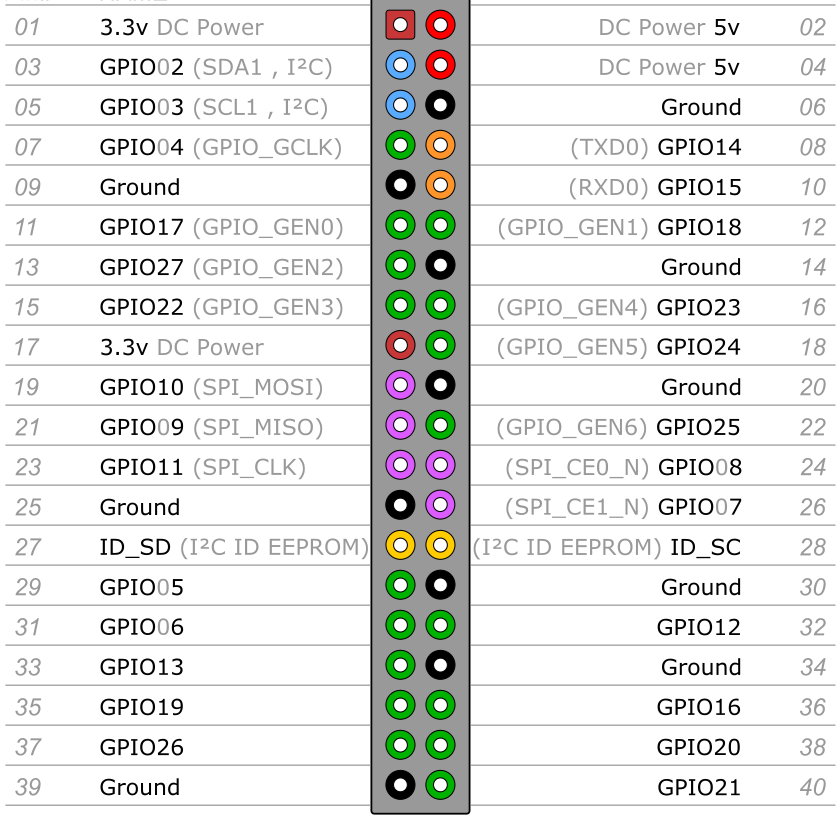
Распиновка такая же как на моделях Raspberry Pi 2,3,Zero:
Здесь есть дополнительная информация по каждому пину.
Пока что я их не паял, а решил провести первоначальную установку системы.
Установка Raspbian
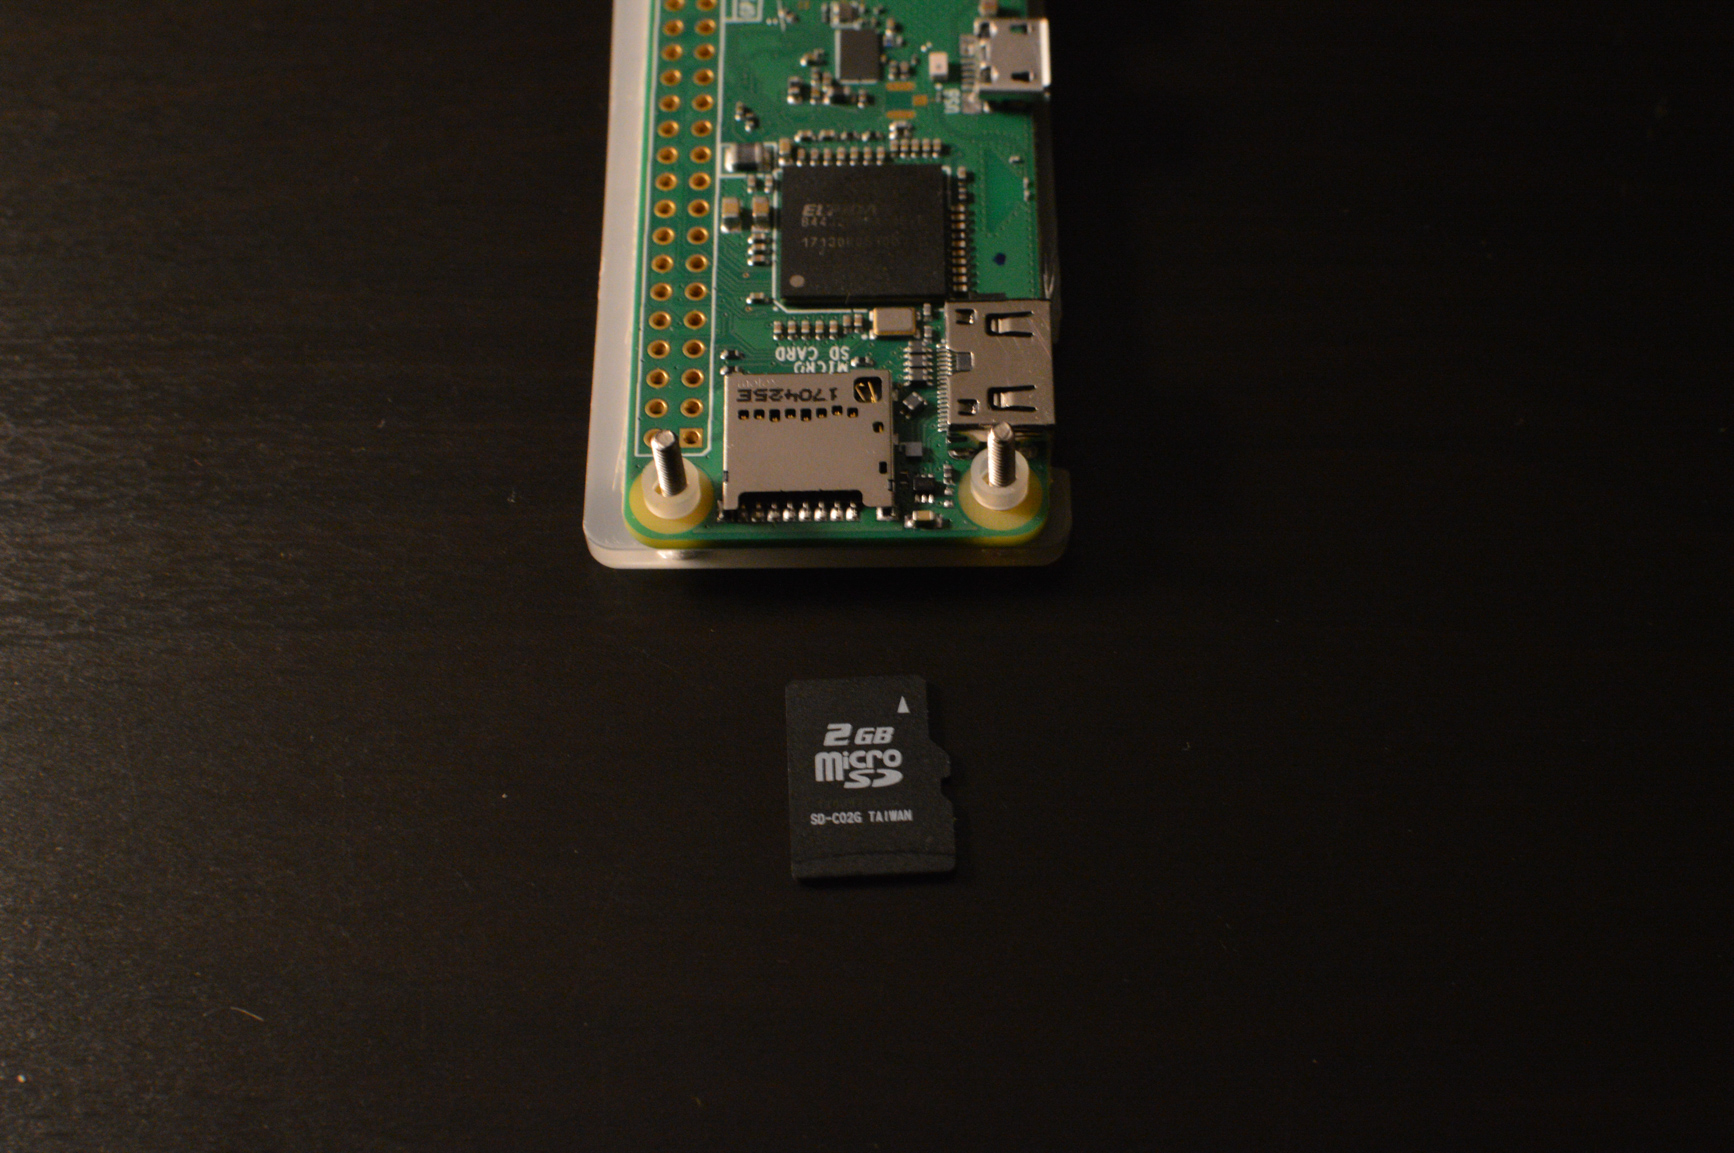
В качестве носителя Raspberry Pi Zero W использует microSD карту, в отличие от старшей модели платы, которая работает на SD. Объем карты должен быть не меньше 2ГБ. После установки на двухгигабайтную карту, свободного места останется около 500МБ — особо не разбежишься. Поэтому если нужно хранить что-то объемное на карте, то лучше взять побольше.
Раньше, когда только появлялись платы Raspberry Pi, еще не было специального дистрибутива Linux для них, и многие использовали обычный Debian, собранный под ARM процессоры. Это было не очень удобно, потому что приходилось вручную ставить разные модули ядра и драйвера. Сейчас же есть прекрасный Raspbian — это тот же Debian, но допиленный для использования на Raspberry Pi. Многие вещи поддерживает “из коробки”, есть удобные консольные утилиты для всяческой настройки и легковесный desktop environment, на случай если планируется запускать с GUI интерфейсом.
Я скачал RASPBIAN STRETCH LITE. Это консольная версия без GUI. Теперь нужно записать его на карту.
Windows
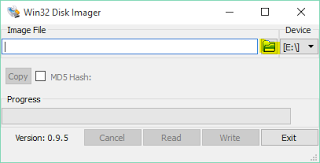
Можно воспользоваться утилитой Win32diskimager или любой похожей — Rufus, Universal USB Creator.
Mac OS
Подключаем карту и смотрим какие диски есть в системе:
$ diskutil list /dev/disk0 (internal, physical): #: TYPE NAME SIZE IDENTIFIER 0: GUID_partition_scheme *251.0 GB disk0 1: EFI EFI 209.7 MB disk0s1 2: Apple_CoreStorage Macintosh HD 250.0 GB disk0s2 3: Apple_Boot Recovery HD 650.0 MB disk0s3 /dev/disk1 (internal, virtual): #: TYPE NAME SIZE IDENTIFIER 0: Apple_HFS Macintosh HD +249.6 GB disk1 Logical Volume on disk0s2 E3AA7CD7-2FF0-4E8C-A081-D37A05FB0815 Unencrypted /dev/disk2 (internal, physical): #: TYPE NAME SIZE IDENTIFIER 0: FDisk_partition_scheme *1.9 GB disk2 1: DOS_FAT_32 TT 1.9 GB disk2s1 Видно что /dev/disk2 — это наша флешка. Отмонтируем ее:
$ diskutil unmountDisk /dev/disk2 И теперь запишем образ Raspbian (не надо добавлять номер раздела, просто /dev/disk2):
$ sudo dd bs=1m if=2017-09-07-raspbian-stretch-lite.img of=/dev/disk2 conv=sync Linux
Подключаем карту и смотрим какие диски есть в системе:
$ sudo fdisk -l Disk /dev/sda: 111.8 GiB, 120034123776 bytes, 234441648 sectors Units: sectors of 1 * 512 = 512 bytes Sector size (logical/physical): 512 bytes / 512 bytes I/O size (minimum/optimal): 512 bytes / 512 bytes Disklabel type: dos Disk identifier: 0xfaa7714f Device Boot Start End Sectors Size Id Type /dev/sda1 * 2048 1026047 1024000 500M 7 HPFS/NTFS/exFAT /dev/sda2 1026048 234438655 233412608 111.3G 7 HPFS/NTFS/exFAT . Disk /dev/sdc: 15 GiB, 16043212800 bytes, 31334400 sectors Units: sectors of 1 * 512 = 512 bytes Sector size (logical/physical): 512 bytes / 512 bytes I/O size (minimum/optimal): 512 bytes / 512 bytes Disklabel type: dos Disk identifier: 0x690a7a2e Device Boot Start End Sectors Size Id Type /dev/sdc1 * 0 2931839 2931840 1.4G 0 Empty /dev/sdc2 2880880 2885487 4608 2.3M ef EFI (FAT-12/16/32) Наша флешка — /dev/sdc . Если замонтирован раздел, размонтируем:
И теперь запишем образ Raspbian (не надо добавлять номер раздела, просто /dev/sdc):
$ sudo dd bs=1m if=2017-09-07-raspbian-stretch-lite.img of=/dev/sdc conv=sync Первый запуск
После записи ОС на microSD карту, вставляем ее в raspberry и подключаем питание, клавиатуру и монитор.
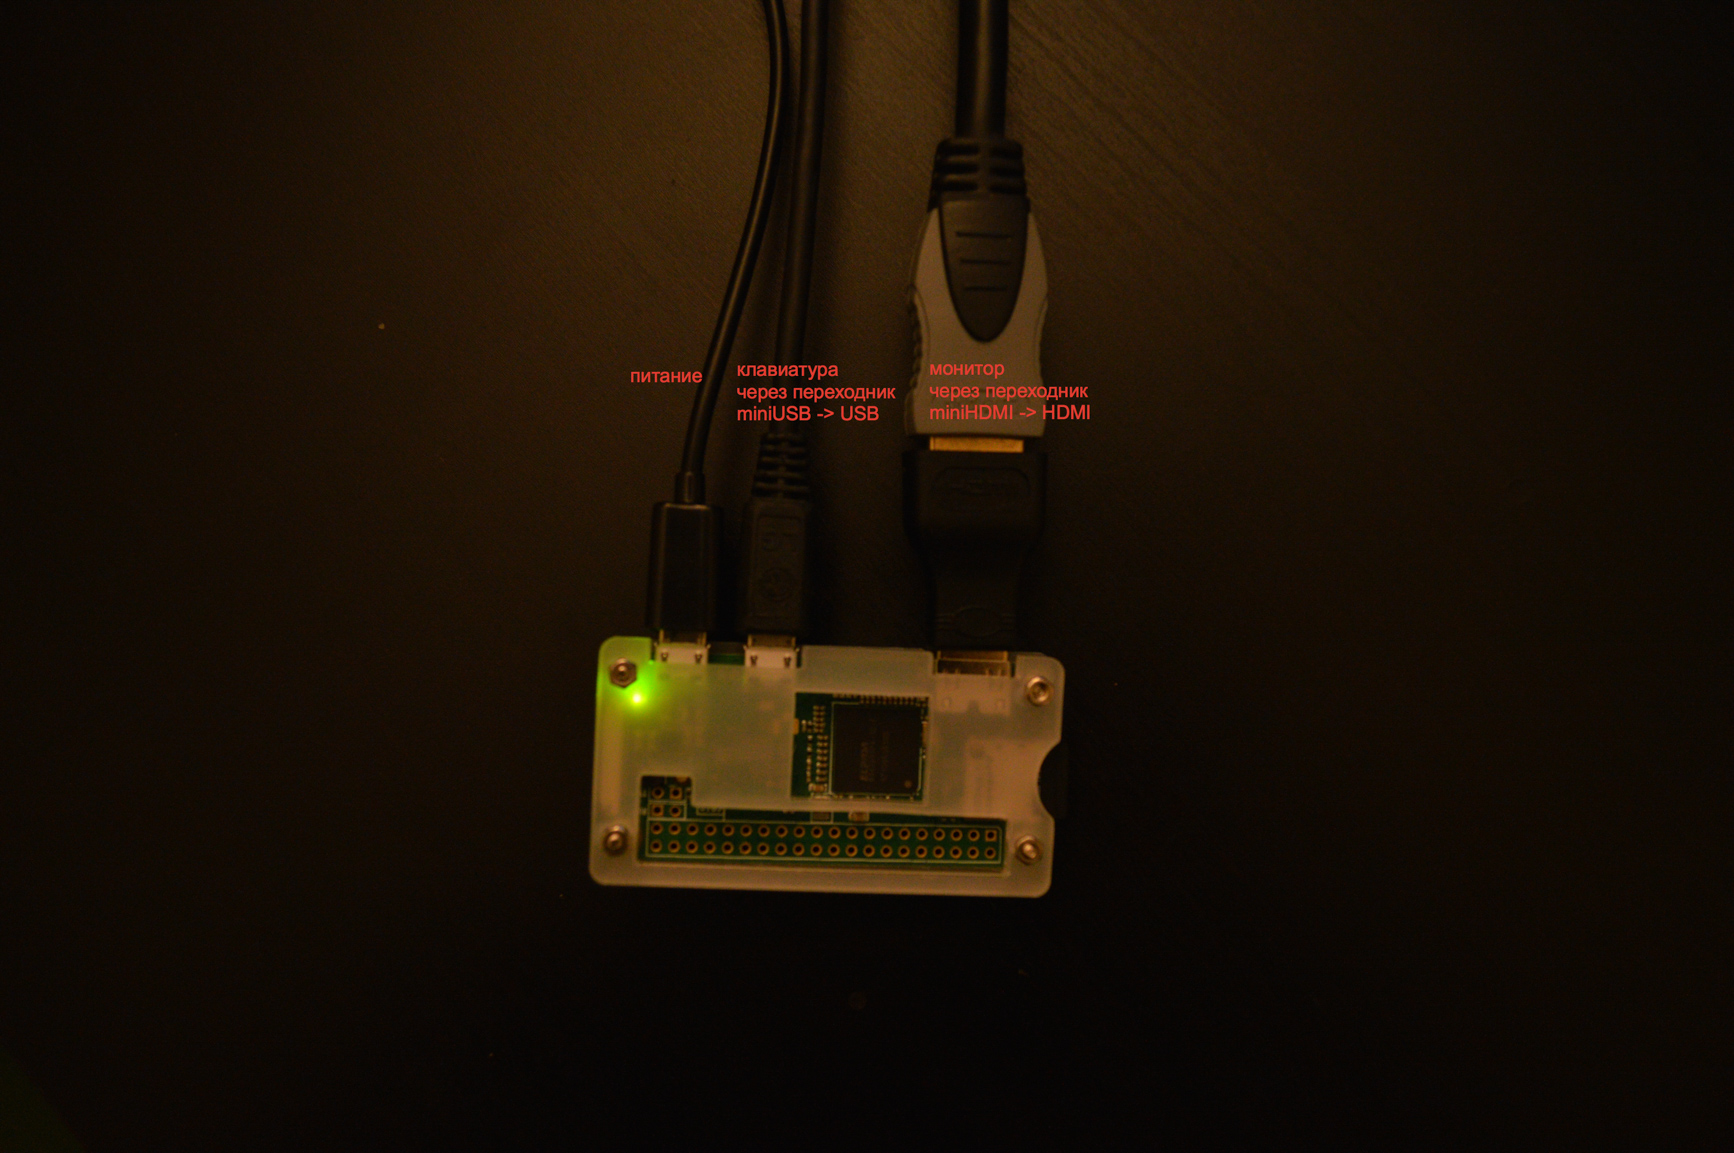
Что интересно, запускается плата при подключении питания в любой из microUSB портов, но вот клавиатура работает только в определенном. Поэтому, если после загрузки не работает клавиатура — просто поменяйте местами разъемы.
Логин и пароль по умолчанию в raspbian:
login: pi password: raspberry Настройка Wi-Fi
Как я писал выше — raspbian “из коробки” отлично подходит для raspberry pi. И все нужное для настройки wi-fi уже есть в системе.
У меня дома стоит обычный wi-fi роутер и создана беспроводная сеть c WPA2-PSK. Чтобы подключить Pi к этой сети, редактируем файл /etc/wpa_supplicant/wpa_supplicant.conf . Моя сеть называется 4te-WIFI и пароль — mywifipassword . Пароль в этом файле хранится в открытом виде. key_mgmt для WPA2-PSK все равно указывается WPA-PSK.
Вот так выглядит мой конфиг:
ctrl_interface=DIR=/var/run/wpa_supplicant GROUP=netdev update_config=1 country=RU network= ssid="4te-WIFI" psk="mywifipassword" key_mgmt=WPA-PSK > Вуаля! Интерфейс wlan0 получил IP-адрес от роутера и готов к работе:
$ ifconfig lo: flags=73 mtu 65536 inet 127.0.0.1 netmask 255.0.0.0 inet6 ::1 prefixlen 128 scopeid 0x10 loop txqueuelen 1 (Local Loopback) RX packets 0 bytes 0 (0.0 B) RX errors 0 dropped 0 overruns 0 frame 0 TX packets 0 bytes 0 (0.0 B) TX errors 0 dropped 0 overruns 0 carrier 0 collisions 0 wlan0: flags=4163 mtu 1500 inet 192.168.1.42 netmask 255.255.255.0 broadcast 192.168.1.255 inet6 fe80::245e:56a5:398e:34c2 prefixlen 64 scopeid 0x20 ether b8:27:ea:fe:34:2a txqueuelen 1000 (Ethernet) RX packets 1418 bytes 174338 (170.2 KiB) RX errors 0 dropped 0 overruns 0 frame 0 TX packets 901 bytes 280257 (273.6 KiB) TX errors 0 dropped 0 overruns 0 carrier 0 collisions 0 Включим ssh и добавим его в автостарт:
$ sudo systemctl start ssh $ sudo systemctl enable ssh 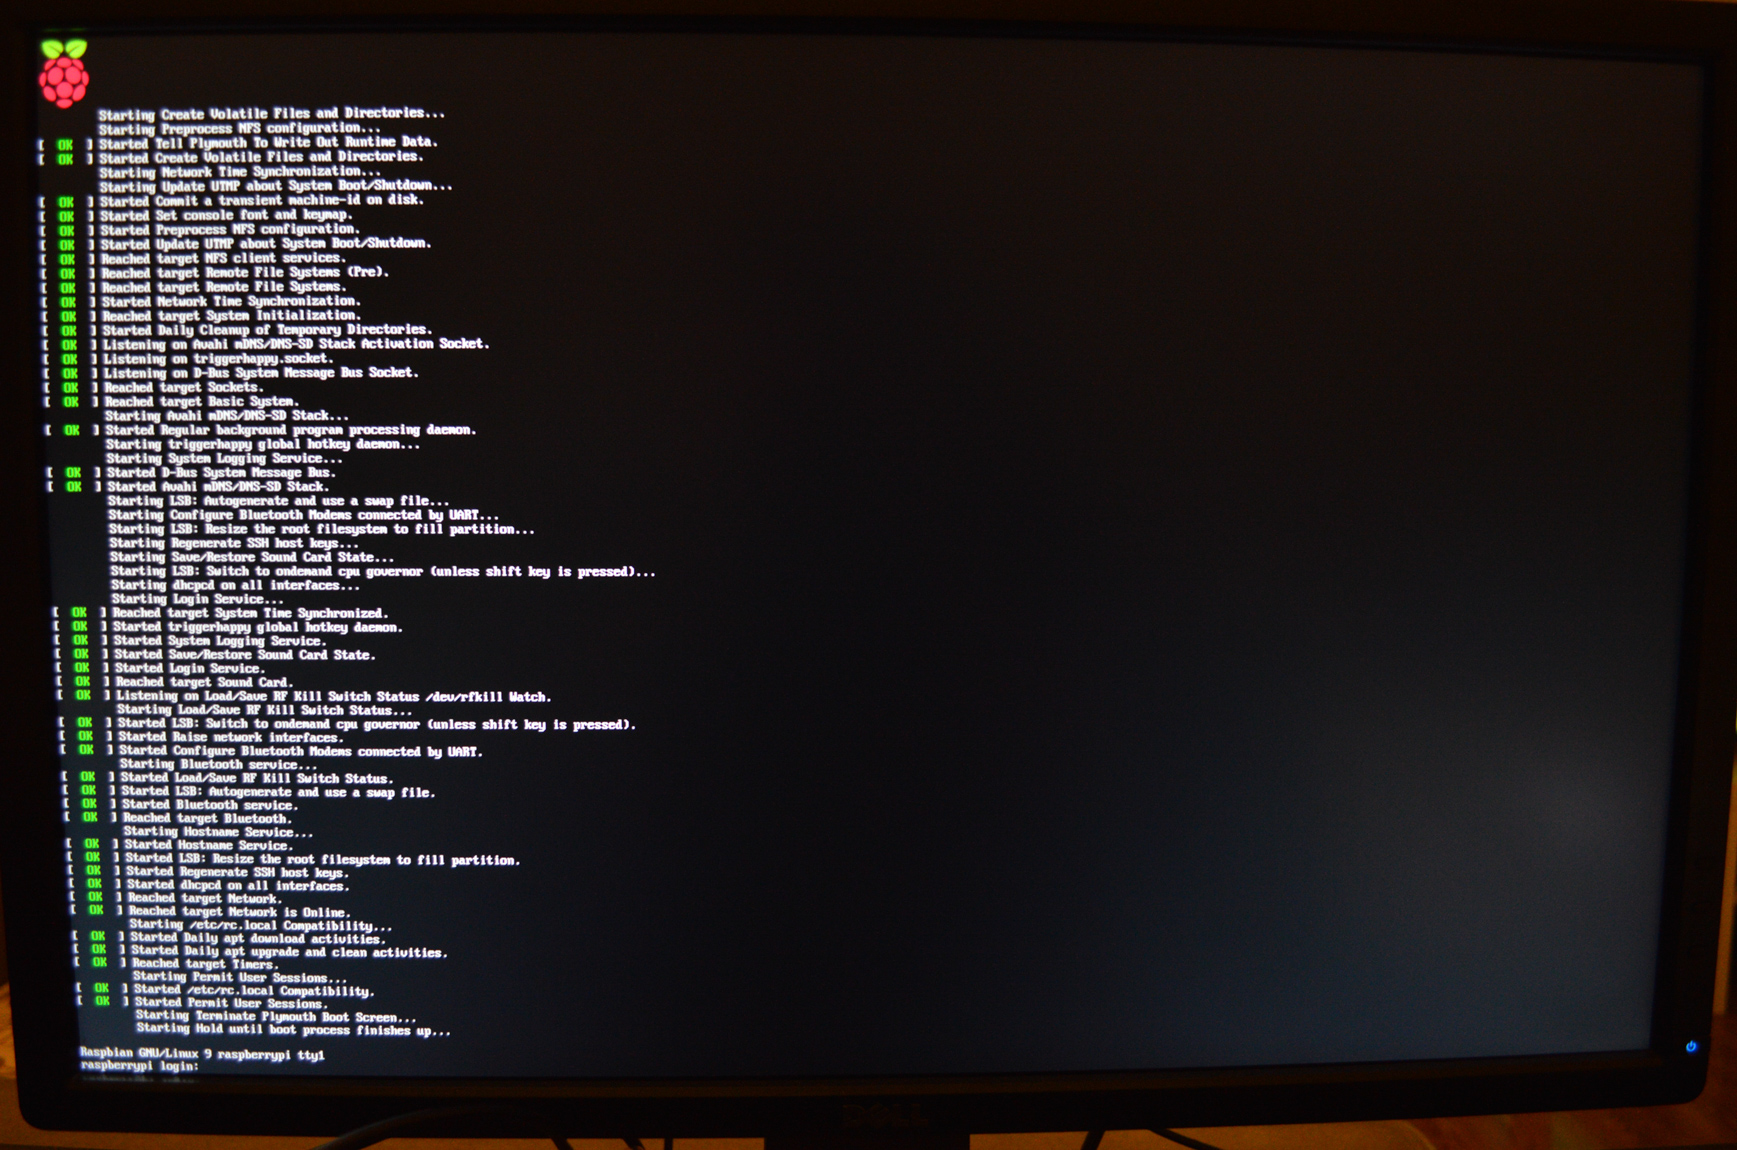
Теперь Rasperry Pi настроен и готов к экспериментам!
Preparing a Raspberry Pi Zero with WiFi and SSH
When working with a Raspberry Pi Zero W, as there is no network port, you will need to enable WiFi and SSH as well so that you can connect to it when it first boots.
This is far simpler than the alternative, which is to connect a keyboard and monitor to the Raspberry Pi Zero W to then set up WiFi and SSH. You can simply use your existing setup.
Prepare the SD Card
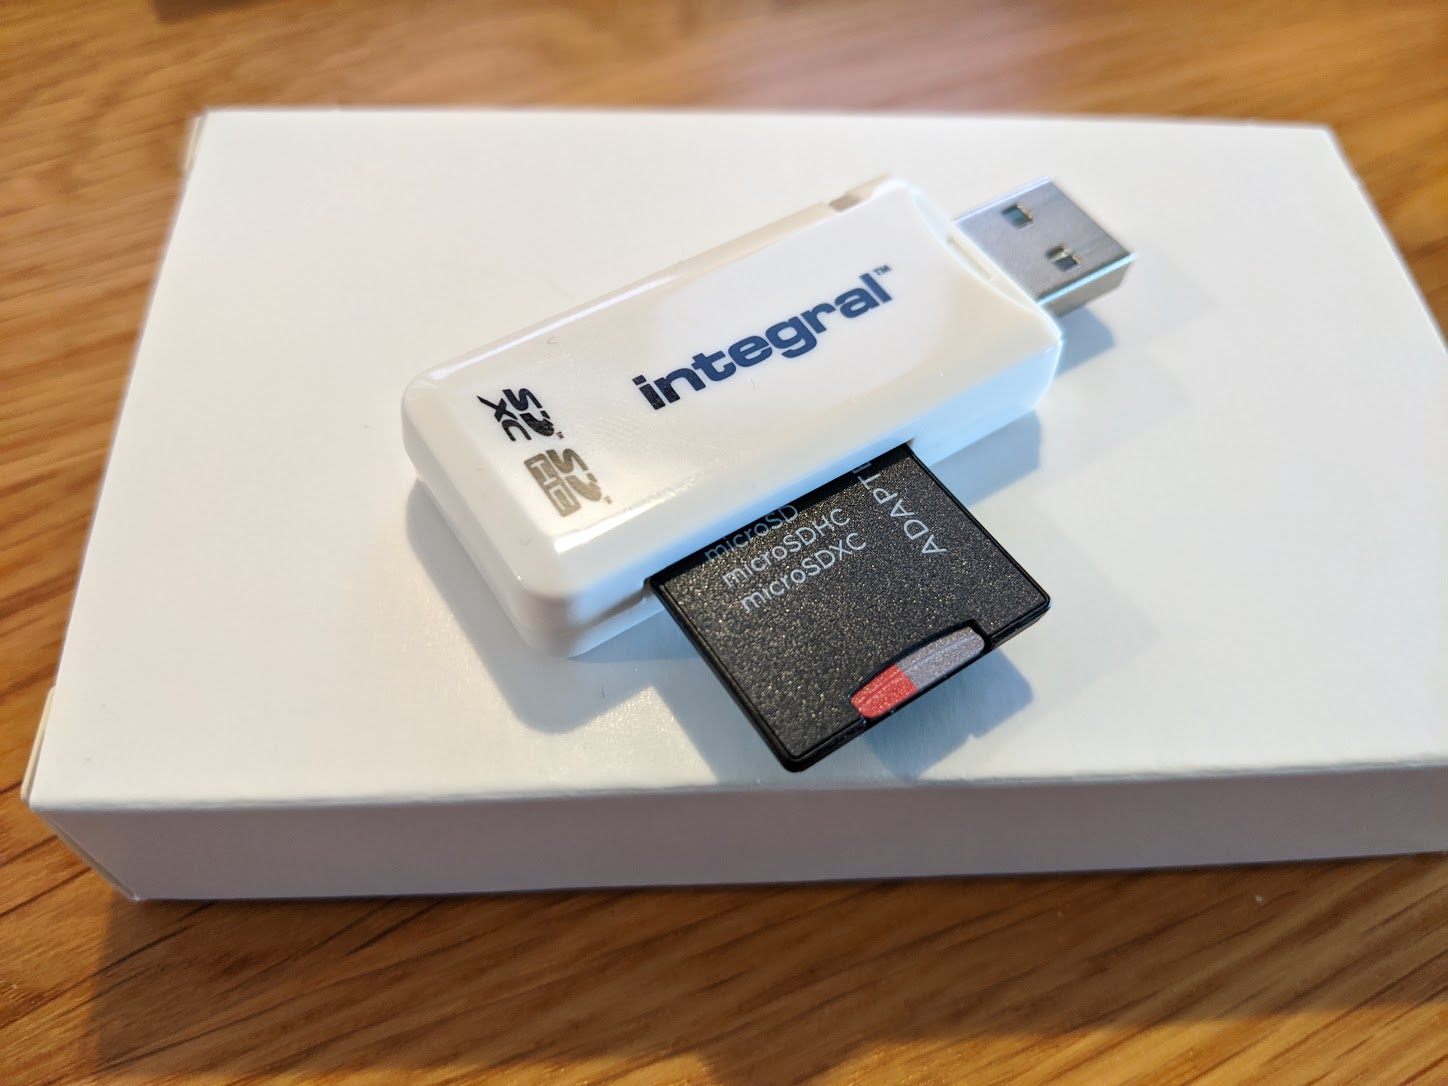
You will need a microSD card and a USB adapter. These are all cheap and plentiful, some examples of adapters are here and here. Plug your microSD card into a USB adapter, then plug it into your computer.
Download OS image
The official image for Raspberry Pi in general is Raspberry Pi OS (formerly Raspbian), which can be downloaded here. If you don’t need a desktop environment, download the Lite version. Not having a desktop environment frees up valuable memory and CPU.
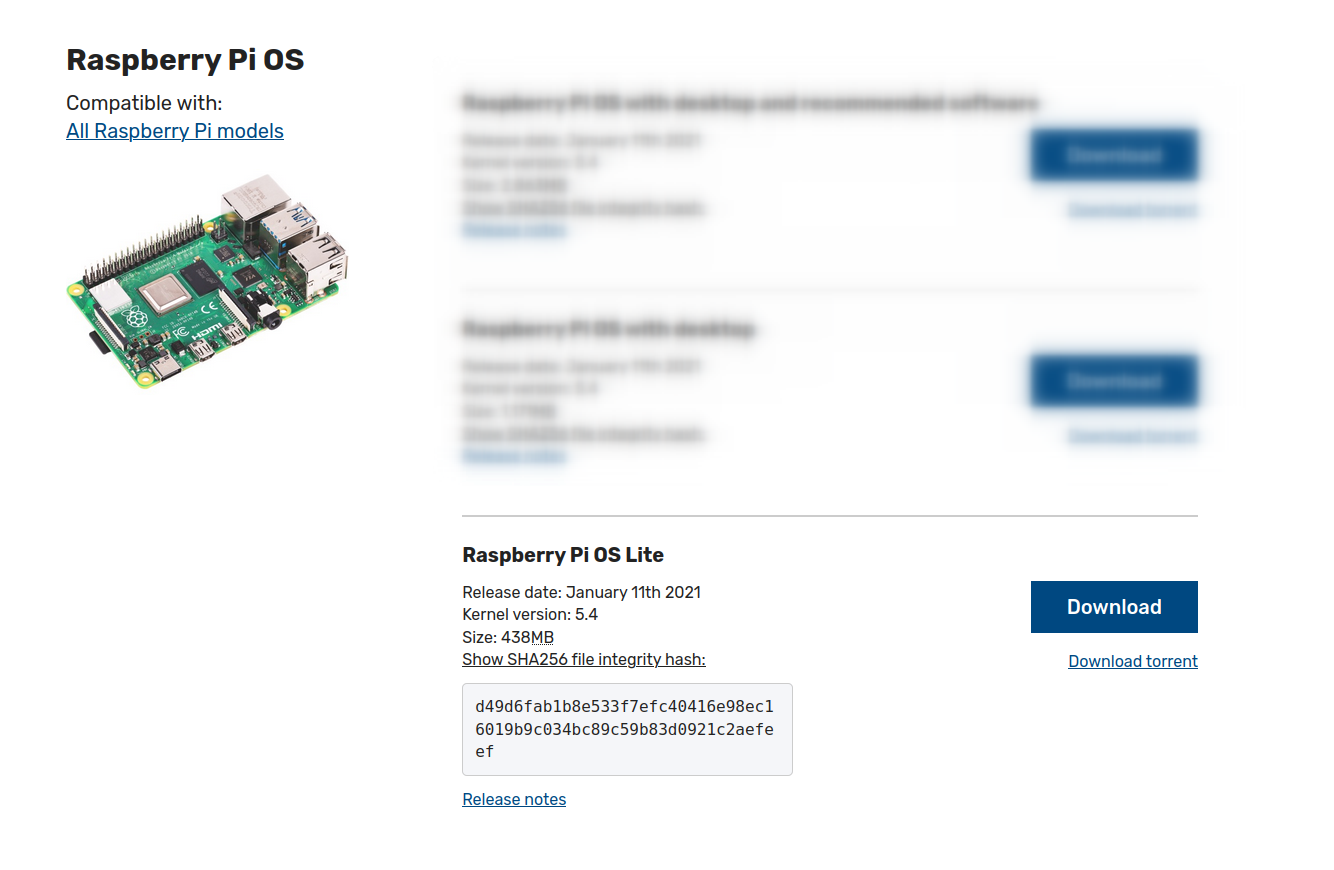
Optionally, you can download and verify the checksum too.
$ wget -O raspios.zip https://downloads.raspberrypi.org/raspios_lite_armhf_latest $ sha256sum raspios.zip d49d6fab1b8e533f7efc40416e98ec16019b9c034bc89c59b83d0921c2aefeef raspios.zipFlash the SD Card
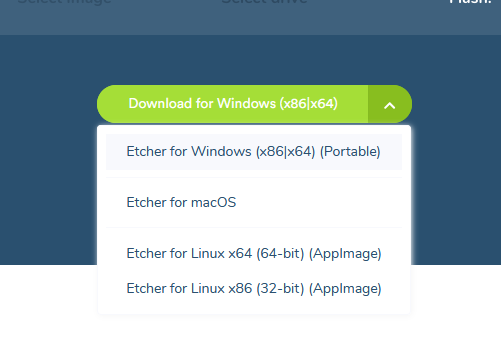
Download Balena Etcher, choose the portable version from the dropdown.
Launch Etcher, then select the zip file that you just downloaded, and choose the USB device carefully.
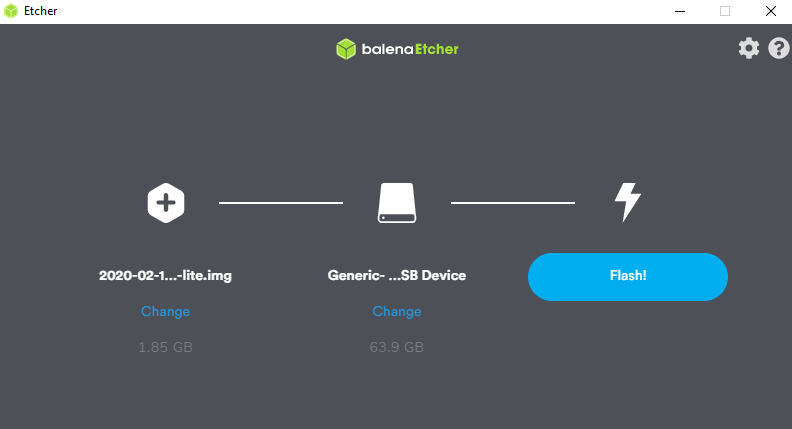
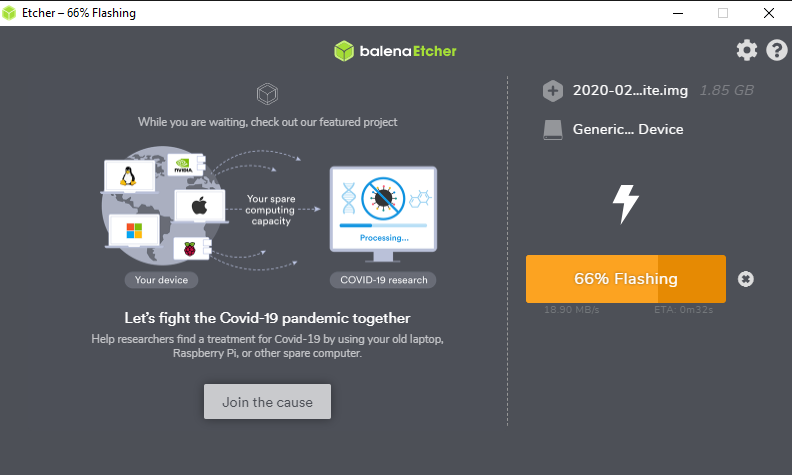
Click Flash and the image should get written to the SD card shortly.
Configure the OS
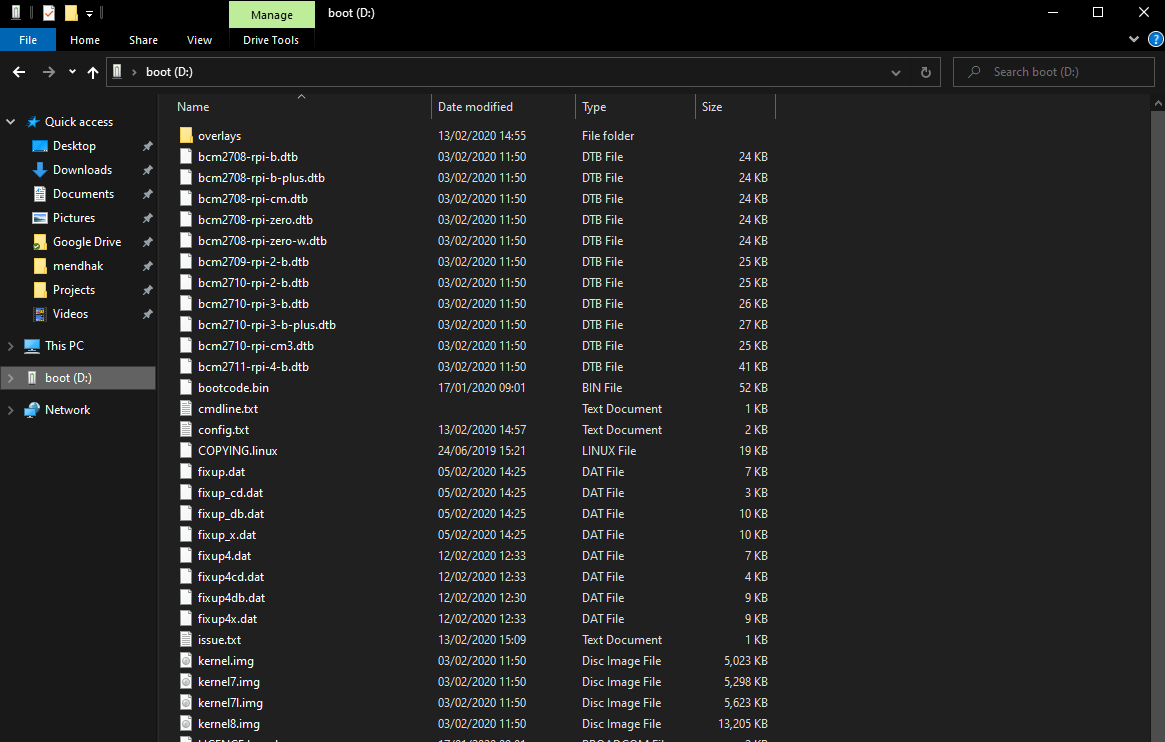
Once flashing is complete, unplug and replug the USB adapter. The drive should now appear in Windows (it appeared as D:\ for me) filled with OS files for the Raspberry Pi.
You now need to allow the Raspberry Pi Zero W to connect to your network and allow yourself to connect to it.
Enable SSH
Raspbian disables SSH by default. To enable it, create an empty file in this drive, called ssh .
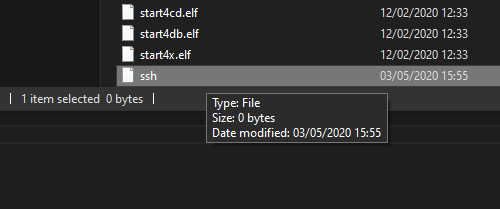
Just the presence of this empty file on disk is enough for Raspbian to enable SSH when you power up the Raspberry Pi later.
Enable WiFi
You will need to tell Raspbian how to connect to your WiFi.
Create a file called wpa_supplicant.conf in the same boot drive. Paste these contents in there, and replace the country, SSID and PSK values.
ctrl_interface=DIR=/var/run/wpa_supplicant GROUP=netdev update_config=1 country=GB network=
Raspberry Pi Zero W does not support 5 GHz, make sure you have 2.4 GHz enabled on the SSID that you are connecting to.
The country code is not always necessary, but helps the WiFi radio figure out which channels it can operate on as different nations may ban the use of certain frequencies based on military, security, industrial/scientific requirements. Without the country code in place, the WiFi may simply refuse to connect.
Run the Raspberry Pi Zero W
Plug the SD Card into the Raspberry Pi Zero W. Connect a micro-USB cable and power up the Pi. You can use the official Raspberry Pi power supply (~2.5A) or a USB port that supplies adequate power (~1.2A).
Wait a few minutes, then have a look at the list of connected devices on your router’s admin pages and find its IP address. If you’re having trouble figuring it out, pick one, start pinging it, and disconnect your most recent Pi to see if that’s the right IP.
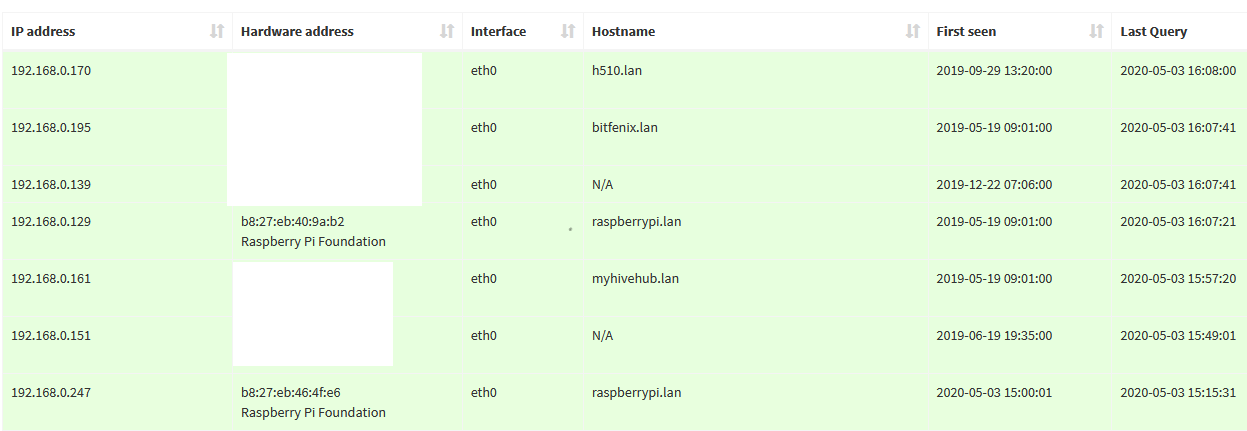
Once you have the right IP, ssh to it with the default password of raspberry
$ ssh [email protected] [email protected]'s password: You’re now connected to the Raspberry Pi.
Change password
As a best practice, run sudo raspi-config and follow the prompts to change your password.
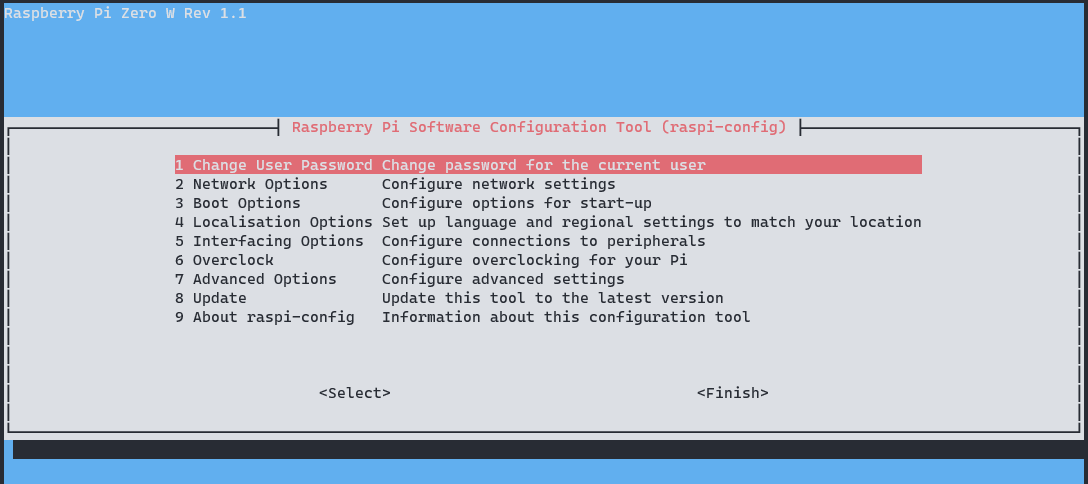
Change hostname
Under sudo raspi-config , choose Network Options, then Hostname. Set the name to something distinctive from other Raspberry Pis.
After renaming you will be prompted to reboot.
Increase swap space
Open up the swap configuration file
sudo nano /etc/dphys-swapfile Change the CONF_SWAPSIZE value from 100 to something larger, like 2048, then save and exit. Restart the swap service.
sudo /etc/init.d/dphys-swapfile stop sudo /etc/init.d/dphys-swapfile start Verify the new swap space using free -m
Raspberry Pi Zero W
The Raspberry Pi Zero W extends the Pi Zero family and comes with added wireless LAN and Bluetooth connectivity.

Getting started
To get started
- MicroSD card with Raspberry Pi OS installed.
- Micro USB power supply.
- A special Raspberry Pi Zero camera cable, if you want to use a Raspberry Pi camera (the standard cable supplied with Raspberry Pi cameras is not compatible with the smaller Raspberry Pi Zero camera connector). Suitable cables are available at low cost from many Raspberry Pi Approved Resellers, and are supplied with the Raspberry Pi Zero Case.
For a step-by-step guide to getting your Pi up and running, check out our online Getting started guide.
There are loads of projects to get started on with your Raspberry Pi Zero in our learning resources area. A couple of great projects are:
Specification
- 802.11 b/g/n wireless LAN
- Bluetooth 4.1
- Bluetooth Low Energy (BLE)
- 1GHz, single-core CPU
- 512MB RAM
- Mini HDMI® port and micro USB On-The-Go (OTG) port
- Micro USB power
- HAT-compatible 40-pin header
- Composite video and reset headers
- CSI camera connector
Compliance
Raspberry Pi Zero W has undergone extensive compliance testing, and meets the following European standards:
- Electromagnetic Compatibility Directive (EMC) 2014/30/EU
- Restriction of Hazardous Substances (RoHS) Directive 2011/65/EU
The Adopted Trademarks HDMI®, HDMI High-Definition Multimedia Interface, and the HDMI Logo are trademarks or registered trademarks of HDMI Licensing Administrator, Inc. in the United States and other countries.
Obsolescence Statement
Raspberry Pi Zero W will remain in production until at least January 2026