- How to run an Ubuntu Desktop virtual machine using VirtualBox 7
- What you’ll learn
- What you’ll need
- Download an Ubuntu Image
- Download and install VirtualBox
- 2. Create a new virtual machine
- Create a user profile
- Define the Virtual Machine’s resources
- 3. Install your image
- 4. Explore Virtual Box
- 5. Tell us your thoughts!
- How will you use this tutorial?
- Устанавливаем операционные системы семейства Linux на VirtualBox
- Установка Linux на VirtualBox
- Установка Extension Pack
- Создание виртуальной машины
- Вариант 1: Установка Ubuntu
- Вариант 2: Установка Kali Linux
- Вариант 3: Установка Debian
- Вариант 4: Установка CentOS
- Вариант 5: Установка Remix OS
How to run an Ubuntu Desktop virtual machine using VirtualBox 7
In this tutorial, we’ll walk you through one of the easiest ways to try out Ubuntu Desktop on a virtual machine. VirtualBox is a general purpose virtualiser that is available across Linux, Mac OS and Windows. It’s a great way to experience Ubuntu regardless of your current operating system.
VirtualBox 7 and above includes a new feature called Unattended Guest OS Install which significantly streamlines the setup experience for common operating systems like Ubuntu, making it easier than ever to get started.
Note: This tutorial will also work for other distributions, so try it out with some of the Ubuntu flavours as well!
What you’ll learn
- How to install and configure VirtualBox
- How to import an Ubuntu image
- How to run a virtual instance of Ubuntu Desktop
- Further configuration options
What you’ll need
Download an Ubuntu Image
You can download an Ubuntu image here. Make sure to save it to a memorable location on your PC! For this tutorial, we will use the latest Ubuntu 22.10 release.

Download and install VirtualBox
You can download VirtualBox from the downloads page here. This page includes instructions on how to install VirtualBox for your specific OS so we won’t repeat those here.
Once you have completed the installation, go ahead and run VirtualBox.
2. Create a new virtual machine
Click New to create a new virtual machine. Fill in the appropriate details:
- Name: If you include the word Ubuntu in your name the Type and Version will auto-update.
- Machine Folder: This is where your virtual machines will be stored so you can resume working on them whenever you like.
- ISO Image: Here you need to add a link to the ISO you downloaded from the Ubuntu website.
We want to install Ubuntu unattendedly so we can leave the checkbox to skip unchecked.
Create a user profile
To enable the automatic install we need to prepopulate our username and password here in addition to our machine name so that it can be configured automatically during first boot.
The default credentials are:
It is important to change these values since the defaults will create a user without sudo access.
Ensure your Hostname has no spaces to proceed!
It is also recommended to check the Guest Additions box to install the default Guest Additions ISO that is downloaded as part of VirtualBox. Guest additions enables a number of quality of life features such as changing resolution and dynamic screen resizing so it is highly recommended!
Note: If you choose not to use unattended install then this step will be skipped and you will go straight to the following screen. Once your machine has been created you will be able to create a username and password by proceeding through the standard Ubuntu Desktop installation flow on first boot.
Define the Virtual Machine’s resources
In the next section we can specifiy how much of our host machine’s memory and processors the virtual machine can use. For good performance it’s recommended to provide your VM with around 8GB of RAM (althought 4GB will still be usable) and 4 CPUs. Try to remain in the green areas of each slider to prevent issues with your machine running both the VM and the host OS.
Then we need to specify the size of the hard disc for the virtual machine. For Ubuntu we recommend around 25 GB as a minimum. By default the hard disk will scale dynamically as more memory is required up to the defined limit. If you want to pre-allocate the full amount, check the ‘Pre-allocate Full Size’ check box. This will improve performance but may take up unnecessary space.
Click Next to continue and view a summary of your machine setting.
After this click Finish to initialize the machine!
3. Install your image
Click Start to launch the virtual machine.
You will see a message saying ‘Powering VM up …’ and your desktop window will appear.
On first boot the unattended installation will kick in so do not interact with the prompt to ‘Try and Install Ubuntu’ and let it progress automatically to the splash screen and into the installer.
Note: If you chose not to use unattended install then you will need to progress through the Ubuntu install manually. Check out our Ubuntu Desktop installation tutorial for more details.
You will notice at this stage that the resolution of the window is fixed at 800×600. This is because the Guest Additions features are not installed until after the Ubuntu installation has completed.
Once the installation completes, the machine will automatically reboot to complete the installation.
Finally you will be greeted with the Ubuntu log-in screen where you can enter your username and password defined during the initial setup (don’t forget that the default password is ‘changeme’ if you left everything as the default).
4. Explore Virtual Box
Enjoy your shiny new Ubuntu Desktop!
As always we recommend opening a terminal and running sudo apt update && sudo apt upgrade -y and then sudo snap refresh to get everything updated to the latest versions.
Once you’ve finished your session you can close your machine by clicking the X in the top right of the window and choosing whether to keep your machine frozen in its current state or shut it down completely.
As you can probably tell, there are tonnes of further configuration options available in VirtualBox and we’ve only scratched the surface.
VirtualBox allows you to create and configure multiple virtual machines, so don’t be afraid to create new instances of Ubuntu to try out different system and storage configurations to fine tune your performance.
Why not try following the tutorial above with one of the Ubuntu flavours!

5. Tell us your thoughts!
Thank you for following this tutorial, we’d love to hear how you got on.
Give us feedback in the Ubuntu Discourse if you have any issues.
To help us improve our tutorials, we’d love to hear more about you:
How will you use this tutorial?
Устанавливаем операционные системы семейства Linux на VirtualBox
ОС Linux интересна многим пользователям, но не многие решаются сменить на нее Windows. Однако если вникнуть в суть работы этой платформы, станет видно, что Windows – не единственный возможный вариант (особенно, с учетом его дороговизны). Для начала нужно понять, каким образом Linux устанавливается на виртуальную машину.
Установка Linux на VirtualBox
Для того чтобы процедура была проведена без проблем, должны быть соблюдены следующие условия:
- Процессор должен поддерживать аппаратную визуализацию VT-x или VT-d (для Интел), AMD-V (для АМД).
- Должна быть установлена программа VM VirtualBox от Oracle.
- На компьютере должен присутствовать скачанный ISO-образ операционной системы Linux.
Установив виртуальную машину (это довольно быстрый процесс), можно заняться собственно самой ОС Linux.
Сегодня можно встретить множество вариаций Linux, разработанных на ее ядре. Сейчас мы рассмотрим некоторые из них – Ubuntu, Kali Linux, Debian, CentOS и Remix OS.
Установка Extension Pack
Первым делом необходимо скачать на официальном сайте и установить специальный пакет расширений VirtualBox Extension Pack. Он позволяет программе иметь максимальную совместимость с дистрибутивами Linux. Подробная инструкция доступна по ссылке ниже.

Создание виртуальной машины
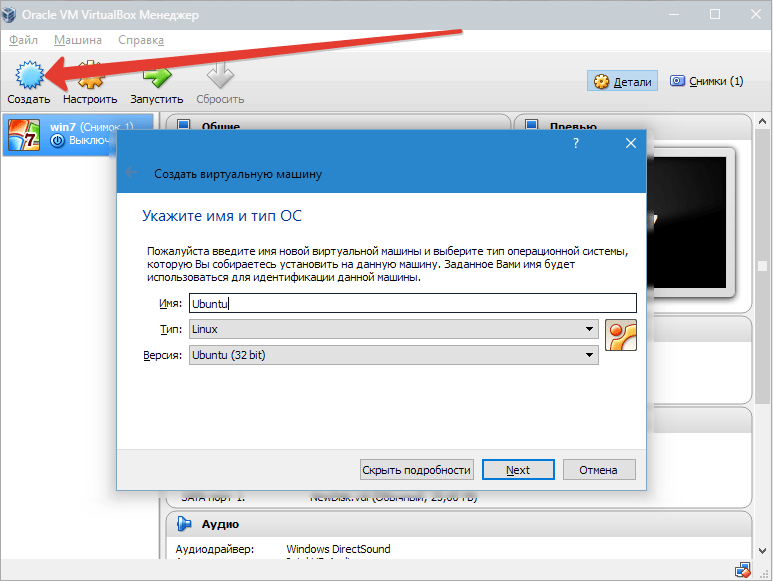
- Запускаем VirtualBox и жмем «Создать». Указываем имя виртуальной машины – Ubuntu, а также тип ОС – Linux. Нужно указать и версию платформы. Это зависит от того, какова разрядность загруженной ОС – 32х или 64х.

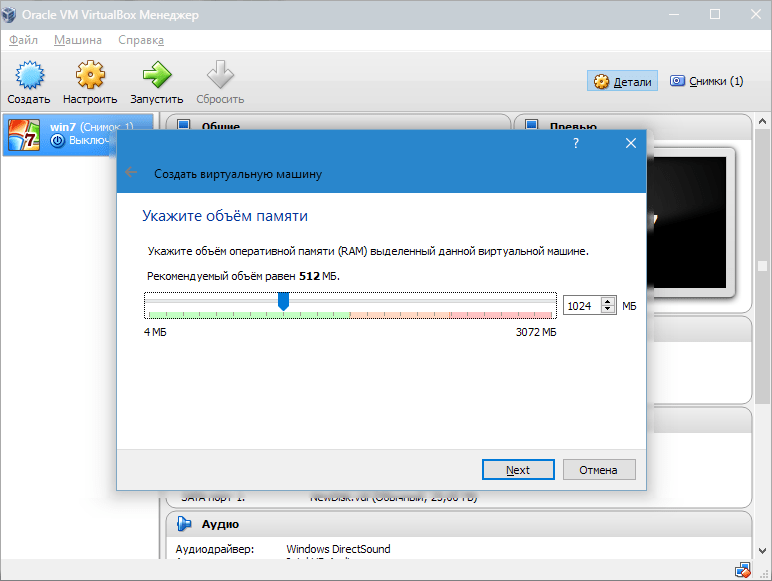
- Задаем объем ОЗУ, который следует выделить для работы «виртуалки. В данном случае операционная система будет функционировать нормально при объеме 1024 Мб.

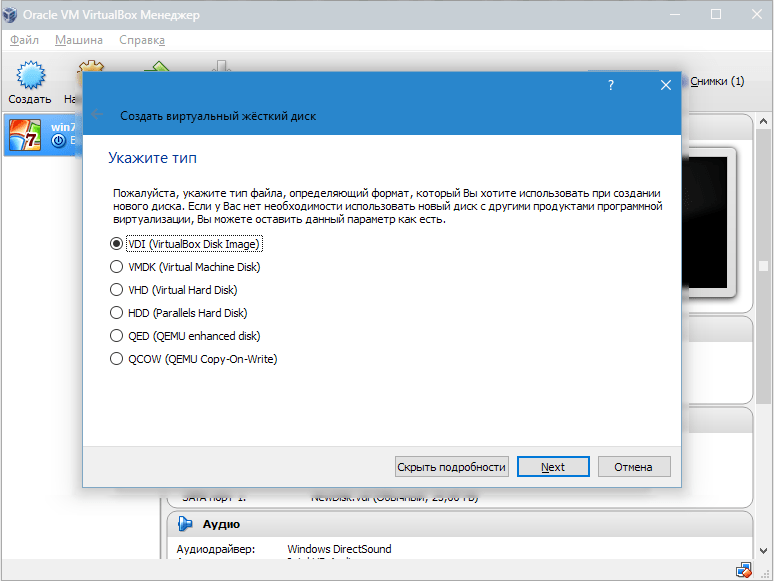
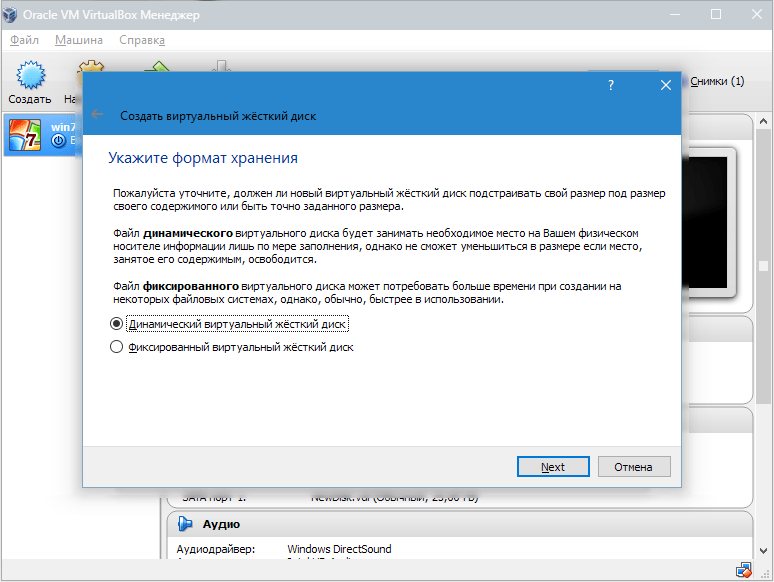
- Создаем новый жесткий диск. Выбираем тип файла, который используется при создании нового образа диска. Лучше всего оставить активным пункт VDI.

- Если хотим, чтобы диск был динамическим, отмечаем соответствующий параметр. Это позволит объему расти по мере того, как он будет заполняться файлами.

- Далее указываем объем памяти, выделяемой на жестком диске, и определяем папку для сохранения виртуального диска.


Мы создали ВМ, однако сейчас она не активна. Для ее включения необходимо осуществить ее запуск, нажав на соответствующую кнопку. Либо можно осуществить двойной клик по самой машине в списке.
Вариант 1: Установка Ubuntu
Установка Ubuntu максимально проста и не требует особых навыков.
- После запуска ВМ появится окно программы установки. В нем следует указать местонахождение загруженного образа Ubuntu.

- Выбрав этот образ, мы перейдем к следующему шагу. В новом окне выбираем язык интерфейса – русский, чтобы процесс установки был полностью понятен.


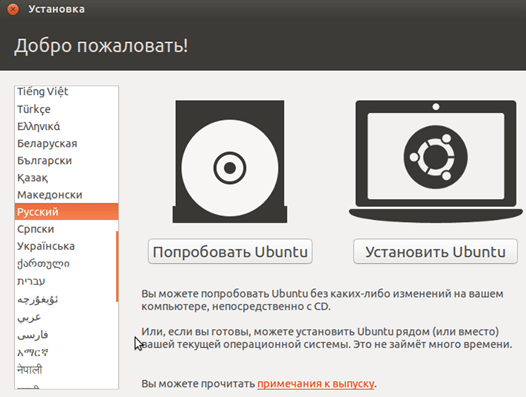
Далее можно пойти двумя путями: либо протестировать Ubuntu, запустив ее с образа диска (при этом она не будет устанавливаться на виртуальный диск), либо выполнить ее полную установку. Получить представление об операционной системе можно и в первом случае, однако полная установка позволит лучше погрузиться в ее среду.
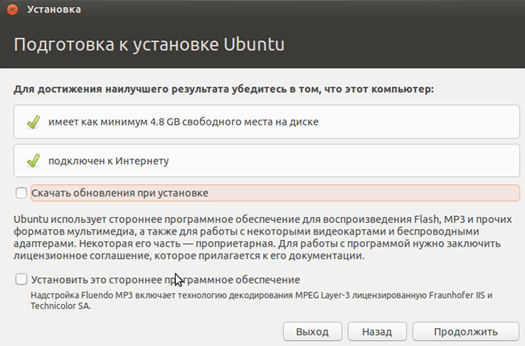
- Выберем «Установить». После этого появится окно подготовки к инсталляции. Проверим, согласуются ли параметры ПК с требованиями разработчиков. Если да, перейдем к следующему шагу.

- При установке выберем пункт, предлагающий стирание диска и установку Ubuntu. В процессе установки можно задать часовой пояс и указать раскладку клавиатуры.

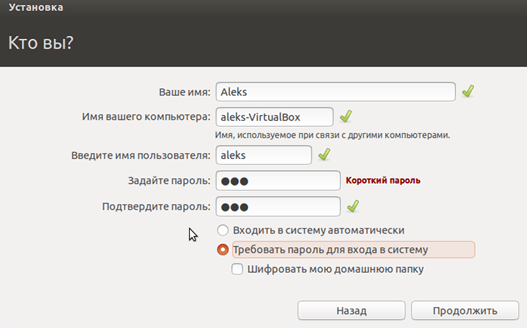
- Далее указываем имя ПК, устанавливаем логин и пароль. Выбираем тип аутентификации.

- Процедура установки займет примерно 20 минут. После ее завершения произойдет автоматическая перезагрузка ПК, после чего запустится рабочий стол установленной Ubuntu.


Установка Linux Ubuntu завершена, можно начать знакомиться с системой. Далее мы поговорим о том, как устанавливать другие ОС семейства Линукс на VirtualBox.
Вариант 2: Установка Kali Linux
Данная система содержит в своем дистрибутиве множество специализированных программ, предназначенных для тестирования безопасности сетей и приложений. Установка Кали несколько отличается от такового процесса с Ubuntu и является более сложным в технической части.

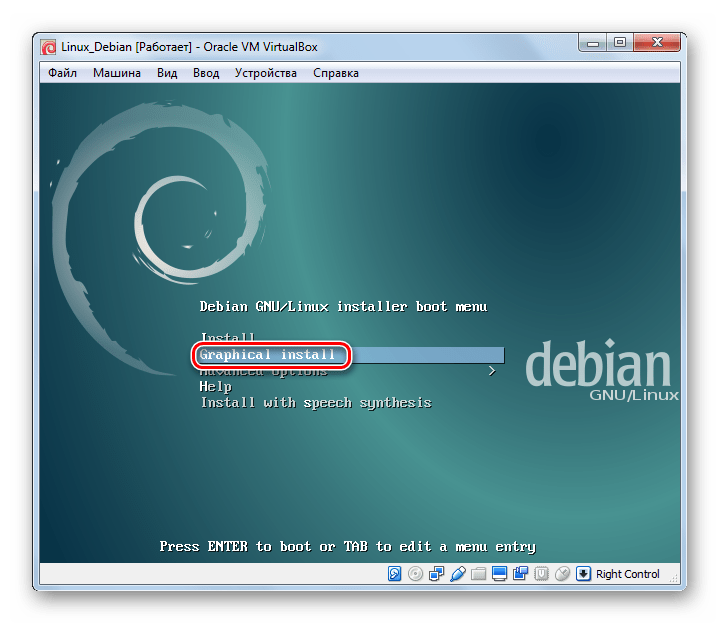
Вариант 3: Установка Debian
Debian можно назвать основой Linux. Эта система отлично подходит для использования как в серверах, так и рабочих станциях. Она поддерживает множество архитектур и имеет самый большой репозиторий (хранилище) пакетов довольно широкого назначения.
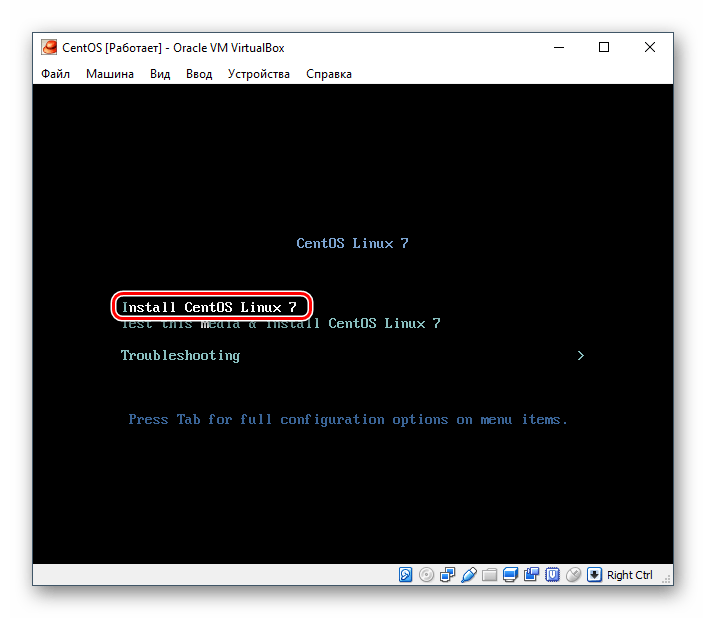
Вариант 4: Установка CentOS
CentOS основана на коммерческом дистрибутиве Red Hat Enterprise Linux компании Red Hat. В отличии от него, система распространяется бесплатно и, вместе с тем, совместима с RHEL.
Вариант 5: Установка Remix OS
Remix OS позволяет пользователям ПК использовать мобильные приложения, предназначенные для ОС Android на любом компьютере с процессором Intel. Система распространяется бесплатно, но имеет закрытый исходный код в отличии от большинства других дистрибутивов Linux.

Мы сегодня познакомились с небольшой частью дистрибутивов Linux. Каким из них пользоваться, решайте сами, руководствуясь поставленными задачами, а VirtualBox поможет разобраться в особенностях и приобрести опыт.