- Install and configure xrdp to use Remote Desktop with Ubuntu
- Prerequisites
- Install a desktop environment on your Linux VM
- Install and configure a remote desktop server
- Set a local user account password
- Create a Network Security Group rule for Remote Desktop traffic
- Connect your Linux VM with a Remote Desktop client
- Troubleshoot
- Next steps
Install and configure xrdp to use Remote Desktop with Ubuntu
When new to Linux, or for quick troubleshooting scenarios, the use of remote desktop may be easier than Secure Shell (SSH) access. This article details how to install and configure a desktop environment (xfce) and remote desktop (xrdp) for your Linux VM running Ubuntu.
The article was written and tested using an Ubuntu 18.04 VM.
Using Remote Desktop over the internet will introduce noticeable «lag» (input latency) when compared to local desktop use. This can be influenced by multiple factors including local internet speed and distance from the datacenter where the virtual machine is hosted. This lag does not usually reflect the performance of the VM itself.
Prerequisites
This article requires an existing Ubuntu 18.04 LTS or Ubuntu 20.04 LTS VM in Azure. If you need to create a VM, use one of the following methods:
Install a desktop environment on your Linux VM
Most Linux VMs in Azure don’t have a desktop environment installed by default. Linux VMs are commonly managed using SSH connections rather than a desktop environment, however there are several desktop environments that you can choose to install. Depending on your choice of desktop environment, it consumes up to 2 GB of disk space and take up to ten minutes to both install and configure all the required packages.
The following example installs the lightweight xfce4 desktop environment on an Ubuntu VM. Commands for other distributions vary slightly (use yum to install on Red Hat Enterprise Linux and configure appropriate selinux rules, or use zypper to install on SUSE, for example).
First, SSH to your VM. The following example connects to the VM named myvm.westus.cloudapp.azure.com with the username of azureuser. Use your own values:
ssh azureuser@myvm.westus.cloudapp.azure.com If you’re using Windows and need more information on using SSH, see How to use SSH keys with Windows.
Next, install xfce using apt :
sudo apt-get update sudo DEBIAN_FRONTEND=noninteractive apt-get -y install xfce4 sudo apt install xfce4-session Install and configure a remote desktop server
Now that you have a desktop environment installed, configure a remote desktop service to listen for incoming remote access connections. xrdp is an open source Remote Desktop Protocol (RDP) server that is available on most Linux distributions and works well with xfce. Install xrdp on your Ubuntu VM as follows:
sudo apt-get -y install xrdp sudo systemctl enable xrdp On Ubuntu 20, you need to give certificate access to an xrdp user:
sudo adduser xrdp ssl-cert Tell xrdp what desktop environment to use when you start your session. Configure xrdp to use xfce as your desktop environment as follows:
echo xfce4-session >~/.xsession Restart the xrdp service for the changes to take effect as follows:
sudo service xrdp restart Set a local user account password
If you created a password for your user account when you created your VM, skip this step. If you only use SSH key authentication and don’t have a local account password set, specify a password before you use xrdp to log in to your VM. xrdp can’t accept SSH keys for authentication. The following example specifies a password for the user account azureuser:
Specifying a password does not update your SSHD configuration to permit password logins if it currently does not. From a security perspective, you may wish to connect to your VM with an SSH tunnel using key-based authentication and then connect to xrdp. If so, skip the following step on creating a network security group rule to allow remote desktop traffic.
Create a Network Security Group rule for Remote Desktop traffic
To allow Remote Desktop traffic to reach your Linux VM, a network security group rule needs to be created that allows TCP on port 3389 to reach your VM. For more information about network security group rules, see What is a network security group? You can also use the Azure portal to create a network security group rule.
The following example creates a network security group rule with az vm open-port on port 3389. From the Azure CLI, not the SSH session to your VM, open the following network security group rule:
az vm open-port --resource-group myResourceGroup --name myVM --port 3389 The following example adds a network security group rule with Add-AzNetworkSecurityRuleConfig on port 3389 to the existing network security group. From the Azure PowerShell, not the SSH session to your VM, get the existing network security group named myVMnsg:
$nsg = Get-AzNetworkSecurityGroup -ResourceGroupName myResourceGroup -Name myVMnsg Add an RDP network security rule named open-port-3389 to your $nsg network security group and update the network security group with Set-AzNetworkSecurityGroup in order for your changes to take effect:
$params = @ < Name = 'open-port-3389' Description = 'Allow RDP' NetworkSecurityGroup = $nsg Access = 'Allow' Protocol = 'TCP' Direction = 'Inbound' Priority = 100 SourceAddressPrefix = 'Internet' SourcePortRange = '*' DestinationAddressPrefix = '*' DestinationPortRange = '3389' >Add-AzNetworkSecurityRuleConfig @params | Set-AzNetworkSecurityGroup Connect your Linux VM with a Remote Desktop client
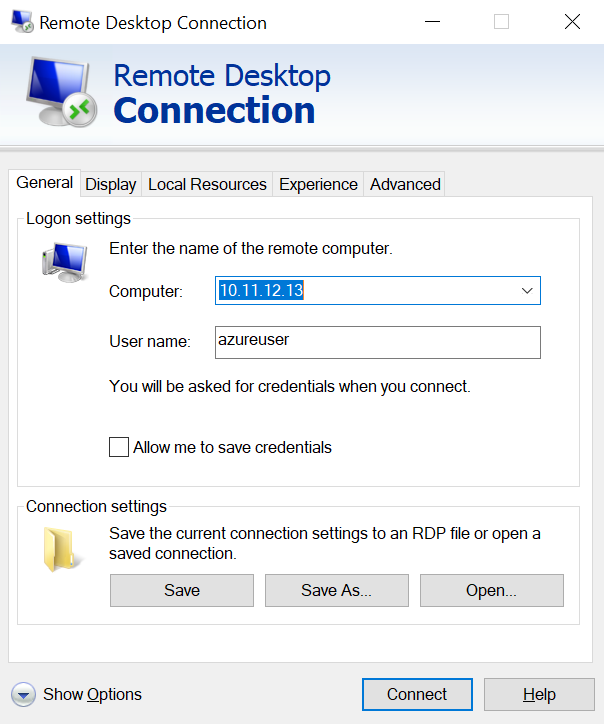
Open your local remote desktop client and connect to the IP address or DNS name of your Linux VM.
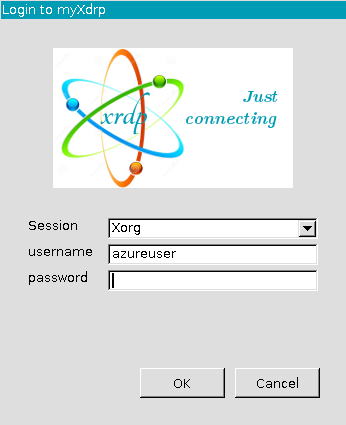
Enter the username and password for the user account on your VM as follows:
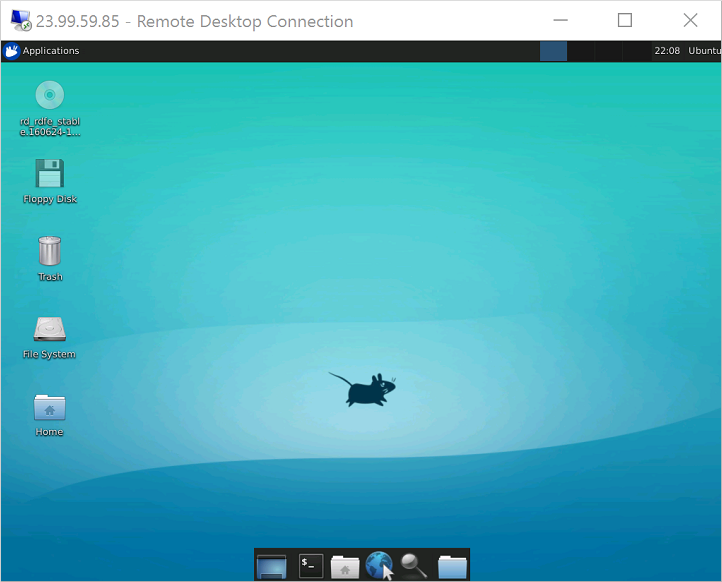
After authenticating, the xfce desktop environment will load and look similar to the following example:
If your local RDP client uses network level authentication (NLA), you may need to disable that connection setting. XRDP does not currently support NLA. You can also look at alternative RDP solutions that do support NLA, such as FreeRDP.
Troubleshoot
If you can’t connect to your Linux VM using a Remote Desktop client, use netstat on your Linux VM to verify that your VM is listening for RDP connections as follows:
sudo netstat -plnt | grep rdp The following example shows the VM listening on TCP port 3389 as expected:
tcp 0 0 127.0.0.1:3350 0.0.0.0:* LISTEN 53192/xrdp-sesman tcp 0 0 0.0.0.0:3389 0.0.0.0:* LISTEN 53188/xrdp If the xrdp-sesman service isn’t listening, on an Ubuntu VM restart the service as follows:
sudo service xrdp restart Review logs in /var/log on your Ubuntu VM for indications as to why the service may not be responding. You can also monitor the syslog during a remote desktop connection attempt to view any errors:
Other Linux distributions such as Red Hat Enterprise Linux and SUSE may have different ways to restart services and alternate log file locations to review.
If you don’t receive any response in your remote desktop client and don’t see any events in the system log, this behavior indicates that remote desktop traffic can’t reach the VM. Review your network security group rules to ensure that you have a rule to permit TCP on port 3389. For more information, see Troubleshoot application connectivity issues.
Next steps
For more information about creating and using SSH keys with Linux VMs, see Create SSH keys for Linux VMs in Azure.
For information on using SSH from Windows, see How to use SSH keys with Windows.


