- How to work with Xrdp Linux
- Establishing a Ubuntu Remote Desktop Server with xrdp
- How to set up an xrdp server on a Ubuntu system
- How to view a Linux system on a Windows xrdp connection
- Using xrdp on a Linux Mint system
- Linux Mint xrdp Installation Process
- What are the pros and cons of xrdp and VNC in Linux?
- How to Connect to Linux Mint with RDP
- Tutorial Connect to Linux Mint with RDP
- What is RDP?
- Introduction to Linux Mint
- Connecting to Linux Mint with RDP (Remote Desktp)
- Conclusion
How to work with Xrdp Linux
Xrdp is an open source solution that enables remote access to Linux machines using the Windows remote desktop protocol (RDP). This remote access client for Linux is compatible with multiple remote access clients such as rdesktop, FreeRDP, and NeutrinoRDP.
Prerequisites for running xrdp include:
- • Installation of the xrdp and xorgxrdp packages;
- • Firewall configured to allow connections on TCP port 3389.
Xrdp provides access to remotely located Linux machines using any one of several RDP clients. The software establishes the connections via the Microsoft Remote Desktop Protocol (RDP). You can enable remote access through xrdp’s graphical interface with rdesktop, NeutrinoRDP, FreeRDP, or the Microsoft Remote Desktop Client.
In addition to its ability to provide a graphical remote session between a Linux and Windows remote machine, other features of xrdp include :
- • Drive redirections where you can mount local drives on a remote machine;
- • Clipboard transfer of files and text between machines;
- • Audio redirection;
- • Encrypted RDP transport with TLS.
Establishing a Ubuntu Remote Desktop Server with xrdp
A Linux system running Ubuntu can be configured to act as an RDP server and allow connection to a Windows machine from the remote Linux computer. This can be done using the standard Windows Remote Desktop client which, unfortunately, is not installed as part of most Linux distros. This means you need to install and configure the RDP server manually on the Linux host. Once installation is complete, you can graphically manage a remote Linux machine.
We are going to show you how to configure a Ubuntu 18.04.2 system for access by RDP using the xrdp Linux package .
Using xrdp, machines running operating systems other than Windows can be configured as an RDP server. Setting up a Linux remote desktop with xrdp requires that the X Window System is installed on your computer.
How to set up an xrdp server on a Ubuntu system
- Update the software repository tree with the following command:
sudo apt-get update - Install the xrdp software from the online repository:
sudo apt-get install xrdp - The next step involves installing the XFCE desktop environment. GNOME 3 is installed by default with Ubuntu 18, but xrdp will get better performance using the lightweight XFCE alternative. You can still use GNOME to log into the Ubuntu machine locally.
- Now it’s time to install XFCE:
sudo apt-get install xfce4 - Create the .xsession file in the user’s home directory and write the xfce4-session string into that file. By doing this, you force the xrdp server to default to the XFCE graphical environment.
echo xfce4-session > ~/.xsession - Set xrdp to start automatically on system reboot.
sudo systemctl enable xrdp - Bounce the xrdp service to ensure the changes have taken effect.
sudo service xrdp restart - Clear the configuration that is stored in the startwm.sh shell script file that is used when starting xrdp:file that is needed to start xrdp:
sudo sh -c ‘cat /dev/null > /etc/xrdp/startwm.sh’
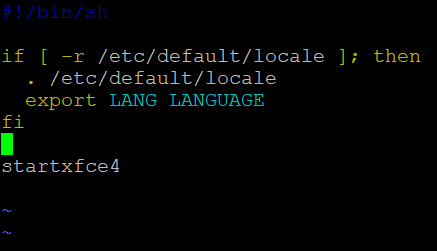
sudo service xrdp restart
ifconfig
or
hostname -I
Either of the above commands will return the machine’s IP address. In our example, the IP address is 192.168.101.208.
In Ubuntu, the firewall is disabled by default. If the firewall is active, you need to open TCP port 3389 to enable remote inbound connections.
You can specify the IP addresses or custom networks that can connect to the remote machine for additional security.
sudo ufw allow from 192.168.101.0/24 to any port 3389
Note: When accessing a remote machine that is behind a NAT on a local network, you can configure port forwarding to allow connectivity from an external IP address. A VPN connection can be used instead of port forwarding to the remote router or firewall.
How to view a Linux system on a Windows xrdp connection
Open the CMD line in Windows with the Start > Run > CMD combination . Run the following command to open the Remote Desktop client and connect to the remote machine:
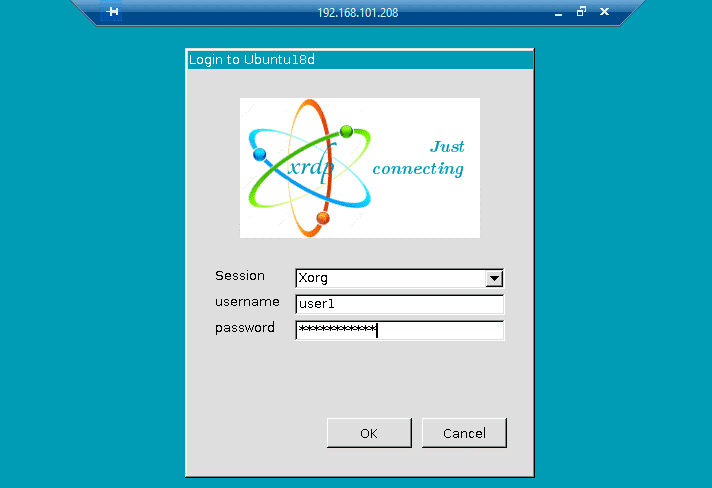
Choose xorg as the session type and enter your login credentials.
After waiting a few minutes, an empty blue screen may be displayed that indicates there is a configuration problem. Use the following steps to get around this issue and fix the xrdp connection.
This problem is caused by changes made in Ubuntu version 18.04 and the xorgxrdp package. These changes have broken the ability to successfully connect using xrdp. Fixing the empty blue screen issue requires that you install the correct version of xorgxrdp-hwe:
sudo apt-get install xorgxrdp-hwe-18.04
You can check the version you are running with this command:
sudo /etc/init.d/xrdp restart
After the correct package is installed, try to connect to the Ubuntu system again using RDP. Execute the following command in the Windows CMD line:
Then, choose xorg in the login window and enter your credentials to establish the connection.
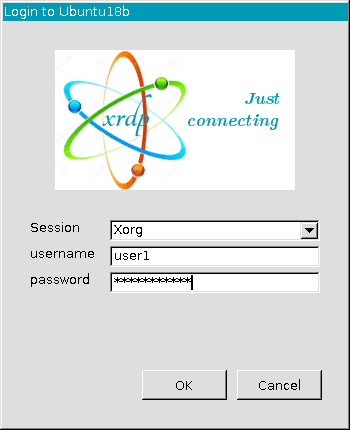
You should now be successfully connected to the Linux machine using the Windows Remote Desktop Protocol. Use the default configuration in the displayed dialog window.
You can modify the resolution by running the mstsc command from the Windows machine. Manually enter the IP address of the Ubuntu system. Select Show Options and choose the desired resolution from the Display tab.
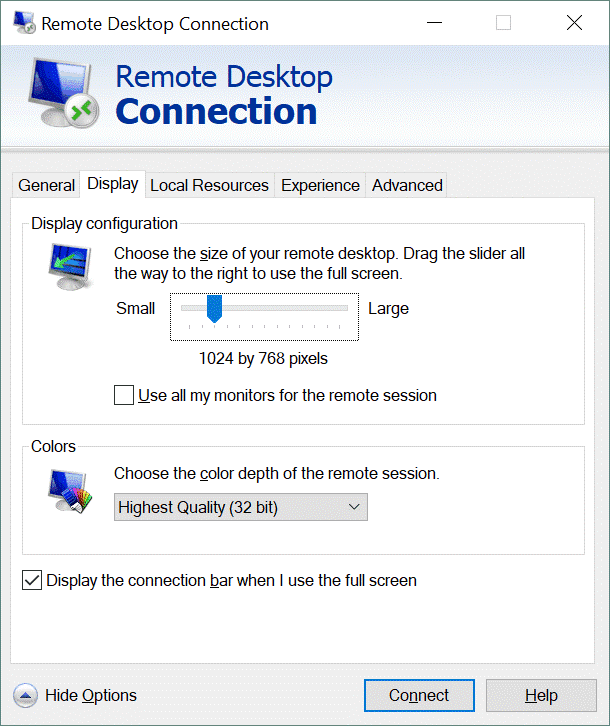
Now you can connect to your Ubuntu system from a Windows remote machine using RDP and adjust the screen resolution as needed. You have successfully established the RDP connection which brings us to the end of this demonstration.
Using xrdp on a Linux Mint system
Now, let’s look at how to get xrdp to work on Linux Mint. Many users are interested in using xrdp on Linux Mint. We will use the recent 18.1 release of Linux Mint to demonstrate how to get this accomplished.
Linux Mint xrdp installation and configuration
The following environment is used for our example of installing and testing xrdp with Linux Mint.
- • A fresh installation of Linux Mint 18.1 is required.
- • A virtual machine running on Hyper-V Server and VirtualBox is used for the installation.
- • The Linux Mint computer needs an Internet connection to download the necessary packages. Without an Internet connection, you need to know where to find xrdp for Linux so you can manually download and install it on your machine.
Linux Mint xrdp Installation Process
Step 1 – Install the xrdp package
Log into your Linux mint system and enter the following command in a terminal:
When the installation is complete, check the xrdp version installed with the xrdp -v command.
Step 2 – Install TigerVnc Server package
A specific VNC Server package is necessary when connecting to the Cinnamon interface in Linux Mint. You need the TigerVNC Server software which is not in the Ubuntu repository.
Download the package and open a Terminal console.
Navigate to the Download folder or wherever you have saved the VNC package. Using the Terminal console, enter the following command to install the package:
sudo dpkg -i tigervncserver_1.7.0-lubuntu1_amd64.deb
If you see error messages or warnings, ignore them for now.
The following command will ensure that all the dependencies are installed:
Configure keyboard settings for the xrdp session
Important: This activity needs to be done from the local Ubuntu machine not using the xrdp connection.
The xrdp login screen defaults to an en-us keyboard configuration. This layout will also be used by the remote session. You may be using a different keyboard layout and want to replicate it when connecting through xrdp. Copy and paste the following text to attempt to automatically identify your current keyboard configuration.
# Set keyboard layout in xrdp sessions
cd /etc/xrdp
test=$(setxkbmap -query | awk -F»:» ‘/layout/ ‘)
echo «your current keyboard layout is..» $test
setxkbmap -layout $test
sudo cp /etc/xrdp/km-0409.ini /etc/xrdp/km-0409.ini.bak
sudo xrdp-genkeymap km-0409.ini
Now you are finished with the configuration.
Perform the remote Connection.
You should now be able to establish a remote desktop session to the Linux Mint system. You may receive an error message the first time you login. Try again, and you should see the Cinnamon Desktop environment and you can begin working on the Linux Mint computer.
The Cinnamon desktop you are presented with is the software rendered version and not the full interface, as seen in the screenshot above.
What are the pros and cons of xrdp and VNC in Linux?
There are several differences in xrdp and Virtual Network Computing (VNC) that may make one more appropriate for your usage scenario. The main differences are:
- ✔ A VNC can be made more secure than an xrdp connection.
- ✔ An xrdp implementation is more cost-effective than using a VNC.
- ✔ VNC connects directly to the remote computer whereas RDP connects to a shared server.
- ✔ A VNC may offer more device compatibility than xrdp.
- ✔ Xrdp is often faster than using a VNC.
Using a third-party solution like Remmina enables you to choose the protocol used for your remote connections. Remmina supports RDP, VNC, and various other protocols, making it a flexible solution for remote desktop access.
How to Connect to Linux Mint with RDP
RDP provides a graphical interface for the user to connect to another computer via a network connection. In this article, we are going to teach you How to Connect to Linux Mint with RDP. Also, you can visit the packages available in Eldernode if you wish to purchase a Admin RDP Server Hosting.
Tutorial Connect to Linux Mint with RDP
What is RDP?
RDP stands for Remote Desktop Protocol and is a protocol for using a desktop computer remotely. The RDP is provided by Microsoft and allows users to connect remotely to another computer. It provides a graphical user interface (GUI) for connecting to another computer over a network. The remote access user experience via the RDP protocol is very close to direct access. The RDP can be set up and enabled on a local network or it can be connected to another remote computer over the Internet using RDP.
Introduction to Linux Mint
Linux Mint is a free, open-source operating system distribution based on Ubuntu and Debian. Linux Mint includes proprietary third-party browser plugins, Java, multimedia support, and other components to enable support for commonly accepted standards. This support allows DVD and BluRay playback as well as a flash to play media. Linux Mint consists of several different software packages, most of which are released under one of the free licenses. Linux Mint’s main license is GNU GPL with LGPL.
Connecting to Linux Mint with RDP (Remote Desktp)
At first, you should install XRDP on your system. To do this run the following command:
Now run the following command to start the XRDP service:
sudo systemctl start xrdpYou can enable the XRDP service:
sudo systemctl enable xrdpTo check the status of XRDP, just use the following command:
sudo systemctl status xrdpIf you get active(running) in the output, it indicates the XRDP service is running.
By default, XRDP uses the /etc/ssl/private/ssl-cert-snakeoil.key file, which can only be read by members of the ssl-cert group. You can add the XRDP user to the ssl-cert group by running the following command:
sudo adduser xrdp ssl-certThen restart the XRDP service:
sudo systemctl restart xrdpYou can check if the Firewall is active on your system or not with the following command:
Now you can allow port 3389 on the firewall with the following command:
Then check the Firewall status to see if the 3389 port is allowed or not:
In this step, you can get your IP of the Linux machine with the following command:
Now you should log out of the system.
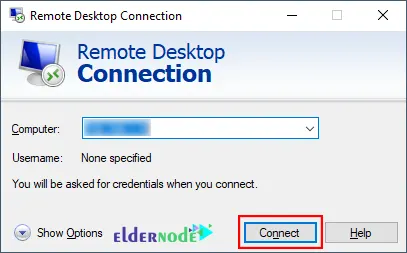
Finally, you should open the Remote Desktop connection and enter your IP and username of the Linux machine to connect to the Linux machine and click on Connect.
Then enter your session, username, and password and click on OK.
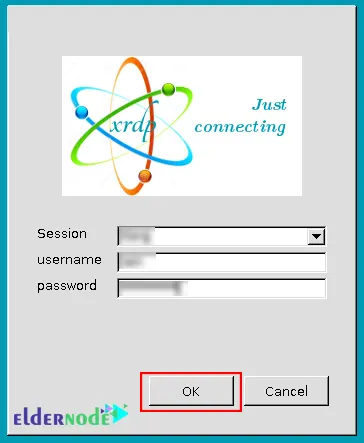
That it is! you can use RDP in Linux Mint.
Conclusion
RDP is used to connect a computer to a remote computer and it allows the client computer to view the remote computer screen. In this article, we taught you how to use and Connect to Linux Mint with RDP. I hope this article was useful for you.
Click on a star to rate it!
Average rating 2.7 / 5. Vote count: 6
No votes so far! Be the first to rate this post.