- Saved searches
- Use saved searches to filter your results more quickly
- License
- Licenses found
- dmgctrl/react-native-linux
- Name already in use
- Sign In Required
- Launching GitHub Desktop
- Launching GitHub Desktop
- Launching Xcode
- Launching Visual Studio Code
- Latest commit
- Git stats
- Files
- README.md
- Настройка рабочего окружения на Linux
- Установка пакетов Node.js, OpenJDK
- Установка Android Studio
- Установка Android SDK
- Настройка переменной сред ANDROID_HOME
- Настройка эмулятора Android
- Установка Watchman
- Создание проекта React Native
- Запуск проекта React Native
- Редактирование кода в приложении — Hello World
- Проблемы?
- Done
- Ссылки:
- Contributors ✨
Saved searches
Use saved searches to filter your results more quickly
You signed in with another tab or window. Reload to refresh your session. You signed out in another tab or window. Reload to refresh your session. You switched accounts on another tab or window. Reload to refresh your session.
A Linux port of React Native, driven by Qt, forked from Canonical
License
Unknown, CC-BY-4.0 licenses found
Licenses found
dmgctrl/react-native-linux
This commit does not belong to any branch on this repository, and may belong to a fork outside of the repository.
Name already in use
A tag already exists with the provided branch name. Many Git commands accept both tag and branch names, so creating this branch may cause unexpected behavior. Are you sure you want to create this branch?
Sign In Required
Please sign in to use Codespaces.
Launching GitHub Desktop
If nothing happens, download GitHub Desktop and try again.
Launching GitHub Desktop
If nothing happens, download GitHub Desktop and try again.
Launching Xcode
If nothing happens, download Xcode and try again.
Launching Visual Studio Code
Your codespace will open once ready.
There was a problem preparing your codespace, please try again.
Latest commit
Git stats
Files
Failed to load latest commit information.
README.md
Learn once, write anywhere: Build mobile apps with React.
- Build native mobile apps using JavaScript and React: React Native lets you build mobile apps using only JavaScript. It uses the same design as React, letting you compose a rich mobile UI from declarative components.
- A React Native app is a real mobile app: With React Native, you don’t build a «mobile web app», an «HTML5 app», or a «hybrid app». You build a real mobile app that’s indistinguishable from an app built using Objective-C, Java, or Swift. React Native uses the same fundamental UI building blocks as regular iOS and Android apps. You just put those building blocks together using JavaScript and React.
- Don’t waste time recompiling: React Native lets you build your app faster. Instead of recompiling, you can reload your app instantly. With hot reloading, you can even run new code while retaining your application state. Give it a try — it’s a magical experience.
- Use native code when you need to: React Native combines smoothly with components written in Objective-C, Java, or Swift. It’s simple to drop down to native code if you need to optimize a few aspects of your application. It’s also easy to build part of your app in React Native, and part of your app using native code directly — that’s how the Facebook app works.
The focus of React Native is on developer efficiency across all the platforms you care about — learn once, write anywhere. Facebook uses React Native in multiple production apps and will continue investing in React Native.
See the official React Native website for an introduction to React Native.
Supported operating systems are >= Android 4.1 (API 16) and >= iOS 8.0.
Follow the Getting Started guide. The recommended way to install React Native depends on your project. Here you can find short guides for the most common scenarios:
The website’s documentation is divided into multiple sections.
- There are Guides that discuss topics like debugging, integrating with existing apps, and the gesture responder system.
- The Components section covers React components such as View and Button .
- The APIs section covers other libraries like Animated and StyleSheet that aren’t React components themselves.
- Finally, React Native provides a small number of Polyfills that offer web-like APIs.
Another great way to learn more about the components and APIs included with React Native is to read their source. Look under the Libraries/Components directory for components like ScrollView and TextInput , for example. The RNTester example is also here to demonstrate some of the ways to use these components. From the source you can get an accurate understanding of each component’s behavior and API.
The React Native documentation only discusses the components, APIs and topics specific to React Native (React on iOS and Android). For further documentation on the React API that is shared between React Native and React DOM, refer to the React documentation.
React Native is under active development. See the guide on upgrading React Native to keep your project up-to-date.
Read below to learn how you can take part in improving React Native.
Facebook has adopted a Code of Conduct that we expect project participants to adhere to. Please read the full text so that you can understand what actions will and will not be tolerated.
Read our contributing guide to learn about our development process, how to propose bug fixes and improvements, and how to build and test your changes to React Native.
We have a list of beginner friendly issues to help you get your feet wet in the React Native codebase and familiar with our contribution process. This is a great place to get started.
React is BSD licensed. We also provide an additional patent grant.
Настройка рабочего окружения на Linux
Данная статья поможет настроить рабочее окружение React Native на операционной системе Linux под мобильную операционную систему Android . В данной статье будет использован популярный дистрибутив — Ubuntu .

Установка пакетов Node.js, OpenJDK
Приступаем к установке пакета Node.js через терминал. Для начала установки необходимо установить Curl для этого вставьте в терминал следующую команду:
А затем, после окончания загрузки, вставьте следующую команду:
curl -sL https://deb.nodesource.com/setup_lts.x | sudo -E bash - Теперь можно установить Node.js командой:
sudo apt-get install -y nodejs Таким образом Вы установите Node.js , актуальную инструкцию по установке можно найти на официальном сайте Node.js.
Для установки OpenJDK вставьте в терминал следующую команду:
sudo apt install openjdk-11-jdk openjdk-11-jdk-headless Проверить правильность установки OpenJDK можно вставив в терминал команду:


Установка Android Studio
Теперь вам потребуется установить Android Studio . В Ubuntu его можно установить используя Snap Store . Для этого в поиске Snap Store введите Android Studio .
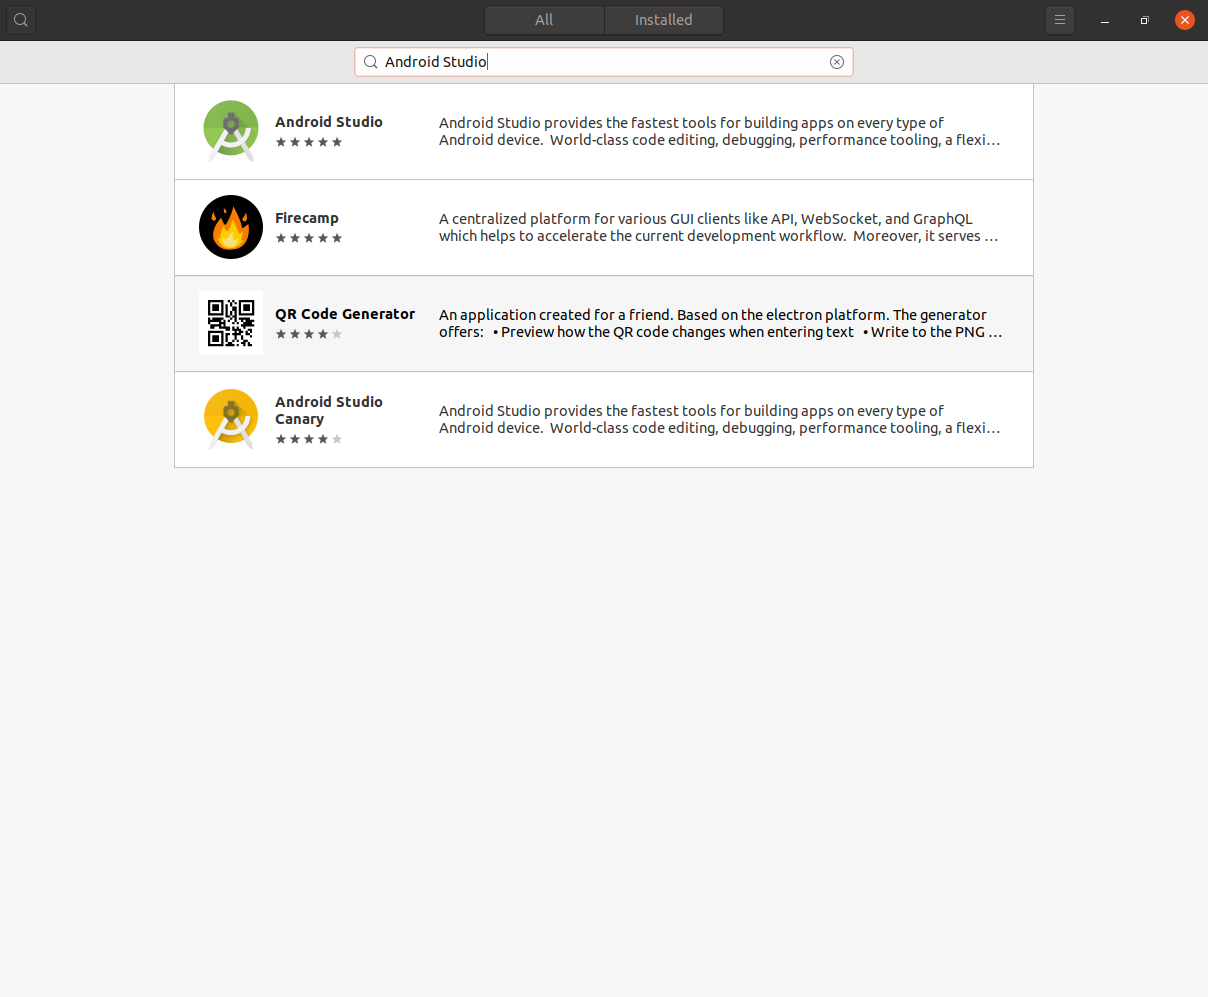
Выберите его и нажмите кнопку Install .

После окончания загрузки запустите Android Stuido и следуйте инструкциям установки. Рекомендуется оставить все настройки по умолчанию.
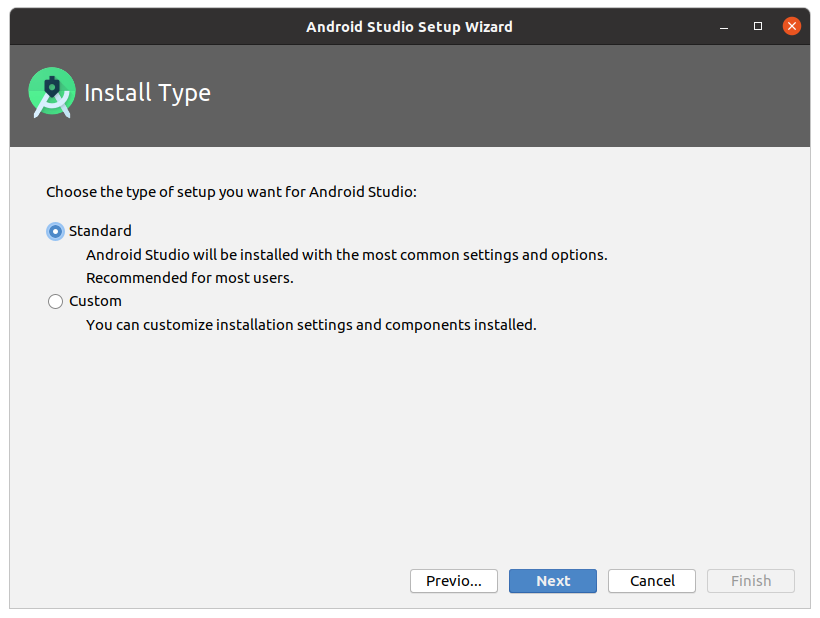
Когда Android Studio завершит установку он запуститься автоматически.

Установка Android SDK
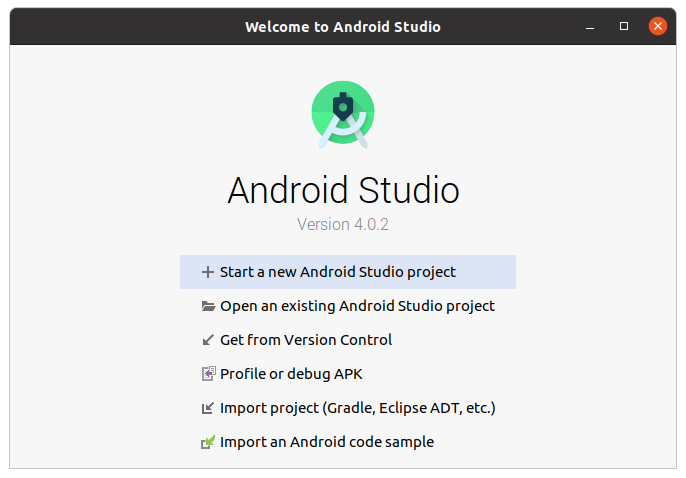
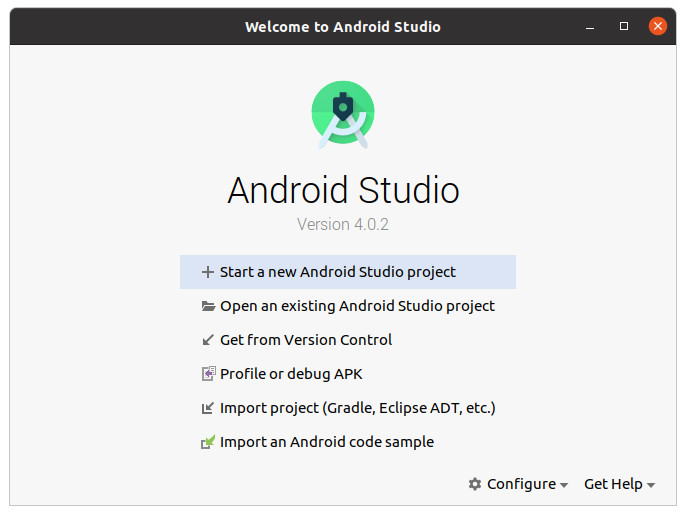
Для начала работы с ОС Android нужно установить определенные компоненты Android SDK . Для их установки откройте Android Studio и нажмите справа внизу кнопку Configure -> SDK Manager . Если ее нет, перезапустите приложение.
В открывшемся SDK Manager в правом нижнем углу установите флажок Show Package Details .
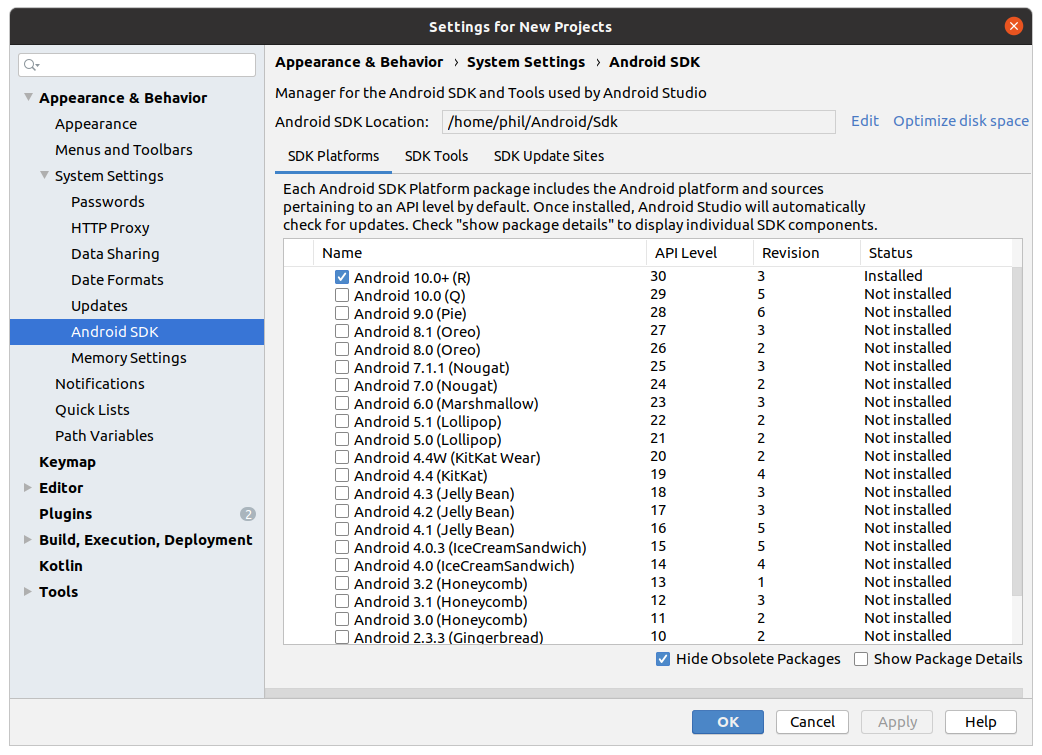
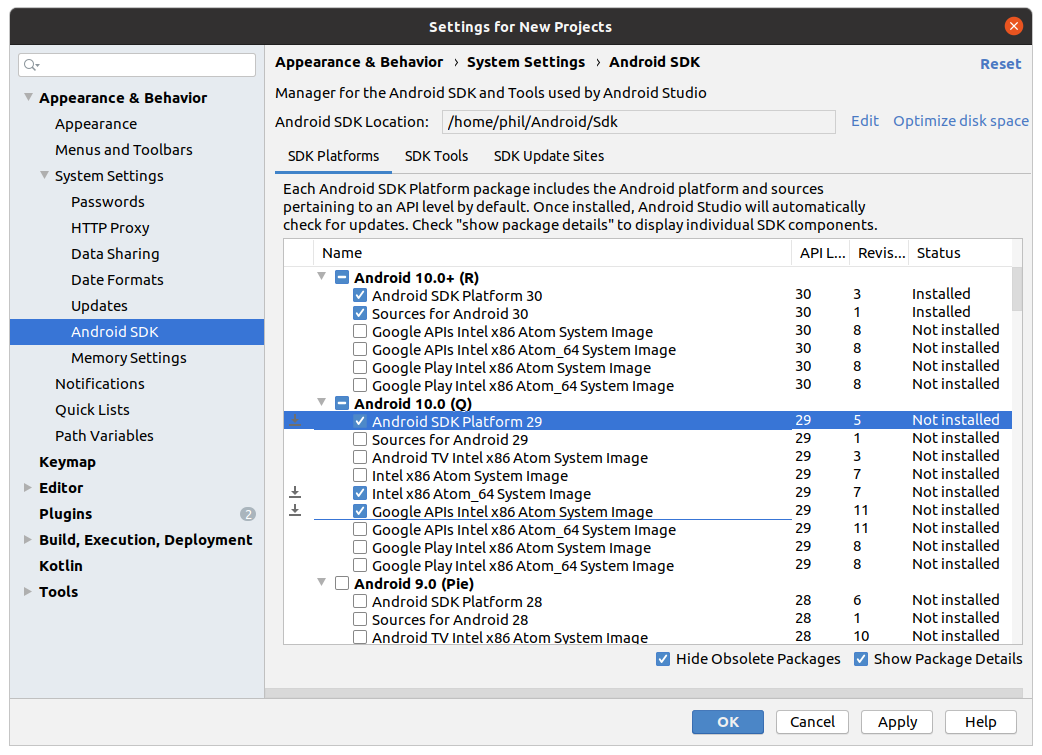
Найдите и разверните список Android 10 (Q) , и убедитесь, что отмечены следующие элементы:
- Android SDK Platform 29
- Intel x86 Atom_64 System Image и/или Google APIs Intel x86 Atom System Image
Затем выберите вкладку SDK Tools и также установите флажок рядом с Show Package Details .
Найдите и разверните запись с пунктом Android SDK Build-Tools , убедитесь, что выбрана версия 29.0.2 .
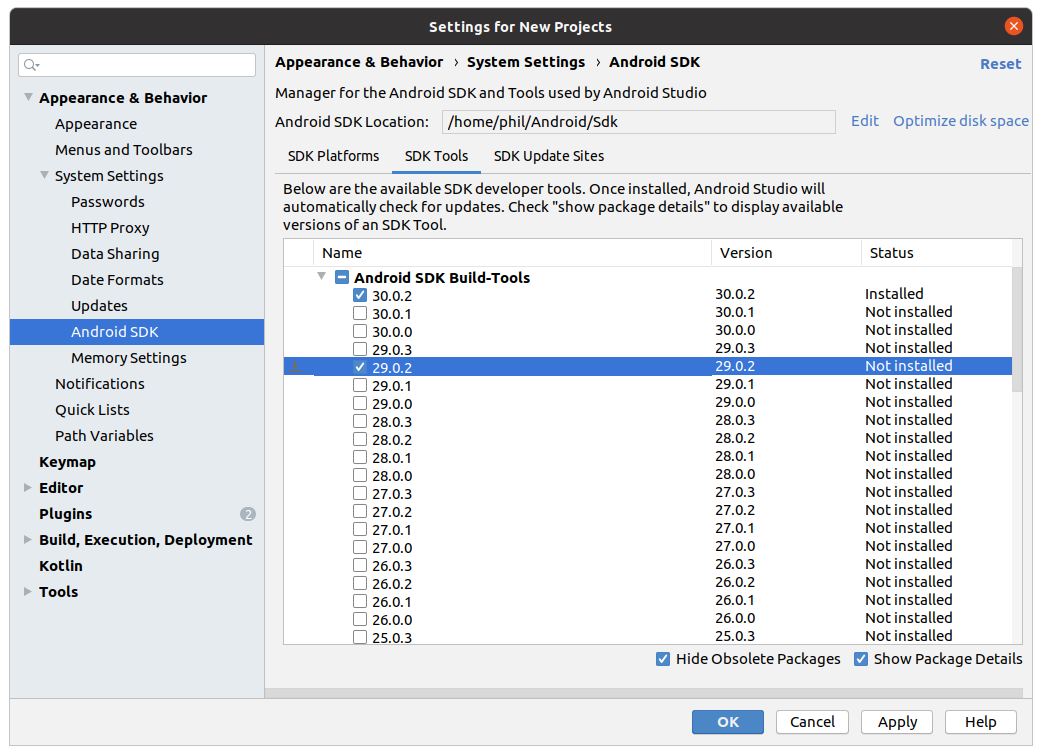
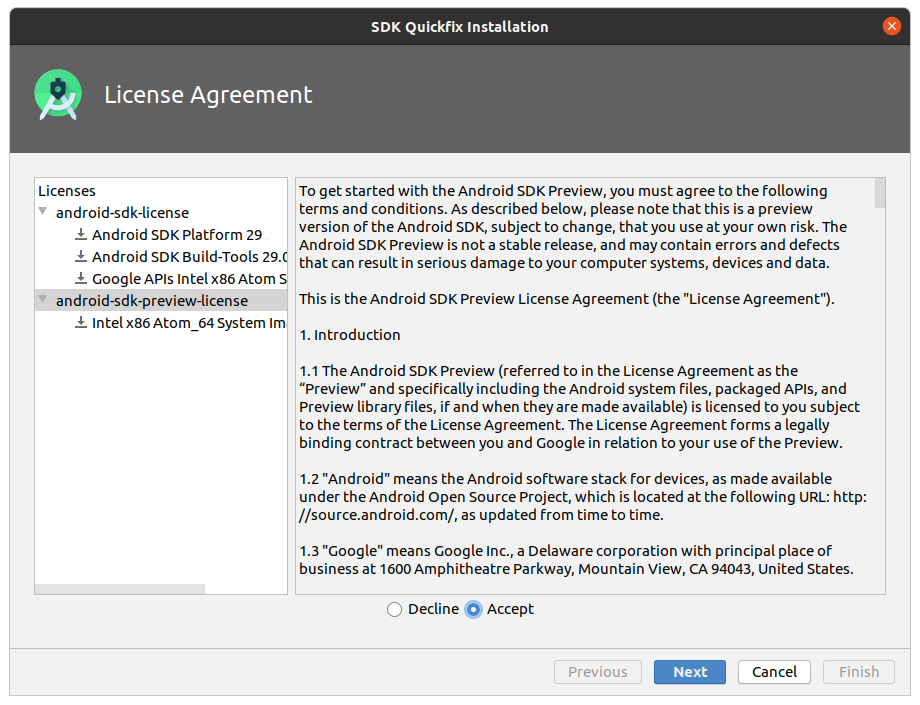
Нажмите Apply , чтобы загрузить и установить Android SDK и соответствующие инструменты сборки.
Во время установки примите лицензионное соглашение.


Настройка переменной сред ANDROID_HOME
Для настройки переменной ANDROID_HOME перейдите в папку Home

и включите отображение скрытых файлов.
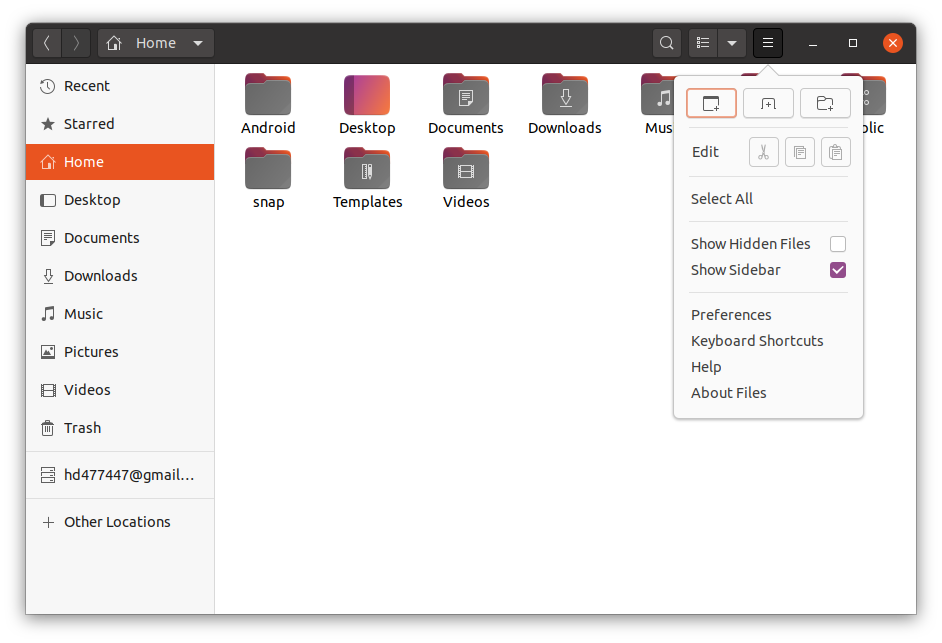
Папка Home будет выглядеть примерно так:
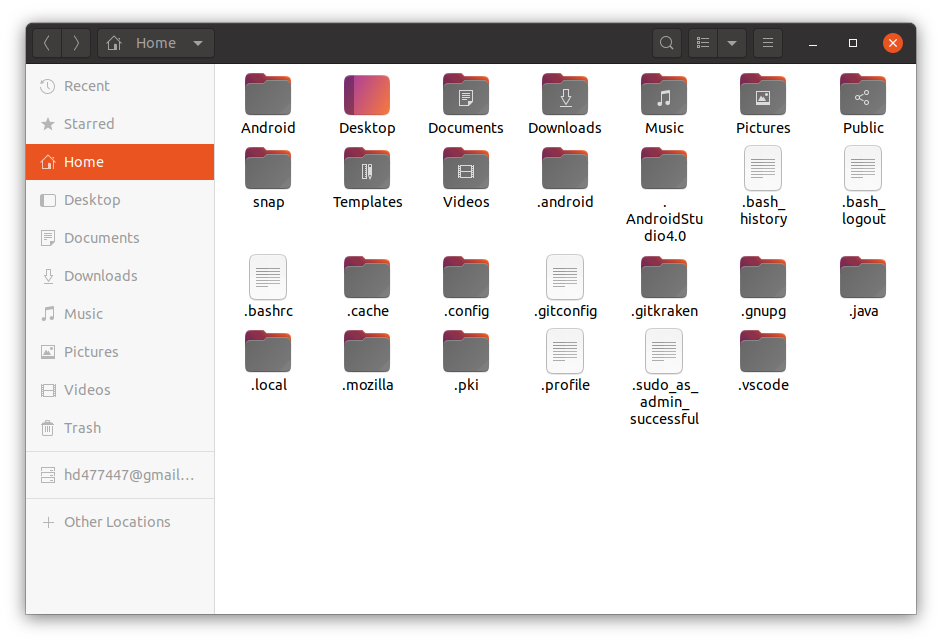
Далее Вам нужно открыть файл .bashrc
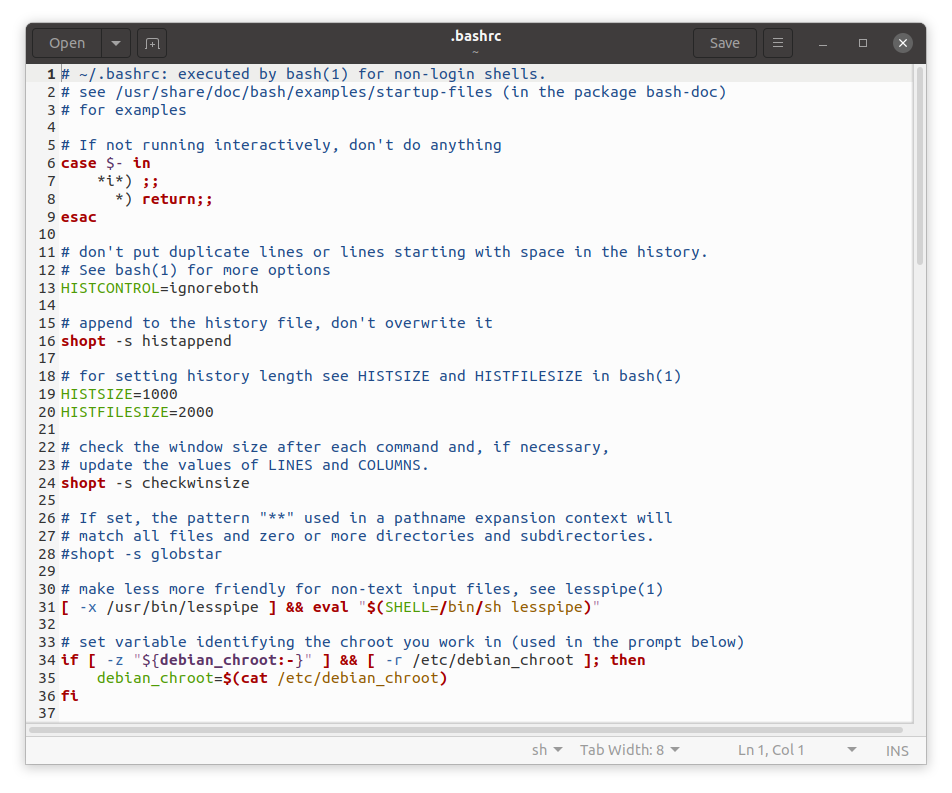
и добавить в него следующие строки:
export ANDROID_HOME=$HOME/Android/Sdk export PATH=$PATH:$ANDROID_HOME/emulator export PATH=$PATH:$ANDROID_HOME/tools export PATH=$PATH:$ANDROID_HOME/tools/bin export PATH=$PATH:$ANDROID_HOME/platform-tools 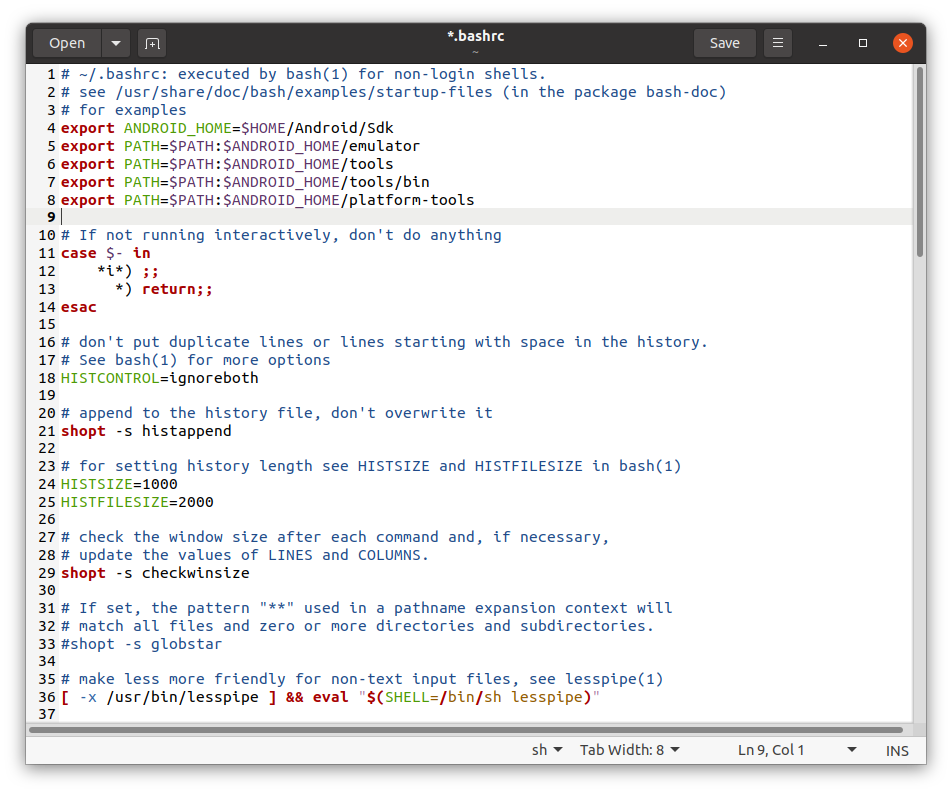
Затем введите в терминал следующую команду:
Таким образом вы добавите переменную ANDROID_HOME . Вы можете убедиться в правильности установки введя команды:


Настройка эмулятора Android
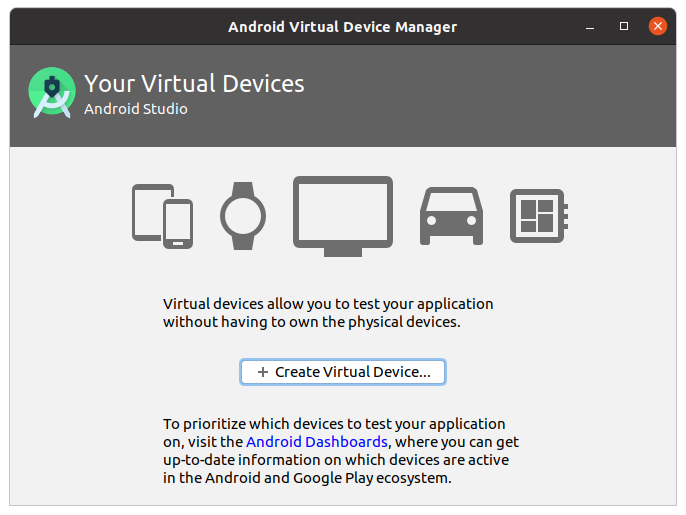
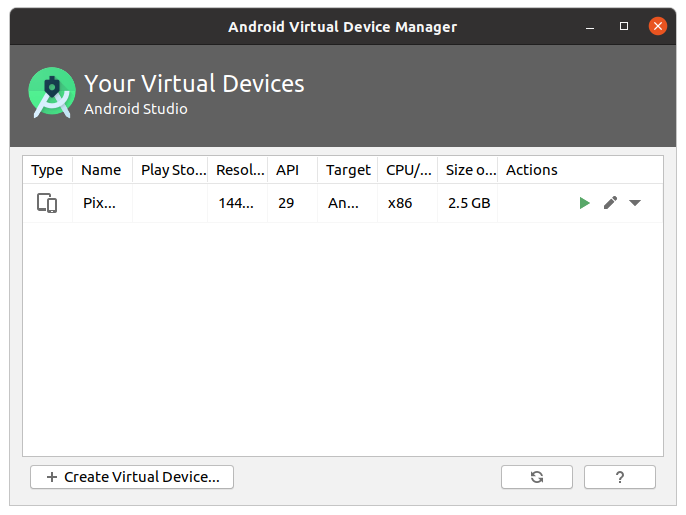
Для того что бы создать или настроить эмулятор нужно, находясь на главном окне Android Studio , выбрать пункт Configure -> AVD Manager .
Далее нажать кнопку Create Virtual Device. ,
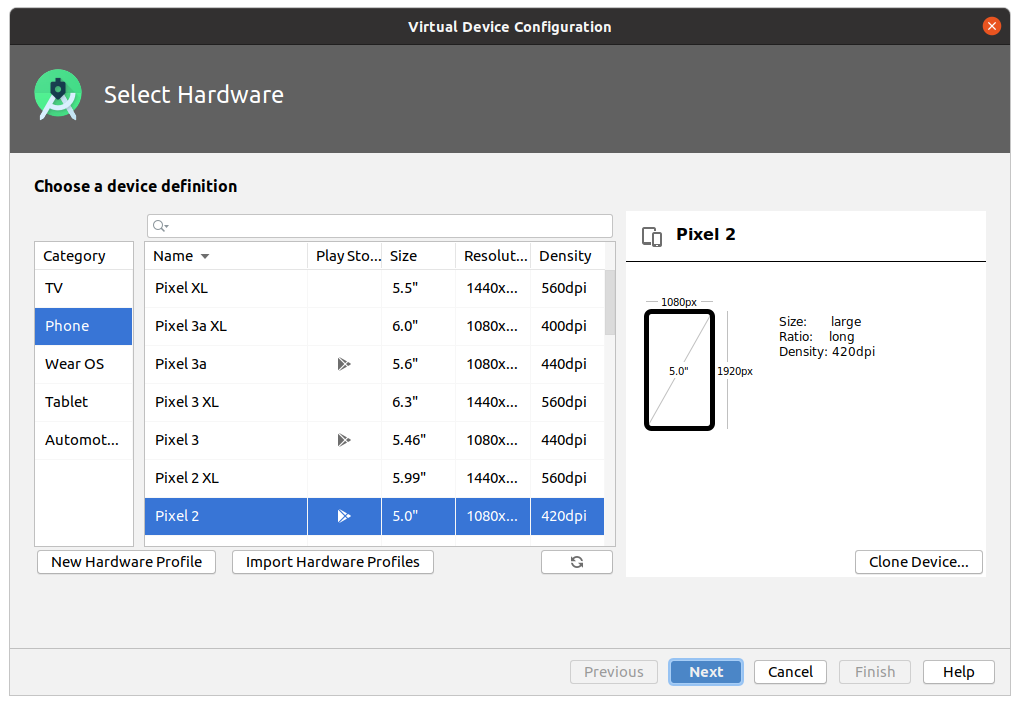
выбираем модель эмулируемого смартфона (Например, Pixel 2) и нажимаем кнопку Next .
В открывшемся окне в столбце Release Name выбрать Q Download (Download является ссылкой на скачивание выбранного образа эмулятора), скачивание и установка начнется автоматически. На момент создания инструкции рекомендуемый API Level 29 , при установке уточните актуальную версию.
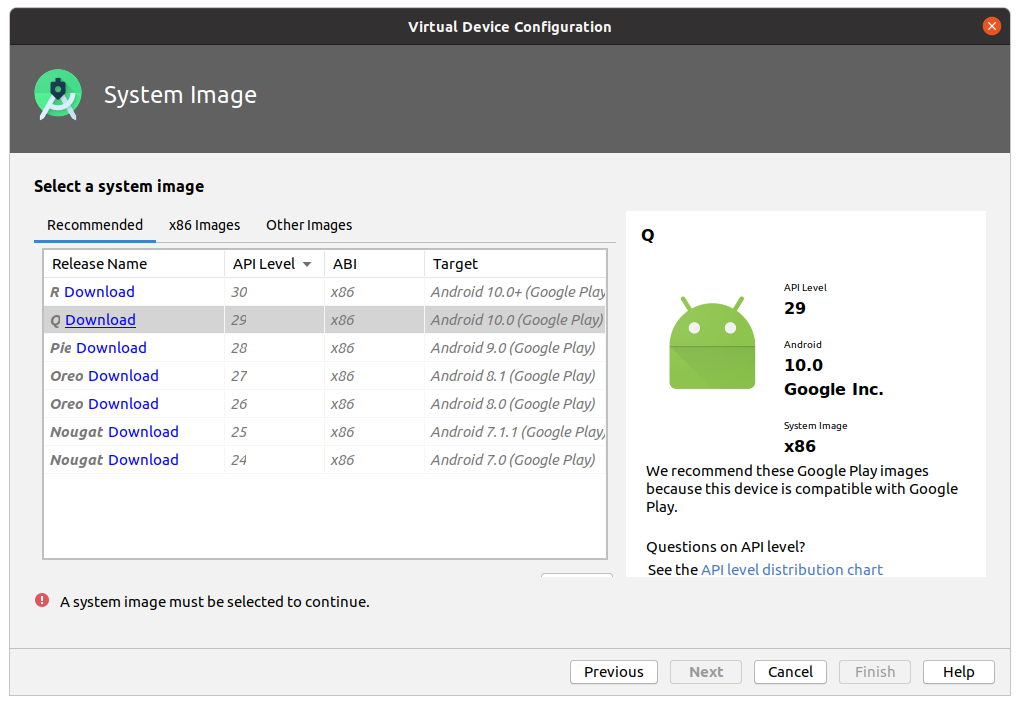
Затем нажмите кнопку Next -> Finish .
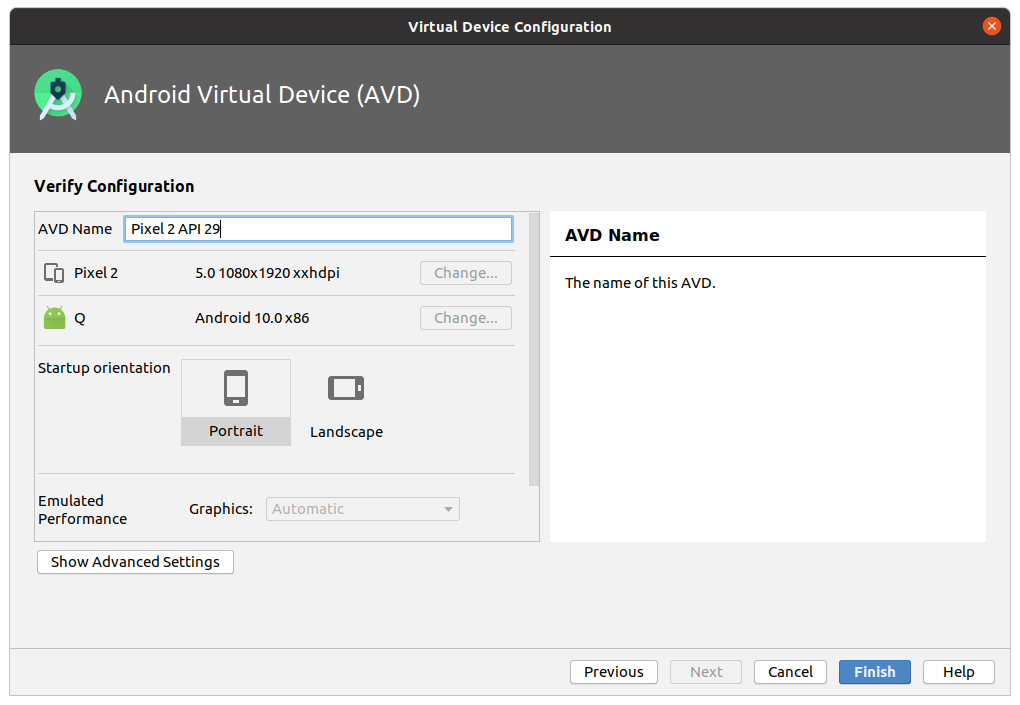
Можно проверить работу эмулятора нажав на зеленую кнопку в форме треугольника, должен появится интерфейс в виде смартфона.
Подключение реального Андроид девайса
Если возникли проблемы с эмулятором, можно использовать реальный смартфон. Для этого нужно стать разработчиком в своем смартфоне. Для этого переходим в настройки смартфона и выбираем пункт Об устройстве Далее нужно найти пункт Версия. и нажать 5-7 до того пока не появится надпись «Вы стали разработчиком». Подключаем смартфон через USB кабель и в зависимости от прошивки включаем режим отладки по USB. Для каждой прошивки алгоритм включения отличается друг от друга. Подробнее.

Установка Watchman
Watchman — это инструмент от Facebook для просмотра изменений в файловой системе. Его установка не обязательна, но без него может возникнуть множество проблем. Для установки Watchman потребуется установить Homebrew . Для этого вставьте в терминал следующую команду:
/bin/bash -c "$(curl -fsSL https://raw.githubusercontent.com/Homebrew/install/master/install.sh)" Рекомендуется установить Homebrew в папку home , для этого введите пароль от своей учетной записи и нажмите кнопку Enter .

Далее терминал запросит подтверждение, нажмите Enter .
После завершения установки нужно сделать следующие действия:
Выполнить в терминале команду:
sudo apt-get install build-essential Далее поочередно выполнить следующие команды:
test -d ~/.linuxbrew && eval $(~/.linuxbrew/bin/brew shellenv) test -d /home/linuxbrew/.linuxbrew && eval $(/home/linuxbrew/.linuxbrew/bin/brew shellenv) test -r ~/.bash_profile && echo "eval \$($(brew --prefix)/bin/brew shellenv)" >>~/.bash_profile echo "eval \$($(brew --prefix)/bin/brew shellenv)" >>~/.profile Теперь можно устанавливать Watchman . Для этого Вам необходимо вставить в терминал команду:
После окончания загрузки Watchman будет готов к работе!

Создание проекта React Native
React Native имеет встроенный интерфейс командной строки, который вы можете использовать для создания нового проекта. Вы можете получить к нему доступ командой npx , которое поставляется с Node.js .
Давайте создадим новый проект React Native под названием MyProject .
Для создания проекта на React Native нужно запустить терминал и ввести команду:
npx react-native init MyProject Начнется инициализация проекта на React Native .


Запуск проекта React Native
Сперва Вам нужно запустить Metro Bundler , сборщик JavaScript , который поставляется с React Native . Metro «принимает входной файл и различные параметры и возвращает один файл JavaScript , который включает весь ваш код и его зависимости». — Metro Docs.
Чтобы запустить Metro Bundler , выполните команду в терминале npx react-native start в папке c Вашим созданным проектом (например: cd MyReact ):
cd MyReact npx react-native start 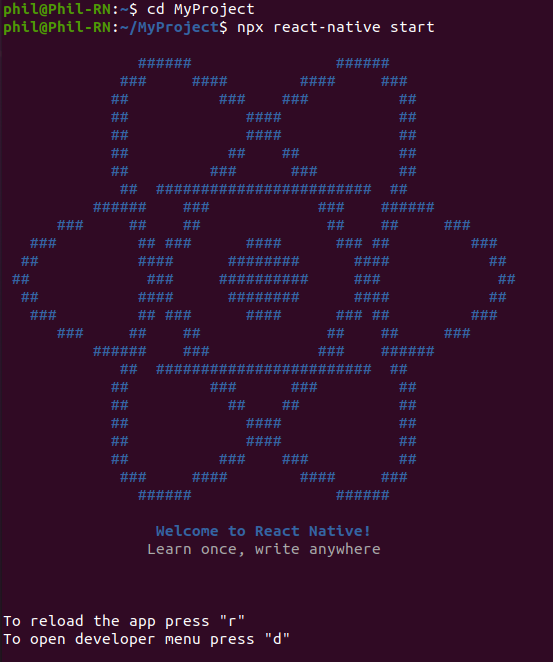
Данная команда запустит Metro Bundler и скомпилирует проект.
В дальнейшем первое окно терминала c Metro Bundler не закрываем .
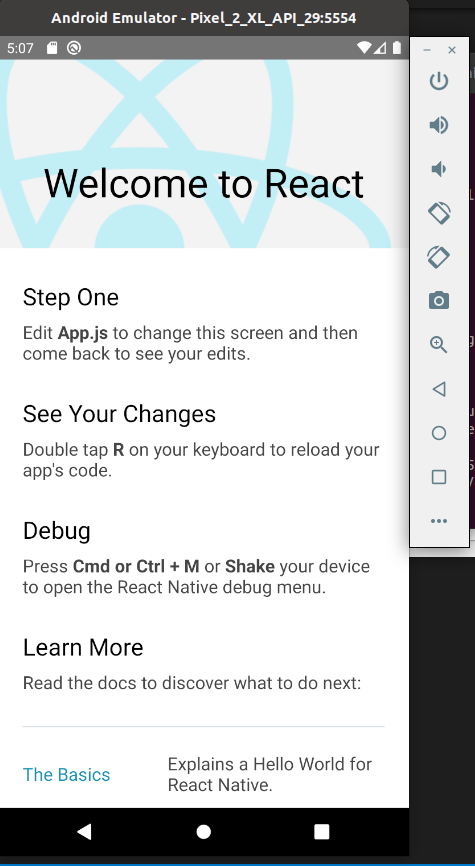
Для запуска Вашего проекта React Native открываем второй терминал и переходим в папку с Вашим проектом выполняя команды:
cd MyReact npx react-native run-android Запустится Ваше приложение на эмуляторе Android или на подключенном смартфоне с включенным режимом отладки по USB.
На экране эмулятора или смартфона должен появится экран приветствия React Native .

Редактирование кода в приложении — Hello World
Для редактирования кода открываем папку с проектом любым редактором кода (рекомендуем Visual Studio Code). Редактирование начинаем с файла App.js . При изменении и сохранении кода, Ctrl + S , происходит автоматическое обновление интерфейса нашего приложения на экране эмулятора.
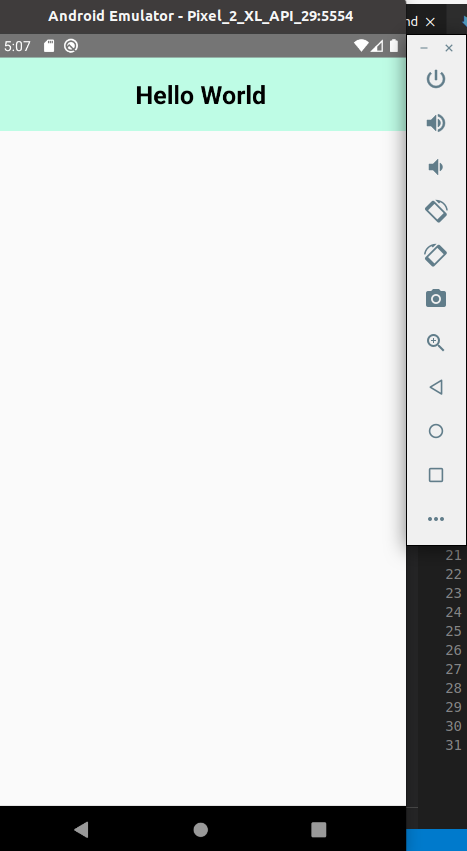
Вставьте в файл App.js следующий код и нажмите Ctrl + S :
import React from 'react' import StyleSheet, Text > from 'react-native' const App = () => return ( > Text style=styles.h1>>Hello WorldText> > ) > const styles = StyleSheet.create( h1: backgroundColor: '#BEFCE5', color: '#000', fontSize: 25, fontWeight: '700', padding: 20, textAlign: 'center' > >) export default App На экране со светлым фоном в вверху в центре появиться надпись «Hello World».
Проблемы?
Пишите в Discord или телеграмм чат, а также подписывайтесь на наши новости
Done
Чтобы узнать, насколько хорошо вы усвоили этот урок, пройдите тест в мобильном приложении нашей школы по этой теме или в боте Telegram.
Ссылки:
Contributors ✨
Thanks goes to these wonderful people (emoji key):