How to Install and Use Grub Customizer on Linux Mint 21
![]()
Grub Customizer is the software package for the customization of GRUB menu entries. It helps in recovering actions on Linux distributions. This tool helps to change things like the boot sequence or waiting time of the standard entry. It is the easiest way of editing GRUB 2 and BURG.
It is a graphical application for renaming, reordering, and deleting boot entries. You can also edit the kernel parameters and modify the appearance of the GRUB menu. In this tutorial, we have demonstrated the installation steps and the usage of Grub Customizer on Linux Mint 21.
How to Install Grub Customizer on Linux Mint 21
Grub Customizer is not available in the official repository of Linux Mint 21 but can be installed through the PPA repository. Execute the below command to add the PPA repository on your system:

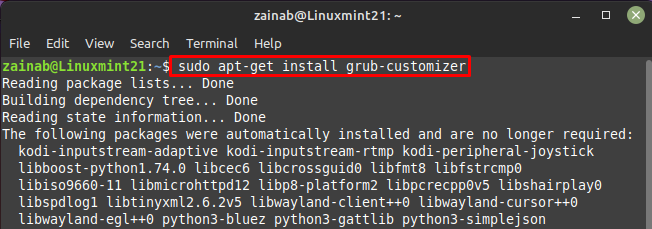
Once, the repository is added, update your system, and install the Grub Customizer from the following command:
How to Use the Grub Customizer on Linux Mint 21
After the installing, launch the Grub Customizer via the following command:
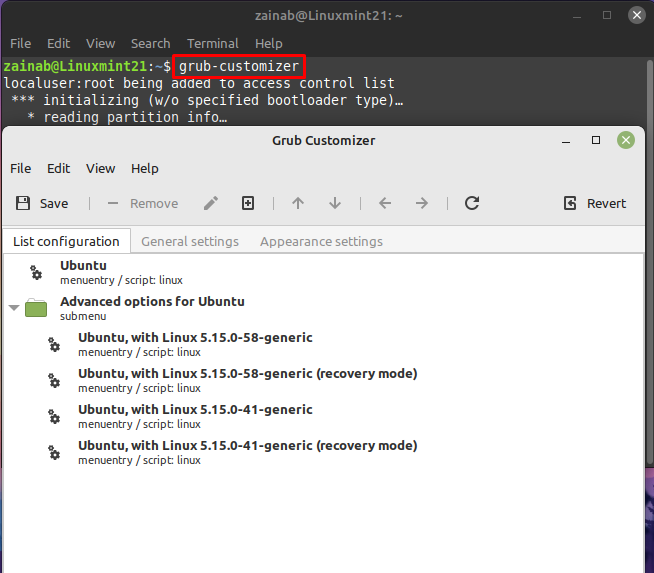
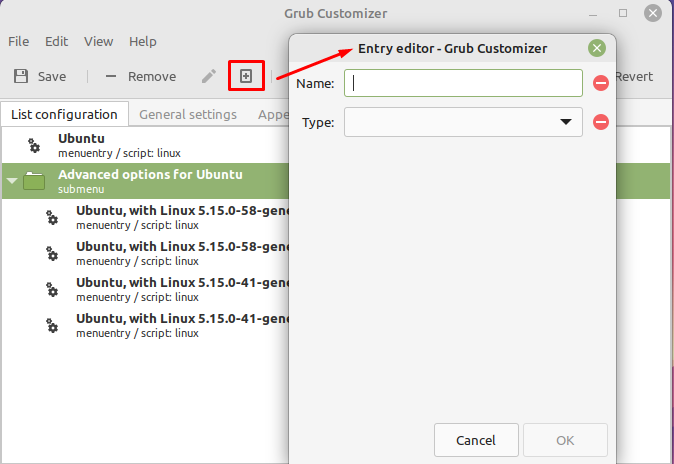
The Grub Customizer consists of three tabs including a List configuration, General settings, and Appearance settings. Under the List Configuration tab, there is the list of bootloader entries of the system. Right-click on any entry to edit it and click on the Plus sign to add the new OS and kernel entry into the system. A dialog box will appear on your screen, fill the box:
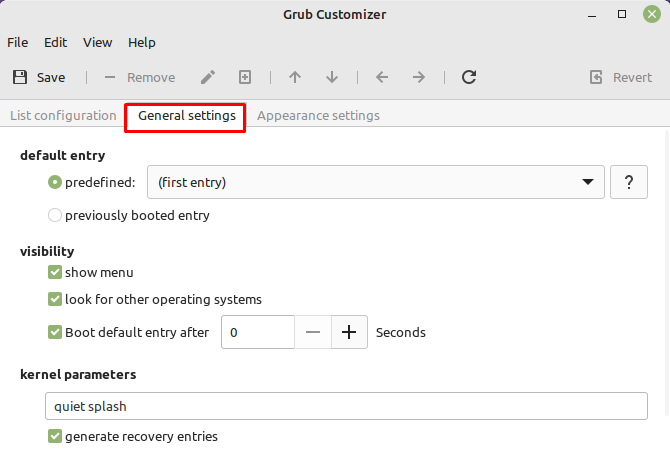
Under General settings, you will find the standard boot entry to select, you can also choose the options to show boot menu:
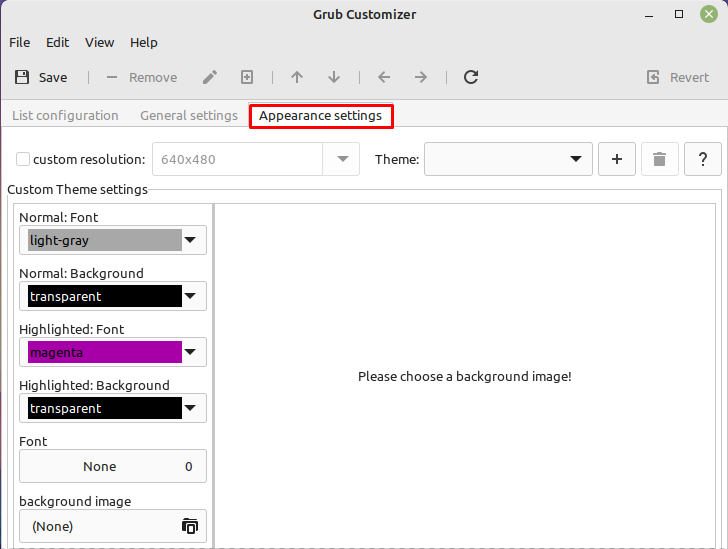
In Appearance Settings, choose a background image, and resolution and change the appearance of grub:
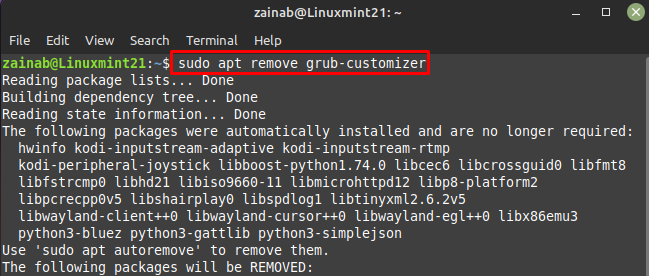
How to Uninstall Grub Customizer on Linux Mint 21
If you don’t require it anymore, uninstall it via the following command:
Conclusion
You can always customize your system through the terminal but Grub Customizer is easy and an amazing software on Linux Mint 21. This tool allows the user to change themes, and background images, change the boot order, and font customization. Follow this guide to install the Grub Customizer on your Linux Mint system and change the look of your old Grub menu.
About the author
Zainab Rehman
I’m an author by profession. My interest in the internet world motivates me to write for Linux Hint and I’m here to share my knowledge with others.
Редактировать grub linux mint
Although grub can be edited using a software Grub Customizer but if you want more control and do it manually in a text editor, here are the steps:
1. For removing memtest, open terminal and type:
sudo chmod -x /etc/grub.d/20_memtest86+
This can also be done graphically by opening /etc/grub.d, right click on 20_memtest86+ and disabling/unchecking “Allow executing file as program”. User must have administrative permissions to do this action. To get administrative rights, type in terminal:
A new window will open which will have administrative rights. Browse the location from this window and perform reguired operations.
2. To remove grub recovery option, open file /etc/default/grub as administrator and uncomment GRUB_DISABLE_RECOVERY=»true» by removing # in front of it. To open this file as administrator, right click on file and select «Open as Administrator».
3. To change default timeout, change the value of GRUB_TIMEOUT=»10″ to «30 or any other value (in seconds) whichever is required in the same file which is mentioned in step 2. Grub Timeout determines how long the grub menu is displayed before the default entry is loaded.
This command is necessary for implementing changes made in step 1 , 2 and 3.
5. For editing/removing boot entries, edit grub.cfg file present in /boot/grub/. To remove extra operating system entry (say Linux Mint 12 installed on sda8) remove these lines from grub.cfg file:
menuentry «Linux Mint 12 32-bit, 3.0.0-12-generic (/dev/sda8) (on /dev/sda8)» —class gnu-linux —class gnu —class os insmod part_msdos
insmod ext2
set root='(hd0,msdos8)’
search —no-floppy —fs-uuid —set=root 8d535868-a72d-4b53-93da-9e83e1d8b7f3
linux /boot/vmlinuz-3.0.0-12-generic root=UUID=8d535868-a72d-4b53-93da-9e83e1d8b7f3 ro quiet splash vt.handoff=7
initrd /boot/initrd.img-3.0.0-12-generic
>
6. To remove memtest, recovery option and other extra operating systems, first follow step 1 and 2, then run command update-grub . Then remove any extra entries from grub.cfg.
7. By default Operating system is listed something like this:
Linux Mint 12 32-bit, 3.0.0-12-generic (on /dev/sda8)
To change its name ie suppose you want this operating system to be listed as «Lisa», edit the name which is written inside quotes after menuentry (see 5th step) to Lisa. On next boot, this operating system will be listed with name «Lisa».
8. If no key is pressed within timeout, the latest installed operating system is selected by default. To change default operating system to start after timeout, change the value in below highlighted text in «set default» from 0 to 1 or 2 according to your choice (do a little bit experiment).
### BEGIN /etc/grub.d/00_header ###
if [ -s $prefix/grubenv ]; then
set have_grubenv=true
load_env
fi
set default=»0″
if [ «$» ]; then
set saved_entry=»$»
save_env saved_entry
set prev_saved_entry=
save_env prev_saved_entry
set boot_once=true
fi
Note: 1. Do not run command update-grub after editing/removing/renaming entries in grub.cfg file as this command reconfigures grub.cfg file and will again include all operating systems present on system.
2. If two Mint or Linux operating systems are installed, step 1 and 2 has to be done for both operating systems. Command chmod -x /etc/grub.d/20_memtest86+ works for main/latest operating system as for previous operating system, sometimes file name is changed by grub. For secondary/previous operating system, open /etc/grub.d and find exact name of file 20_memtest. and run above command.
Please don’t demote this tutorial on basis of method of root permissions. This tutorial is basically for editing grub entries, not about root permissions. Methods of taking root permissions I have mentioned may not be appropriate but I have adopted easiest methods I know.
compizomania

Редактирование загрузчика GRUB иногда нужно, когда у пользователя на жёстком диске установлено две и более ОС Linux. Так как в этом случае, во время обновления систем и особенно когда разработчики меняют ядро системы, происходит автоматическое обновление GRUB. А также, порой, пользователь не всегда извлекает носитель с дистрибутивом и в GRUB начинают отображаться дополнительные параметры другой системы.

Отсюда происходит увеличение времени отображения GRUB при включении компьютера, т.к. загрузчику необходимо подгрузить все параметры.
Для редактирования загрузчика GRUB существует специальное графическое приложение — Grub Customizer.
Grub Customizer — это графический менеджер настроек GRUB (загрузчик ОС при старте компьютера).
С помощью данной утилиты вы можете добавлять и удалять операционные системы в меню загрузки компьютера, менять их порядок, название, время ожидания, оформление загрузчика GRUB.

Основные возможности Grub Customizer:
— Сортировка, переименование, изменение порядка систем, удаление пунктов меню загрузчика GRUB;
— Определение операционной системы для загрузки по умолчанию, указание задержки перед загрузкой;
— Задание фонового изображения, цвета текста и цвета фона текста.
Установка Grub Customizer в Ubuntu и производные
Откройте терминал (Ctrl+Alt+T), скопируйте и выполните следующие команды:
sudo add-apt-repository ppa:danielrichter2007/grub-customizer
sudo apt install grub-customizer
После установки вы найдёте Grub Customizer поиском в меню:

Если у вас происходит подобное с загрузчиком GRUB, выделите дополнительные параметры в Grub Customizer, которые следует удалить:

Затем правый клик на выделении и в контекстном меню — Удалить:

После удаления ненужных параметров, необходимо сохранить изменения, нажатием на кнопке Сохранить:

Теперь можно закрыть окно Grub Customizer.
Для того чтобы проверить, как получилось отображение GRUB после редактирования, совсем не обязательно перезагружать компьютер. Для просмотра GRUB, не выходя из системы, существует консольная утилита — Grub-emu, т.е. эмулятор загрузчика систем.
Для его установки выполните в терминале следующую команду:
sudo apt install grub-emu
А затем выполните команду в терминале на открытие эмулятора:
Когда откроется окно эмулятора, отодвиньте его поодаль с терминалом и активируйте окно терминала, кликом на нём, а затем можете использовать клавиши с стрелками вверх/вниз, для выбора пункта Дополнительные параметры и Enter, для его просмотра в окне эмулятора (как написано в нижней части окна эмулятора):

Теперь, как видно на снимке, в Дополнительных параметрах загрузчика GRUB отобразились только те параметры, которые мне необходимы для выбора и корректной загрузки системы.
Примечание. Для закрытия окна эмулятора, необходимо закрыть сам терминал.
В Grub Customizer имеются другие параметры для редактирования, как говорилось в начале статьи, но не переусердствуйте в их редактировании, иначе система может не загрузится и придётся восстанавливать загрузчик с помощью флешки с дистрибутивом, как описано в ЭТОЙ инструкции.